

Advanced Database Schema Management with Atlas & Prisma ORM
Atlas is a database schema management tool that works alongside Prisma ORM to add CI/CD linting, schema monitoring, versioning, and support for low-level database objects (views, triggers, row-level security) that the Prisma schema doesn't express. This guide is for teams already on Prisma ORM 7 who want migration workflows beyond what Prisma Migrate covers, while keeping Prisma's data model and type-safe Client.
Updated (July 2026): Refreshed for Prisma ORM 7 and Atlas CLI v1.2. Key changes verified against the current docs: the
prisma migrate diffflag--to-schema-datamodelwas removed and replaced by--to-schema; the database connection URL now lives inprisma.config.ts(not in thedatasourceblock ofschema.prisma); the recommended generator isprisma-clientwith an explicitoutputpath; andprisma generatemust be run explicitly after schema changes because migrate commands no longer trigger it automatically. The Atlas config file is stillatlas.hcl. All commands and the generated migration SQL below were captured against Atlas CLI v1.2 and a local Prisma Postgres database (Prisma 7.8, PostgreSQL 16).
Introduction
Atlas is a data modeling and migrations tool that enables advanced database schema management workflows, like CI/CD integrations, schema monitoring, versioning, and more.
In this guide, you will learn how to make use of Atlas advanced schema management and migration workflows by replacing Prisma Migrate in an existing Prisma ORM project with it.
That way, you can still use Prisma ORM's data model and type-safe query capabilities while taking advantage of the enhanced migration capabilities provided by Atlas.
You can find the example repo for this tutorial on GitHub. The repo has branches that correspond to every step of this guide.
Why use Atlas instead of Prisma Migrate?
Prisma Migrate is a migration tool that covers the majority of use cases application developers have when managing their database schemas. It provides workflows specifically designed for taking you from development to production and with team collaboration in mind.
However, for even more capabilities, you may use a dedicated tool like Atlas to extend your migration workflows in the following scenarios:
- Continuous Integration (CI): With Atlas, you can catch issues before they hit production with GitHub Actions, GitLab CI, and CircleCI Orbs integrations. You can also detect risky migrations, test data migrations, database functions, and more.
- Continuous Delivery (CD): Atlas can be integrated into your pipelines to provide native integrations with your deployment machinery (for example, the Kubernetes Operator or Terraform).
- Schema monitoring: Atlas can monitor your database schema and alert you when it drifts away from its expected state.
- Support for low-level database features: Automatic migration planning for advanced database objects such as views, stored procedures, triggers, row-level security, and more.
Prerequisites
To complete this guide, you need:
- an existing Prisma ORM 7 project (with the
prismaand@prisma/clientpackages installed) - a PostgreSQL database and its connection string; if you don't have one, you can start a local Prisma Postgres instance with
npx prisma dev -n atlas - Docker installed on your machine (Atlas uses it to manage the ephemeral dev database described below)
For the purpose of this guide, we'll assume that your Prisma schema contains the standard User and Post models that we use as main examples across our documentation. If you don't have a Prisma ORM project, you can use the orm/script example to follow this guide.
In Prisma ORM 7, the database connection URL lives in prisma.config.ts, not in the datasource block of schema.prisma. A minimal config looks like this:
// prisma.config.ts
import "dotenv/config";
import { defineConfig, env } from "prisma/config";

export default defineConfig({
  schema: "prisma/schema.prisma",
  migrations: {
    path: "prisma/migrations",
  },
  datasource: {
    url: env("DATABASE_URL"),
  },
});
Because Atlas invokes the Prisma CLI, make sure DATABASE_URL is set in your environment so prisma.config.ts can resolve it.
The starting point for this step is the start branch in the example repo.
Step 1: Add Atlas to existing Prisma ORM project
To kick off this tutorial, first install the Atlas CLI:
curl -sSf https://atlasgo.sh | shIf you prefer a different installation method (like Docker or Homebrew), you can find it in the getting started guide.
Next, navigate into the root directory of your project that uses Prisma ORM and create the main Atlas schema file, called atlas.hcl:
touch atlas.hclNow, add the following code to it:
// atlas.hcl

data "external_schema" "prisma" {
    program = [
      "npx",
      "prisma",
      "migrate",
      "diff",
      "--from-empty",
      "--to-schema",
      "prisma/schema.prisma",
      "--script"
    ]
}

env "local" {
  dev = "docker://postgres/16/dev?search_path=public"
  schema {
    src = data.external_schema.prisma.url
  }
  migration {
    dir = "file://atlas/migrations"
    exclude = ["_prisma_migrations"]
  }
}
To get syntax highlighting and other convenient features for the Atlas schema file, install the Atlas VS Code extension.
In the above snippet, you're doing two things:
- Define an
external_schemacalledprismavia thedatablock: Atlas integrates database schema definitions from various sources. In this case, the source is the SQL that's generated by theprisma migrate diffcommand, specified via theprogramfield. (In Prisma ORM 7, the flag is--to-schema; the older--to-schema-datamodelwas removed.) - Specify details about your environment (called
local) using theenvblock:dev: Points to a shadow database (which is called dev database in Atlas). Similar to Prisma Migrate, Atlas uses a shadow database to "dry-run" migrations. The connection you provide here is similar to theshadowDatabaseUrlin the Prisma schema. For convenience we're using Docker in this case to manage these ephemeral database instances.schema: Points to the database connection URL of the database targeted by Prisma ORM (in most cases, this will be identical to theDATABASE_URLenvironment variable).migration: Points to the directory on your file system where you want to store the Atlas migration files (similar to theprisma/migrationsfolder). Note that you're also excluding the_prisma_migrationstable from being tracked in Atlas' migration history.
In addition to the shadow database, Atlas' migration system and Prisma Migrate have another commonality: they both use a dedicated table in the database to track the history of applied migrations. In Prisma Migrate, this table is called _prisma_migrations. In Atlas, it's called atlas_schema_revisions.
In order to tell Atlas that the current state of your database (with all its existing tables and other database objects) should be the starting point for tracking migrations in your project, you need to do an initial baseline migration.
To do that, first run the following command to create Atlas' migration directory:
atlas migrate diff --env localThis command:
- looks at the current state of your
localenvironment and generates SQL migration files based on theexternal_schemadefined in your Atlas schema. - creates the
atlas/migrationsfolder and puts the SQL migration in there.
After running it, your folder structure should look similar to this:
.
├── README.md
├── atlas
│   └── migrations
│       ├── 20241210094213.sql
│       └── atlas.sum
├── atlas.hcl
├── prisma
│   ├── migrations
│   │   ├── 20241210092000_init
│   │   │   └── migration.sql
│   │   └── migration_lock.toml
│   └── schema.prisma
├── prisma.config.ts
├── src
└── ...
At this point, Atlas hasn't done anything to your database yet. It only created files on your local machine.
Now, you need to apply the generated migrations to tell Atlas that this should be the beginning of its migration history. To do so, run the atlas migrate apply command but provide the --baseline __TIMESTAMP__ option to it this time.
Copy the timestamp from the filename that Atlas created inside atlas/migrations and use it to replace the __TIMESTAMP__ placeholder value in the next snippet. Similarly, replace the __DATABASE_URL__ placeholder with your database connection string:
atlas migrate apply \
  --env local \
  --url __DATABASE_URL__ \
  --baseline __TIMESTAMP__
Assuming the generated migration file is called 20241210094213.sql and your database is running at postgresql://johndoe:mypassword42@localhost:5432/example-db?search_path=public&sslmode=disable, the command should look as follows:
atlas migrate apply \
  --env local \
  --url "postgresql://johndoe:mypassword42@localhost:5432/example-db?search_path=public&sslmode=disable" \
  --baseline 20241210094213
Because the database already matches the baseline migration, the command reports that there is nothing left to run:
No migration files to executeIf you inspect your database now, you'll see that the atlas_schema_revisions table has been created and contains an entry that marks the beginning of the Atlas migration history.
Your project should now be in a state looking similar to the
step-1branch of the example repo.
Step 2: Running a migration with Atlas
Next, you'll learn how to make edits to your Prisma schema and reflect the change in your database using Atlas migrations. On a high-level, the process will look as follows:
- Make a change to the Prisma schema
- Run
atlas migrate diffto create migration files - Run
atlas migrate applyto execute the migration files against your database - Run
npx prisma generateto update your Prisma Client - Access the modified schema in your application code via Prisma Client
For the purpose of this tutorial, we're going to expand the Prisma schema with a Tag model that has a many-to-many relation to the Post model:
model User {
  id    Int     @id @default(autoincrement())
  email String  @unique
  name  String?
  posts Post[]
}

model Post {
  id        Int     @id @default(autoincrement())
  title     String
  content   String?
  published Boolean @default(false)
  author    User?   @relation(fields: [authorId], references: [id])
  authorId  Int?
+  tags      Tag[]
}

+ model Tag {
+   id    Int    @id @default(autoincrement())
+   name  String @unique
+   posts Post[]
+ }
With that change in place, now run the command to create the migration files on your machine:
atlas migrate diff --env localAs before, this creates a new file inside the atlas/migrations folder, for example 20241210132739.sql, with the SQL code that reflects the change in your data model. For the change above, Atlas CLI v1.2 generates the following (captured against a local Prisma Postgres database):
-- Create "Tag" table
CREATE TABLE "public"."Tag" (
  "id" serial NOT NULL,
  "name" text NOT NULL,
  PRIMARY KEY ("id")
);
-- Create index "Tag_name_key" to table: "Tag"
CREATE UNIQUE INDEX "Tag_name_key" ON "public"."Tag" ("name");
-- Create "_PostToTag" table
CREATE TABLE "public"."_PostToTag" (
  "A" integer NOT NULL,
  "B" integer NOT NULL,
  CONSTRAINT "_PostToTag_AB_pkey" PRIMARY KEY ("A", "B"),
  CONSTRAINT "_PostToTag_A_fkey" FOREIGN KEY ("A") REFERENCES "public"."Post" ("id") ON UPDATE CASCADE ON DELETE CASCADE,
  CONSTRAINT "_PostToTag_B_fkey" FOREIGN KEY ("B") REFERENCES "public"."Tag" ("id") ON UPDATE CASCADE ON DELETE CASCADE
);
-- Create index "_PostToTag_B_index" to table: "_PostToTag"
CREATE INDEX "_PostToTag_B_index" ON "public"."_PostToTag" ("B");
The join table now uses a composite primary key (_PostToTag_AB_pkey) for the implicit relation, which is the current Prisma ORM behavior.
Next, you can apply the migration with the same atlas migrate apply command as before, minus the --baseline option this time (remember to replace the __DATABASE_URL__ placeholder):
atlas migrate apply \
  --env local \
  --url __DATABASE_URL__
Your database schema is now updated, but your generated Prisma Client isn't aware of the schema change yet. In Prisma ORM 7, the recommended prisma-client generator writes the Client to an explicit output path rather than into node_modules:
generator client {
  provider = "prisma-client"
  output   = "../src/generated/prisma"
}
Migrate commands no longer trigger generation automatically, so re-generate the Client explicitly using the Prisma CLI after every schema change:
npx prisma generateNow, you can go into your application code and run queries against the updated schema. In our case, that would be a query involving the new Tag model, for example:
const tag = await prisma.tag.create({
  data: {
    name: "Technology",
    posts: {
      create: { title: "Prisma and Atlas are a killer combo!" }
    }
  }
})
Your project should now be in a state looking similar to the
step-2branch of the example repo.
Step 3: Add a partial index to the DB schema
In this section, you'll learn how you can expand your database schema with features that are not supported in the Prisma schema. As an example, we're going to use a partial index.
The workflow to achieve this looks as follows:
- Create a SQL file inside the
atlasdirectory that reflects the desired change - Update
atlas.hclto include that SQL file so that Atlas is aware of it - Run
atlas migrate diffto create migration files - Run
atlas migrate applyto execute the migration files against your database
This time, you won't need to re-generate Prisma Client because you didn't make any manual edits to the Prisma schema file.
Let's go and add a partial index.
First, create a file called published_posts_index.sql inside the atlas directory:
touch atlas/published_posts_index.sqlThen, add the following code to it:
CREATE INDEX "idx_published_posts"
ON "Post" ("id")
WHERE "published" = true;
This creates an index on Post records that have their published field set to true. This index helps when you query for these published posts, for example:
const publishedPosts = await prisma.post.findMany({
  where: { published: true }
});
You now need to adjust the atlas.hcl file to make sure it's aware of the new SQL snippet for the schema. You can do this by using the composite_schema approach. Adjust your atlas.hcl file as follows:
data "external_schema" "prisma" {
    program = [
      "npx",
      "prisma",
      "migrate",
      "diff",
      "--from-empty",
      "--to-schema",
      "prisma/schema.prisma",
      "--script"
    ]
}

env "local" {
  dev = "docker://postgres/16/dev?search_path=public"
  schema {
+    src = data.composite_schema.prisma-extended.url
  }
  migration {
    dir = "file://atlas/migrations"
    exclude = ["_prisma_migrations"]
  }
}

+ data "composite_schema" "prisma-extended" {
+   schema "public" {
+     url = data.external_schema.prisma.url
+   }
+   schema "public" {
+     url = "file://atlas/published_posts_index.sql"
+   }
+ }
Note that
composite_schemais an Atlas Pro feature and requires you to be authenticated viaatlas login.
Atlas is now aware of the schema change, so you can go ahead and generate the migration files as before:
atlas migrate diff --env localYou'll again see a new file inside the atlas/migrations directory containing a CREATE INDEX ... WHERE "published" = true statement for the partial index. Go ahead and execute the migration with the same command as before (replacing __DATABASE_URL__ with your own connection string):
atlas migrate apply \
  --env local \
  --url __DATABASE_URL__
Your database is now updated with a partial index that speeds up your queries for published posts.
Your project should now be in a state looking similar to the
step-3branch of the example repo.
Frequently asked questions
Conclusion
In this tutorial, you learned how to integrate Atlas into an existing Prisma ORM 7 project. Atlas extends your schema management and migration workflows while you keep Prisma ORM's data model and type-safe Client.
Check out the example repo if you want to have a quick look at the final result of this tutorial.
Looking ahead: Prisma 8 is a TypeScript-native rewrite of Prisma ORM, built for AI coding agents, and it is now the current release. Prisma 7 remains fully supported; its docs live at prisma.io/docs/orm/v7. To start with Prisma 8, run npm create prisma@latest or read the Prisma 8 docs.
About the author

Nikolas was employee #3 at Prisma and spent 9 years teaching developers about ORMs and databases. He left in October 2025 to focus on his own projects and work as an independent Software Engineer and Developer Educator.
Keep reading
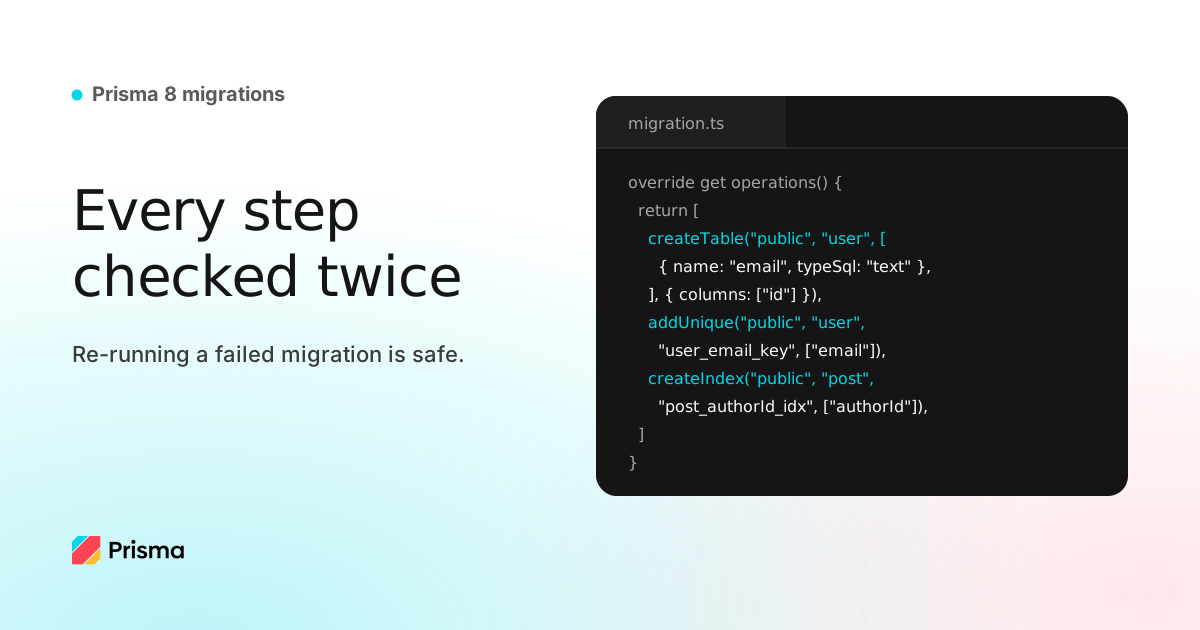
TypeScript Migrations in Prisma 8
In Prisma 8, migrations are TypeScript files you can read, edit, and re-run with confidence. Every step is verified before it runs and again after, and every failure points directly at the operation that caused it.



Choosing the Best Join Strategy in Prisma ORM: join vs query
Prisma ORM loads relations with database-level joins (a single SQL query with JSON aggregation) or application-level joins (one query per table). Learn how both work and when to use which.
Build your next app with Prisma
Start free. Scale when you’re ready.