# How to use `create-react-native-app` with GraphQL & Apollo
URL: https://www.prisma.io/blog/tutorial-using-create-react-native-app-with-graphql-apollo-e630aee3ae1e
Published: 2017-03-28
Authors: Nikolas Burk
Description: Learn how to build an Instagram-style React Native app with Create React Native App, GraphQL, and Apollo.
The easiest way to get started with React Native apps that are using a GraphQL backend is with create-react-native-app
and Apollo. In this tutorial we will learn how to build an Instagram app, where users can view and post images.
> ⚠️ **This tutorial is outdated!** Check out the [Prisma examples](https://github.com/prisma/prisma-examples/) to learn how to build GraphQL servers with a database. ⚠️
The easiest way to get started with React Native apps that are using a GraphQL backend is with [`create-react-native-app`](https://github.com/react-community/create-react-native-app) and [Apollo](http://dev.apollodata.com/). In this tutorial we will learn how to build an Instagram app, where users can view and post images. The complete code for this tutorial is available on [GitHub](https://github.com/graphcool-examples/react-native-graphql/tree/master/quickstart-with-apollo).
> If you’re just getting started with GraphQL, check out the [How to GraphQL](https://www.howtographql.com) fullstack tutorial website for a holistic and in-depth learning experience.
## Getting your GraphQL endpoint [#getting-your-graphql-endpoint]
For this tutorial you’ll need a GraphQL project with the following data model:
```graphql
type Post {
id: ID!
description: String!
imageUrl: String!
}
```
Using the [Graphcool CLI](https://www.npmjs.com/package/graphcool), you can generate a fully-fledged GraphQL server from your command line by providing this schema as an input argument to the `graphcool init` command:
1. In case you haven’t already, install the Graphcool CLI: `npm install -g graphcool`
2. Save the schema from above in a file called `instagram.schema`
3. Create the GraphQL server: `graphcool init instagram.schema`
> **Note**: This tutorial uses Graphcool to bootstrap a GraphQL server. If you want to build your own GraphQL server to be used in production use cases, be sure to check out [Prisma](https://www.prisma.io/)
That’s it, copy the endpoint for the Simple API since we'll need it later on. Notice that you can now also manage this project in the Graphcool console or explore it in a GraphQL playground.
## Getting started with `create-react-native-app` [#getting-started-with-create-react-native-app]
### Installation [#installation]
With `create-react-native-app`, it's super easy to start out with a new React Native application! It comes with a lot of nice features and configurations out-of-the-box, let's you easily run your app on a real-device by scanning a QR code from the terminal and saves you from having to use native development tools such as Xcode or Android Studio.
If you don’t have `create-react-native-app` installed on your machine yet, now is the time to do so with the following command:
npm install -g create-react-native-app
### Creating a new React Native app [#creating-a-new-react-native-app]
After installing, we can easily create and run a new project from the command line:
create-react-native-app react-native-apollo-instagram-example
cd react-native-apollo-instagram-example
npm run ios # or
npm run android
Here is what the initial screen looks like in the iOS simulator:
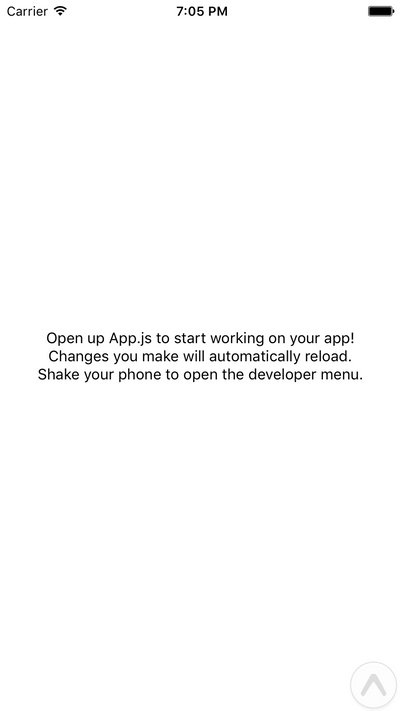
Hot-reloading is already setup as well, so any changes you make in the JavaScript code will immediately appear on the screen!
## Integrating Apollo in a React Native Application [#integrating-apollo-in-a-react-native-application]
### Installing the Dependencies [#installing-the-dependencies]
[Apollo Client](http://dev.apollodata.com/react/) is one of the most popular GraphQL clients available at the moment. It implements features like caching, optimistic UI, [query batching](https://www.prisma.io/blog/improving-performance-with-apollo-query-batching-66455ea9d8b) as well as realtime updates using subscriptions and generally makes interacting with a GraphQL backend a breeze.
We will need three dependencies to use it in our React application:
1. [`apollo-client`](https://github.com/apollographql/apollo-client): Contains the general functionality of Apollo Client
2. [`react-apollo`](https://github.com/apollographql/react-apollo): Implements React-specific bindings for Apollo
3. [`graphql-tag`](https://github.com/apollographql/graphql-tag): Provides functionality for parsing the [JavaScript template literals](http://exploringjs.com/es6/ch_template-literals.html) that will contain our GraphQL queries and mutations
You can install all three dependencies at once:
npm install apollo-client react-apollo graphql-tag --save
Additionally, we’re using [React Router Native](https://github.com/jmurzy/react-router-native) to deal with navigation in our app, let’s go ahead install that as well:
npm install react-router-native --save
### Mocking the needed Components [#mocking-the-needed-components]
Let’s first build the components needed for our app, where we want to display, create or delete posts. Afterwards, we’ll inject the required data using Apollo and wire everything up with React Router.
These are the three components that we need:
* `ListPage` in `components/ListPage.js` that will list all posts from our backend
```js
import React from 'react'
import { ScrollView, View, Text, Button } from 'react-native'
import { withRouter } from 'react-router-native'
class ListPage extends React.Component {
render() {
return (
// here is where we will render our posts
)
}
createPost = () => {
this.props.router.push('/create')
}
}
```
* `CreatePage` in `components/CreatePage.js` to create new posts
```js
import React from 'react'
import { View, TextInput, Button, Image, Text } from 'react-native'
import { withRouter } from 'react-router-native'
class CreatePage extends React.Component {
state = {
description: '',
imageUrl: '',
}
render() {
return (
this.setState({ description: text })}
placeholder={'Description'}
/>
this.setState({ imageUrl: text })}
placeholder={'Image Url'}
/>
{this.renderImage()}
{this.renderButton()}
)
}
renderButton() {
if (this.state.description && this.state.imageUrl) {
return
}
return null
}
renderImage() {
if (this.state.imageUrl) {
return
}
return null
}
handlePost = () => {
// we'll learn what to do here in a bit :)
}
}
```
* `Post` in `componens/Post.js` to display and delete a single post
```js
import React from 'react'
import { View, Image, Text } from 'react-native'
export default class Post extends React.Component {
static propTypes = {
post: React.PropTypes.object,
}
render() {
return (
{this.props.post.description}
)
}
}
```
### Setting up React Router Native and Apollo Client [#setting-up-react-router-native-and-apollo-client]
First, we have to import all required dependencies in App.js:
```js
import ApolloClient, { createNetworkInterface } from 'apollo-client'
import { ApolloProvider } from 'react-apollo'
import { nativeHistory, Route, Router } from 'react-router-native'
```
Next we can create a new instance of `ApolloClient` below the import statements:
```js
const networkInterface = createNetworkInterface({
uri: 'https://api.graph.cool/simple/v1/__PROJECT_ID__',
})
const client = new ApolloClient({
networkInterface,
})
```
> **Note**: The uri that we have to pass to the `createNetworkInterface` call is the GraphQL endpoint for the Simple API that we generated in the first step using `graphcool init`. You can also retrieve that endpoint from the Graphcool console by selecting your project and then clicking the **ENDPOINTS**-button in the bottom-left corner.
Let’s now setup the routes for our application:
```js
export default (
)
```
Note that the `ApolloProvider` is wrapping `Router`, which enables all child components to use access the Apollo functionality to send queries and mutations.
## Using Apollo for Queries and Mutations [#using-apollo-for-queries-and-mutations]
Now we are ready to use Apollo in our components to interact with the GraphQL API!
### Querying all Posts in ListPage [#querying-all-posts-in-listpage]
To display all posts in `ListPage`, we're adding three new imports in `components/ListPage.js`:
```js
import Post from '../src/components/Post'
import { graphql } from 'react-apollo'
import gql from 'graphql-tag'
```
Apart from the `Post` component that renders a single post, we import `gql` and `graphql`. `gql` is used to create queries and mutations. [`graphql`](http://dev.apollodata.com/react/api.html#graphql) actually is a higher-order component that takes as input arguments one or more queries and/or mutations that were created with `gql` as well as a React component and injects the data from the query and/or the mutation function into the component as a prop.
First, let’s think about the query to display all posts:
```graphql
query allPosts {
allPosts(orderBy: createdAt_DESC) {
id
imageUrl
description
}
}
```
We’re sorting the posts in descending order, so the latest posts appear on top of the list.
Now we’re replacing the current export statement with this:
```js
export default withRouter(graphql(FeedQuery)(ListPage))
```
This injects a new prop called `data` to `ListPage`. Back in the render method of `ListPage`, we can first check if the data has already been loaded with `this.props.data.loading`. If `loading` is set to `false`, the data has arrived and we can map over `this.props.data.allPosts` to display the posts. We're also passing the `this.props.data.refetch` method to every post to re-execute the query after a post has been deleted.
Putting it all together, this is the `render` method that we end up with:
```js
render () {
if (this.props.data.loading) {
return (Loading)
}
return (
{this.props.data.allPosts.reverse().map((post) =>
)}
)
}
```
### Creating Posts in CreatePage [#creating-posts-in-createpage]
Adding mutations to React components is similar to adding queries, but instead of injected data, functions are injected for each mutation. Again, we need to import the Apollo related packages at the top of `components/CreatePage.js`:
```js
import { graphql } from 'react-apollo'
import gql from 'graphql-tag'
```
The mutation to create a new post looks as follows:
```graphql
mutation addPost($description: String!, $imageUrl: String!) {
createPost(description: $description, imageUrl: $imageUrl) {
description
imageUrl
}
}
```
Now, at the end of the file, outside of the `CreatePage` class, but before the `export default withRouter(CreatePage)` statement, we can add a new mutation with `gql`:
```js
const addMutation = gql`
mutation addPost($description: String!, $imageUrl: String!) {
createPost(description: $description, imageUrl: $imageUrl) {
id
description
imageUrl
}
}
`
```
Similar to the `FeedQuery` before, we now have to replace the export statement like so:
```js
const PageWithMutation = graphql(addMutation)(withRouter(CreatePage))
```
This will inject a function called `mutate` into the props of the `CreatePage` component. This function takes a `description` and the `imageUrl` as arguments so that we can provide the necessary info for each post that's being created. Using that, we can implement the `handlePost` method of the `CreatePage` class to create a post:
```js
handlePost = () => {
const { description, imageUrl } = this.state
this.props.mutate({ variables: { description, imageUrl } }).then(() => {
this.props.router.replace('/')
})
}
```
## Conclusion [#conclusion]
That’s it! Using `create-react-native-app` and Apollo Client, it's easy to write React Native applications that work with a GraphQL backend. If you want to dive deeper in the example code, you can check it out on [GitHub](https://github.com/graphcool-examples/react-native-graphql/tree/master/quickstart-with-apollo).