The Ultimate Guide to Testing with Prisma: Integration Testing

Integration testing allows you to ensure the various components of your application work properly together. In this article you will take a look at how to set up your testing environment and how to write integration tests.
Table Of Contents
- Table Of Contents
- Introduction
- Prerequisites
- Set up Postgres in a Docker container
- Add a Vitest configuration file for integration tests
- Update the unit testing configuration
- Write a script to spin up the test environment
- Configure your npm scripts
- Write the integration tests
- Summary & What's next
Introduction
So far in this series, you have explored mocking your Prisma Client and using that mocked Prisma Client to write unit tests against small isolated areas of your application.
In this section of the series, you will say goodbye to the mocked Prisma Client and write integration tests against a real database! By the end of this article you will have set up an integration testing environment and written integration tests for your Express API.
What is integration testing?
In the previous article of this series you learned to write unit tests, focusing on testing small isolated units of code to ensure the smallest building blocks of your application function properly. The goal of those tests was to test specific scenarios and bits of functionality without worrying about the underlying database, external modules, or interactions between components.
Integration testing, however, is a different mindset altogether. This kind of testing involves taking related areas, or components, of your application and ensuring they function properly together.
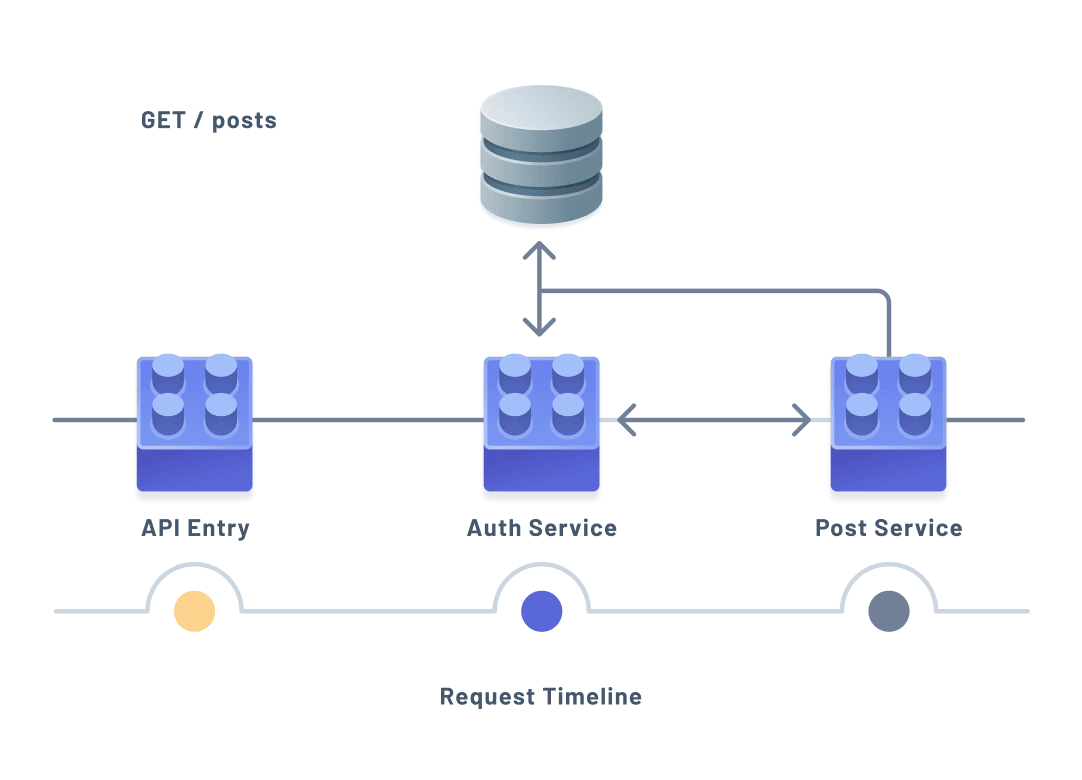
The diagram above illustrates an example scenario where fetching a user's posts might require multiple hits to a database to verify the user has access to the API or any posts before actually retrieving the data.
As illustrated above, multiple components of an application may be involved in handling indivual requests or actions. This often means database interactions happen multiple times across the different components during a single request or invocation. Because of this, integration tests often include a testing environment that includes a database to test against.
With this very brief overview of integration testing, you will now begin preparing a testing environment where you will run integration tests.
Technologies you will use
Prerequisites
Assumed knowledge
The following would be helpful to have when working through the steps below:
- Basic knowledge of JavaScript or TypeScript
- Basic knowledge of Prisma Client and its functionalities
- Basic understanding of Docker
- Some experience with a testing framework
Development environment
To follow along with the examples provided, you will be expected to have:
This series makes heavy use of this GitHub repository. Make sure to clone the repository and check out the unit-tests branch as that branch is the starting point for this article.
Clone the repository
In your terminal head over to a directory where you store your projects. In that directory run the following command:
git clone git@github.com:sabinadams/express_sample_app.gitThe command above will clone the project into a folder named express_sample_app. The default branch for that repository is main, so you will need to checkout the unit-tests branch.
cd express_sample_app
git checkout unit-tests
Once you have cloned the repository, there are a few steps to take to set the project up.
First, navigate into the project and install the node_modules:
npm i Next, create a .env file at the root of the project:
touch .envThis file should contain a variable named API_SECRET whose value you can set to any string you want as well as one named DATABASE_URL which can be left empty for now:
# .env
API_SECRET="supersecretstring"
DATABASE_URL=""
In .env the API_SECRET variable provides a secret key used by the authentication services to encrypt your passwords. In a real-world application this value should be replaced with a long random string with numeric and alphabetic characters.
The DATABASE_URL, as the name suggests, contains the URL to your database. You currently do not have or need a real database.
Set up Postgres in a Docker container
The very first thing you will do to prepare your testing environment is build a Docker container using Docker Compose that provides a Postgres server. This will be the database your application uses while running integration tests.
Before moving on, however, make sure you have Docker installed and running on your machine. You can follow the steps here to get Docker set up on your machine.
To begin configuring your Docker container, create a new file at the root of your project named docker-compose.yml:
touch docker-compose.ymlThis file is where you will configure your container, letting Docker know how to set up the database server, which image to use (a Docker image is a set of instructions detailing how to build a container), and how to store the container's data.
Note: There are a ton of things you can configure within the
docker-compose.ymlfile. You can find the documentation here.
Your container should create and expose a Postgres server.
To accomplish this, start off by specifying which version of Compose's file format you will use:
# docker-compose.yml
version: '3.8'
This version number also determines which version of the Docker Engine you will be using. 3.8 is the latest version at the time of writing this article.
Next, you will need a service in which your database server will run. Create a new service named db with the following configuration:
# docker-compose.yml
version: '3.8'
services:
  db:
    image: postgres:14.1-alpine
    restart: always
    environment:
      - POSTGRES_USER=postgres
      - POSTGRES_PASSWORD=postgres
    ports:
      - '5432:5432'
    volumes:
      - db:/var/lib/postgresql/data
The configuration added above specifies a service named db with the following configrations:
image: Defines which Docker image to use when building this servicerestart: Thealwaysoption lets Docker know to restart this service any time a failure happens or if Docker is restartedenvironment: Configures the environment variables to expose within the containerports: Specifies that Docker should map your machine's5432port to the container's5432port which is where the Postgres server will be runningvolumes: Specifies a name for a volume along with location on your local machine where your container will persist its data
To finish off your service's configuration, you need to let Docker know how to configure and network the volume defined in the volumes configuration.
Add the following to your docker-compose.yml file to let Docker know the volumes should be stored on your local Docker host machine (in your file system):
# docker-compose.yml
version: '3.8'
services:
  db:
    image: postgres:14.1-alpine
    restart: always
    environment:
      - POSTGRES_USER=postgres
      - POSTGRES_PASSWORD=postgres
    ports:
      - '5432:5432'
    volumes:
      - db:/var/lib/postgresql/data
volumes:
  db:
    driver: local
If you now head over to your terminal and navigate to the root of your project, you should be able to run the following command to start up your container running Postgres:
docker-compose up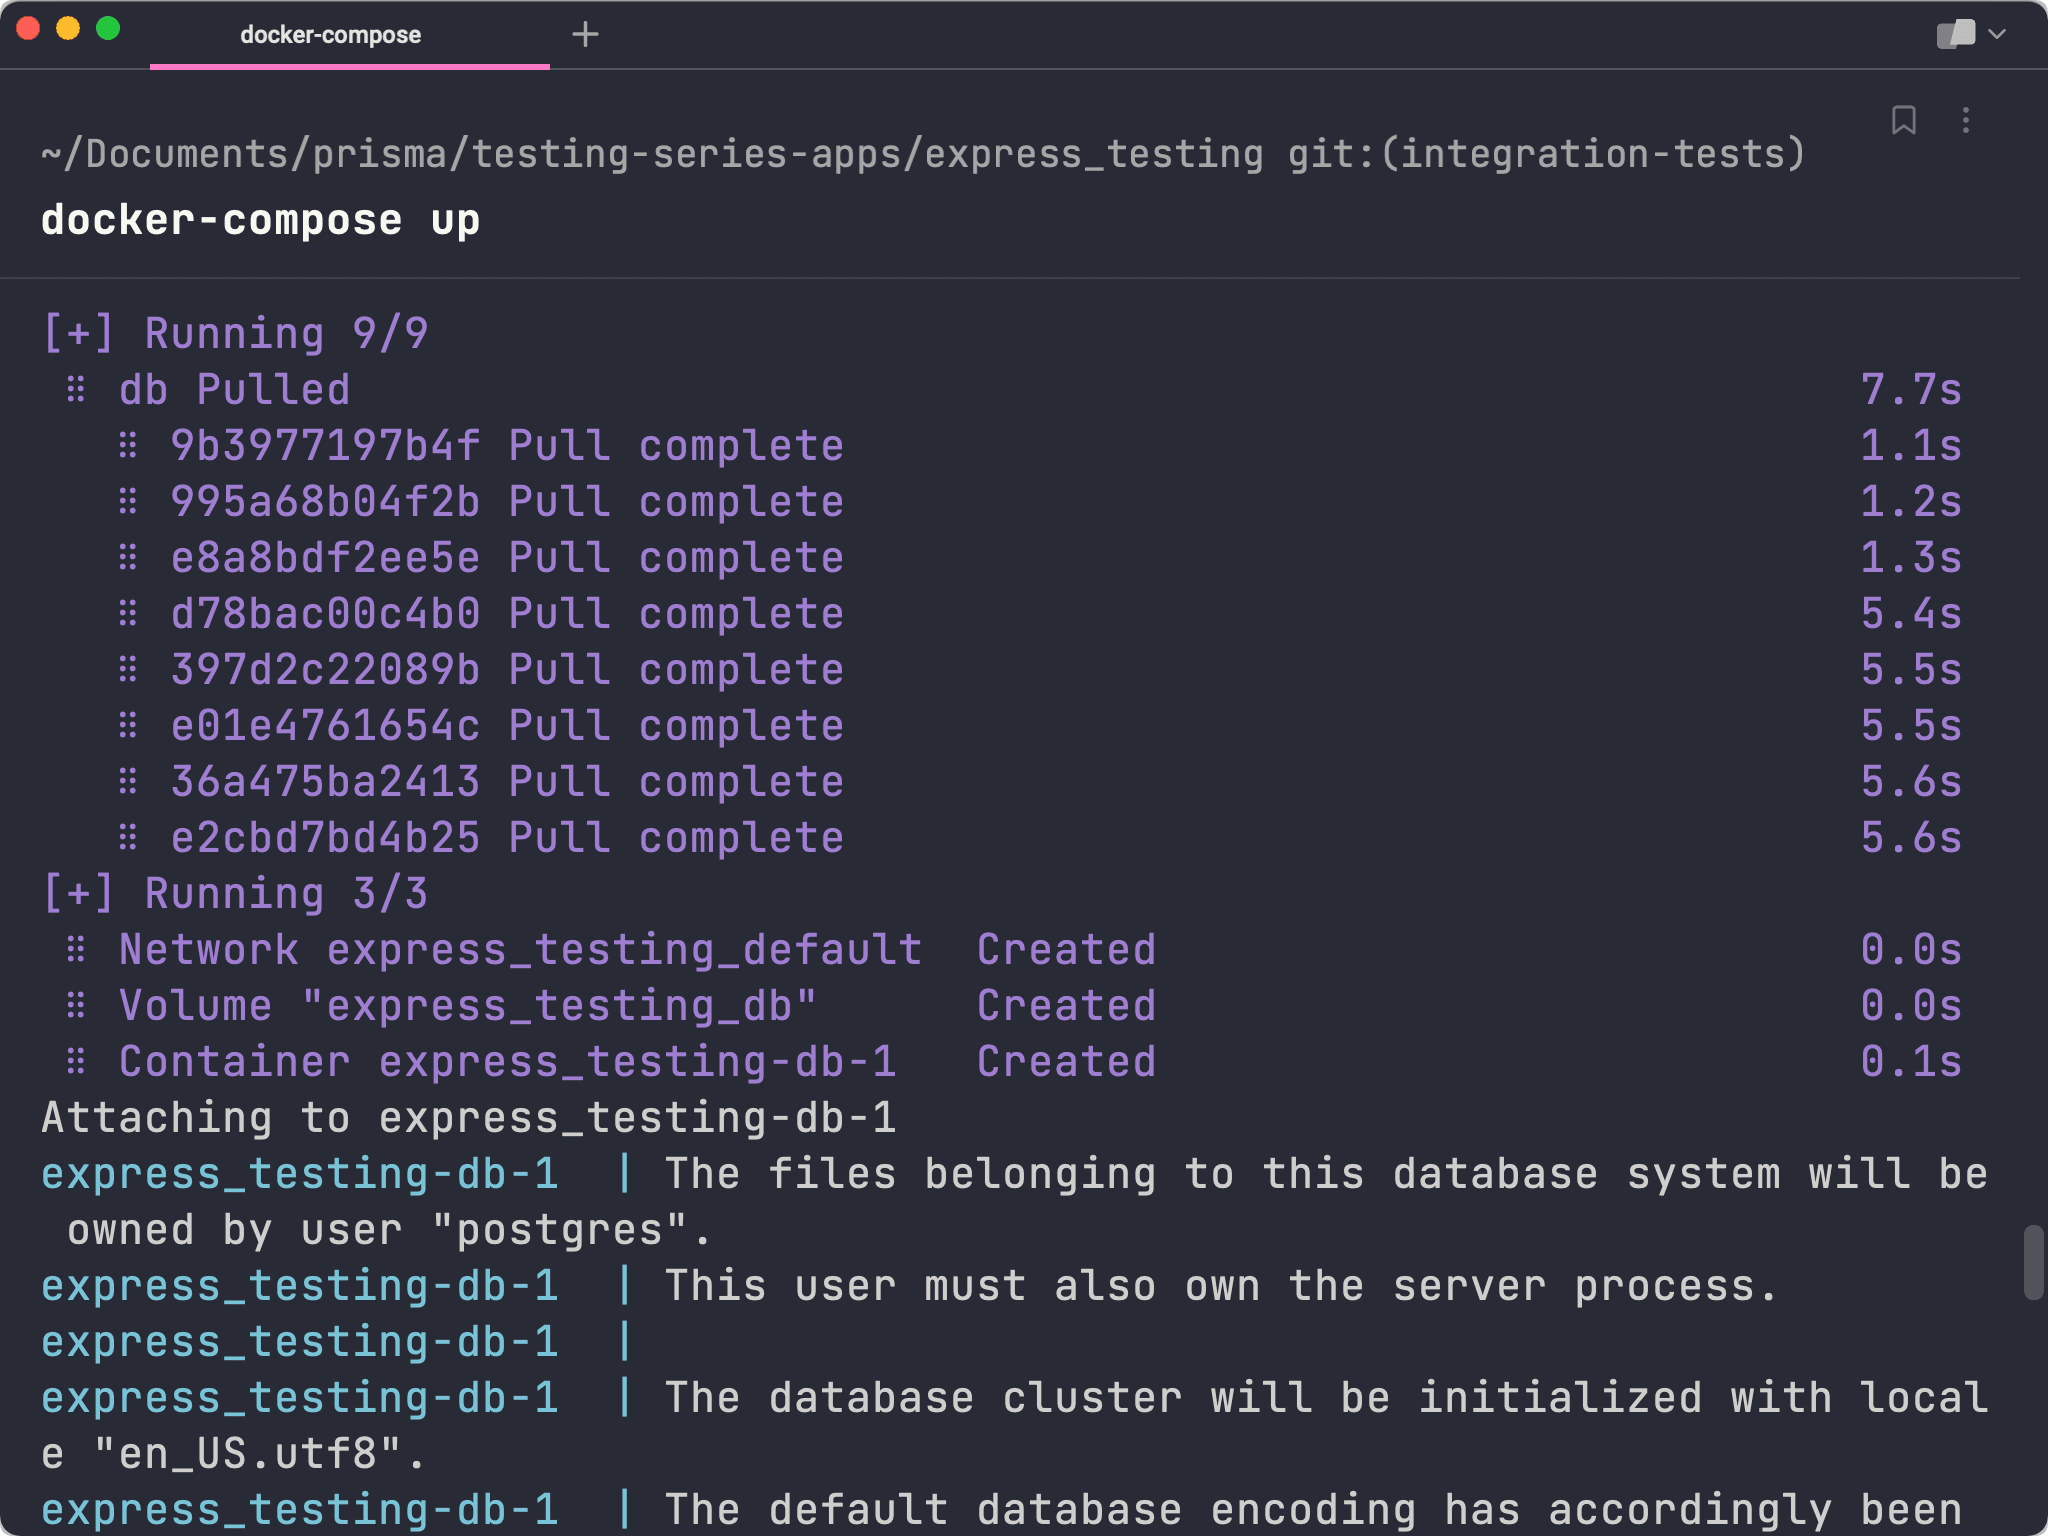
Your database server is now available and accessible from the url postgres://postgres:postgres@localhost:5432.
Update your .env file's DATABASE_URL variable to point to that url and specify quotes as the database name:
# .env
API_SECRET="supersecretstring"
DATABASE_URL="postgres://postgres:postgres@localhost:5432/quotes"
Add a Vitest configuration file for integration tests
In the previous article, you created a configuration file for Vitest. That configuration file, vitest.config.unit.ts, was specific to the unit tests in the project.
Now, you will create a second configuration file named vitest.config.integration.ts where you will configure how Vitest should run when running your integration tests.
Note: These files will be very similar in this series. Depending on the complexity of your project, splitting your configurations out like this becomes more obviously beneficial.
Create a new file at the root of your project named vitest.config.integration.ts:
touch vitest.config.integration.tsPaste the following into that new file:
// vitest.config.integration.ts
import { defineConfig } from 'vitest/config'

export default defineConfig({
  test: {
    include: ['src/tests/**/*.test.ts'],
  },
  resolve: {
    alias: {
      auth: '/src/auth',
      quotes: '/src/quotes',
      lib: '/src/lib'
    }
  }
})
The snippet above is essentially the same as the contents of vitest.config.unit.ts except the test.include blob points to any .ts files within src/tests rather than any files within src like the unit tests configuration does. This means all of your integration tests should go in a new folder within src named tests.
Next, add another key to this new configuration file that tells Vitest not to run multiple tests at the same time in different threads:
// vitest.config.integration.ts
import { defineConfig } from 'vitest/config'

export default defineConfig({
  test: {
    include: ['src/tests/**/*.test.ts'],
    threads: false
  },
  resolve: {
    alias: {
      auth: '/src/auth',
      quotes: '/src/quotes',
      lib: '/src/lib'
    }
  }
})
This is extrememely important because your integration tests will be interacting with a database and expecting specific sets of data. If multiple tests are running at the same time and interacting with your database, you will likely cause problems in your tests due to unexpected data.
On a similar note, you will also need a way to reset your database between tests. In this application, between every single test you will completely clear out your database so you can start with a blank slate on each test.
Create a new folder in src named tests and a new folder with tests named helpers:
mkdir -p src/tests/helpers Within that new directory, create a file named prisma.ts:
touch src/tests/helpers/prisma.tsThis file is a helper that simply instantiates and exports Prisma Client.
Add the following to that file:
// src/tests/helpers/prisma.ts
import { PrismaClient } from '@prisma/client'

const prisma = new PrismaClient()
export default prisma
Now create another file in src/tests/helpers named reset-db.ts:
touch src/tests/helpers/reset-db.ts This file is where you will write and export a function that resets your database.
Your database only has three tables: Tag, Quote and User. Write and export a function that runs deleteMany on each of those tables within a transaction:
// src/tests/helpers/reset-db.ts
import { PrismaClient } from '@prisma/client'

const prisma = new PrismaClient()

export default async () => {
  await prisma.$transaction([
    prisma.tag.deleteMany(),
    prisma.quote.deleteMany(),
    prisma.user.deleteMany()
  ])
}
With the file written above, you now have a way to clear your database. The last thing to do here is actually invoke that function between each and every integration test.
A nice way to do this is to use a setup file. This is a file that you can configure Vitest to process before running any tests. Here you can use Vitest's lifecycle hooks to customize its behavior.
Create another file in src/tests/helpers named setup.ts.
touch src/tests/helpers/setup.tsYour goal is to reset the database before every single test to make sure you have a clean slate. You can accomplish this by running the function exported by reset-db.ts within the beforeEach lifecycle function provided by Vitest.
Within setup.ts, use beforeEach to run your reset function between every test:
// src/tests/helpers/setup.ts

import resetDb from './reset-db'
import { beforeEach } from 'vitest'

beforeEach(async () => {
  await resetDb()
})
Now when you run your suite of tests, every individual test across all files within src/tests will start with a clean slate.
Note: You may be wondering about a scenario where you would want to start off with some data in a specific testing context. Within each individual test file you write, you can also hook into these lifecycle functions and customize the behavior per-file. An example of this will be shown later on.
Lastly, you now need to let Vitest know about this setup file and tell it to run the file whenever you run your tests.
Update vitest.config.integration.ts with the following:
// vitest.config.integration.ts
import { defineConfig } from 'vitest/config'

export default defineConfig({
  test: {
    include: ['src/tests/**/*.test.ts'],
    threads: false,
+    setupFiles: ['src/tests/helpers/setup.ts']
  },
  resolve: {
    alias: {
      auth: '/src/auth',
      quotes: '/src/quotes',
      lib: '/src/lib'
    }
  }
})
Update the unit testing configuration
Currently, the unit testing configuration file will also run your integration tests as it searches for any .ts file that lies within src.
Update the configuration in vitest.config.unit.ts to ignore files within src/tests:
// vitest.config.unit.ts
import { defineConfig } from 'vitest/config'

export default defineConfig({
  test: {
-    include: ['src/**/*.test.ts']
+    include: [
+      'src/**/*.test.ts',
+      '!src/tests'
+    ]
  },
  resolve: {
    alias: {
      auth: '/src/auth',
      quotes: '/src/quotes',
      lib: '/src/lib'
    }
  }
})
Now your unit tests and integration tests are completely separate and can only be run using their own individual commands.
Write a script to spin up the test environment
Up until now you have built out ways to:
- Spin up a database server within a Docker container
- Run integration tests with a specific testing configuration
- Run unit tests separately from integration tests
What is missing is a way to actually orchestrate the creation of your Docker container and the running of your integration tests in a way that ensures your database is running and available to your testing environment.
To make this work, you will write a set of custom bash scripts that start up your Docker container, wait for the server to be ready, and then run your tests.
Create a new directory at the root of your project named scripts:
mkdir scriptsWithin that directory, create a file named run-integration.sh:
touch scripts/run-integration.shWithin this file, you will need the following steps to happen:
- Load in any environment variables from
.envso you have access to the database URL. - Start your Docker container in detached mode.
- Wait for the database server to become available.
- Run a Prisma migration to apply your Prisma schema to the database.
- Run your integration tests. As a bonus, you should also be able to run this file with a
--uiflag to run Vitest's GUI interface.
Load up your environment variables
This first step is where you will read in a .env file and make those variables available within the context of your scripts.
Create another file in scripts named setenv.sh:
touch scripts/setenv.shWithin this file, add the following snippet:
#!/usr/bin/env bash
# scripts/setenv.sh

# Export env vars
export $(grep -v '^#' .env | xargs)
This will read in your .env file and export each variable so it becomes available in your scripts.
Back in scripts/run-integration.sh, you can now use this file to gain access to the environment variables using the source command:
#!/usr/bin/env bash
# scripts/run-integration.sh

DIR="$(cd "$(dirname "$0")" && pwd)"
source $DIR/setenv.sh
Above, the DIR variable is used to find the relative path to setenv.sh and that path is used to execute the script.
Start your Docker container in detached mode
The next step is to spin up your Docker container. It is important to note that you will need to start the container in detached mode.
Typically, when you run docker-compose up your terminal will be connected to the container's output so you can see what is going on. This, however, prevents the terminal from performing any other actions until you stop your Docker container.
Running the container in detached mode allows it to run in the background, freeing up your terminal to continue running commands (like the command to run your integration tests).
Add the following to run-integration.sh:
#!/usr/bin/env bash
# scripts/run-integration.sh

DIR="$(cd "$(dirname "$0")" && pwd)"
source $DIR/setenv.sh
+docker-compose up -d
Here, the -d flag signifies the container should be run in detached mode.
Make the script wait until the database server is ready
Before running your Prisma migration and your tests, you need to be sure your database is ready to accept requests.
In order to do this, you will use a well-known script called wait-for-it.sh. This script allows you to provide a URL along with some timing configurations and will cause the script to wait until the resource at a provided URL becomes available before moving on.
Download the contents of that script into a file named scripts/wait-for-it.sh by running the command below:
curl https://raw.githubusercontent.com/nickjj/wait-for-it/master/wait-for-it.sh -o scripts/wait-for-it.shWarning: If the
wait-for-it.shscript does not work for you, please see the GitHub discussion for an alternative way to connect to the database and ensure the test runs successfully.
Then, head back into run-integration.sh and update it with the following:
#!/usr/bin/env bash
# src/run-integration.sh

DIR="$(cd "$(dirname "$0")" && pwd)"
source $DIR/setenv.sh
docker-compose up -d
+echo '🟡 - Waiting for database to be ready...'
+$DIR/wait-for-it.sh "${DATABASE_URL}" -- echo '🟢 - Database is ready!'
Your script will now wait for the database at the location specified in the DATABASE_URL environment variable to be available before continuing.
If you are on a Mac, you will also need to run the following command to install and alias a command that is used within the wait-for-it.sh script:
brew install coreutils && alias timeout=gtimeoutPrepare the database and run the tests
The last two steps are now safe to take place.
After the wait-for-it script is run, run a Prisma migration to apply any new changes to the database:
#!/usr/bin/env bash
# src/run-integration.sh

DIR="$(cd "$(dirname "$0")" && pwd)"
source $DIR/setenv.sh
docker-compose up -d
echo '🟡 - Waiting for database to be ready...'
$DIR/wait-for-it.sh "${DATABASE_URL}" -- echo '🟢 - Database is ready!'
+npx prisma migrate dev --name init
Then to wrap this all up, add the following statement to run your integration tests:
#!/usr/bin/env bash
# src/run-integration.sh

DIR="$(cd "$(dirname "$0")" && pwd)"
source $DIR/setenv.sh
docker-compose up -d
echo '🟡 - Waiting for database to be ready...'
$DIR/wait-for-it.sh "${DATABASE_URL}" -- echo '🟢 - Database is ready!'
npx prisma migrate dev --name init
+if [ "$#" -eq  "0" ]
+  then
+    vitest -c ./vitest.config.integration.ts
+else
+    vitest -c ./vitest.config.integration.ts --ui
+fi
Notice the if/else statement that was used. This is what allows you to look for a flag passed to the script. If a flag was found, it is assumed to be --ui and will run the tests with the Vitest user interface.
Make the scripts executable
The scripts required to run your tests are all complete, however if you try to execute any of them you will get a permissions error.
In order to make these scripts executable, you will need to run the following command which gives your current user access to run them:
chmod +x scripts/*Configure your npm scripts
Your scripts are now executable. The next step is to create scripts records within package.json that will invoke these custom scripts and start up your tests.
In package.json add the following to the scripts section:
// package.json
// ...
"scripts": {
  // ...
  "test:unit": "vitest -c ./vitest.config.unit.ts",
  "test:unit:ui": "vitest -c ./vitest.config.unit.ts --ui",
+  "test:int": "./scripts/run-integration.sh",
+  "test:int:ui": "./scripts/run-integration.sh --ui"
},
// ...
Now, if you run either of the following scripts you should see your Docker container spinning up, a Prisma migration being executed, and finally your tests being run:
npm run test:int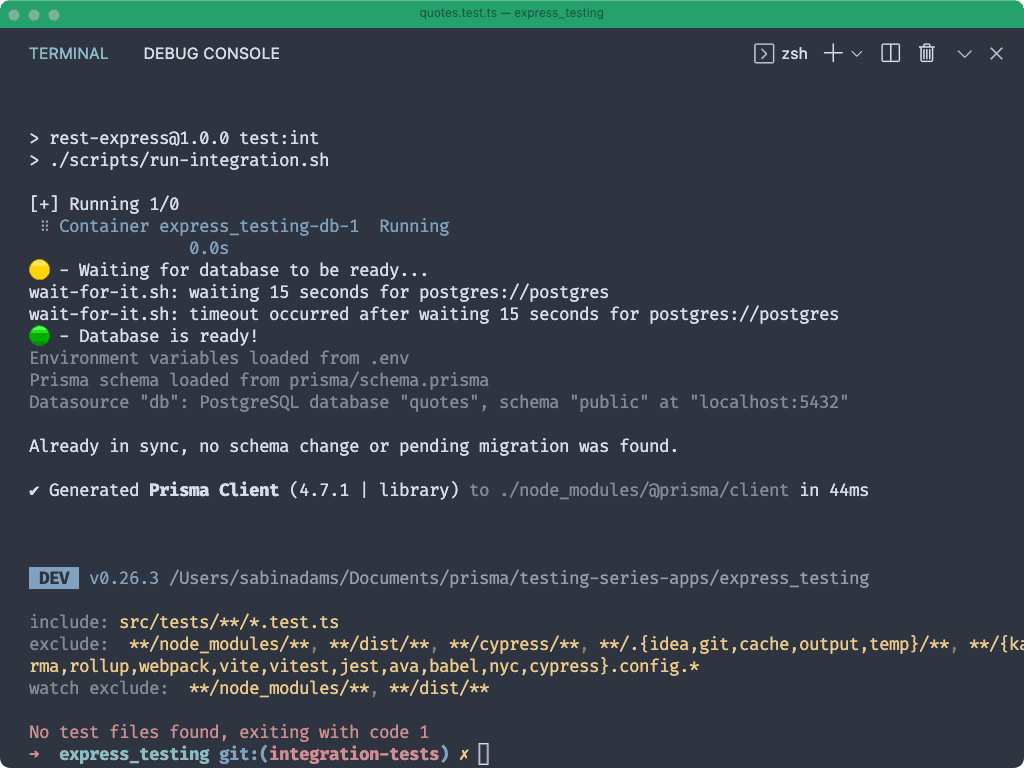
Note: At the moment your tests will fail. That is because Vitest could not find any files with tests to run.
Write the integration tests
Now it is time to put your testing environment to use and write some tests!
When thinking about which parts of your applications need integration tests it is important to think about important interactions between components and how those interactions are invoked.
In the case of the Express API you are working in, the important groupings of interactions occur between routes, controllers and services. When a user hits an endpoint in your API, the route handler passes the request to a controller and the controller may invoke service functions to interact with the database.
Keeping this in mind, you will focus your integration tests on testing each route individually, ensuring each one responds properly to HTTP requests. This includes both valid and invalid requests to the API. The goal is for your tests to mimic the experience your API's consumer would have when interacting with it.
Note: There are many differing opinions on what integration tests should cover. In some cases, a developer may want to write dedicated integration tests to ensure smaller components (such as your controllers and services) work correctly together along with tests that validate the entire API route works correctly. The decision about what should be covered in your tests depends entirely on your application's needs and what you as a developer feel needs to be tested.
Similar to the previous article in this series, in order to keep the information in this tutorial to a manageable length you will focus on writing the tests for the API routes /auth/signin and /auth/signup.
Note: If you are curious about what the tests for the
/quotes/*routes would look like, the complete set of tests is available in theintegration-testsbranch of the GitHub repository.
Write the tests for /auth/signup
Create a new file in src/tests named auth.test.ts
touch src/tests/auth.test.tsThis is where all tests relating to the /auth routes of your API will go.
Within this file, import the describe, expect and it functions from Vitest and use describe to define this suite of tests:
// src/tests/auth.test.ts
import { describe, expect, it } from 'vitest'

describe('/auth', async () => {
  // tests will go here
})
The first endpoint you will test is the POST /auth/signup route.
Within the test suite context, add another describe block to describe the suite of tests associated with this specific route:
// src/tests/auth.test.ts
import { describe, expect, it } from 'vitest'

describe('/auth', async () => {
  describe('[POST] /auth/signup', () => {
    // tests will go here
  })
})
This route allows you to provide a username and a password to create a new user. By looking through the logic in src/auth/auth.controller.ts and the route definition at src/auth/auth.routes.ts, it can be determined that the following behaviors that are important to test for:
- It should respond with a
200status code and user details - It should respond with a valid session token when successful
- It should respond with a
400status code if a user exists with the provided username - It should respond with a
400status code if an invalid request body is provided
Note: The tests should include any variation of responses you would expect from the API, both successful and errored. Reading through an API's route definitions and controllers will usually be enough to determine the different scenarios you should test for.
The next four sections will detail how to write the tests for these scenarios.
It should respond with a 200 status code and user details
To begin writing the test for this scenario, use the it function imported from Vitest to describe what "it" should do.
Within the describe block for the /auth/signup route add the following:
describe('/auth', async () => {
  describe('[POST] /auth/signup', () => {
+    it('should respond with a `200` status code and user details', async () => {
+      // test logic will go here
+    })
  })
})
In order to actually POST data to the endpoint in your application you will make use of a library named supertest. This library allows you to provide it an HTTP server and send requests to that server via a simple API.
Install supertest as a development dependency:
npm i -D supertest @types/supertestThen import supertest at the top of src/tests/auth.test.ts with the name request. Also import the default export from src/lib/createServer, which provides the app object:
// src/tests/auth.test.ts
import { describe, expect, it } from 'vitest'
+import request from 'supertest'
+import app from 'lib/createServer'

describe('/auth', async () => {
  describe('[POST] /auth/signup', () => {
    it('should respond with a `200` status code and user details', async () => {
      // test logic will go here
    })
  })
})
You can now send a request to your Express API using the request function:
// src/tests/auth.test.ts
// ...
describe('/auth', async () => {
  describe('[POST] /auth/signup', () => {
    it('should respond with a `200` status code and user details', async () => {
+      const { status, body } = await request(app).post('/auth/signup').send({
+        username: 'testusername',
+        password: 'testpassword'
+      })
    })
  })
})
Above, the app instance was passed to the request function. The response of that function is a set of functions that allow you to interact with the HTTP server passed to request.
The post function was then used to define the HTTP method and route you intended to interact with. Finally send was invoked to send the POST request along with a request body.
The returned value of that contains all of the details of the request's response, however the status and body values were specifically pulled out of the response.
Now that you have access to the response status and body, you can verify the route performed the action it was intended to and responded with the correct values.
Add the following to this test to verify these cases:
// src/tests/auth.test.ts
// 1
+import prisma from './helpers/prisma'
// ...
describe('/auth', async () => {
  describe('[POST] /auth/signup', () => {
    it('should respond with a `200` status code and user details', async () => {
      const { status, body } = await request(app).post('/auth/signup').send({
        username: 'testusername',
        password: 'testpassword'
      })
      // 2
+     const newUser = await prisma.user.findFirst()
      // 3
+     expect(status).toBe(200)
      // 4
+     expect(newUser).not.toBeNull()
      // 5
+     expect(body.user).toStrictEqual({
+        username: 'testusername',
+        id: newUser?.id
+     })
    })
  })
})
The changes above do the following:
- Imports
prismaso you can query the database to double-check data was created correctly - Uses
prismato fetch the newly created user - Ensures the request responded with a
200status code - Ensures a user record was found
- Ensures the response body contained a
userobject with the user'susernameandid
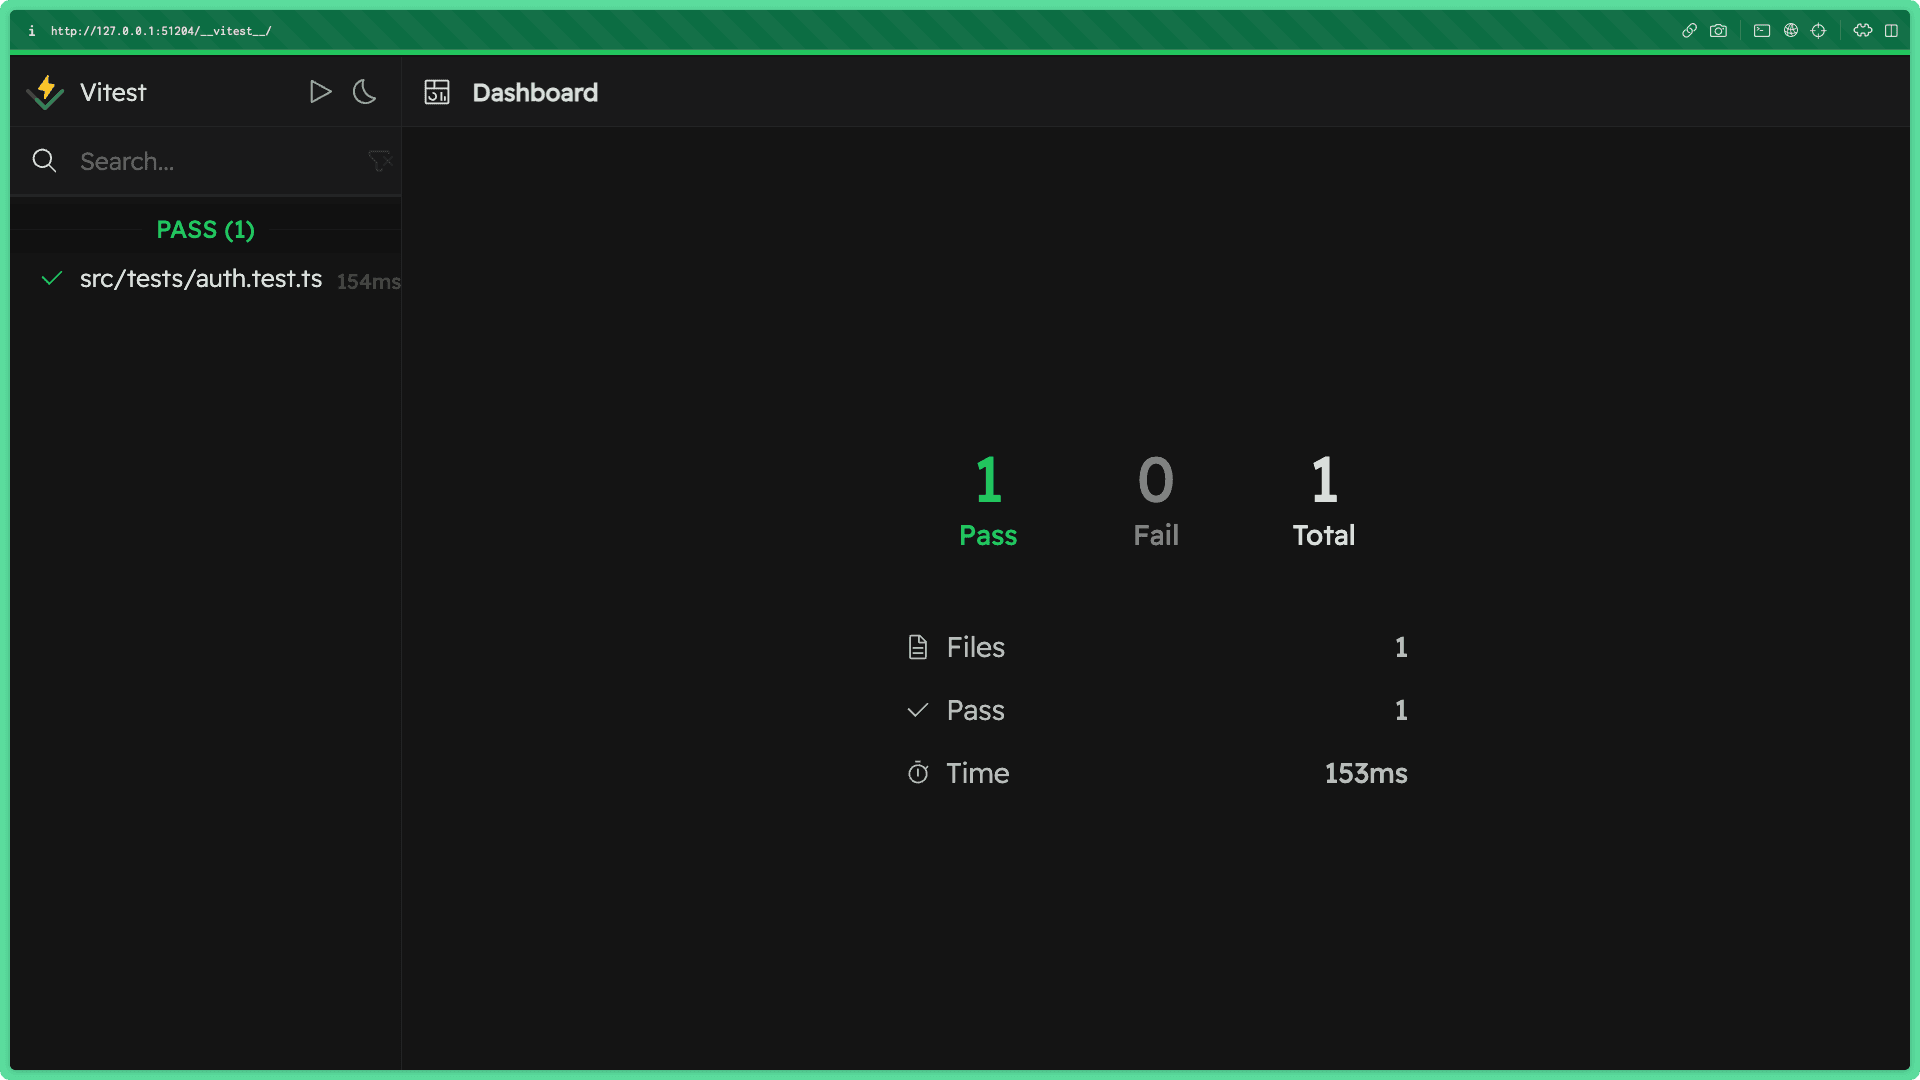
If you run npm run test:int:ui in your terminal, you should see the Vitest GUI open up along with a successful test message.
Note: If you had not yet run this command you may be prompted to install the
@vitest/uipackage and re-run the command.
Note: No modules, including Prisma Client, were mocked in this test! Your test was run against a real database and verified the data interactions in this route work properly.
It should respond with a valid session token when successful
This next test will verify that when a user is created, the response should include a session token that can be used to validate that user's requests to the API.
Create a new test for this scenario beneath the previous test:
// src/tests/auth.test.ts
// ...
describe('/auth', async () => {
  describe('[POST] /auth/signup', () => {
    // ...
+    it('should respond with a valid session token when successful', async () => {
+
+    })
  })
})
This test will be a bit simpler than the previous. All it needs to do is send a valid sign up request and inspect the response to verify a valid token was sent back.
Use supertest to send a POST request to the /auth/signup endpoint and retrieve the response body:
// src/tests/auth.test.ts
// ...
describe('/auth', async () => {
  describe('[POST] /auth/signup', () => {
    // ...
    it('should respond with a valid session token when successful', async () => {
+      const { body } = await request(app).post('/auth/signup').send({
+        username: 'testusername',
+        password: 'testpassword'
+      })
    })
  })
})
The response body should contain a field named token which contains the session token string.
Add a set of expectations that verify the token field is present in the response, and also use the jwt library to verify the token is a valid session token:
// src/tests/auth.test.ts
+import jwt from 'jsonwebtoken'
// ...
describe('/auth', async () => {
  describe('[POST] /auth/signup', () => {
    // ...
    it('should respond with a valid session token when successful', async () => {
      const { body } = await request(app).post('/auth/signup').send({
        username: 'testusername',
        password: 'testpassword'
      })
+      expect(body).toHaveProperty('token')
+      expect(jwt.verify(body.token, process.env.API_SECRET as string))
    })
  })
})

// ...
It should respond with a 400 status code if a user exists with the provided username
Until now, you have verified valid requests to /auth/signup respond as expected. Now you will switch gears and make sure the app appropriately handles invalid requests.
Add another test for this scenario:
// src/tests/auth.test.ts
// ...
describe('/auth', async () => {
  describe('[POST] /auth/signup', () => {
    // ...
+    it('should respond with a `400` status code if a user exists with the provided username', async () => {
+
+    })
  })
})
In order to trigger the 400 that should occur when a sign up request is made with an existing username, a user must already exist in the database.
Add a query to this test that creates a user named 'testusername' with any password:
// src/tests/auth.test.ts
// ...
describe('/auth', async () => {
  describe('[POST] /auth/signup', () => {
    // ...
    it('should respond with a `400` status code if a user exists with the provided username', async () => {
+     await prisma.user.create({
+       data: {
+         username: 'testusername',
+         password: 'somepassword'
+       }
+     })
    })
  })
})
Now you should be able to trigger the error by sending a sign up request with the same username as that user.
Note: Remember, this user record (as well as the other records created as a result of your sign up tests) are deleted between each individual test.
Send a request to /auth/signup providing the same username as the user created above: 'testusername':
// src/tests/auth.test.ts
// ...
describe('/auth', async () => {
  describe('[POST] /auth/signup', () => {
    // ...
    it('should respond with a `400` status code if a user exists with the provided username', async () => {
      await prisma.user.create({
        data: {
          username: 'testusername',
          password: 'somepassword'
        }
      })

+      const { status, body } = await request(app).post('/auth/signup').send({
+        username: 'testusername',
+        password: 'testpassword'
+      })
    })
  })
})
Now that a request is being sent to that endpoint, it is time to think about what you would expect to happen in this scenario. You would expect:
- The request to respond with a
400status code - The response body to not contain a
userobject - The count of users in the database to be only
1
Add the following expectations to the test to verify these points are all met:
// src/tests/auth.test.ts
// ...
describe('/auth', async () => {
  describe('[POST] /auth/signup', () => {
    // ...
    it('should respond with a `400` status code if a user exists with the provided username', async () => {
      await prisma.user.create({
        data: {
          username: 'testusername',
          password: 'somepassword'
        }
      })

      const { status, body } = await request(app).post('/auth/signup').send({
        username: 'testusername',
        password: 'testpassword'
      })

+      const count = await prisma.user.count()
+      expect(status).toBe(400)
+      expect(count).toBe(1)
+      expect(body).not.toHaveProperty('user')
    })
  })
})
It should respond with a 400 status code if an invalid request body is provided
The last test you will write for this endpoint is a test verifying a request will respond with a 400 status code if an invalid request body is sent to the API.
This endpoint, as indicated in src/auth/auth.router.ts, uses zod to validate its request body contains a valid username and password field via a middleware named validate defined in src/lib/middlewares.ts.
This test will specifically make sure the validate middleware and the zod definitions are working as expected.
Add a new test for this scenario:
// src/tests/auth.test.ts
// ...
describe('/auth', async () => {
  describe('[POST] /auth/signup', () => {
    // ...
+    it('should respond with a `400` status code if an invalid request body is provided', async () => {
+
+    })
  })
})
This test will very straightforward. It should simply send a POST request to the /auth/signup endpoint and provide an invalid request body.
Use supertest to send a POST request to /auth/signup, however instead of a username field send an email field:
// src/tests/auth.test.ts
// ...
describe('/auth', async () => {
  describe('[POST] /auth/signup', () => {
    // ...
    it('should respond with a `400` status code if an invalid request body is provided', async () => {
+      const { body, status } = await request(app).post('/auth/signup').send({
+        email: 'test@prisma.io', // should be username
+        password: 'testpassword'
+      })
    })
  })
})
This request body should cause the validation middleware to respond to the request with a 400 error code before continuing to the controller.
Use the following set of expectations to validate this behavior:
// src/tests/auth.test.ts
// ...
describe('/auth', async () => {
  describe('[POST] /auth/signup', () => {
    // ...
    it('should respond with a `400` status code if an invalid request body is provided', async () => {
      const { body, status } = await request(app).post('/auth/signup').send({
        email: 'test@prisma.io', // should be username
        password: 'testpassword'
      })
+      expect(status).toBe(400)
+      expect(body.message).toBe(
+        `Invalid or missing input provided for: username`
+      )
    })
  })
})
With that, your suite of tests for the /auth/signup endpoint is complete! If you take a look back at the Vitest GUI you should find all of your tests are successful:
npm run test:int:ui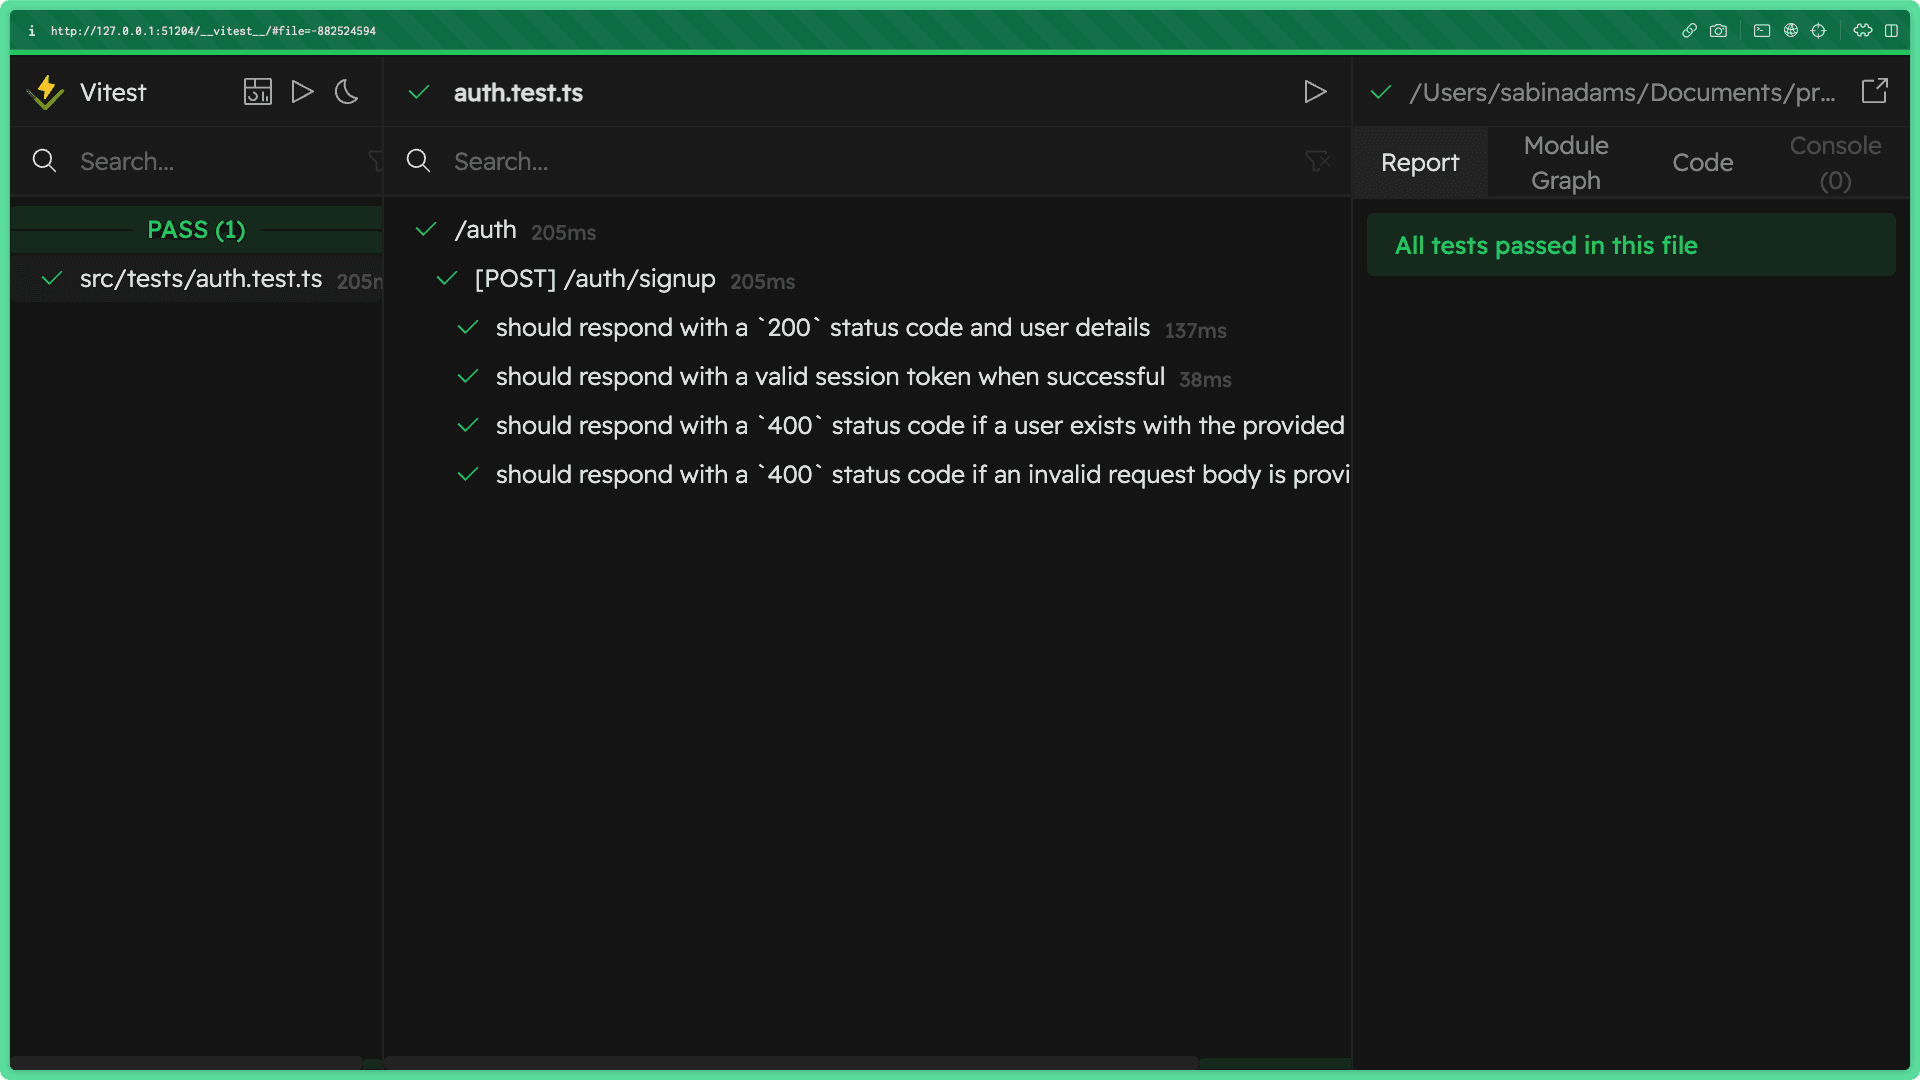
Write the tests for /auth/signin
This next endpoint you will write tests for has many similarities to the previous one, however rather than creating a new user it validates an existing user.
The /auth/signin endpoint takes in a username and a password, makes sure a user exists with the provided data, generates a session token and responds to the request with the session token and the user's details.
Note: The implementation of this functionality can be found in
src/auth/auth.controller.tsandsrc/auth/auth.router.ts.
In your suite of tests you will verify the following are true of this endpoint:
- It should respond with a
200status code when provided valid credentials - It should respond with the user details when successful
- It should respond with a valid session token when successful
- It should respond with a
400status code when given invalid credentials - It should respond with a
400status code when the user cannot be found - It should respond with a
400status code when given an invalid request body
Before testing each scenario, you will need to define another suite of tests to group all of the tests related to this endpoint.
Under the closing tag where you defined the /auth/signup suite of tests, add another describe for the /auth/signin route:
// src/tests/auth.test.ts
// ...
describe('/auth', () => {
  describe('[POST] /auth/signup', () => {
    // ...
  })
+  describe('[POST] /auth/signin', () => {
+
+  })
})
The tests you will write in this suite will also require a user to exist in the database, as you will be the sign in functionality.
Within the describe block you just added, you can use Vitest's beforeEach function to add a user to the database before each test.
Add the following to the new suite of tests:
// src/tests/auth.test.ts
+ import { beforeEach, describe, expect, it } from 'vitest'
+ import bcrypt from 'bcrypt'
// ...
describe('/auth', () => {
  describe('[POST] /auth/signup', () => {
    // ...
  })
  describe('[POST] /auth/signin', () => {
+    beforeEach(async () => {
+      await prisma.user.create({
+        data: {
+          username: 'testusername',
+          password: bcrypt.hashSync('testpassword', 8)
+        }
+      })
+    })
  })
})Note: It is important to note that the encryption method for the password here must exactly match the encryption method used in
src/auth/auth.service.ts.
Now that the initial setup for this suite of tests is complete you can move on to writing the tests.
Just like before, the next six sections will cover each of these scenarios individually and walk through how the test works.
It should respond with a 200 status code when provided valid credentials
This first test will simply verify a valid sign in request with correct credentials results in a 200 response code from the API.
To start, add your new test within the describe block for this suite of tests right beneath the beforeEach function:
// src/tests/auth.test.ts
// ...
describe('/auth', () => {
  describe('[POST] /auth/signup', () => { /* ... */ })
  describe('[POST] /auth/signin', () => {
    beforeEach(async () => {
      // ...
    })
+    it('should respond with a `200` status code when provided valid credentials', async () => {
+
+    })
  })
})
To test for the desired behavior, send a POST request to the /auth/signin endpoint with the same username and password used to create your test user. Then verify the status code of the response is 200:
// src/tests/auth.test.ts
// ...
describe('/auth', () => {
  describe('[POST] /auth/signup', () => { /* ... */ })
  describe('[POST] /auth/signin', () => {
    // ...
    it('should respond with a `200` status code when provided valid credentials', async () => {
+      const { status } = await request(app).post('/auth/signin').send({
+        username: 'testusername',
+        password: 'testpassword'
+      })
+
+      expect(status).toBe(200)
    })
  })
})
It should respond with the user details when successful
This next test is very similar to the previous test, except rather than checking for a 200 response status you will check for a user object in the response body and validate its contents.
Add another test with the following contents:
// src/tests/auth.test.ts
// ...
describe('/auth', () => {
  describe('[POST] /auth/signup', () => { /* ... */ })
  describe('[POST] /auth/signin', () => {
    // ...
+    it('should respond with the user details when successful', async () => {
+      // 1
+      const { body } = await request(app).post('/auth/signin').send({
+        username: 'testusername',
+        password: 'testpassword'
+      })
+      // 2
+      const keys = Object.keys(body.user)
+      // 3
+      expect(keys.length).toBe(2)
+      expect(keys).toStrictEqual(['id', 'username'])
+      expect(body.user.username).toBe('testusername')
+    })
  })
})
The contents of the test above do the following:
- Sends a
POSTrequest to/auth/signinwith a request body containing the test user's username and password - Extracts the keys of the response body's
userobject - Validates there are two keys,
idandusername, in the response and that the value ofuser.usernamematches the test user's username
It should respond with a valid session token when successful
In this test, you again will follow a very similar process to the previous two tests, only this test will verify the presence of a valid session token in the response body.
Add the following test beneath the previous one:
// src/tests/auth.test.ts
// ...
describe('/auth', () => {
  describe('[POST] /auth/signup', () => { /* ... */ })
  describe('[POST] /auth/signin', () => {
    // ...
+    it('should respond with a valid session token when successful', async () => {
+      const { body } = await request(app).post('/auth/signin').send({
+        username: 'testusername',
+        password: 'testpassword'
+      })
+
+      expect(body).toHaveProperty('token')
+      expect(jwt.verify(body.token, process.env.API_SECRET as string))
+    })
  })
})
As you can see above, a request was sent to the target endpoint and the response body was abstracted from the result.
The toHaveProperty function was used to verify the present of a token key in the response body. Then the session token was validated using the jwt.verify function.
Note: It is important to note that similar to the password encryption, it is important that the session token is validated using the same function as is used in
src/auth/auth.service.ts.
It should respond with a 400 status code when given invalid credentials
You will now verify a correct errored response will result from sending a request body with invalid credentials.
To recreate this scenario, you will simply send a POST request to /auth/signin with your test user's correct username but an incorrect password.
Add the following test:
// src/tests/auth.test.ts
// ...
describe('/auth', () => {
  describe('[POST] /auth/signup', () => { /* ... */ })
  describe('[POST] /auth/signin', () => {
    // ...
+    it('should respond with a `400` status code when given invalid credentials', async () => {
+      const { body, status } = await request(app).post('/auth/signin').send({
+        username: 'testusername',
+        password: 'wrongpassword'
+      })
+      expect(status).toBe(400)
+      expect(body).not.toHaveProperty('token')
+    })
  })
})
As you can see above, the response's status is expected to be 400.
An expectation was also added for the response body to not contain a token property as an invalid login request should not trigger a session token to be generated.
Note: The second expectation of this test is not strictly necessary as the
400status code is enough to know the condition in your controller was met to short-circuit the request and respond with an error.
It should respond with a 400 status code when the user cannot be found
Here you will test the scenario where a user cannot be found with the provided username. This, as was the case in the previous test, should short-circuit the request and cause an early response with an error status code.
Add the following to your tests:
// src/tests/auth.test.ts
// ...
describe('/auth', () => {
  describe('[POST] /auth/signup', () => { /* ... */ })
  describe('[POST] /auth/signin', () => {
    // ...
+    it('should respond with a `400` status code when the user cannot be found', async () => {
+      const { body, status } = await request(app).post('/auth/signin').send({
+        username: 'wrongusername',
+        password: 'testpassword'
+      })
+      expect(status).toBe(400)
+      expect(body).not.toHaveProperty('token')
+    })
  })
})
It should respond with a 400 status code when given an invalid request body
In this final test, you will verify sending an invalid request body causes an error response.
The validate middleware used in src/auth/auth.router.ts should catch the invalid request body and short-circuit the auth controller altogether.
Add the following test to finish off this suite of tests:
// src/tests/auth.test.ts
// ...
describe('/auth', () => {
  describe('[POST] /auth/signup', () => { /* ... */ })
  describe('[POST] /auth/signin', () => {
    // ...
+    it('should respond with a `400` status code when given an invalid request body', async () => {
+      const { body, status } = await request(app).post('/auth/signin').send({
+        email: 'test@prisma.io', // should be username
+        password: 'testpassword'
+      })
+      expect(status).toBe(400)
+      expect(body.message).toBe(
+        `Invalid or missing input provided for: username`
+      )
+    })
  })
})
As you can see above, the username field was switched out for an email field as was done in a test previously in this article. As a result, the request body does not match the zod definition for the request body and triggers an error.
If you head over to the Vitest GUI you should see your entire suite of tests for both endpoints successfully passing all checks.

Summary & What's next
Congrats on making it to the end of this article! This section of the testing series was jam-packed full of information, so let's recap. During this article you:
- Learned about what integration testing is
- Set up a Docker container to run a Postgres database in your testing environment
- Configured Vitest so you could run unit tests and integration tests independently
- Wrote a set of startup shell scripts to spin up your testing environment and run your integration test suite
- Wrote tests for two major endpoints in your Express API
In the next section of this series, you will take a look at one last kind of testing that will be covered in these articles: end-to-end testing.
We hope you'll follow along with the rest of this series!
Build your next app with Prisma
Start free. Scale when you’re ready.