The Ultimate Guide to Testing with Prisma: End-To-End Testing

End-to-end testing is one of the more "zoomed-out" forms of testing an application as it allows you to test interactions with your application from the perspective of a user. In this article, you will look at some practical examples of setting up and writing end-to-end tests.
Table Of Contents
- Table Of Contents
- Introduction
- Prerequisites
- Set up a project for end-to-end tests
- Install and initialize Playwright
- Set up the testing environment
- Write the end-to-end tests
- Why Playwright?
- Summary & What's next
Introduction
At this point in this series, you have written extensive tests to ensure the functions and behaviors of a standalone Express API work as intended. These tests came in the form of integration tests and unit tests.
In this section of the series, you will add another layer of complexity to this application. This article will explore a monorepo containing the same Express API and tests from the previous articles along with a React application that consumes that API. The goal of this tutorial will be to write end-to-end tests that make sure the interactions a user will make in your application are working correctly.
What is end-to-end testing?
End-to-end testing is a broad methodology of testing that focuses on emulating user interactions within an application to ensure they work correctly.
While the tests in the previous parts of this series focused on verifying the individual building blocks of the application work properly, end-to-end tests ensure that the user's experience of your application is what you would expect.
As an example, end-to-end tests might check for things like the following:
- If a user navigates to the home page while not signed in, will they be redirected to the login page?
- If a user deletes a record via the UI, will its HTML element disappear?
- Can a user submit the login form without filling in the email field?
What makes end-to-end testing so useful is that it not only verifies the behavior of a specific part of your technology stack but also ensures all of the pieces are working together as expected. Rather than writing tests specifically against the frontend client or the backend API, these tests utilize both and act as if the test runner was a user.
With this general idea of what end-to-end testing is, you are now ready to begin setting up your testing environment.
Technologies you will use
Prerequisites
Assumed knowledge
The following would be helpful to have when working through the steps below:
- Basic knowledge of JavaScript or TypeScript
- Basic knowledge of Prisma Client and its functionalities
- Basic understanding of Docker
- Some experience with a testing framework
Development environment
To follow along with the examples provided, you will be expected to have:
- Node.js installed
- A code editor of your choice (we recommend VSCode)
- Git installed
- pnpm installed
- Docker installed
This series makes heavy use of this GitHub repository. Make sure to clone the repository.
Clone the repository
In your terminal head over to a directory where you store your projects. In that directory run the following command:
git clone git@github.com:sabinadams/testing_mono_repo.gitThe command above will clone the project into a folder named testing_mono_repo. The default branch for that repository is main.
Once you have cloned the repository, there are a few steps involved in setting the project up.
First, navigate into the project and install the node_modules:
cd testing_mono_repo
pnpm i
Next, create a .env file at the root of the project:
touch .envAdd the following variables to that new file:
# .env
DATABASE_URL="postgres://postgres:postgres@localhost:5432/quotes"
API_SECRET="mXXZFmBF03"
VITE_API_URL="http://localhost:3000"
In the .env file, the following variables were added:
API_SECRET: Provides a secret key used by the authentication services to encrypt your passwords. In a real-world application, this value should be replaced with a long random string with numeric and alphabetic characters.DATABASE_URL: Contains the URL to your database.VITE_API_URL: The URL location of the Express API.
A look at the repository
As was mentioned above, unlike the previous parts of this series the repository you will work this in this article is a pnpm monorepo that contains two separate applications.
Below is the folder structure of the project:
├── backend/
├── frontend/
├── prisma/
├── scripts/
├── node_modules/
├── package.json
├── pnpm-lock.yaml
├── pnpm-workspace.yaml
├── docker-compose.yml
└── .env
The backend folder contains the Express API along with its integration and unit tests. This project is the same API worked on in the previous sections of this series.
The frontend folder contains a new frontend React application. The application is complete and will not be modified in this series.
The prisma and scripts folders contain the same files they did in the previous articles in this series. prisma/ contains the schema.prisma file and scripts/ contains the .sh scripts that help run and set up a testing environment.
The remaining files are where the package configuration, Docker container, and pnpm workspaces are defined.
If you take a look in package.json, you will see the following in the scripts section:
// package.json
// ...
"scripts": {
  "prepare": "husky install",
  "checks": "pnpm run -r checks",
  "startup": "./scripts/db-startup.sh && pnpm run -r dev",
  "test:backend:int": "pnpm run --filter=backend test:int",
  "test:backend:unit": "pnpm run --filter=backend test:unit"
}
// ...
These are the commands that can be run in the pnpm monorepo. The commands here primarily use pnpm to run commands that are defined in backend/package.json and frontend/package.json.
Run the following command from the root of the project to start the application:
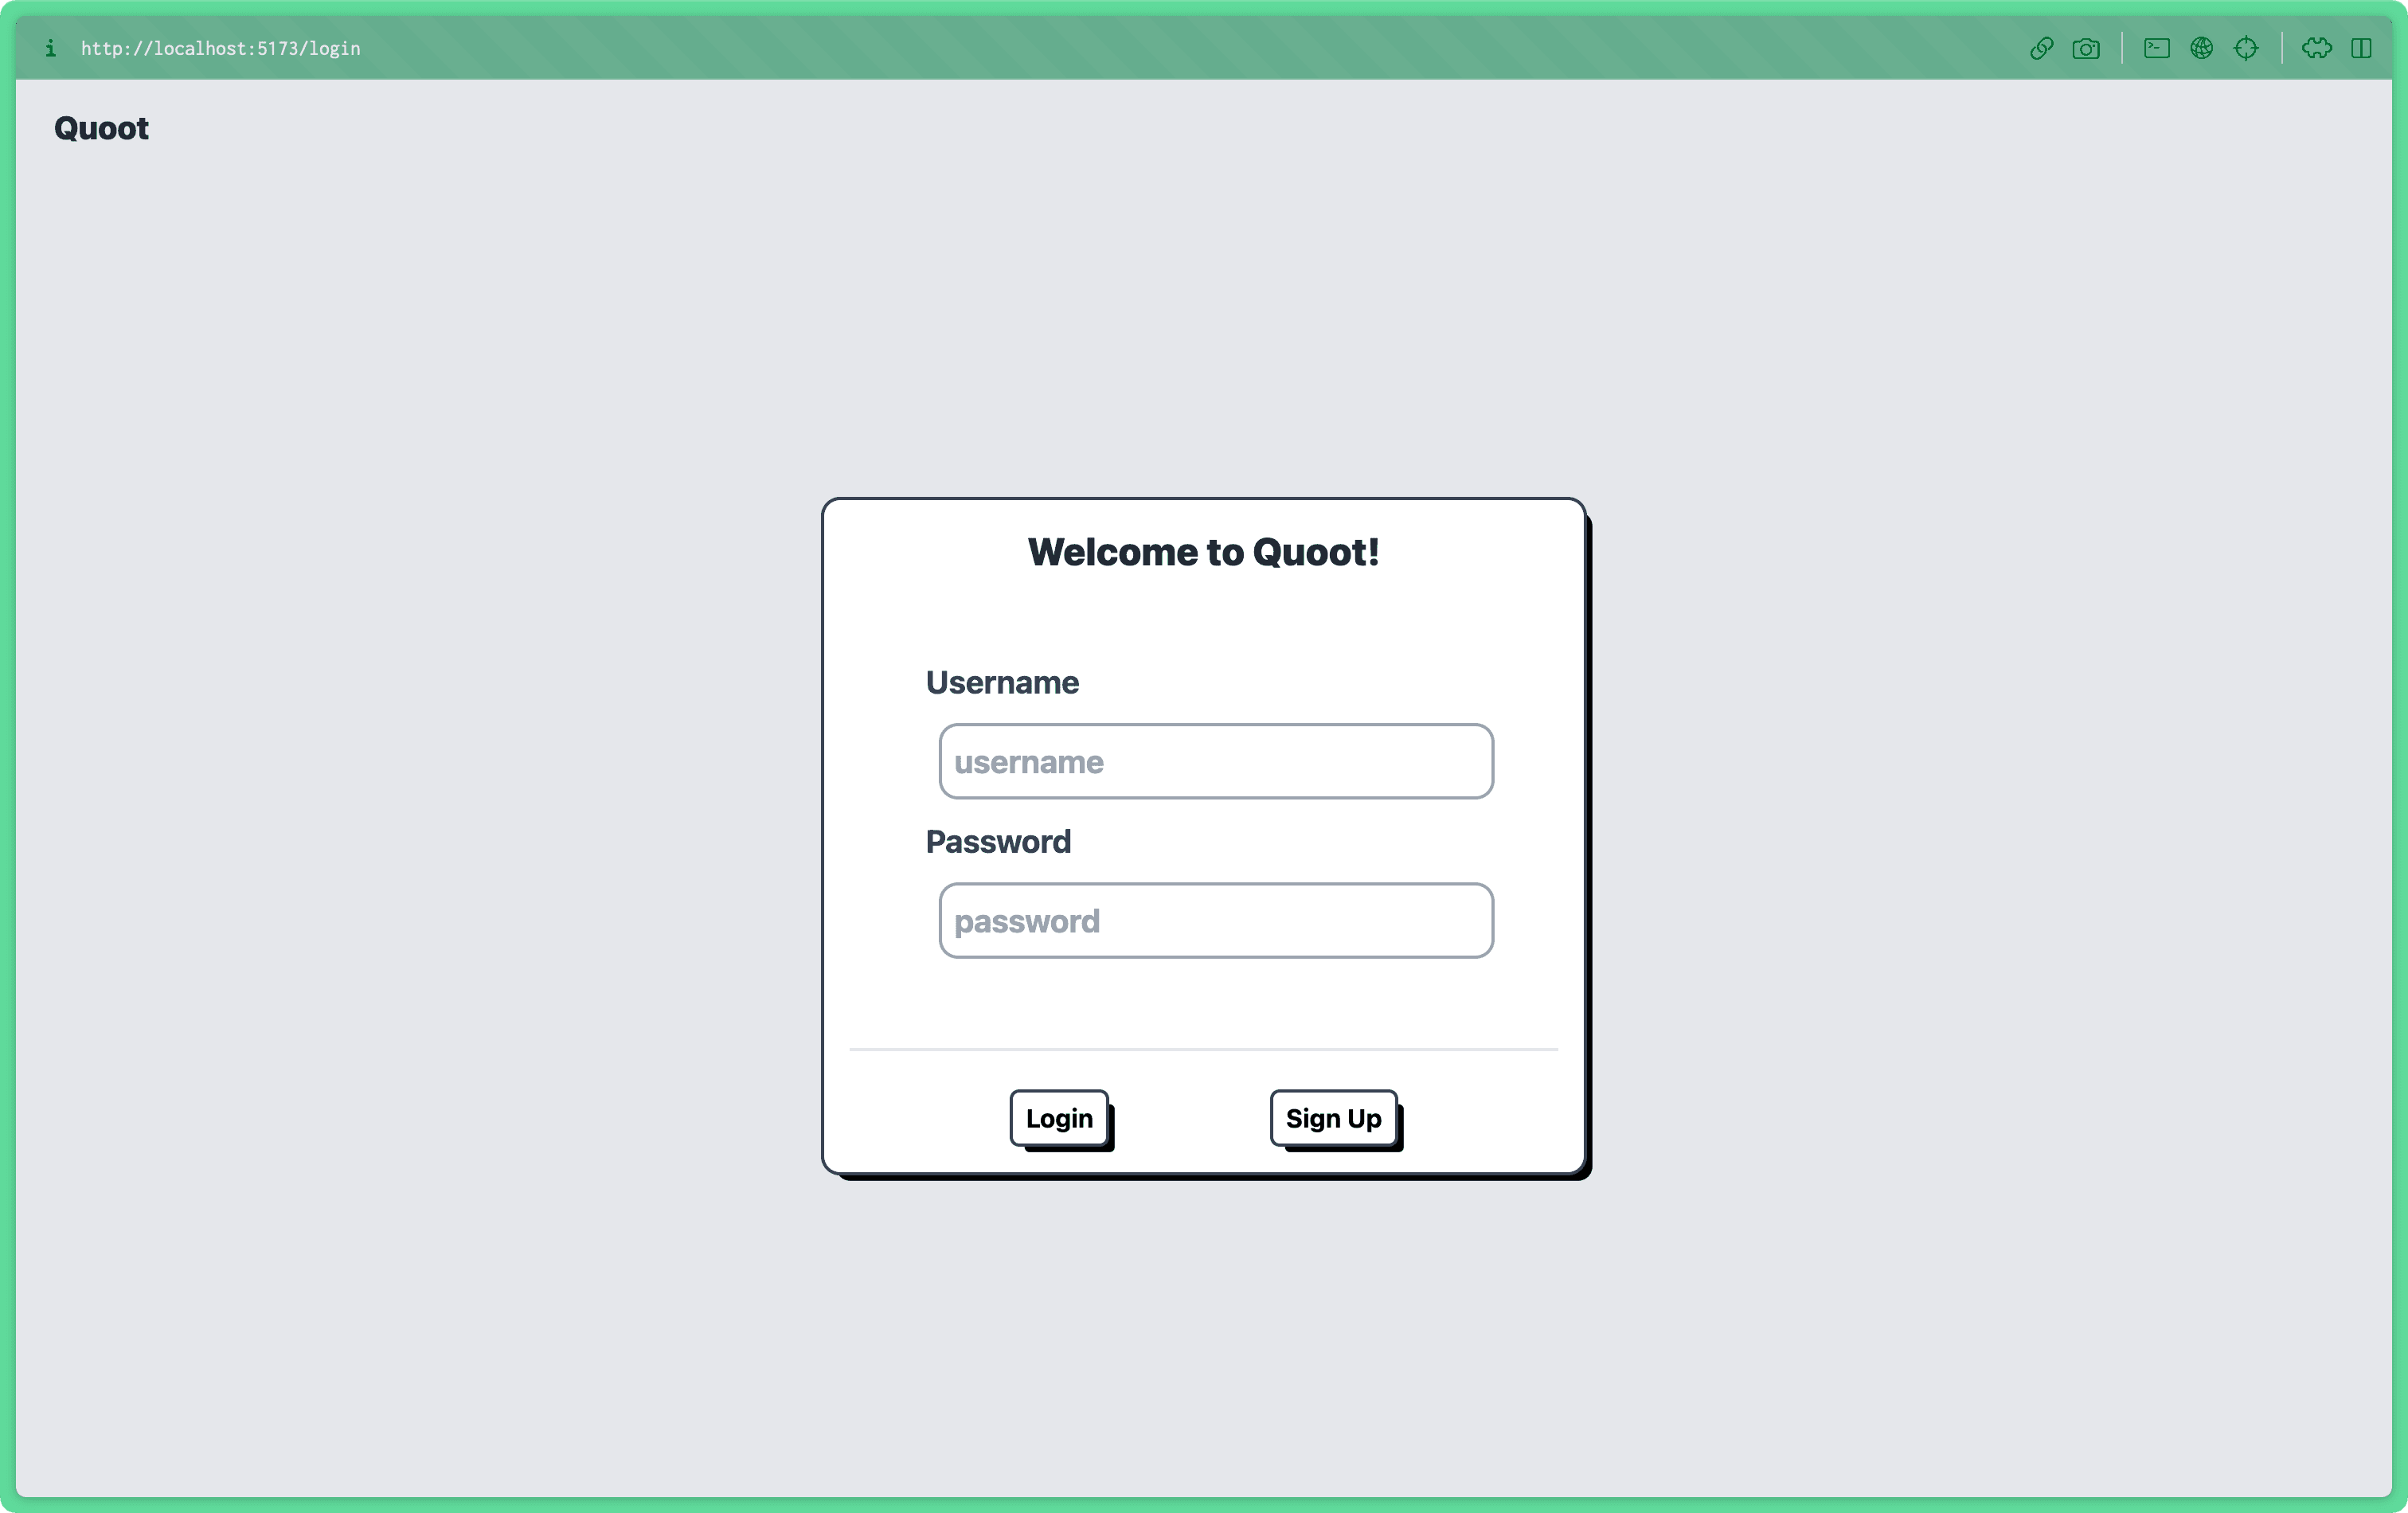
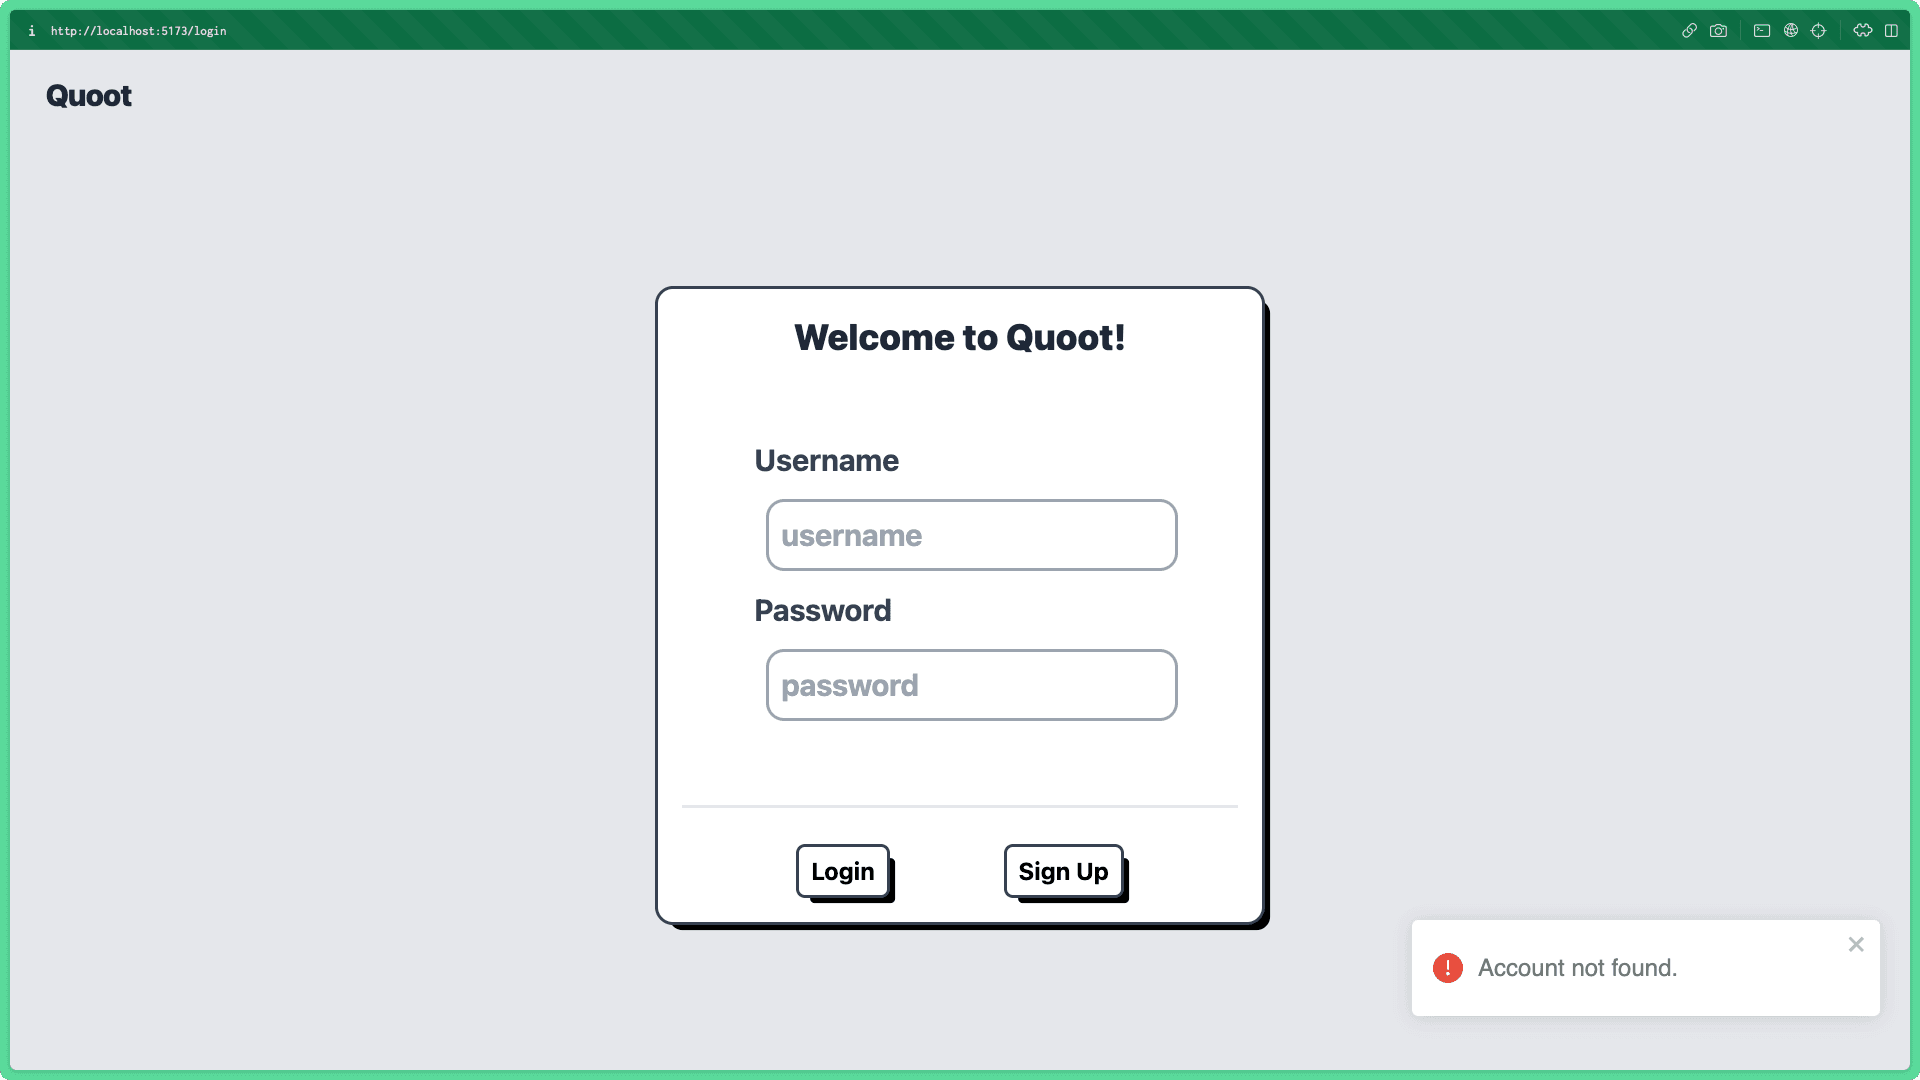
pnpm startupIf you then navigate to http//localhost:5173, you should be presented with the application's login page:
Next, you will jump into setting up your end-to-end tests and their testing environment.
Set up a project for end-to-end tests
To begin setting up the end-to-end tests you will set up a new project within your monorepo that will contain all of your end-to-end testing code.
Note: Your end-to-end tests and their related code are in a separate project in the monorepo because these tests do not belong to the frontend or the backend project. They are their own entity and interact with both projects.
The first step in this process is creating a new folder for your project.
Add a new folder named e2e to the root of the monorepo:
mkdir e2eWithin that new directory, you will need to initialize pnpm using the following command:
cd e2e
pnpm init
This command will create a package.json file with an initial configuration including a name field whose value is 'e2e'. This name is what pnpm will use to define the project's workspace.
Within the root of the monorepo, open the pnpm-workspace.yaml file and add the following:
# pnpm-workspace.yaml
packages:
  - backend
  - frontend
  - e2e # <- Add the project name to the list of packages
The project where you will write your end-to-end tests is now registered within your pnpm monorepo and you are ready to begin setting up your testing library.
Install and initialize Playwright
In this article, you will use Playwright to run your end-to-end tests.
Note: Why Playwright instead of Cypress or another more mature tool? There are some really cool features of Playwright that will be highlighted later on in this article that set Playwright apart from the others in this specific use-case.
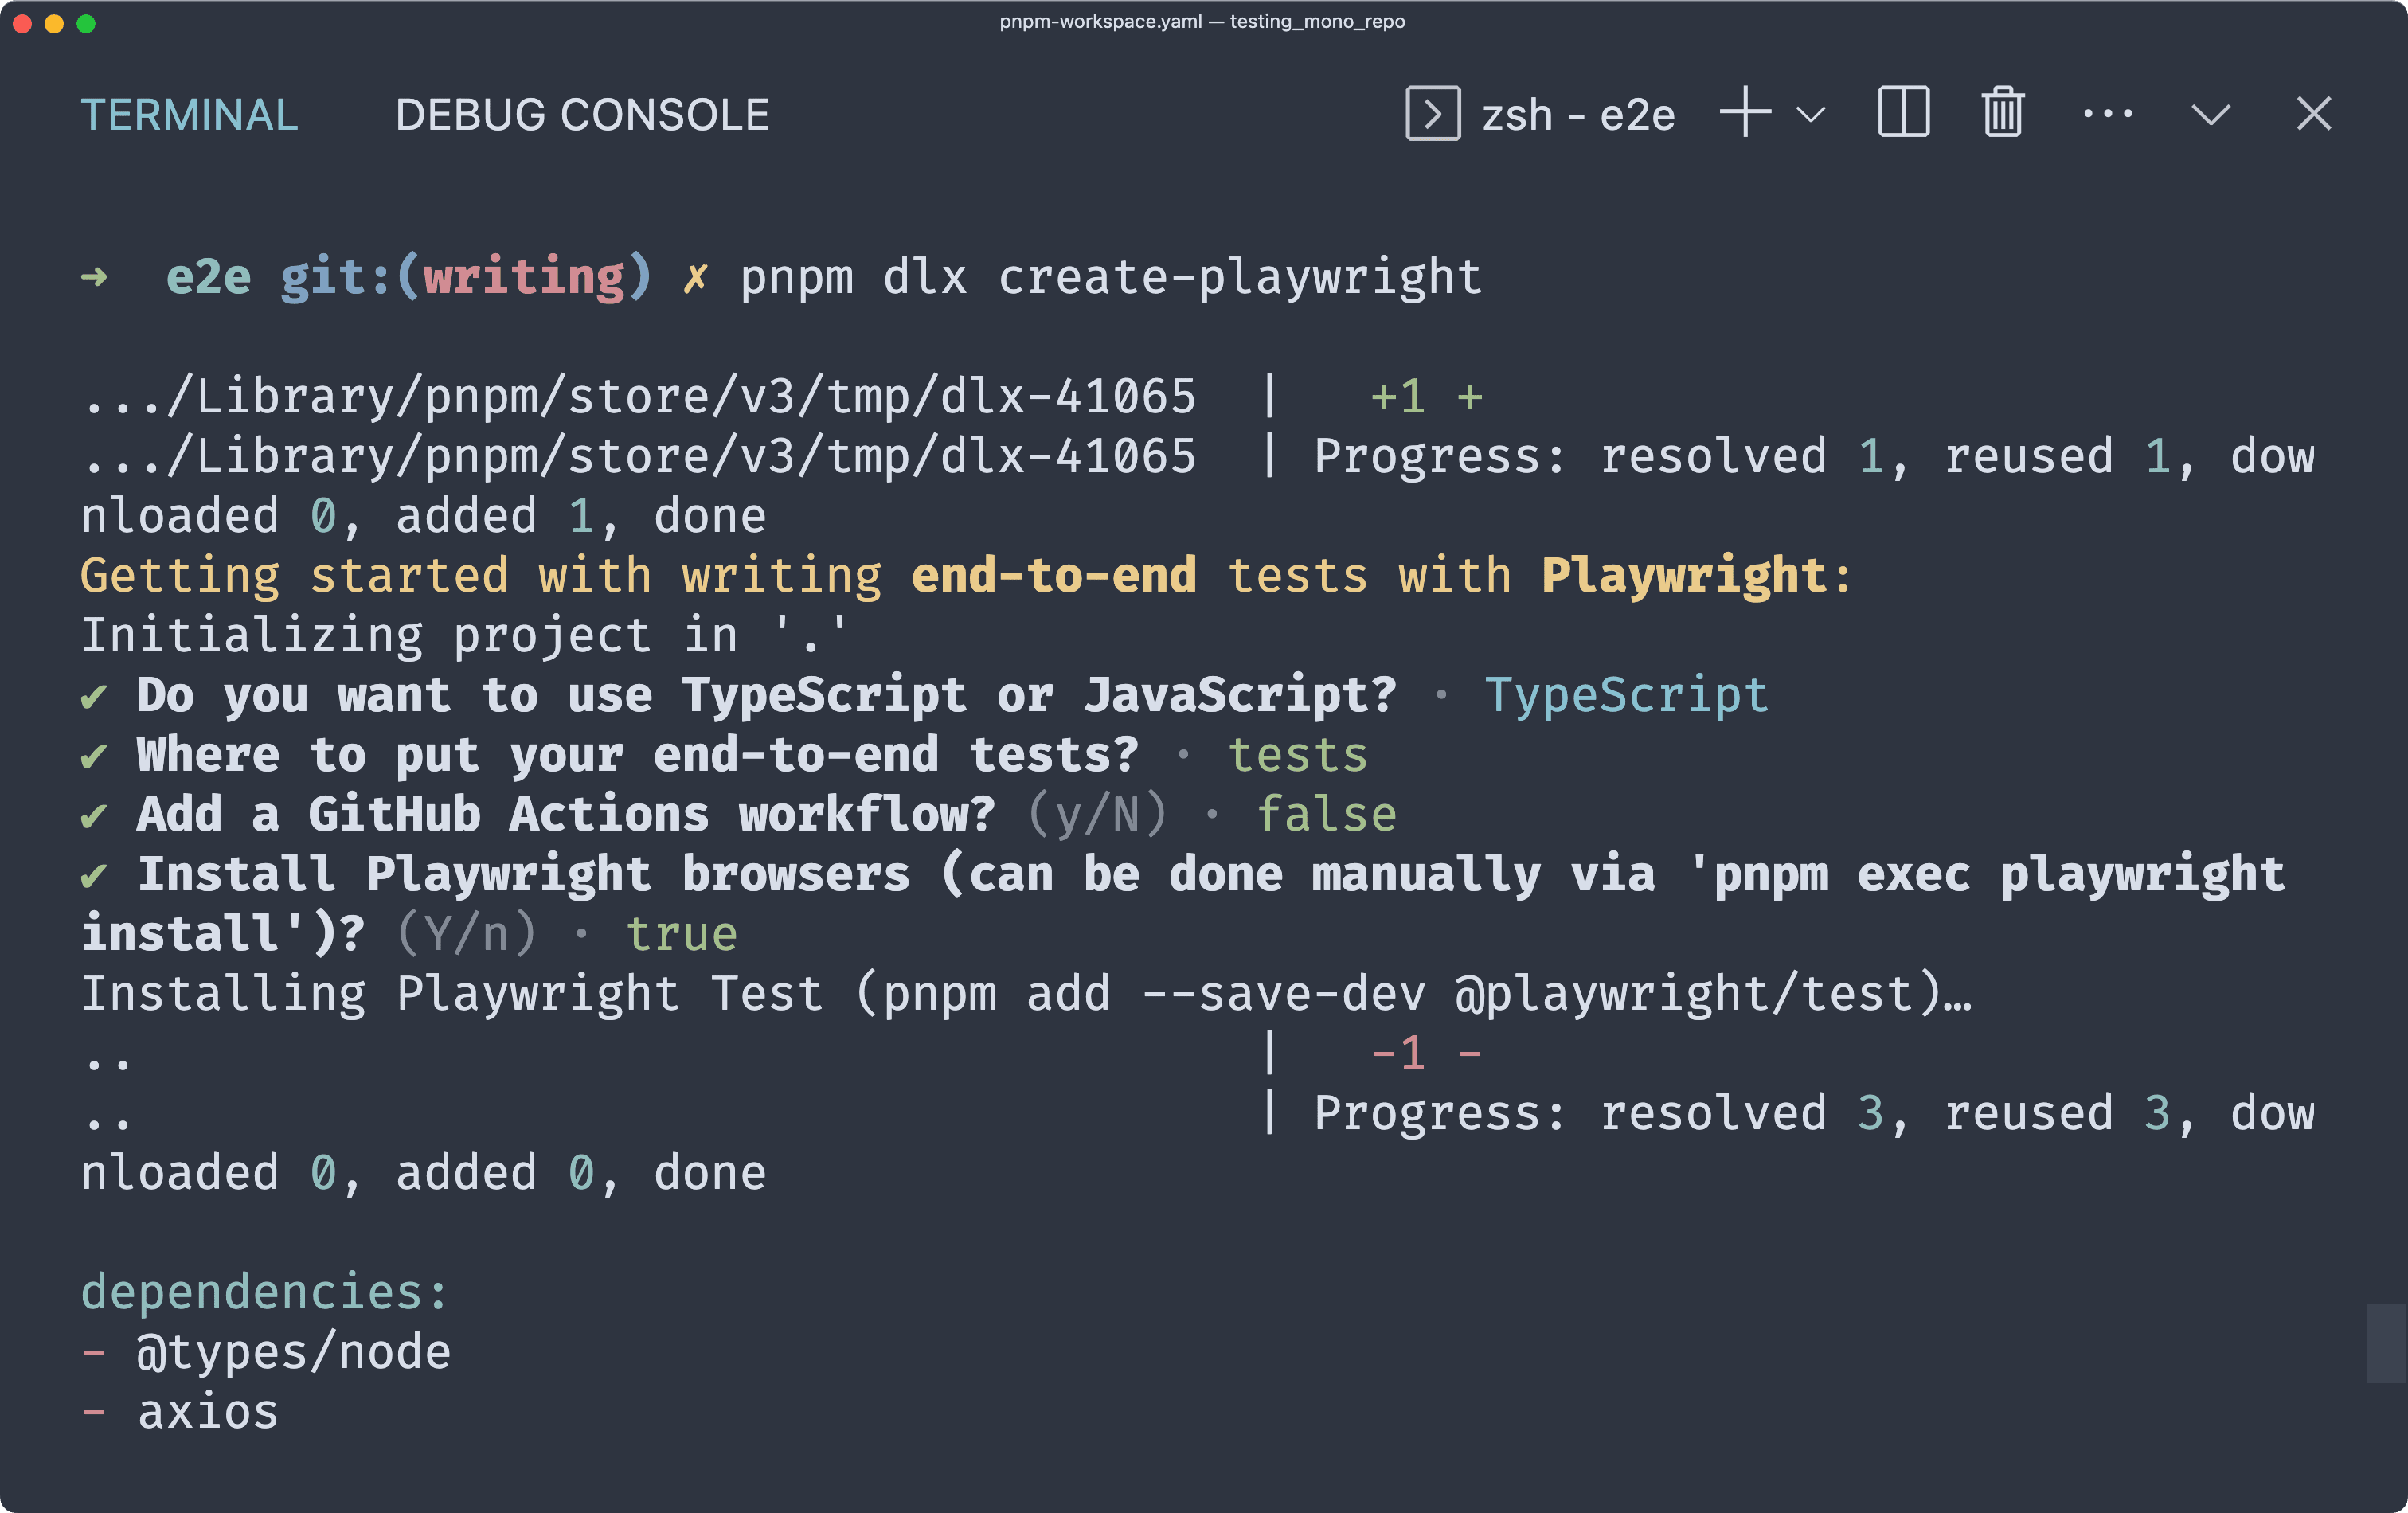
To begin, install playwright inside the e2e directory:
pnpm dlx create-playwrightAfter running the above command, you will be asked a series of questions about your project. Use the defaults for each of these options by hitting Return:
Notice
Note: The installation step of this process will likely take a while as Playwright installs the binaries for multiple browsers your tests will run in.
This configuration set up the general structure of the project, however, it also included some files you do not need.
Remove the unneeded files by running the following:
rm -R tests-examples
rm tests/*Note: The files you deleted were just example files used to show you where your tests should go and how they can be written.
Next, as this project will be written using TypeScript, initialize TypeScript in this folder:
pnpm add typescript @types/node
npx tsc --init
At this point, you are ready to begin writing TypeScript in this project and have access to the tools provided by Playwright. The next step is to configure Playwright and write a startup script that will spin up the database, frontend and backend for your tests.
Set up the testing environment
There are two main things needed to run end-to-end tests:
- Configure Playwright to start the frontend and backend servers automatically when tests are run
- Add a shell script that starts up the test database before running the end-to-end tests
The goal of these steps is to provide a way to run a single command to spin up a database, wait for the database to come online, start up the development servers for the frontend and backend projects and finally run the end-to-end tests.
Configure Playwright
When you initialized Playwright, a new file was generated in the e2e folder named playwright.config.ts. At the very bottom of that file, you will find a configuration option commented out called webServer.
This configuration option allows you to provide an object (or an array of objects) containing a command to start up a web server before your tests are run. It also allows you to provide a port number for each object which Playwright will use to wait for the server on that port to become accessible before starting the tests.
You will use this option to configure Playwright to start your backend and frontend projects.
In playwright.config.ts, uncomment that section and add the following:
// playwright.config.ts
// ...
- // webServer: {
- //   command: 'npm run start',
- //   port: 3000,
- // },
+ webServer: [
+  {
+    command: 'pnpm run --filter=backend dev',
+    port: 3000,
+    reuseExistingServer: true
+  },
+  {
+    command: 'pnpm run --filter=frontend dev',
+    port: 5173,
+    reuseExistingServer: true
+  }
+],
For each of the commands in the configuration above, pnpm is used to run the appropriate dev script in the frontend and backend projects using the --filter flag. These scripts are defined in each project's package.json files.
Note: For information about how to run commands in pnpm, check out their documentation.
Each object has a reuseExistingServer key set to true. This lets Playwright know it should reuse a running server in the event it had been started previous to running the test.
Write a startup script
Now that Playwright itself is configured to spin up the development servers, you will need a way to start a test database as well as Playwright's test runner in a single command.
The way you will do this is very similar to the script written in the previous article of this series which was used to spin up a database before running integration tests.
Head over to the scripts/ folder at the root of the monorepo and create a new file named run-e2e.sh:
cd ../scripts
touch run-e2e.sh
This file is where you will write your startup script.
Note: Check out
scripts/run-integration.shto see the startup script written in the previous article.
The first thing this file needs is to be made executable, which will allow you to run the file via the terminal.
Add the following to the very top of run-e2e.sh:
# scripts/run-e2e.sh
#!/usr/bin/env bashNote: This line is referred to as a shebang line and is used to set bash as the default shell for executing commands.
Then, run the following command from the root of the monorepo to mark the file as an executable in the filesystem:
chmod +x run-e2e.shNow that the file is executable, you will begin writing the actual startup script.
Add the following line to run the database startup script written in the previous article of this series:
# scripts/run-e2e.sh
#!/usr/bin/env bash
+DIR="$(cd "$(dirname "$0")" && pwd)"
+$DIR/db-startup.sh
This script will start a Docker container based on the docker-compose.yml file at the root of the project. It will then wait for the database to become available and run prisma migrate dev before allowing the script to continue.
After the database has been started, the last thing the script needs is to run the end-to-end tests.
Add the following to the end of run-e2e.sh:
# scripts/run-e2e.sh
#!/usr/bin/env bash
DIR="$(cd "$(dirname "$0")" && pwd)"
$DIR/db-startup.sh
+
+if [ "$#" -eq  "0" ]
+  then
+    npx playwright test
+else
+    npx playwright test --headed
+fi
+npx playwright show-report
The lines added above run npx playwright test, which invokes the test runner. If any arguments were provided to the command that invokes this script, the script assumes the tests should be run in headed mode, signified by the --headed argument. This will cause your end-to-end tests to be shown running in an actual browser.
Finally, at the end of the script, npx playwright show-report is run, which serves a local development server with a webpage displaying the results of your tests.
With the script complete, the last step is to configure a way to run it.
In package.json within the e2e folder, add the following to the scripts section:
// e2e/package.json
// ...
-"scripts": {},
+"scripts": {
+  "test": "../scripts/run-e2e.sh",
+  "test:headed": "../scripts/run-e2e.sh --headed"
+},
// ...
Because prisma is not in this directory, you will also need to specify where the Prisma schema is in this package.json file:
// e2e/package.json
// ...
+"prisma": {
+  "schema": "../prisma/schema.prisma"
+}
// ...
This allows you to run your end-to-end tests if your terminal is navigated to the e2e folder.
To make this even simpler, head over to the package.json file at the root of the monorepo and add the following to the scripts section:
// package.json
// ...
"scripts": {
  // ...
  "test:e2e": "pnpm run --filter=e2e test",
  "test:e2e:headed": "pnpm run --filter=e2e test:headed"
},
// ...
Now you can run the end-to-end tests from the root of your project.
Assuming your terminal is currently in the e2e folder, the following will navigate you to the root of the project and run your test script:
cd ..
pnpm test:e2e # or 'pnpm test:e2e:headed'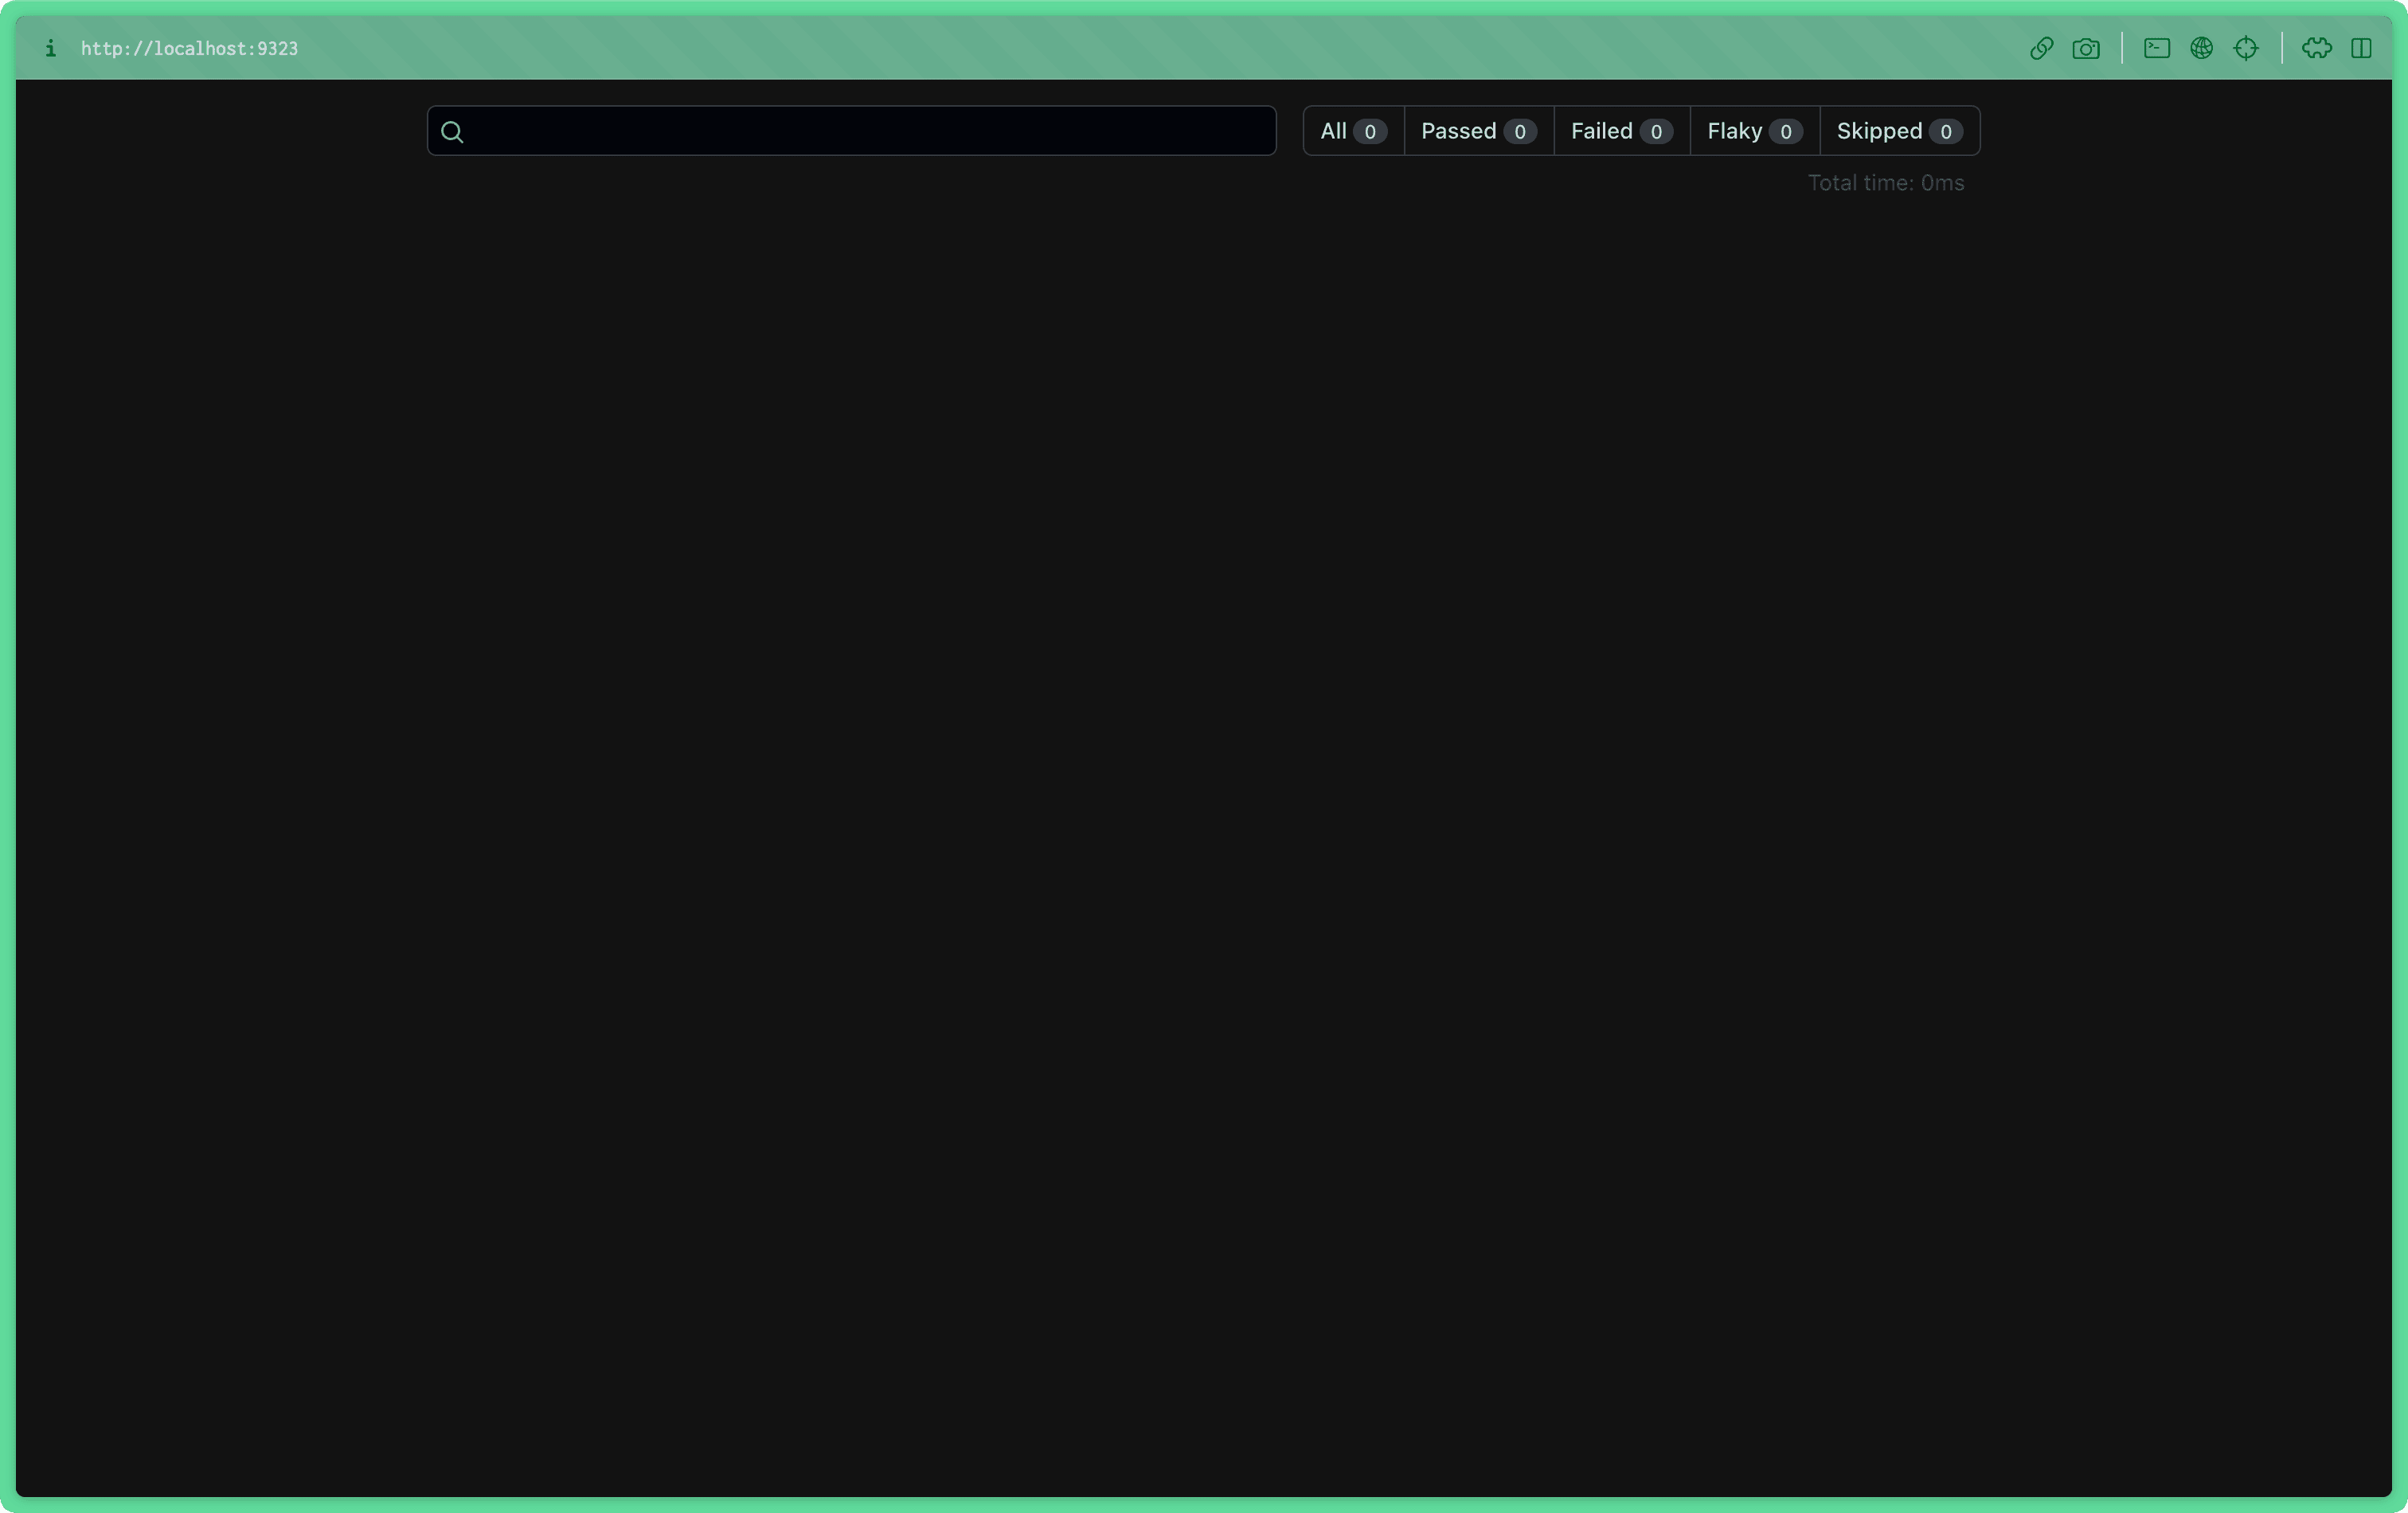
The test report should be empty. There are no tests!
Write the end-to-end tests
Playwright is configured and your testing environment is ready to go! You will now begin to write end-to-end tests for the application.
What to test
In this article, you will write end-to-end tests for everything relating to the authentication workflows of the application.
Note: The GitHub repository's
e2e-testsbranch includes a full suite of end-to-end tests for the entire application.
Remember that end-to-end tests focus on testing the application's workflows that a user might take. Take a look at the login page you will write tests for:
Although it may not be immediately obvious, there are many scenarios you can test that a user may run into regarding authentication.
For example, a user should:
- ... be redirected to the login page if they attempt to access the home page while not signed in.
- ... be redirected to the home page when an account is successfully created.
- ... be redirected to the home page after a successful login.
- ... be warned if their login attempt is not successful.
- ... be warned if they attempt to sign up with an existing username.
- ... be warned if they submit an empty form.
- ... be returned to the login page when you sign out.
In this article, you will write tests for only a few of these scenarios to keep things to a manageable length. Specifically, you will cover the scenarios below in this article.
A user should:
- ... be redirected to the login page if they attempt to access the home page while not signed in.
- ... be redirected to the home page when an account is successfully created.
- ... be redirected to the home page after a successful login.
- ... be warned if their login attempt is not successful.
- ... be warned if they submit an empty form.
Note: These scenarios will cover all of the main concepts we hope to convey in this article. We encourage you to take a swing at writing tests for the other scenarios on your own as well!
With a concrete goal set, you will now begin writing the tests.
Example test
Playwright provides a vast library of helpers and tools that allow you to test your application very intuitively.
Take a look at the sample test below for a hypothetical application that allows you to post messages to a board:
test('should allow you to submit a post', async ({
  page
}) => {
  // Login
  await page.goto('http://localhost:5173/login')
  await page.locator('#username').fill('testaccount')
  await page.locator('#password').fill('testpassword')
  await page.click('#login')
  await page.waitForLoadState('networkidle')
  // Fill in and submit a post
  await page.locator('#postBody').fill('A sample post')
  await page.click('#submitPost')
  await page.waitForLoadState('networkidle')
  // Expect a post to show up on the page
  await expect(page.getByText('A sample post')).toBeVisible()
})
The test above verifies that when you post a message it automatically shows up on the webpage.
To accomplish this, the test has to follow the flow a user would take to achieve the desired result. More specifically, the test has to:
- Log in with a test account
- Submit a post
- Verify the post showed up on the webpage
As you might already have noticed, a lot of these steps such as signing in may end up being repeated a ton. Especially in a test suite with dozens (or much more) tests that require a signed-in user.
To avoid duplicating sets of instructions in each test, you will make use of two concepts that allow you to group these instructions into reusable chunks. These are pages and fixtures.
Pages
First, you will set up a page for your login page. This is essentially just a helper class that groups various sets of interactions with the webpage into individual member functions of the class that will ultimately be consumed by fixtures and your tests themselves.
Within the e2e/tests folder create a new folder named pages:
mkdir -p e2e/tests/pagesInside that folder, create a new file named login.page.ts:
touch e2e/tests/pages/login.page.tsHere is where you will define the class that describes your login page.
At the very top of the file, import the Page type provided by Playwright:
// e2e/tests/pages/login.page.ts
import type { Page } from '@playwright/test'
This helper type describes a fixture available to all tests registered within Playwright named page. The page object represents a single tab within a browser. The class you are writing will require this page object in its constructor so it can interact with the browser page.
In login.page.ts, add and export a class named LoginPage whose constructor takes in a page argument of the type Page:
// e2e/tests/pages/login.page.ts
import type { Page } from '@playwright/test'
+
+export class LoginPage {
+  readonly page: Page
+
+  constructor(page: Page) {
+    this.page = page
+  }
+}
With access to the browser page, you can now define reusable interactions specific to this page.
First, add a member function named goto that navigates to the /login page of the application:
// e2e/tests/pages/login.page.ts
import type { Page } from '@playwright/test'

export class LoginPage {
  readonly page: Page

  constructor(page: Page) {
    this.page = page
  }
+
+  async goto() {
+    await this.page.goto('http://localhost:5173/login')
+    await this.page.waitForURL('http://localhost:5173/login')
+  }
}Note: For information about the
pageobject's available function, check out Playwright's documentation.
Next, add a second function that fills in the login form:
// e2e/tests/pages/login.page.ts
import type { Page } from '@playwright/test'

export class LoginPage {
  readonly page: Page

  constructor(page: Page) {
    this.page = page
  }

  async goto() {
    await this.page.goto('http://localhost:5173/login')
    await this.page.waitForURL('http://localhost:5173/login')
  }
+
+  async populateForm(username: string, password: string) {
+    await this.page.fill('#username', username)
+    await this.page.fill('#password', password)
+  }
}
For this tutorial, these are the only reusable sets of instructions the login page will need.
Next, you will use a fixture to expose an instance of this LoginPage class to each of your tests.
Fixtures
Think back to the example test shown above:
test('should allow you to submit a post', async ({
  page
}) {
  // ...
}
Here, a page object is destructured from the parameter of the test function's callback function. This is the same fixture provided by Playwright that was referenced in the previous section.
Playwright comes with an API that allows you to extend the existing test function to provide custom fixtures. In this section, you will write a fixture that allows you to provide the LoginPage class to each of your tests.
Login page fixture
Starting from the root of the monorepo, create a new folder in e2e/tests named fixtures:
mkdir -p e2e/tests/fixturesThen, create a file in that new folder named auth.fixture.ts:
touch e2e/tests/fixtures/auth.fixture.tsAt the very top of that file, import the test function from Playwright using the name base:
// e2e/tests/fixtures/auth.fixture.ts
import { test as base } from '@playwright/test'
The variable imported here is the default test function that you will extend with your custom fixture. Before extending this function, however, you need to define a type that describes the fixtures you will add.
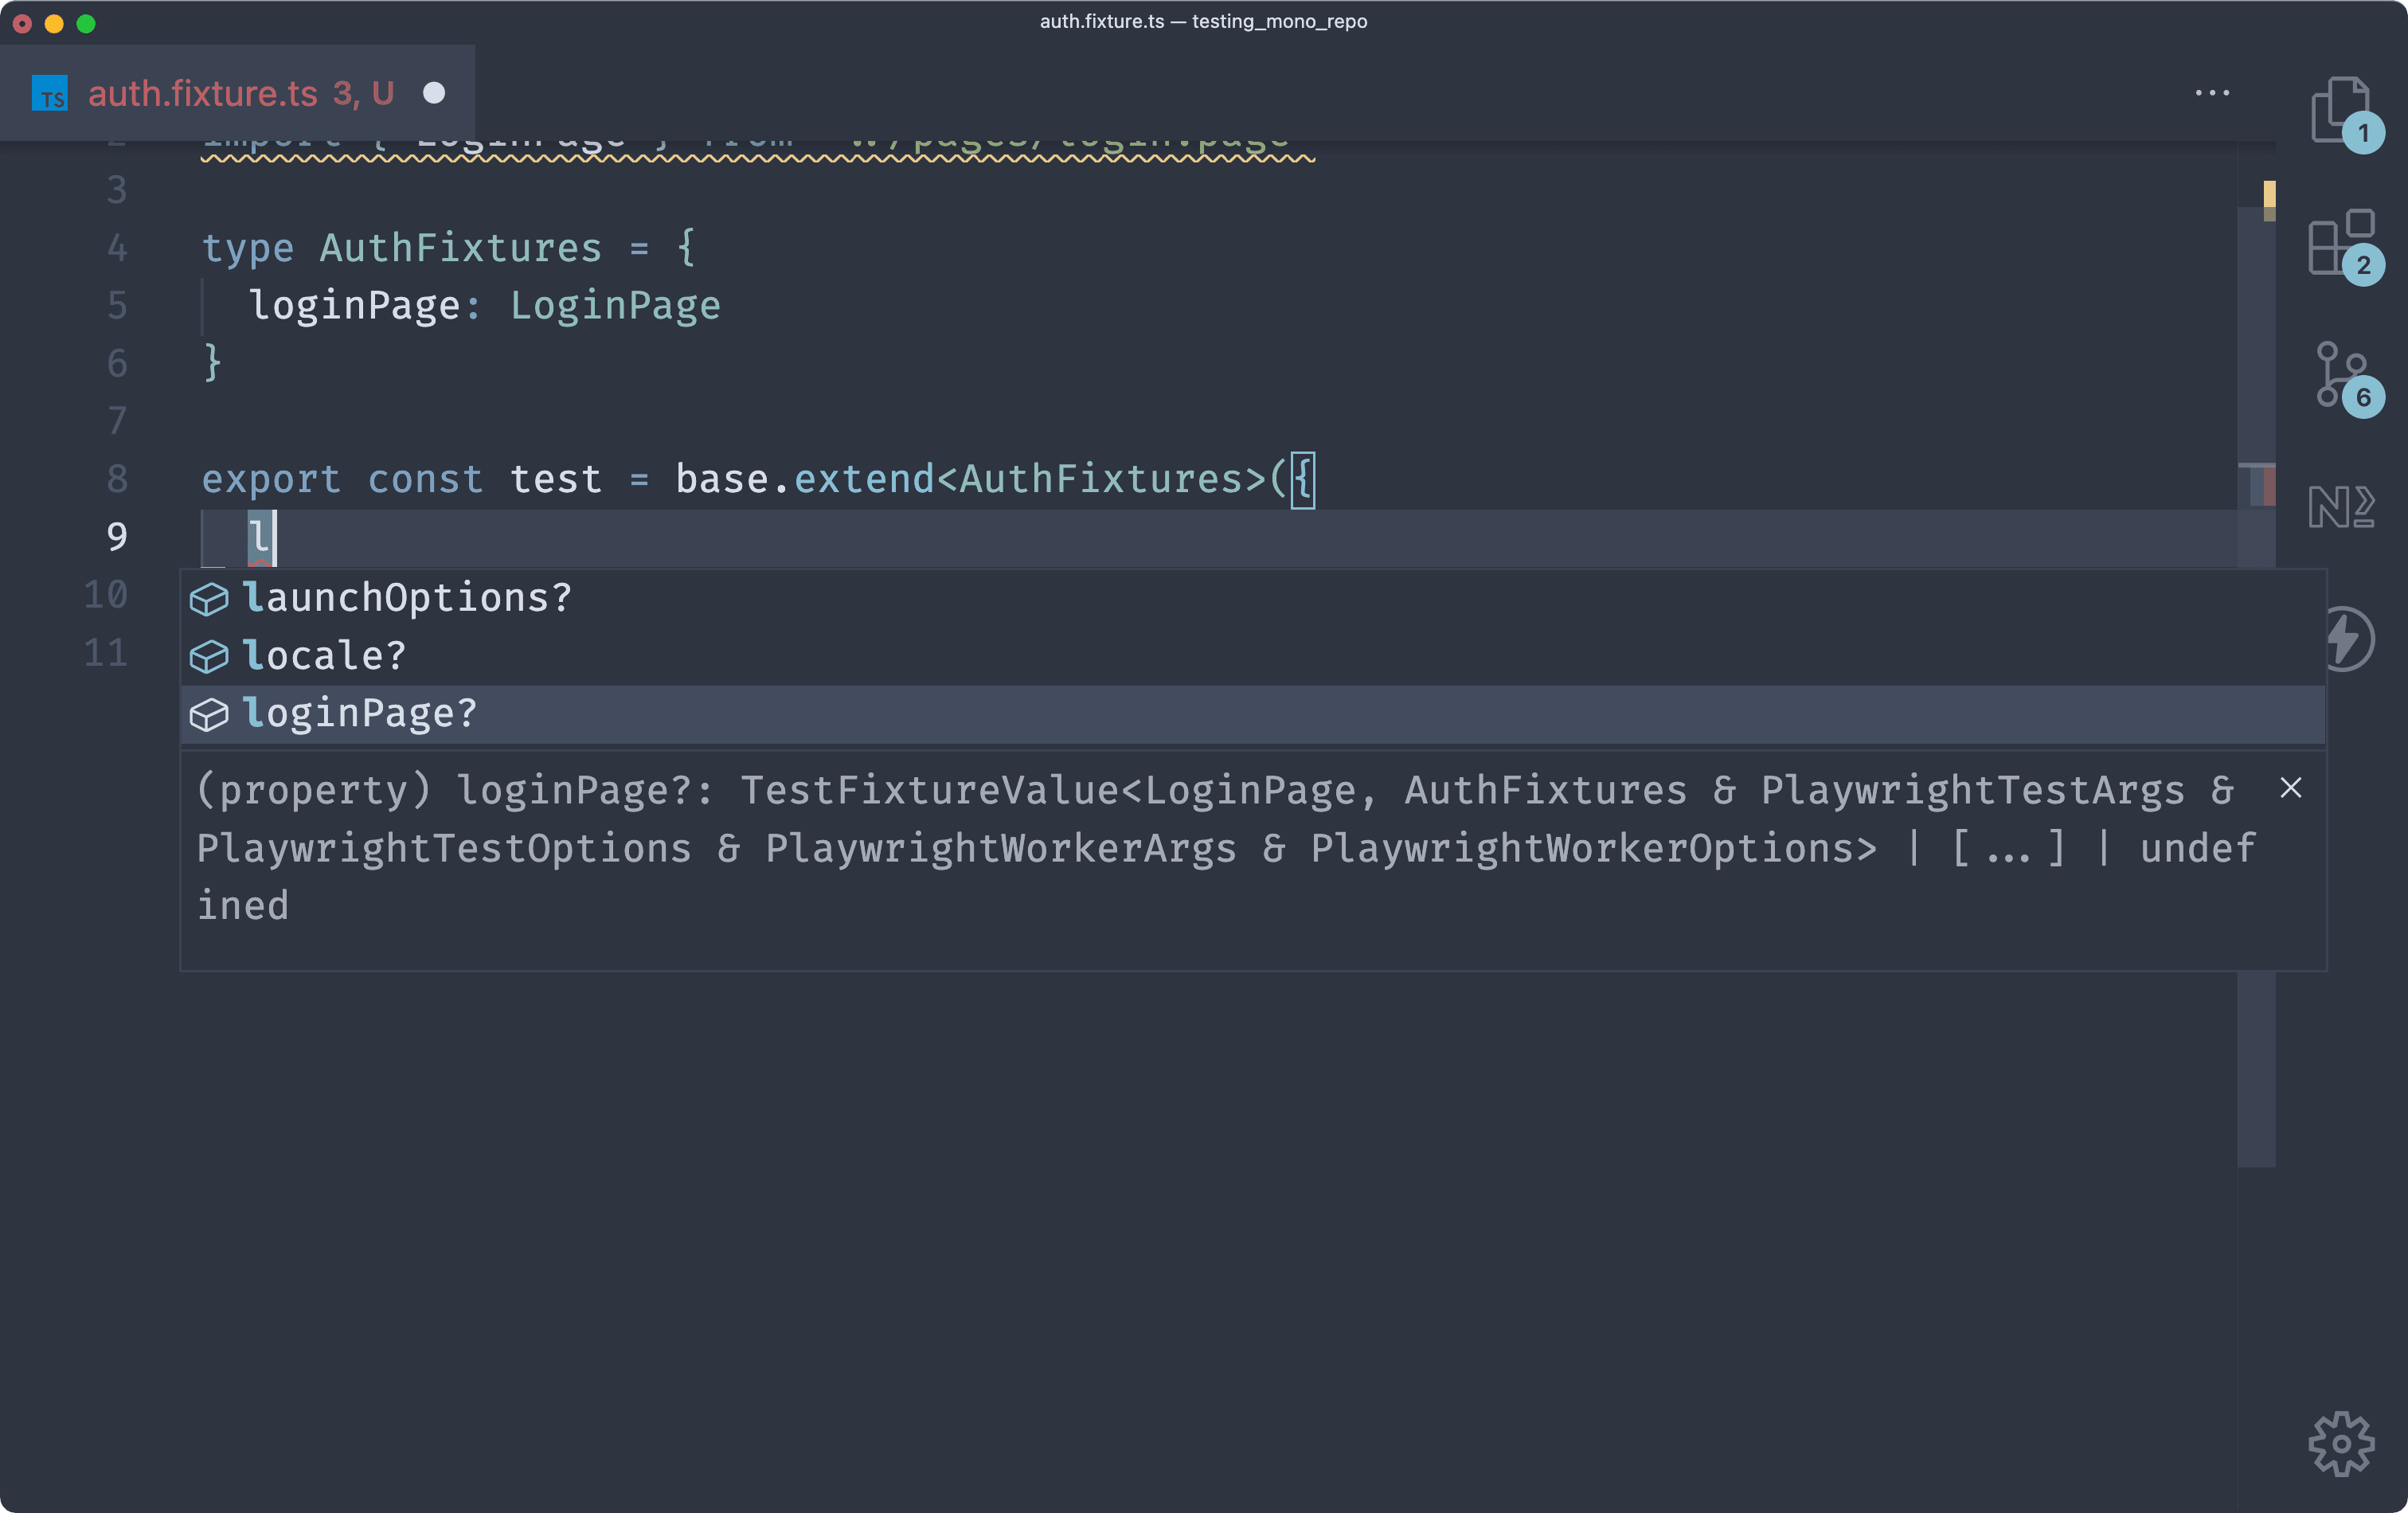
Add the following to describe a fixture named loginPage that provides an instance of the LoginPage class to your tests:
// e2e/tests/fixtures/auth.fixture.ts
import { test as base } from '@playwright/test'
+import { LoginPage } from '../pages/login.page'
+
+type AuthFixtures = {
+  loginPage: LoginPage
+}
You can now use that type to extend the type of the test function:
// e2e/tests/fixtures/auth.fixture.ts
import { test as base } from '@playwright/test'
import { LoginPage } from '../pages/login.page'

type AuthFixtures = {
  loginPage: LoginPage
}

+export const test = base.extend<AuthFixtures>({})
Within the object parameter of the base.extend function, you will now find you have IntelliSense describing a loginPage property.
This property is where you will define a new custom fixture. The value will be an asynchronous function with two parameters:
- An object containing all of the available fixtures to the
testfunction. - A
usefunction that expects an instance ofLoginPageas its only parameter. This function provides the instance of theLoginPageclass to all of the tests.
The body of this function should instantiate the LoginPage class with the page fixture. It should then invoke the goto function of the instantiated class. This will cause the login page to be the starting point in the browser when the loginPage fixture is used within a test. Finally, the use function should be invoked with the loginPage variable as its input, providing the instance to the tests that use the new fixture.
The updates below implement the changes described above:
// e2e/tests/fixtures/auth.fixture.ts
import { test as base } from '@playwright/test'
import { LoginPage } from '../pages/login.page'

type AuthFixtures = {
  loginPage: LoginPage
}

-export const test = base.extend<AuthFixtures>({})
+export const test = base.extend<AuthFixtures>({
+  loginPage: async ({ page }, use) => {
+    const loginPage = new LoginPage(page)
+    await loginPage.goto()
+    await use(loginPage)
+  },
+})
The last thing to do here is to also export a function named expect, which is a function provided by Playwright that allows you to set expectations for your tests. This will allow you to easily import test and expect from the same location.
Add the expect export to the bottom of the file:
// e2e/tests/fixtures/auth.fixture.ts
import { test as base } from '@playwright/test'
import { LoginPage } from '../pages/login.page'

type AuthFixtures = {
  loginPage: LoginPage
}

export const test = base.extend<AuthFixtures>({
  loginPage: async ({ page }, use) => {
    const loginPage = new LoginPage(page)
    await loginPage.goto()
    await use(loginPage)
  },
})
+
+ export { expect } from '@playwright/test'
Your first custom fixture is complete and ready to be used in your tests! Before getting to that though, your suite of tests will also require a user to exist in the test database to verify the authentication functionality is working. To do this, you will need to add a few more fixtures that handle:
- Generating unique login credentials for each test
- Creating a test account for each test
- Providing access to the test context's local storage data
- Cleaning up test data between each test
User credentials fixture
Start by creating a fixture to generate login credentials that are unique to each test.
In e2e/fixtures/auth.fixture.ts, add a type named UserDetails below the import statements with a username and password property:
// e2e/tests/fixtures/auth.fixture.ts
// ...
+type UserDetails = {
+  username: string
+  password: string
+}
// ...
Use this type within the AuthFixtures type to describe a new user_credentials property:
// e2e/tests/fixtures/auth.fixture.ts
// ...
type AuthFixtures = {
  loginPage: LoginPage
+  user_credentials: UserDetails
}
// ...
Your test object can now handle a user_credentials fixture. This fixture will do three things:
- Generate a random username and password
- Provide an object containing the username and password for each test
- Use Prisma to delete all users from the database that have the generated username
The fixture will use Faker to generate random data, so you will first need to install the Faker library within the e2e folder:
cd e2e
pnpm add @faker-js/faker -D
The credentials generated in this fixture will often be used to create a new account via the UI. To avoid leaving stale data in the test database you will need a way to clean up these accounts between tests.
One of the cool parts about Playwright is that it runs in the Node runtime, which means you can use Prisma Client to interact with your database within the tests and fixtures. You will take advantage of this to clean up the test accounts.
Create a new folder within e2e/tests named helpers and add a file named prisma.ts. Navigate back to the root of the monorepo and run the following command:
cd ..
mkdir -p e2e/tests/helpers
touch e2e/tests/helpers/prisma.ts
Within the new file, import PrismaClient and export the instantiated client:
// e2e/tests/helpers/prisma.ts
import { PrismaClient } from '@prisma/client'
const prisma = new PrismaClient()
export default prisma
At the top of the auth.fixture.ts file import prisma and faker:
// e2e/tests/fixtures/auth.fixture.ts
// ...
+import prisma from '../helpers/prisma'
+import { faker } from '@faker-js/faker'
// ...
You now have all the tools needed to write the user_credentials fixture.
Add the following to the test object's set of fixtures to define the fixture that generates, provides and cleans up the test credentials:
// e2e/tests/fixtures/auth.fixture.ts
// ...
export const test = base.extend<AuthFixtures>({
  // ...
  user_credentials: async ({}, use) => {
    const username = faker.internet.userName()
    const password = faker.internet.password()

    await use({
      username,
      password
    })

    await prisma.user.deleteMany({ where: { username } })
  },
})
// ...Note: Prisma is used to delete a generated user here just in case the credentials were used to create data. This will run at the end of every test.
You can now use this fixture in your tests to get access to a unique set of credentials. These credentials are not in any way associated with a user in the database yet.
Account fixture
To give your tests access to a real user, you will create another fixture named account that creates a new account with the generated credentials and provides those details to the tests.
This fixture will require your custom user_credentials fixture. It will use the credentials to fill out the sign-up form and submit the form with the unique credentials.
The data this fixture will provide to the tests is an object containing the username and password of the new user.
Add a new line to the AuthFixtures type named account with a type of UserDetails:
// e2e/fixtures/auth.fixture.ts
// ...
type AuthFixtures = {
  loginPage: LoginPage
  user_credentials: UserDetails
+  account: UserDetails
}
// ...
Then add the following fixture to the test object:
// e2e/fixtures/auth.fixture.ts
// ...
export const test = base.extend<AuthFixtures>({
  // ...
+  account: async ({ browser, user_credentials }, use) => {
+    // Create a new tab in the test's browser
+    const page = await browser.newPage()
+    // Navigate to the login page
+    const loginPage = new LoginPage(page)
+    await loginPage.goto()
+    // Fill in and submit the sign-up form
+    await loginPage.populateForm(
+      user_credentials.username,
+      user_credentials.password
+    )
+    await page.click('#signup')
+    await page.waitForLoadState('networkidle')
+    // Close the tab
+    await page.close()
+    // Provide the credentials to the test
+    await use(user_credentials)
+  },
})
// ...
Using this fixture in a test will give you the credentials for a user that exists in the database. At the end of the test, the user will be deleted because this fixture requires the user_credentials fixture, triggering the cleanup Prisma query.
Local storage fixture
The final fixture you will need to perform tests on the authentication of your application should give you access to the test browser's local storage data.
When a user signs in to the application, their information and authentication token are stored in local storage. Your tests will need to read that data to ensure the data made it there successfully.
Note: This data can be accessed (rather tediously) directly from the tests. Creating a fixture to provide this data just makes the data much more easily accessible.
Within the e2e/tests/helpers folder, create a new file named LocalStorage.ts:
touch e2e/tests/helpers/LocalStorage.tsIn that file, import the BrowserContext type provided by Playwright:
// e2e/tests/helpers/LocalStorage.ts
import type { BrowserContext } from '@playwright/test'
To provide local storage access, you will wrap another fixture named context in a class. This process will be similar to the class you wrote previously that wrapped the page fixture.
Add the following snippet to the LocalStorage.ts file:
// e2e/tests/helpers/LocalStorage.ts
import type { BrowserContext } from '@playwright/test'
+
+export class LocalStorage {
+  private context: BrowserContext
+
+  constructor(context: BrowserContext) {
+    this.context = context
+  }
+}
Within this class, add a single getter function that uses the context fixture's storageState function to access the browser context's local storage data for the site running at http://localhost:5173:
// e2e/tests/helpers/LocalStorage.ts
import type { BrowserContext } from '@playwright/test'

export class LocalStorage {
  private context: BrowserContext

  constructor(context: BrowserContext) {
    this.context = context
  }

+  get localStorage() {
+    return this.context.storageState().then(storage => {
+      const origin = storage.origins.find(
+        ({ origin }) => origin === 'http://localhost:5173'
+      )
+      if (origin) {
+        return origin.localStorage.reduce(
+          (acc, curr) => ({ ...acc, [curr.name]: curr.value }),
+          {}
+        )
+      }
+      return {}
+    })
+  }
}Note: Check out Playwright's documentation on the
contextobject to better understand the code above.
This class provides you a way to easily access local storage, however, the data still needs to be provided to your tests via a fixture.
Back over in auth.fixtures.ts, import the LocalStorage class:
// e2e/tests/fixtures/auth.fixture.ts
// ...
+import { LocalStorage } from '../helpers/LocalStorage'
// ...
Next, add another property named storage to the AuthFixtures type whose type is LocalStorage:
// e2e/tests/fixtures/auth.fixture.ts
// ...
type AuthFixtures = {
  loginPage: LoginPage
  user_credentials: UserDetails
  account: UserDetails
+  storage: LocalStorage
}
// ...
Finally, add a new fixture that instantiates the LocalStorage class with the page fixture's context and provides it to your tests using the use function:
// e2e/tests/fixtures/auth.fixture.ts
// ...
export const test = base.extend<AuthFixtures>({
  // ...
+  storage: async ({ page }, use) => {
+    const storage = new LocalStorage(page.context())
+    await use(storage)
+  }
})
// ...
With this fixture complete, you are now ready to handle every scenario you will test for in the next section.
Note: In the
e2e-testsbranch of the GitHub repository you will notice the setup for the fixtures is a little bit different. The following are different in this article to clarify the roles of fixtures and pages:
- TypeScript aliases were not used to shorten import URLs
- A
base.fixture.tsfile is not used as a base fixture for theauth.fixture.tsfile to share properties between files as there is only one fixture file used in this article
Tests
The first test you will write will verify a user who is not logged in is redirected to the login screen if they attempt to access the home page.
Verify an unauthorized user is redirected to the login screen
To start, create a new file in e2e/tests named auth.spec.ts:
touch e2e/tests/auth.spec.tsAt the very top of this file, import the test and expect variables from the auth.fixture.ts file:
// e2e/tests/auth.spec.ts
import { test, expect } from './fixtures/auth.fixture'
Now that you have access to your custom test object, use it to describe your suite of tests using its describe function:
// e2e/tests/auth.spec.ts
import { test, expect } from './fixtures/auth.fixture'
+
+test.describe('auth', () => {
+  // Your tests will go here
+})
This first test does not need to use the custom loginPage fixture because it will not start on the login page. Instead, you will use the default page fixture, attempt to access the home page and verify the page is redirected to the login screen.
Add the following test to accomplish this:
// e2e/tests/auth.spec.ts
// ...
test.describe('auth', () => {
+  test('should redirect unauthorized user to the login page', async ({
+    page
+  }) => {
+    await page.goto('http://localhost:5173/')
+    await expect(page).toHaveURL('http://localhost:5173/login')
+  })
})
If you now run your suite of tests you should see you have a single successful test:
pnpm test:e2e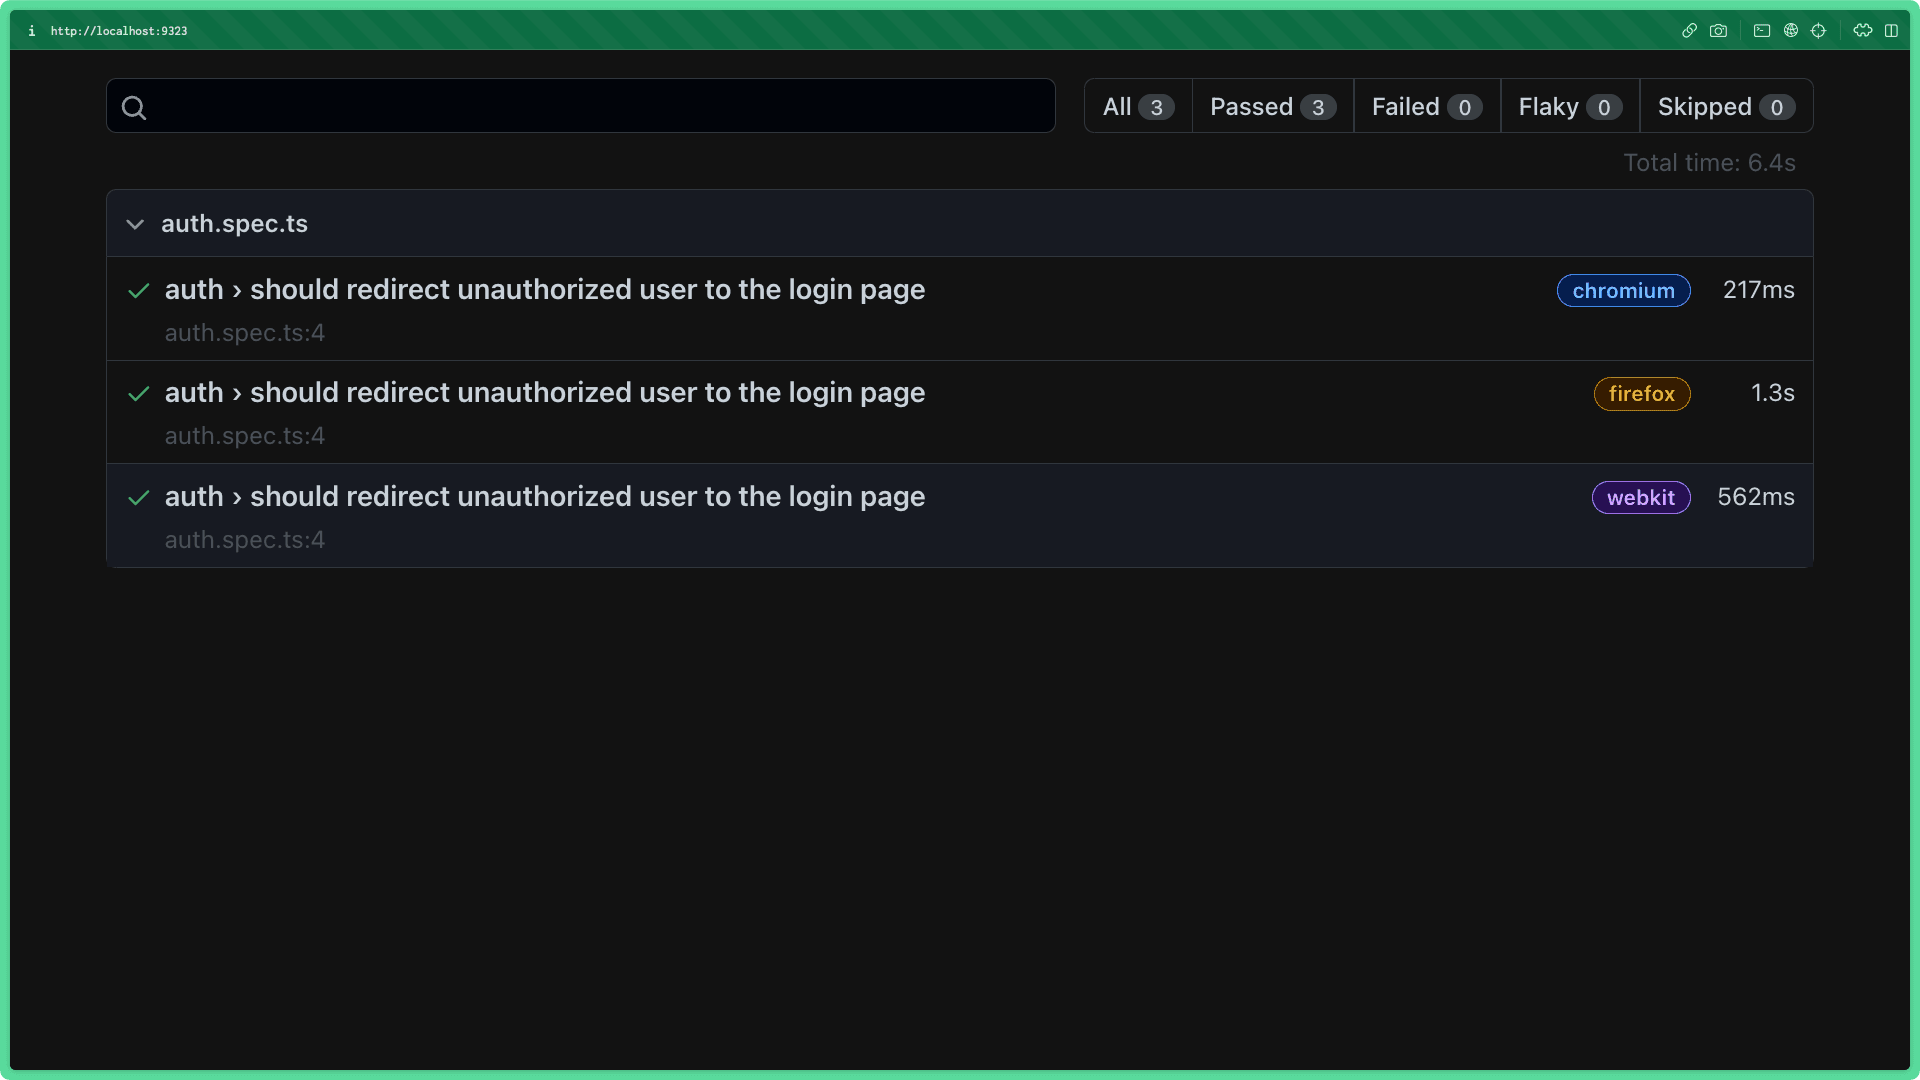
You will see three rows because your test is run in three different browsers by default.
Note: If you receive an error containing the following text:
'browserType.launch: Executable does not exist at ...', try runningnpx playwright installwithin thee2efolder. Then run your tests again. This error occurs if the target browser was not downloaded.
Verify a user is warned if they sign in with incorrect credentials
On the application's login page, if the user attempts to sign in with incorrect credentials a message should pop up on the screen letting them know there was a problem. In this test, you will validate that functionality is working.
Notice the popup on the bottom right.
To start this test off, add a test to the test suite that brings in the page and loginPage fixtures:
// e2e/tests/auth.spec.ts
// ...
test.describe('auth', () => {
  // ...
+  test('should warn you if your login is incorrect', async ({
+    page,
+    loginPage
+  }) => {
+    // The test instructions will go here
+  })
})Note: Because the
loginPagefixture was included in this test, the test's page will start at the login page of the application.
Next, fill in the login form with a set of invalid login credentials using the LoginPage class's populateForm function:
// e2e/tests/auth.spec.ts
// ...
test.describe('auth', () => {
  // ...
  test('should warn you if your login is incorrect', async ({
    page,
    loginPage
  }) => {
+    await loginPage.populateForm('incorrect', 'password')
  })
})
Finally, use the page object's click function to click the login button, wait for the request to finish and verify the popup appears:
// e2e/tests/auth.spec.ts
// ...
test.describe('auth', () => {
  // ...
  test('should warn you if your login is incorrect', async ({
    page,
    loginPage
  }) => {
    await loginPage.populateForm('incorrect', 'password')
+    await page.click('#login')
+    await page.waitForLoadState('networkidle')
+    await expect(page.getByText('Account not found.')).toBeVisible()
  })
})
Running the end-to-end tests should now show another set of successful tests:
pnpm test:e2e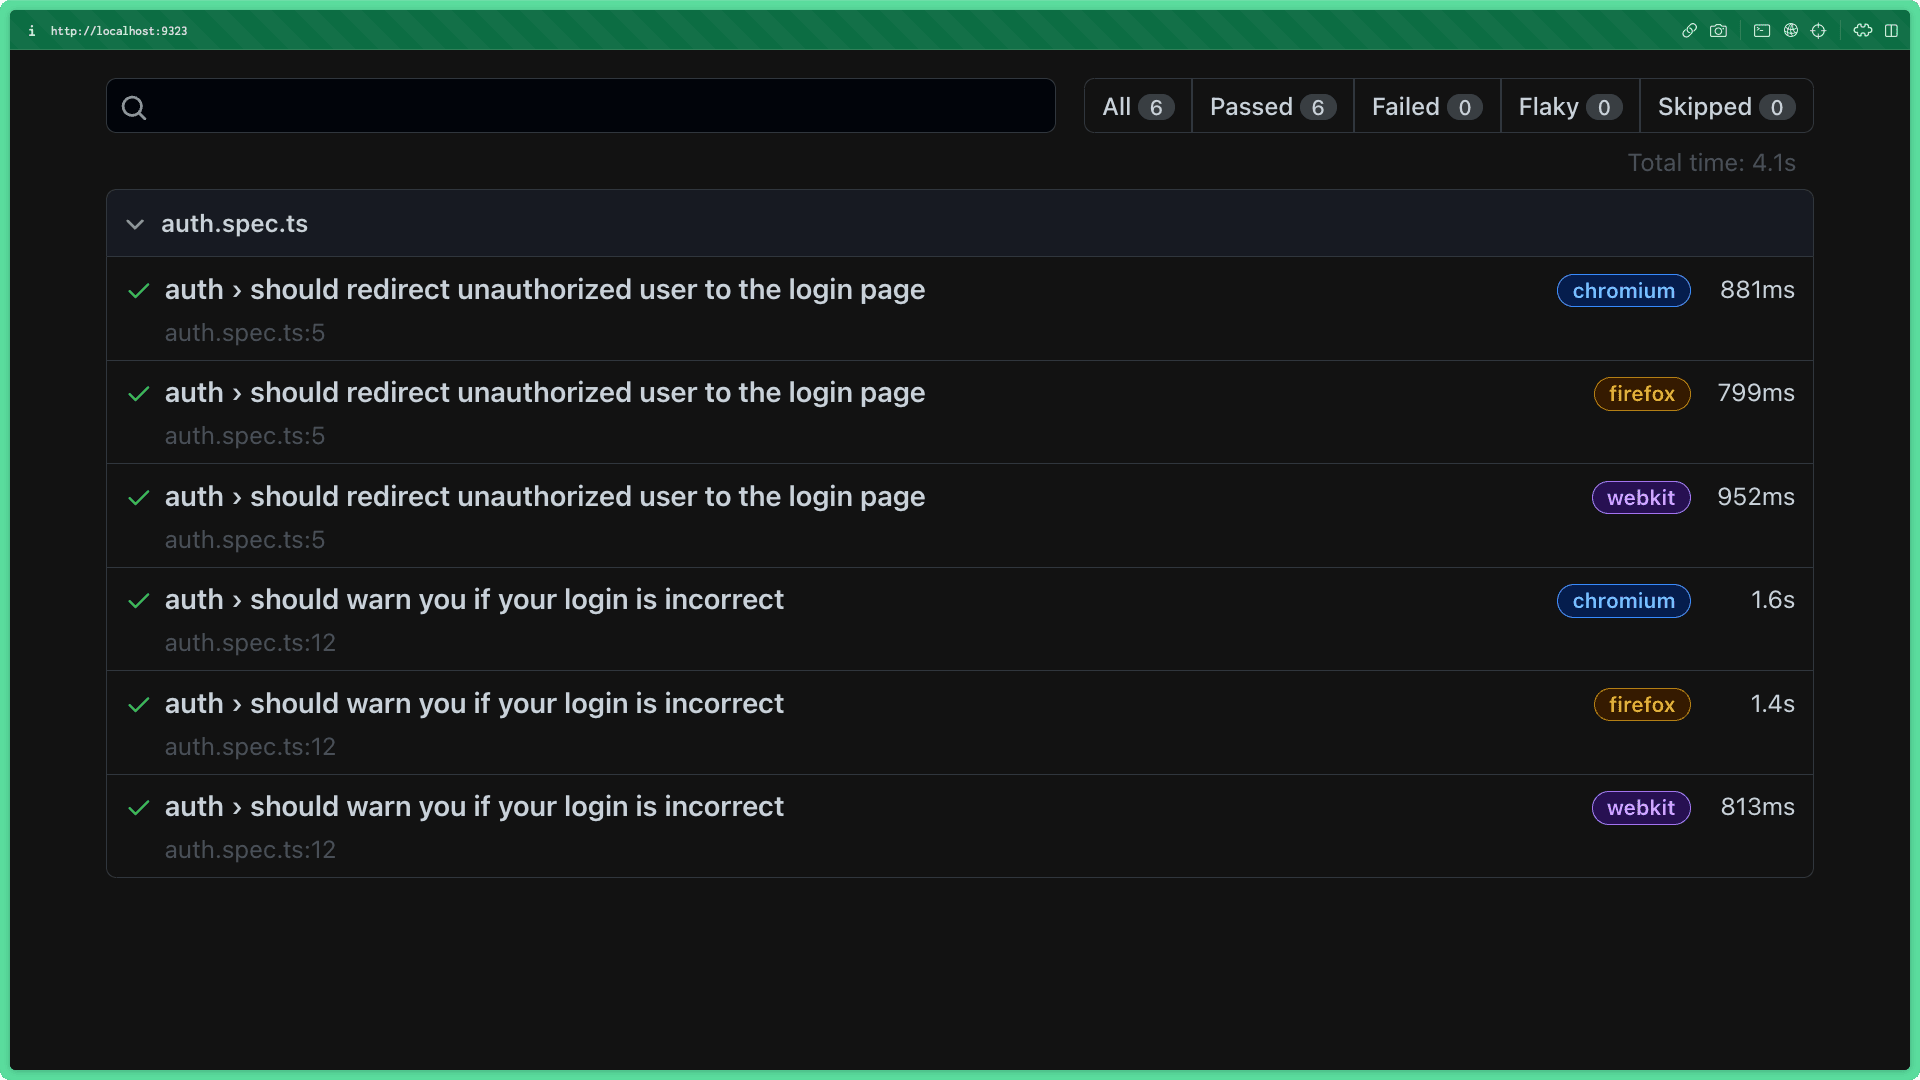
Verify a user is warned if they attempt to submit an empty form
This test will be very similar to the previous test in that it will start at the login page and submit the login form. The only difference is that the form should be empty and the error message should contain the text: 'Please enter a username and password'.
Add the following test to verify the expected error message is displayed:
// e2e/tests/auth.spec.ts
// ...
test.describe('auth', () => {
  // ...
+  test('should warn you if your form is empty', async ({
+    page,
+    loginPage
+  }) => {
+    await loginPage.page.click('#login')
+    await page.waitForLoadState('networkidle')
+    await expect(
+      page.getByText('Please enter a username and password')
+    ).toBeVisible()
+  })
})Note: In this test, the
clickfunction is accessed via theloginPage.pageproperty. This is done purely to get rid of an ESLint warning that occurs when a variable goes unused.
Running the end-to-end tests should now show a third set of successful tests:
pnpm test:e2e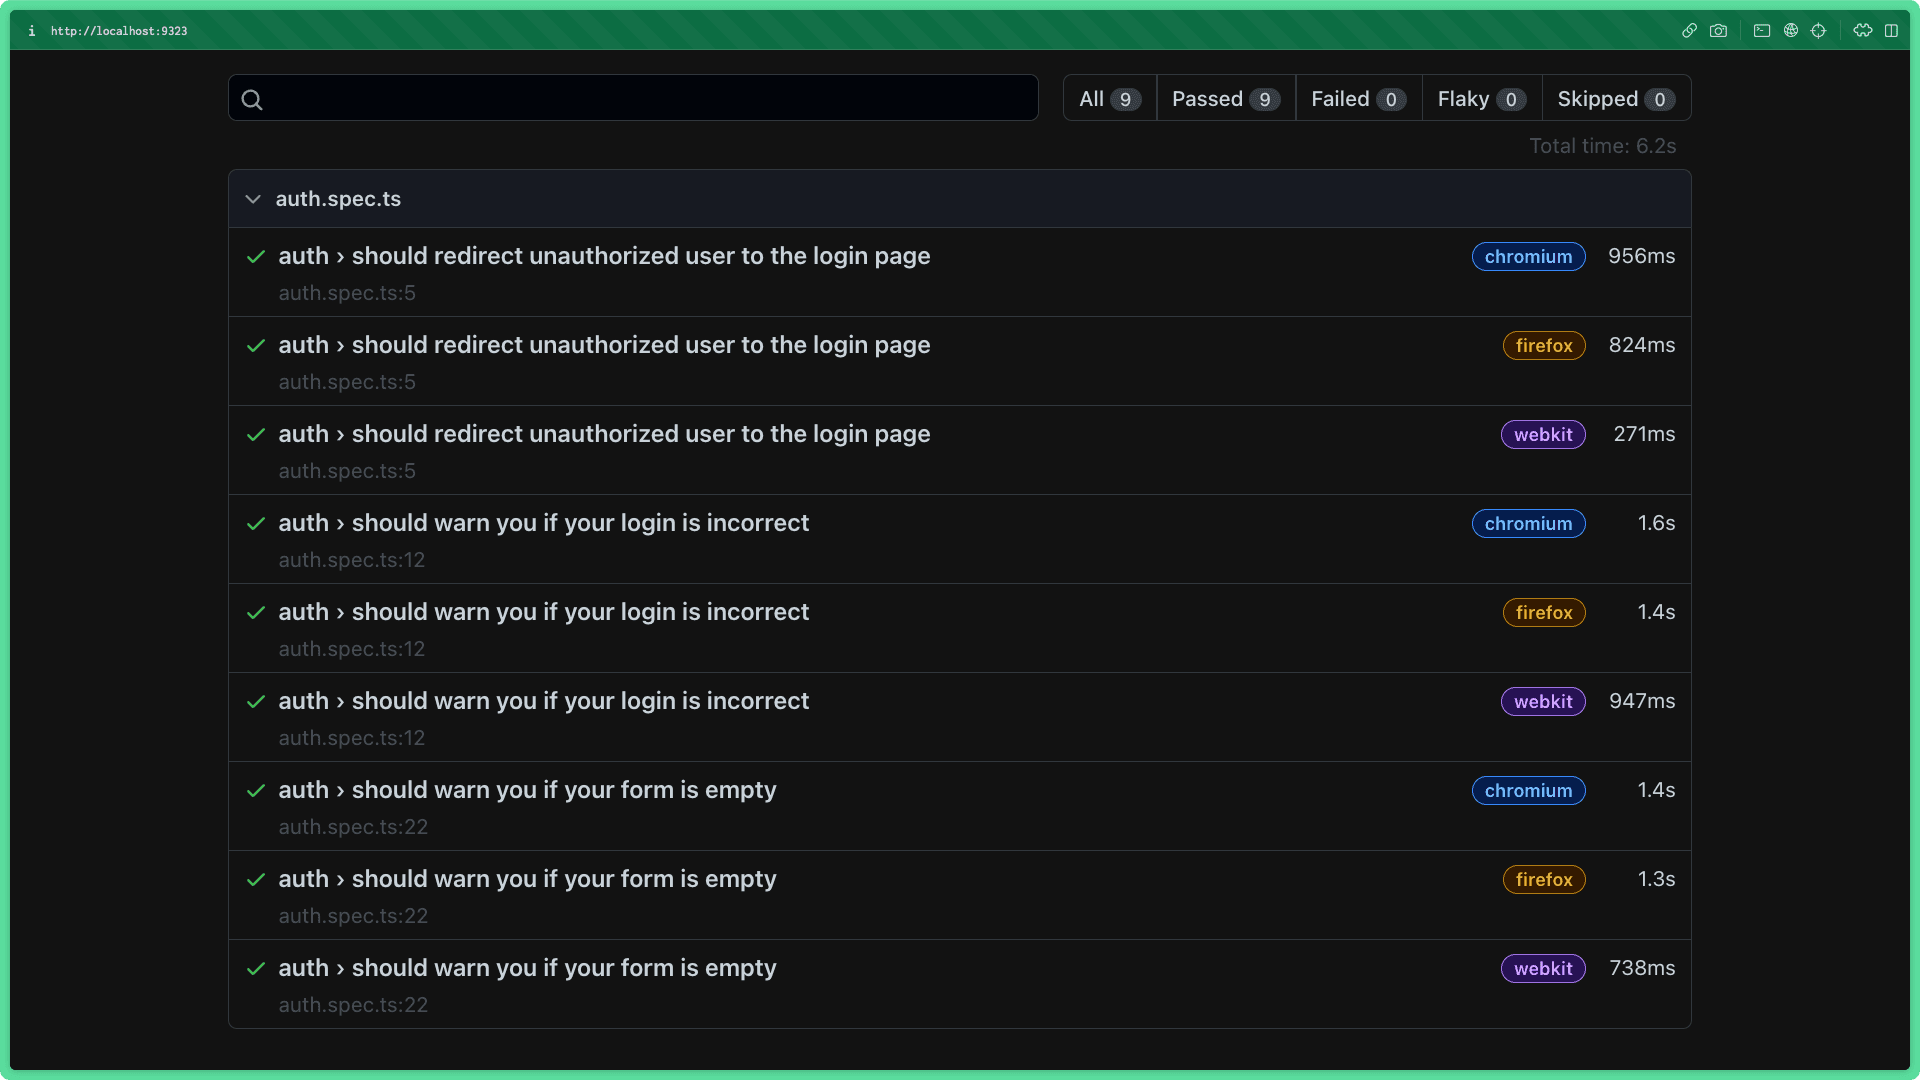
Verify the user is directed to the home page after creating a new account
Until now, the tests you've written have assumed the user had either not signed in or was unable to do so.
In this test, you will verify a user is redirected to the home page when they successfully create a new account via the signup form.
Add a new test to the suite that pulls in the user_credentials, loginPage, storage and page fixtures:
// e2e/tests/auth.spec.ts
// ...
test.describe('auth', () => {
  // ...
+  test('should redirect to the home page when a new account is created', async ({
+    user_credentials,
+    loginPage,
+    storage,
+    page
+  }) => {
+    // Test will go here
+  })
})
The first thing this test needs to do is fill out the sign-up form with unique user credentials. The user_credentials fixture has the data that is unique to this test, so you will use those values.
Add the following snippet to fill out the sign-up form and submit it:
// e2e/tests/auth.spec.ts
// ...
test.describe('auth', () => {
  // ...
  test('should redirect to the home page when a new account is created', async ({
    user_credentials,
    loginPage,
    storage,
    page
  }) => {
+    await loginPage.populateForm(
+      user_credentials.username,
+      user_credentials.password
+    )
+    await page.click('#signup')
+    await page.waitForLoadState('networkidle')
  })
})
At this point, the test will fill out the sign-up form and click the sign-up button. When that happens, the browser should be redirected to the home page and the user details should be available in local storage in a key named 'quoots-user'.
Add the following to verify the redirect happened and that the user data is available in local storage:
// e2e/tests/auth.spec.ts
// ...
test.describe('auth', () => {
  // ...
  test('should redirect to the home page when a new account is created', async ({
    user_credentials,
    loginPage,
    storage,
    page
  }) => {
    await loginPage.populateForm(
      user_credentials.username,
      user_credentials.password
    )
    await page.click('#signup')
    await page.waitForLoadState('networkidle')
+
+    const localStorage = await storage.localStorage
+
+    expect(localStorage).toHaveProperty('quoots-user')
+    await expect(page).toHaveURL('http://localhost:5173')
  })
})
If all went well, you should see a fourth set of successful tests when you run:
pnpm test:e2e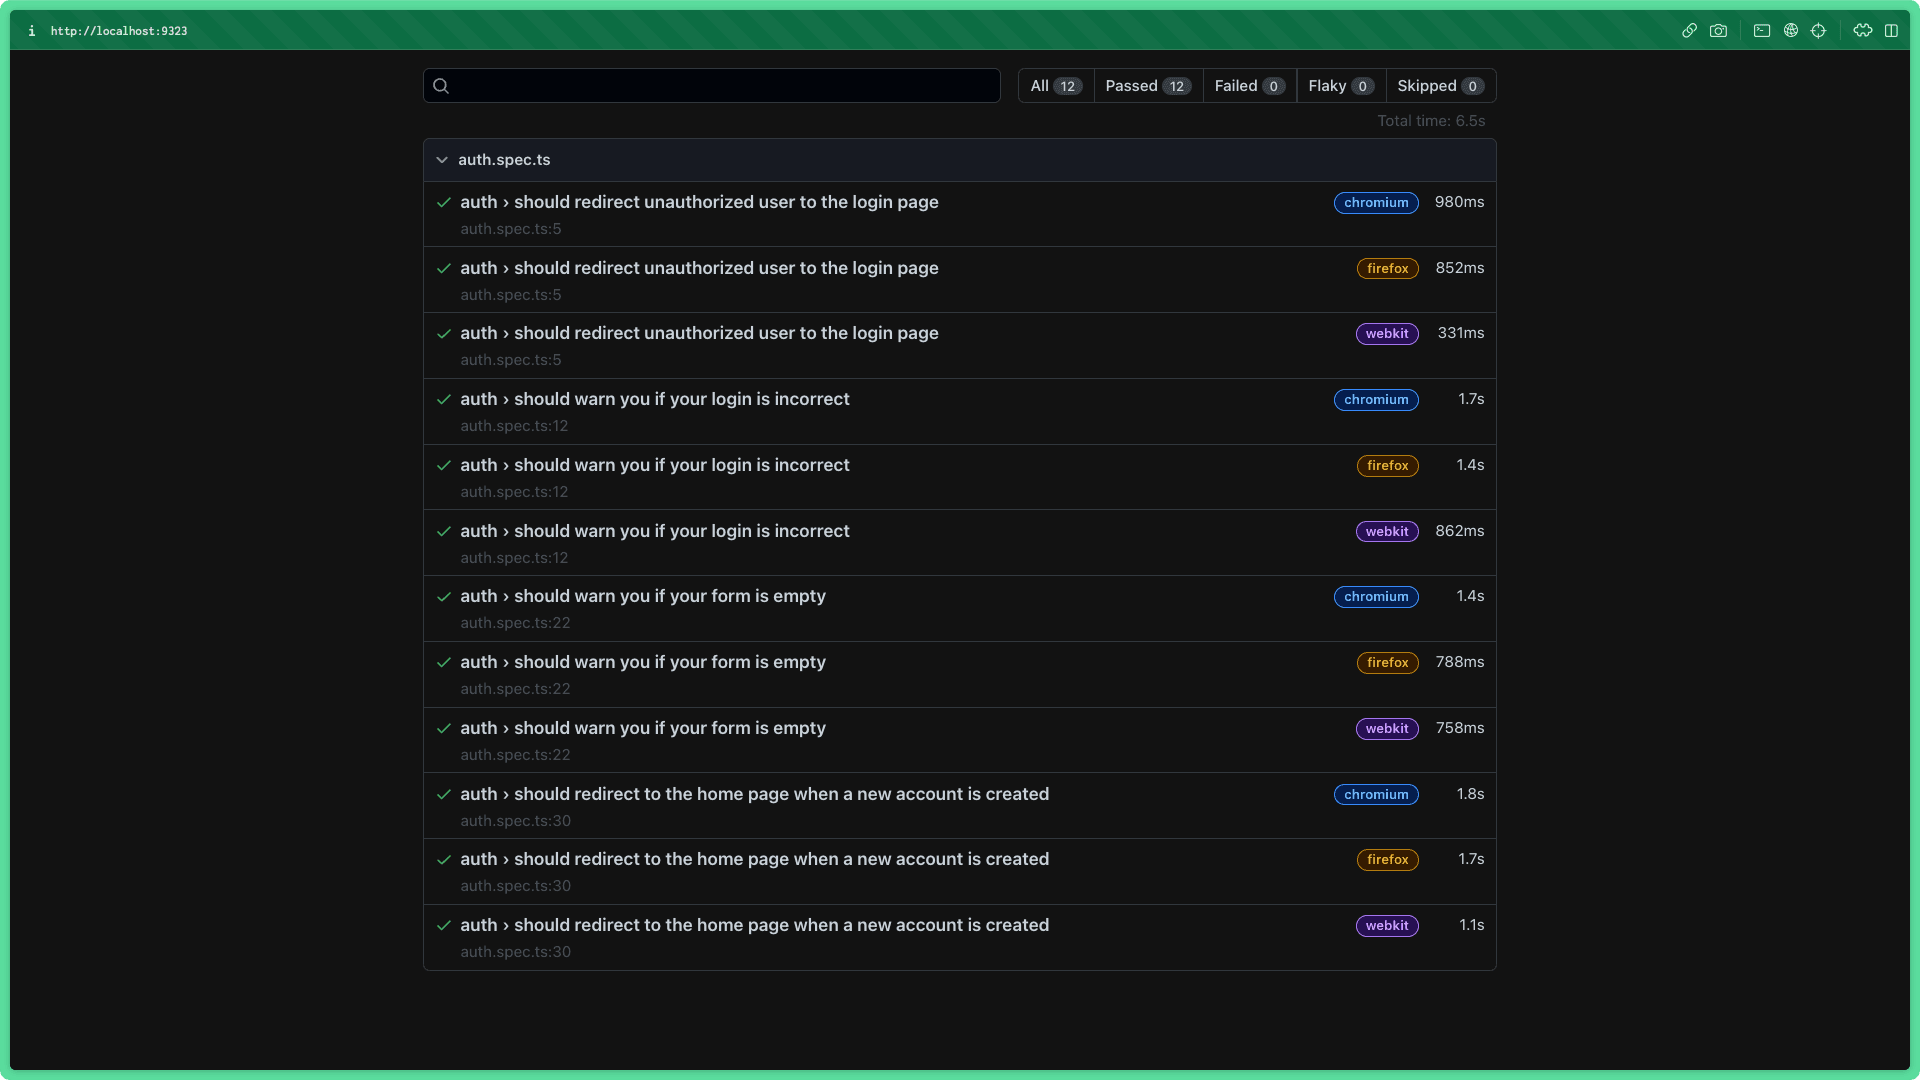
Note: Remember, the test account created during this test is cleaned up after the test completes. To verify this, try turning on query logging in
e2e/tests/helpers/prisma.tsand running the tests again to see the cleanup queries.
Verify the user is directed to the home page after signing in
This final test is similar to the previous test, however, it assumes a user account is already available in the database. It will log in instead of creating a new account and verify the user ends up on the home page.
Because you need a new account to be generated and not only a set of unique credentials, this test should include the account fixture rather than the user_credentials fixture:
// e2e/tests/auth.spec.ts
// ...
test.describe('auth', () => {
  // ...
+  test('should redirect to the home page after signing in', async ({
+    account,
+    loginPage,
+    storage,
+    page
+  }) => {
+    // Test will go here
+  })
})
The set of instructions for this test is almost identical to the previous test, except rather than using the user_credentials values you will use the account object's values to populate the login form:
// e2e/tests/auth.spec.ts
// ...
test.describe('auth', () => {
  // ...
  test('should redirect to the home page after signing in', async ({
    account,
    loginPage,
    storage,
    page
  }) => {
+    await loginPage.populateForm(account.username, account.password)
+    await page.click('#login')
+    await page.waitForLoadState('networkidle')
+
+    const localStorage = await storage.localStorage
+
+    expect(localStorage).toHaveProperty('quoots-user')
+    await expect(page).toHaveURL('http://localhost:5173')
  })
})
If you now run the suite of tests, you should see a fifth set of successful tests:
pnpm test:e2e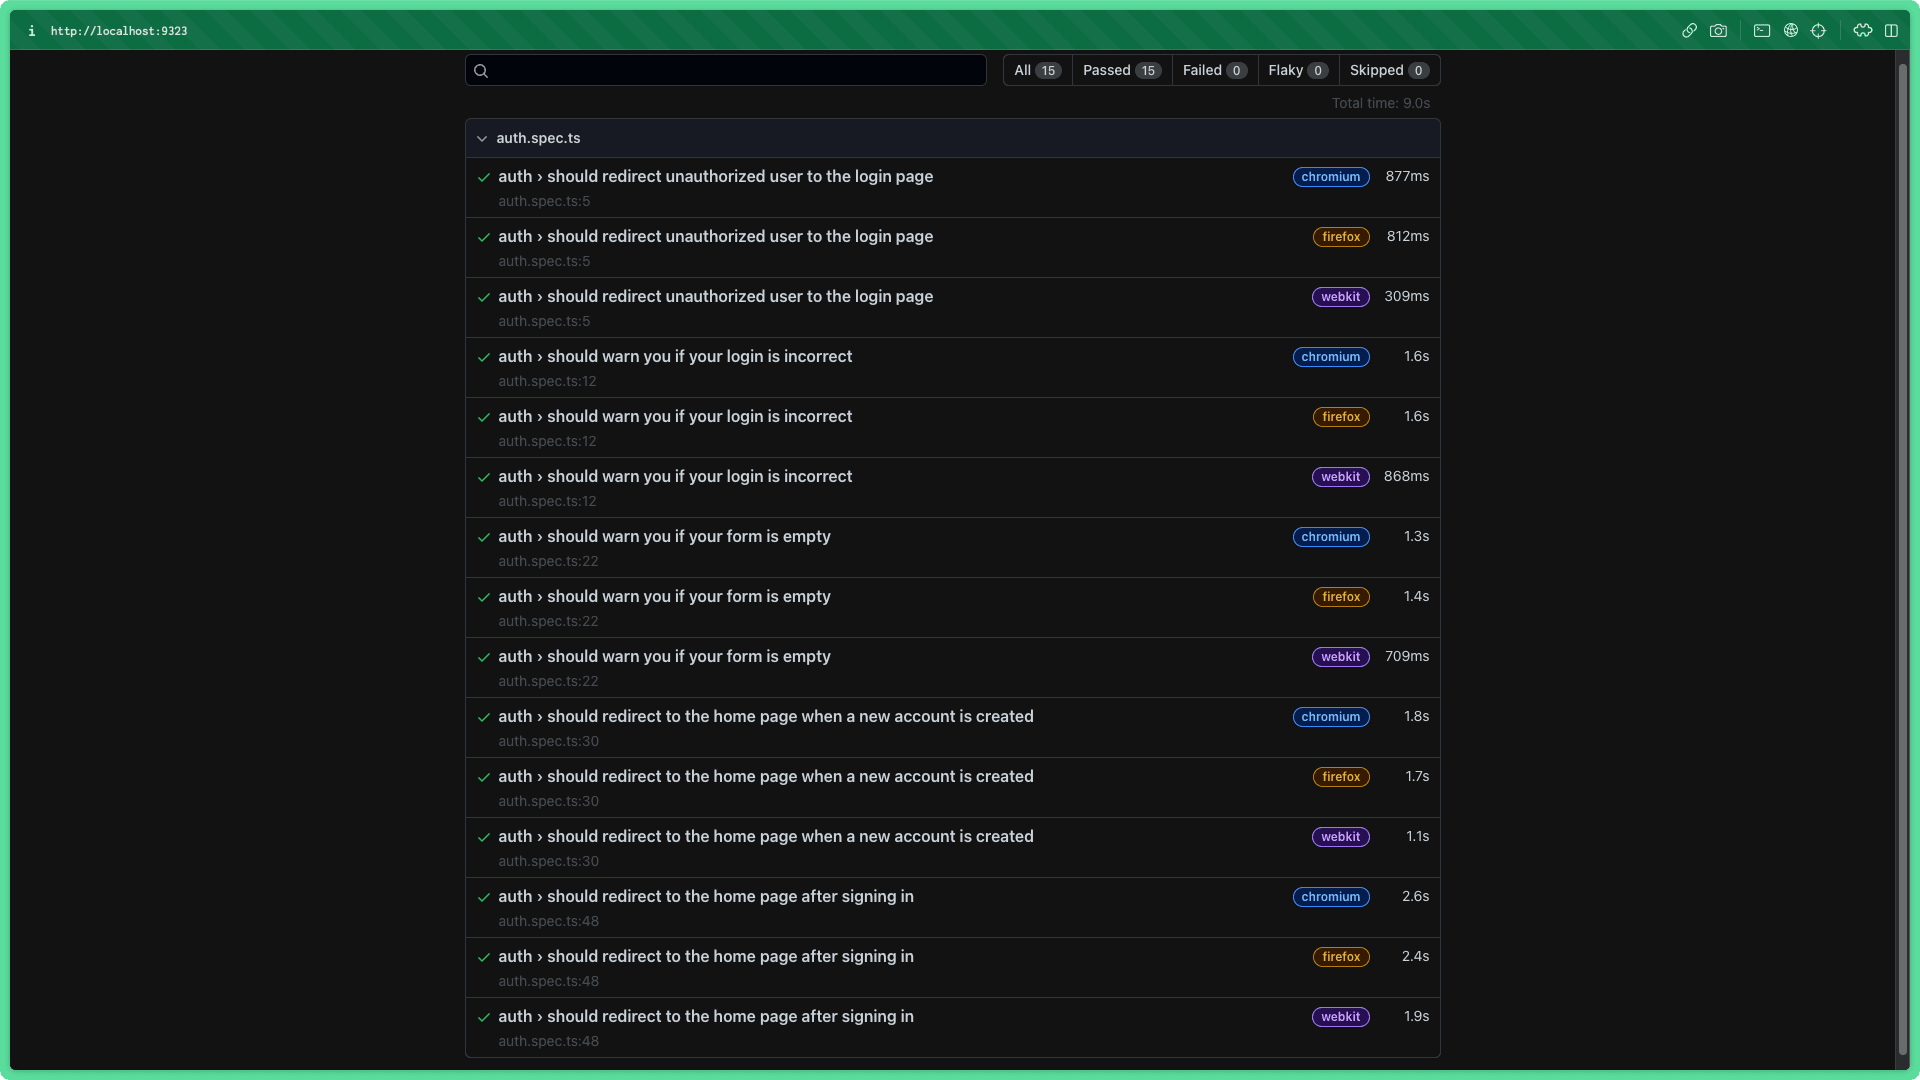
Why Playwright?
There are a ton of tools out there that help you write and run end-to-end tests. Many of these tools are very mature and do a great job at what they are intended to do.
So... why does this article use Playwright, a relatively new end-to-end testing tool instead of a more mature tool?
Playwright was chosen as the tool of choice in this article for a few reasons:
- Ease of use
- Extensible API
- Flexible fixture system
In this article, an important aspect of the tests you wrote was the implementation of fixtures that allow you to set up test-specific data and clean up that data afterward.
Because of Playwright's intuitive and extensible fixture system, you were able to import and use Prisma Client directly in these fixtures to create and delete data in your database.
Extensibility and developer experience is something we at Prisma care a lot about. The easy and intuitive experience of extending Playwright and its fixtures played a big role when deciding on a tool.
Note: This is not to say any of the other tools out there are "bad". The opinions above simply express that Playwright fit particularly well in the specific use-case presented in this article.
Summary & What's next
End-to-end testing gives you the ability to automate the kind of testing you would otherwise have had to do manually. Through sets of instructions, you can navigate your application and ensure the desired behaviors work correctly.
Throughout this article you:
- Learned what end-to-end testing is
- Set up a project in pnpm to hold your end-to-end tests
- Configured and scripted your testing environment
- Created fixtures and pages to avoid code duplication in your tests
- Wrote a set of tests to validate the authentication workflows of your application
There was a lot to cover in this tutorial! We encourage you to take a look at the GitHub repository to see a full suite of end-to-end tests that cover the entire application.
In the next and final section of this series, you will set up a CI/CD pipeline that runs your unit, integration and end-to-end tests as you push changes to your GitHub repository.
Build your next app with Prisma
Start free. Scale when you’re ready.