The Ultimate Guide to Testing with Prisma: CI Pipelines

Continuous Integration (CI) refers to the process of safely integrating code changes from various authors into a central repository. In this article, you will learn in more detail what a CI pipeline is, how to configure a CI pipeline and how to use that pipeline to automate your tests.
Table Of Contents
- Table Of Contents
- Introduction
- Prerequisites
- Set up your own GitHub repository
- Set up a workflow
- Add a unit testing job
- Add an integration testing job
- Add an end-to-end testing job
- Summary & Final thoughts
Introduction
As you come to the end of this series, take a step back and think about what you have accomplished in the last four articles. You:
- Mocked Prisma Client
- Learned about and wrote unit tests
- Learned about and wrote integration tests
- Learned about and wrote end-to-end tests
The testing strategies and concepts you've learned will allow you to write code and verify new changes work as you hope and expect with an existing codebase.
This peace of mind is very important, especially on a large team. There is, however, one rough edge in what you've learned: The requirement to run your tests manually as you make changes.
In this article, you will learn to automate the running of your tests so that changes to your codebase will automatically be tested as pull requests are made to the primary branch.
What are continuous integration pipelines?
A continuous integration pipeline describes a set of steps that must be completed before publishing a new version of a piece of software. You have likely seen or heard the acronym CI/CD, which refers to continuous integration as well as continuous deployment. Typically, these individual concepts are handled through pipelines like the ones you will look at today.
For the purposes of this article, you will focus primarily on the CI part, where you will build, test and eventually merge your code.
There are many technologies that allow you to set up your pipelines, and choosing which to use often depends on the stack you are using. For example, you can set up pipelines in:
- Jenkins
- CircleCI
- GitLab
- AWS Codepipeline
- so many more...
In this article, you will learn how to define your pipeline using GitHub Actions, which will allow you to configure your pipeline to run against code changes whenever you create a pull request to your primary branch.
Technologies you will use
Prerequisites
Assumed knowledge
The following would be helpful to have when working through the steps below:
- Basic knowledge of using Git
- Basic understanding of Docker
Development environment
To follow along with the examples provided, you will be expected to have:
- Node.js installed
- A code editor of your choice (we recommend VSCode)
- Git installed
- pnpm installed
- Docker installed
This series makes heavy use of this GitHub repository. Make sure to clone the repository.
Clone the repository
In your terminal head over to a directory where you store your projects. In that directory run the following command:
git clone git@github.com:sabinadams/testing_mono_repo.gitThe command above will clone the project into a folder named testing_mono_repo. The default branch for that repository is main.
You will need to switch to the e2e-tests branch, which contains the complete set up end-to-end tests from the previous article:
cd testing_mono_repo
git checkout e2e-tests
Once you have cloned the repository and checked out the correct branch, there are a few steps involved in setting the project up.
First, install the node_modules:
pnpm i Next, create a .env file at the root of the project:
touch .envAdd the following variables to that new file:
# .env
DATABASE_URL="postgres://postgres:postgres@localhost:5432/quotes"
API_SECRET="mXXZFmBF03"
VITE_API_URL="http://localhost:3000"
In the .env file, the following variables were added:
API_SECRET: Provides a secret key used by the authentication services to encrypt your passwords. In a real-world application, this value should be replaced with a long random string with numeric and alphabetic characters.DATABASE_URL: Contains the URL to your database.VITE_API_URL: The URL location of the Express API.
Set up your own GitHub repository
In order to begin configuring a pipeline to run in GitHub Actions, you will first need your own GitHub repository with a main branch to submit pull requests to.
Head to the GitHub website and sign in to your account.
Note: If you do not already have a GitHub account, you can create a free one here.
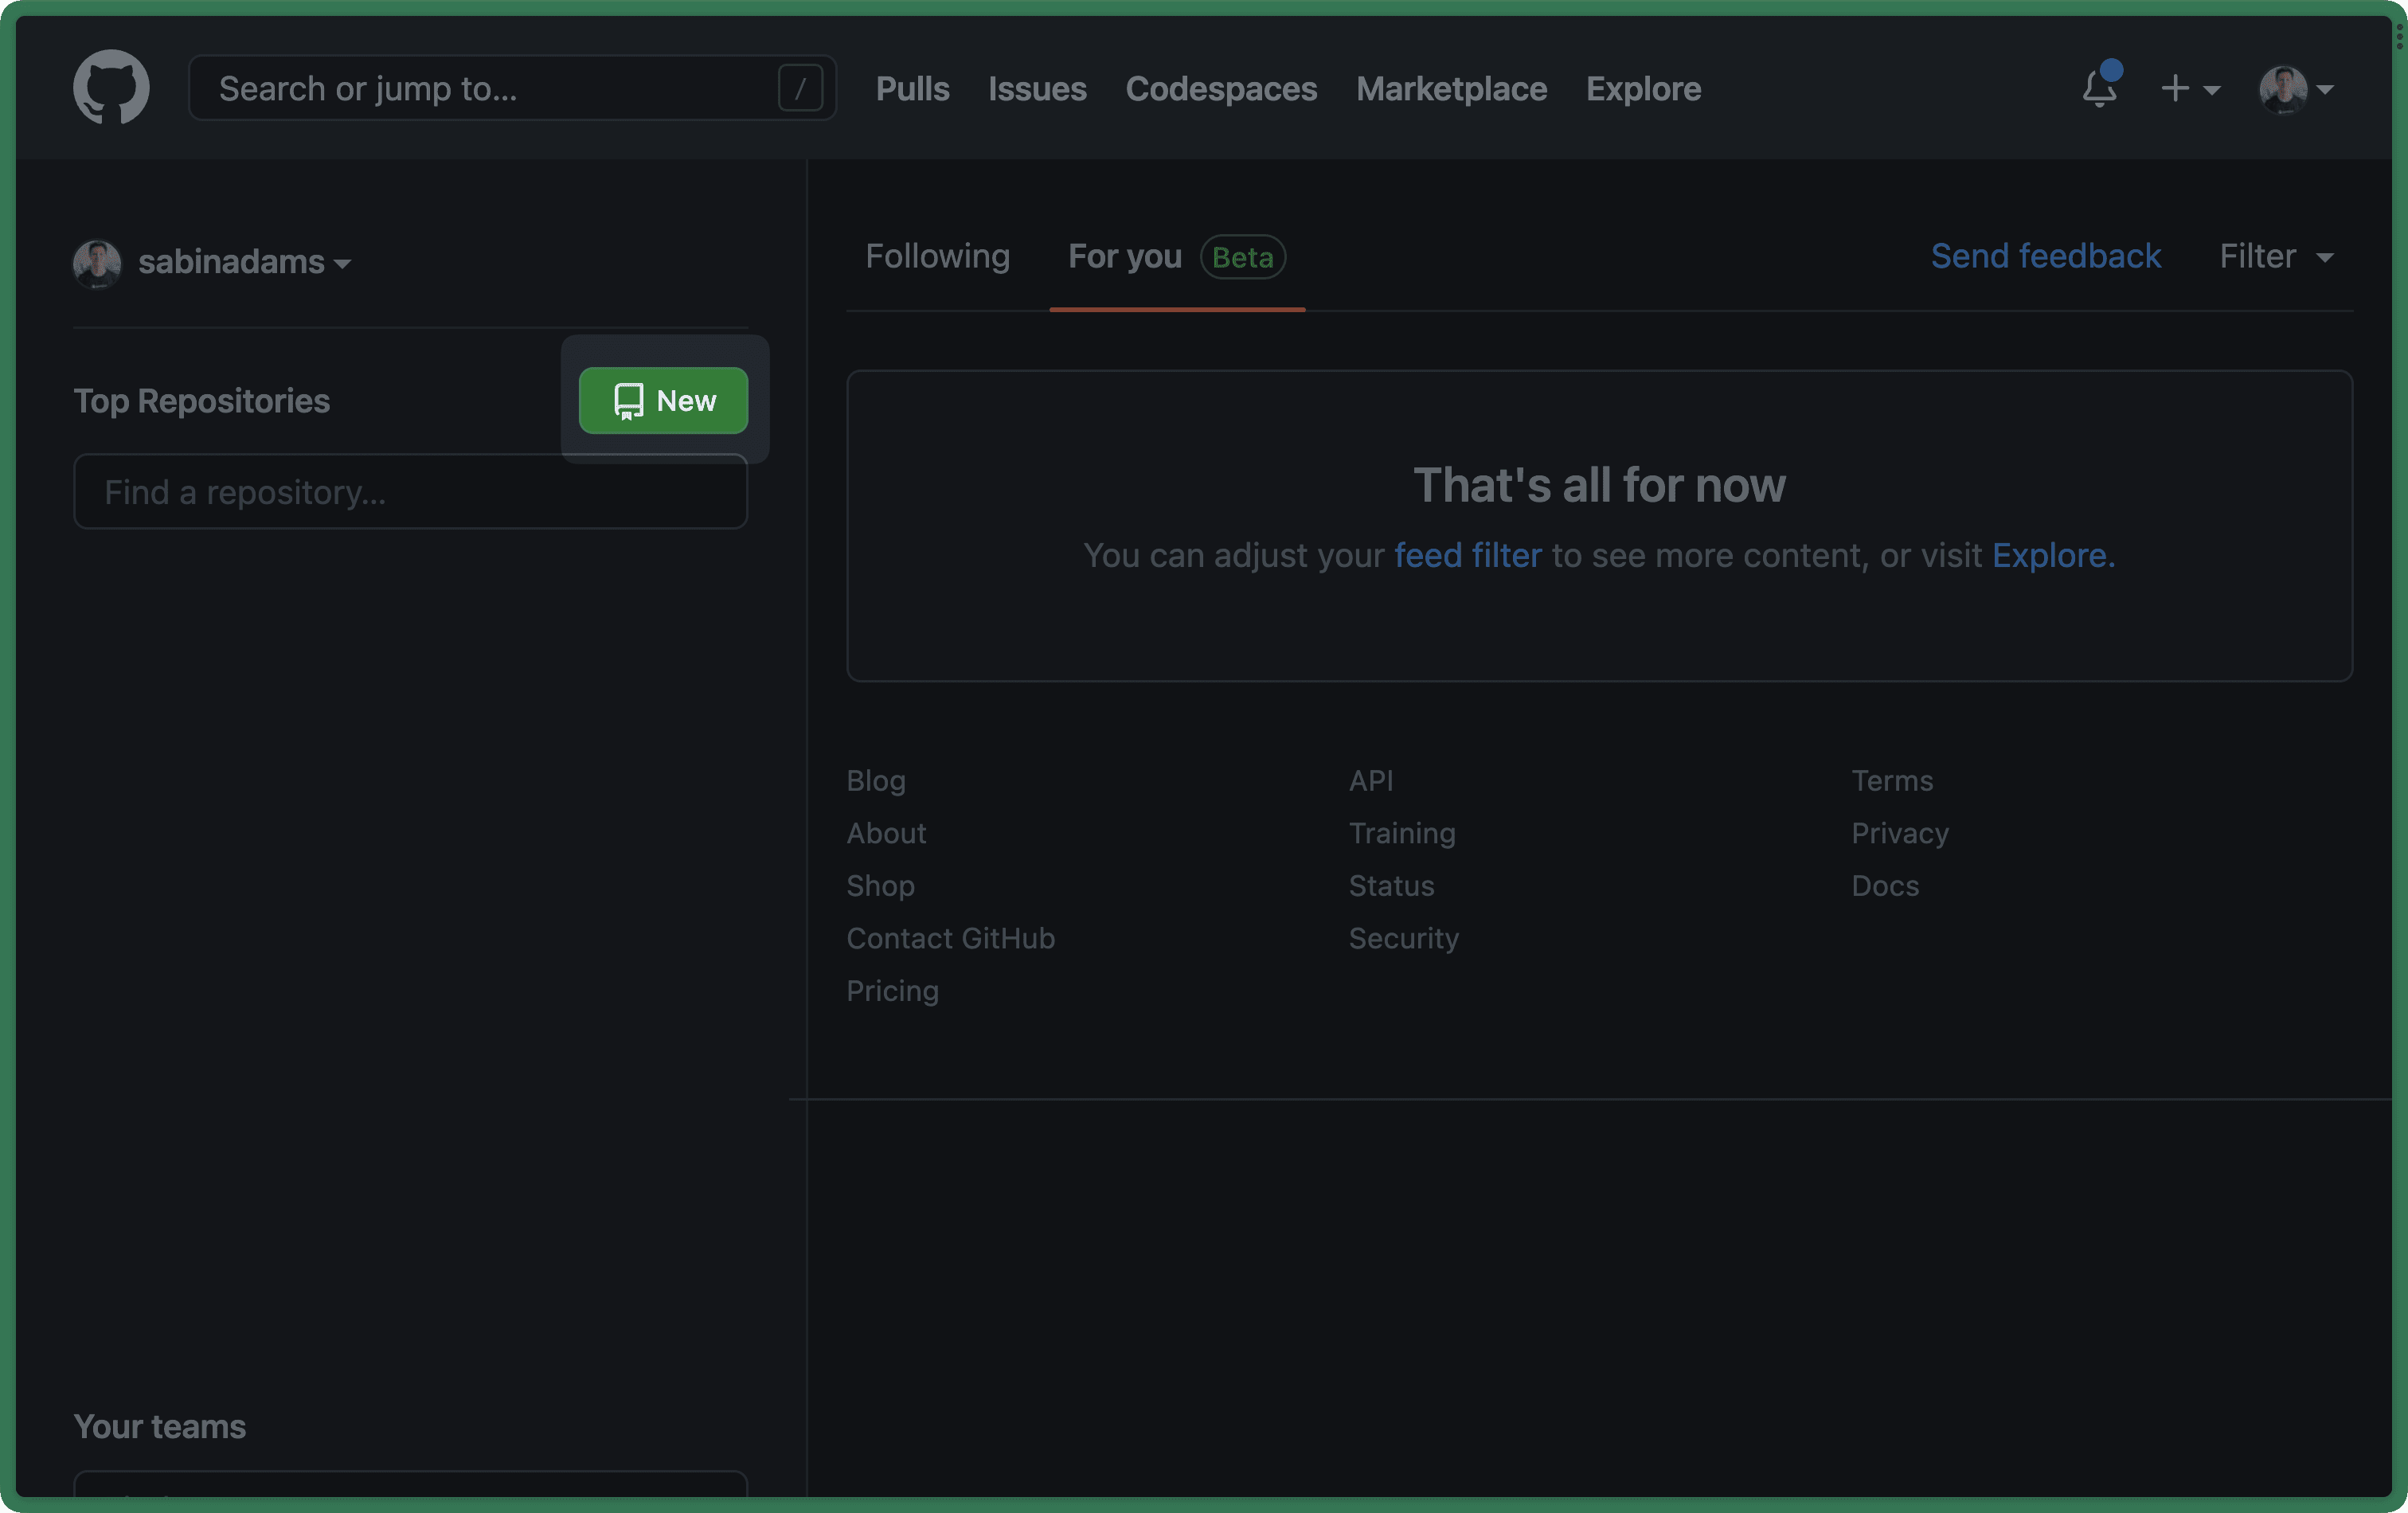
Once you have signed in, click the New button indicated below to create a new repository:
On the next page you will be asked for some information about your repository. Fill out the fields indicated below and hit the Create repository button at the bottom of the page:

You will then be navigated to the new repository's home page. At the top there will be a text field that allows you to copy the repository's URL. Click the copy icon to copy the URL:
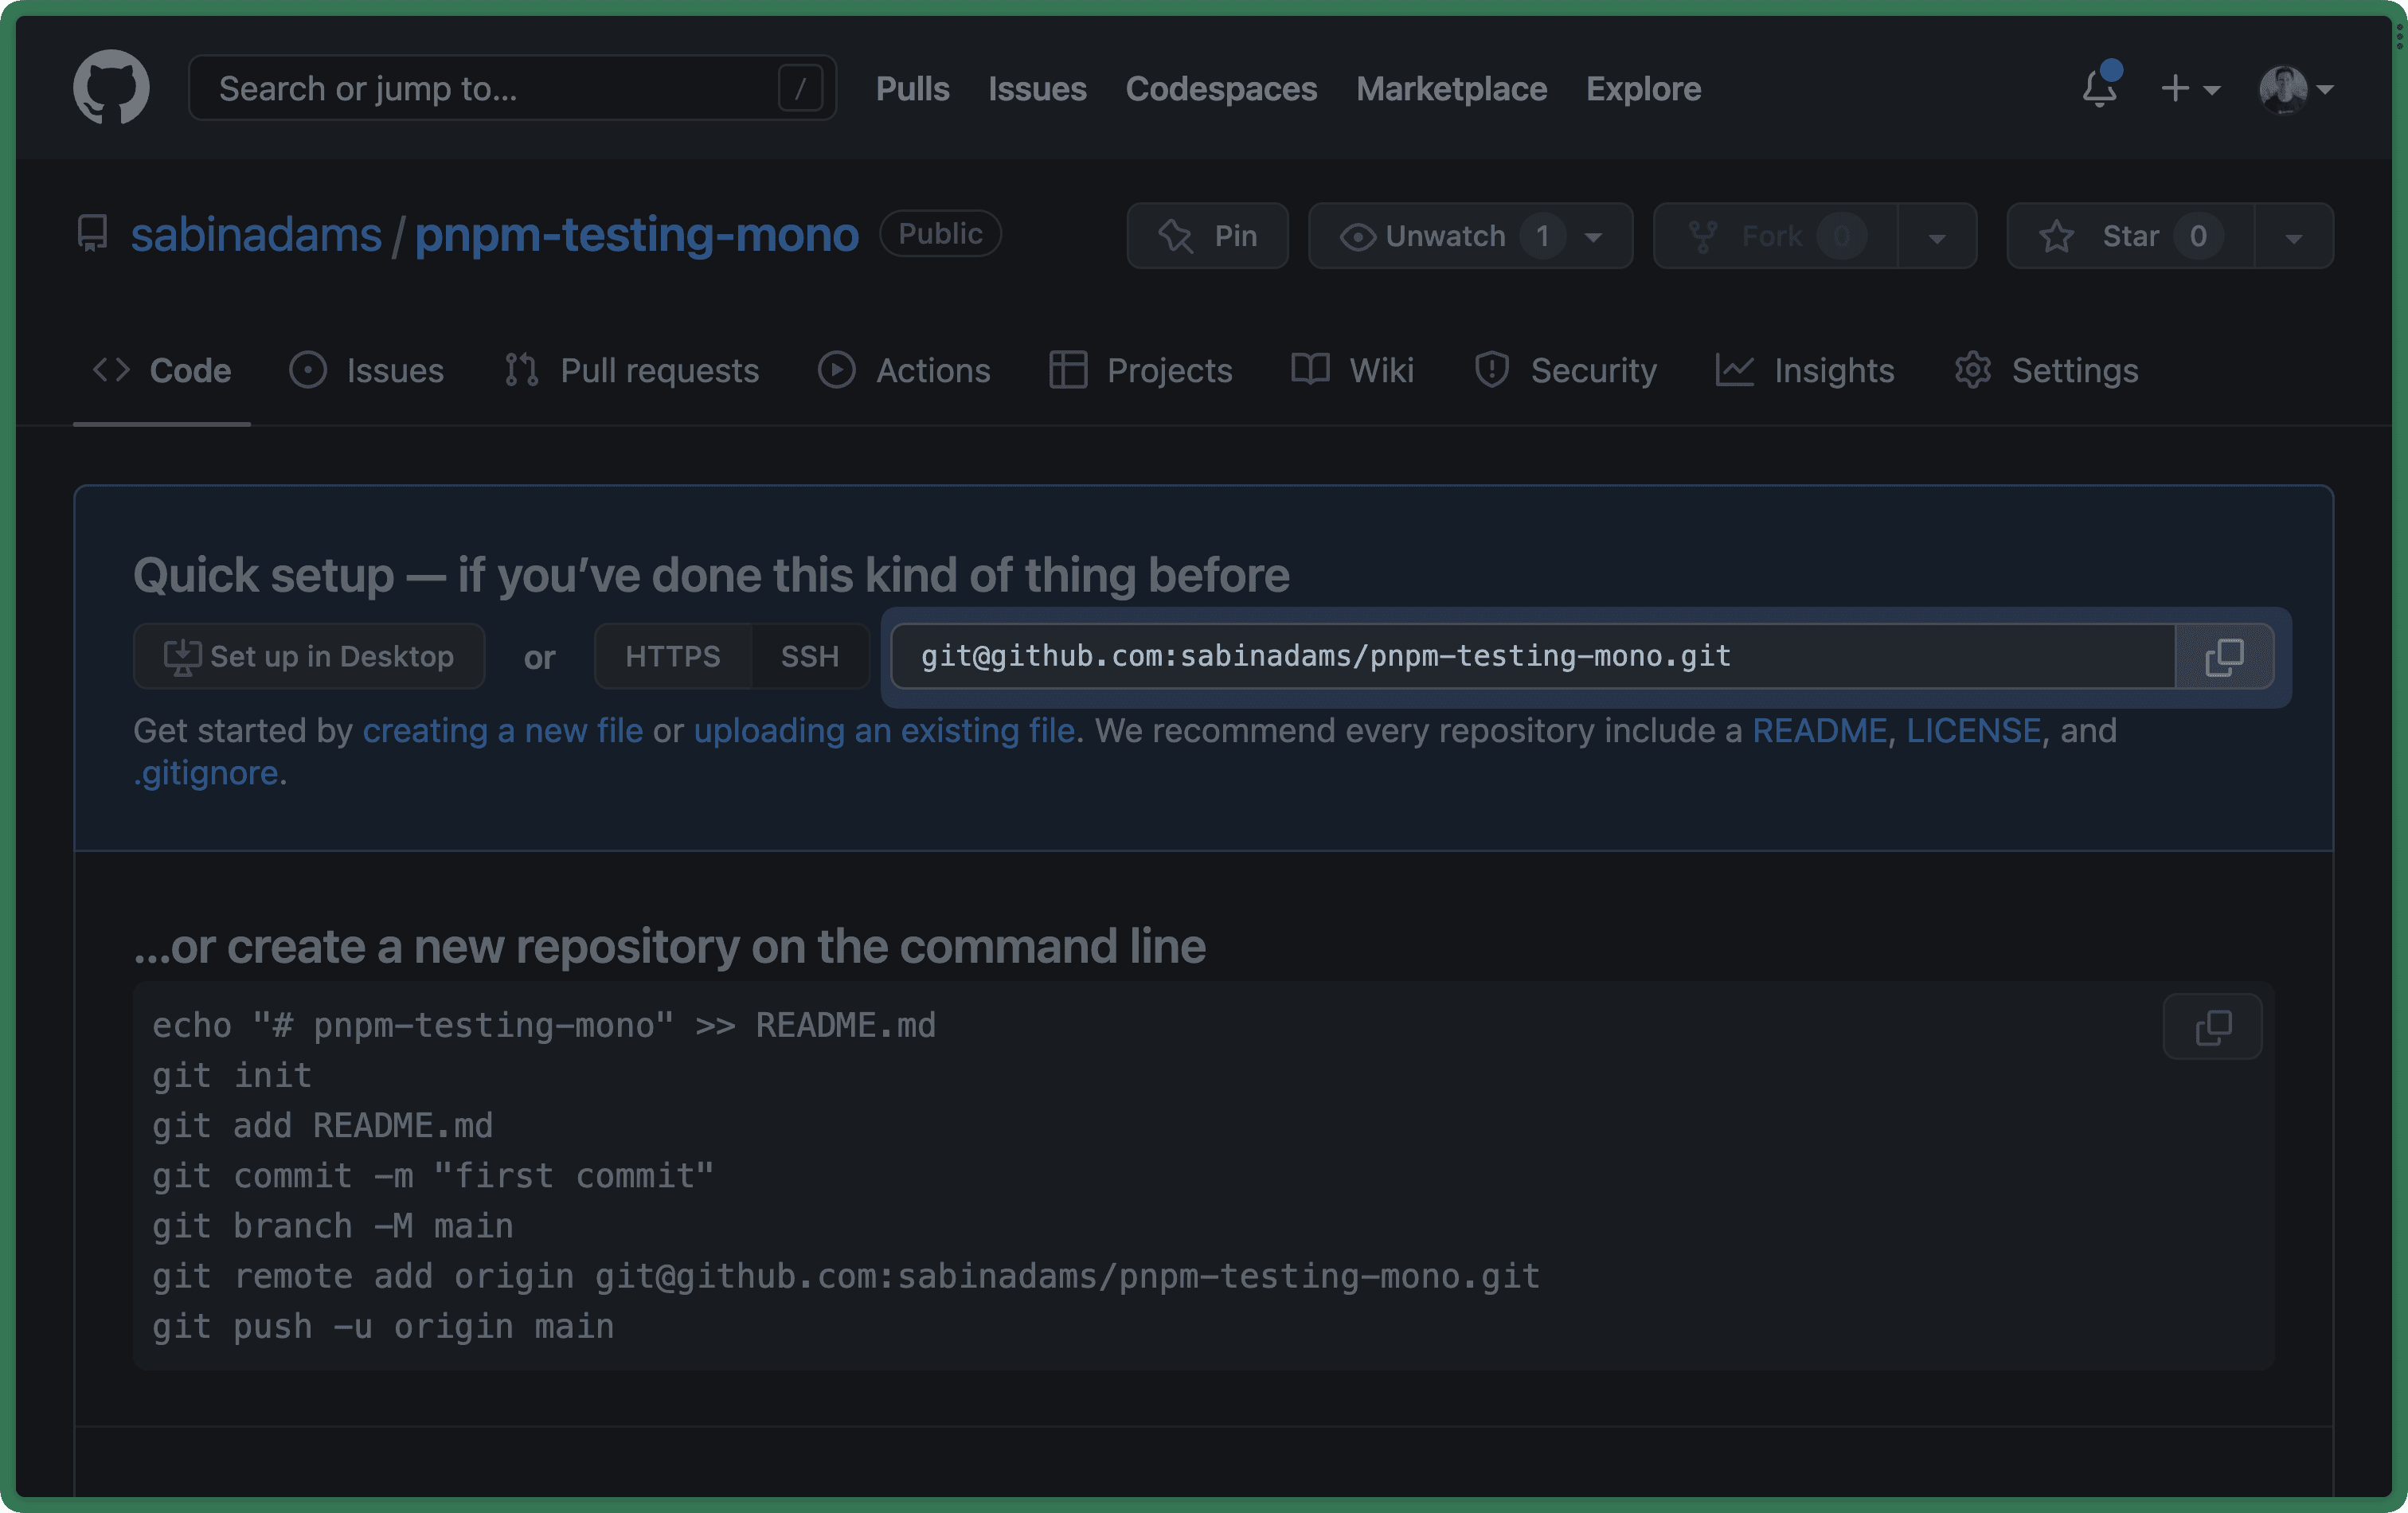
Now that you have a URL to a new GitHub repository, head into the codebase's root directory in your terminal and change the project's origin to point to the new repository with the following command (be sure to insert the URL you just copied in the second line):
git remote remove origin
git remote add origin <paste-url-here>
# Example: git remote add origin git@github.com:sabinadams/pnpm-testing-mono.git
You will be working off of the progress in the e2e-tests branch, so that branch should be considered main. Merge e2e-tests into main:
git add .
git commit -m "Reset to main"
git checkout main
git merge e2e-tests
Finally, push the project to your new repository:
git push -u origin mainSet up a workflow
You are now set up with a respository that you can push changes to. The next goal is to trigger a set of tasks whenever a pull request is made or updated against the main branch you already created.
When using GitHub, you can create workflow files to define these steps. These files must be created within a .github/workflows folder within your project's root directory.
Create a new folder in your project named .github:
mkdir -p .github/workflowsWithin the .github/workflows folder, create a new file where you will define your test workflow named test.yml:
touch .github/workflows/test.ymlWithin this file, you will provide the steps GitHub Actions should take to prepare your project and run your suite of tests.
To start off this workflow, use the name attribute to give your workflow a name:
# .github/workflows/tests.yml
name: Tests
The workflow will now be displayed within GitHub as 'Tests'.
The next thing to do is configure this workflow to only run when a pull request is made against the main branch of the repository. Add the on keyword with the following options to accomplish this:
# .github/workflows/tests.yml
name: Tests
on:
  pull_request:
    branches:
- mainNote: Note the indentation. Indentation is very important in a YAML file and improper indendation will cause the file to fail.
Now you have named your workflow and configured it to only run when a pull request is made or updated against main. Next, you will begin to define a job that runs your unit tests.
Note: There are a ton of options to configure within a workflow file that change how the workflow is run, what it does, etc... For a full list, check out GitHub's documentation.
Add a unit testing job
To define a set of instructions related to a specific task (called steps) within a workflow, you will use the job keyword. Each job runs its set of steps within an isolated environment that you configure.
Add a jobs section to the .github/workflows/tests.yml file and specify a job named unit-tests:
# .github/workflows/tests.yml
name: Tests
on:
  pull_request:
    branches:
      - main
jobs:
  unit-tests:
As was mentioned previously, each individual job is run in its own environment. In order to run a job, you need to specify which type of machine the job should be run in.
Use the runs-on keyword to specify the job should be run on an ubuntu-latest machine:
# .github/workflows/tests.yml
name: Tests
on:
  pull_request:
    branches:
      - main
jobs:
  unit-tests:
    runs-on: ubuntu-latest
The last section you will define to set up your unit testing job is the steps section, where you will define the set of steps the job should take to run your unit tests.
Add the following to the unit-tests job:
# .github/workflows/tests.yml
# ...
jobs:
  unit-tests:
    runs-on: ubuntu-latest
    steps:
      - uses: actions/checkout@v3
This defines a steps section with one step. That one step uses v3 of a pre-built action named actions/checkout which checks out your GitHub repository so you can interact with it inside of the job.
Note: An action is a set of individual steps you can use within your workflows. They can help break out re-usable sets of steps into a single file.
Next, you will need to define a set of steps that installs Node.js on the virtual environment, installs PNPM, and installs your repository's packages.
These steps will be needed on every testing job you create, so you will define these within a re-usable custom action.
Create a new folder named actions within the .github directory and a build folder within the .github/actions folder:
mkdir -p .github/actions/buildThen create a file within .github/actions/build named action.yml:
touch .github/actions/build/action.ymlWithin that file, paste the following:
# .github/actions/build/action.yml
name: 'Build'
description: 'Sets up the repository'
runs:
  using: 'composite'
  steps:
    - name: Set up pnpm
      uses: pnpm/action-setup@v2
      with:
        version: latest
    - name: Install Node.js
      uses: actions/setup-node@v3
    - name: Install dependencies
      shell: bash
      run: pnpm install
This file defines a composite action, which allows you to use the steps defined in this action within a job.
The steps you added above do the following:
- Sets up PNPM in the virtual environment
- Sets up Node.js in the virtual environment
- Runs
pnpm installin the repository to installnode_modules
Now that this re-usable action is defined, you can use it in your main workflow file.
Back in .github/workflows/tests.yml, use the uses keyword to use that custom action:
# .github/workflows/tests.yml
# ...
jobs:
  unit-tests:
    runs-on: ubuntu-latest
    steps:
      - uses: actions/checkout@v3
      - uses: ./.github/actions/build
At this point, the job will check out the repository, set up the virtual environment and install node_modules. All that remains is to actually run the tests.
Add a final step that runs pnpm test:backend:unit to run the unit tests:
# .github/workflows/tests.yml
# ...
jobs:
  unit-tests:
    runs-on: ubuntu-latest
    steps:
      - uses: actions/checkout@v3
      - uses: ./.github/actions/build
      - name: Run tests
run: pnpm test:backend:unitNote: Notice you named this new step
'Run tests'using thenamekeyword and ran an arbitrary command using therunkeyword.
This job is now complete and ready to be tested. In order to test, first push this code up to the main branch in your repository:
git add .
git commit -m "Adds a workflow with a unit testing job"
git push
The workflow is now defined on the main branch. The workflow will only be triggered, however, if you submit a pull request against that branch.
Create a new branch named new-branch:
git checkout -b new-branchWithin that new branch, make minor change by adding a comment to the backend/src/index.ts file:
// backend/src/index.ts
import app from 'lib/createServer'

+ // Starts up the app
app.listen(3000, () => console.log(`🚀 Server ready at: http://localhost:3000`))
Now commit and push those changes to the remote repository. The repository is not currently aware of a new-branch branch, so you will need to specify the origin should use a branch named new-branch to handle these changes:
git add .
git commit -m "Adds a comment"
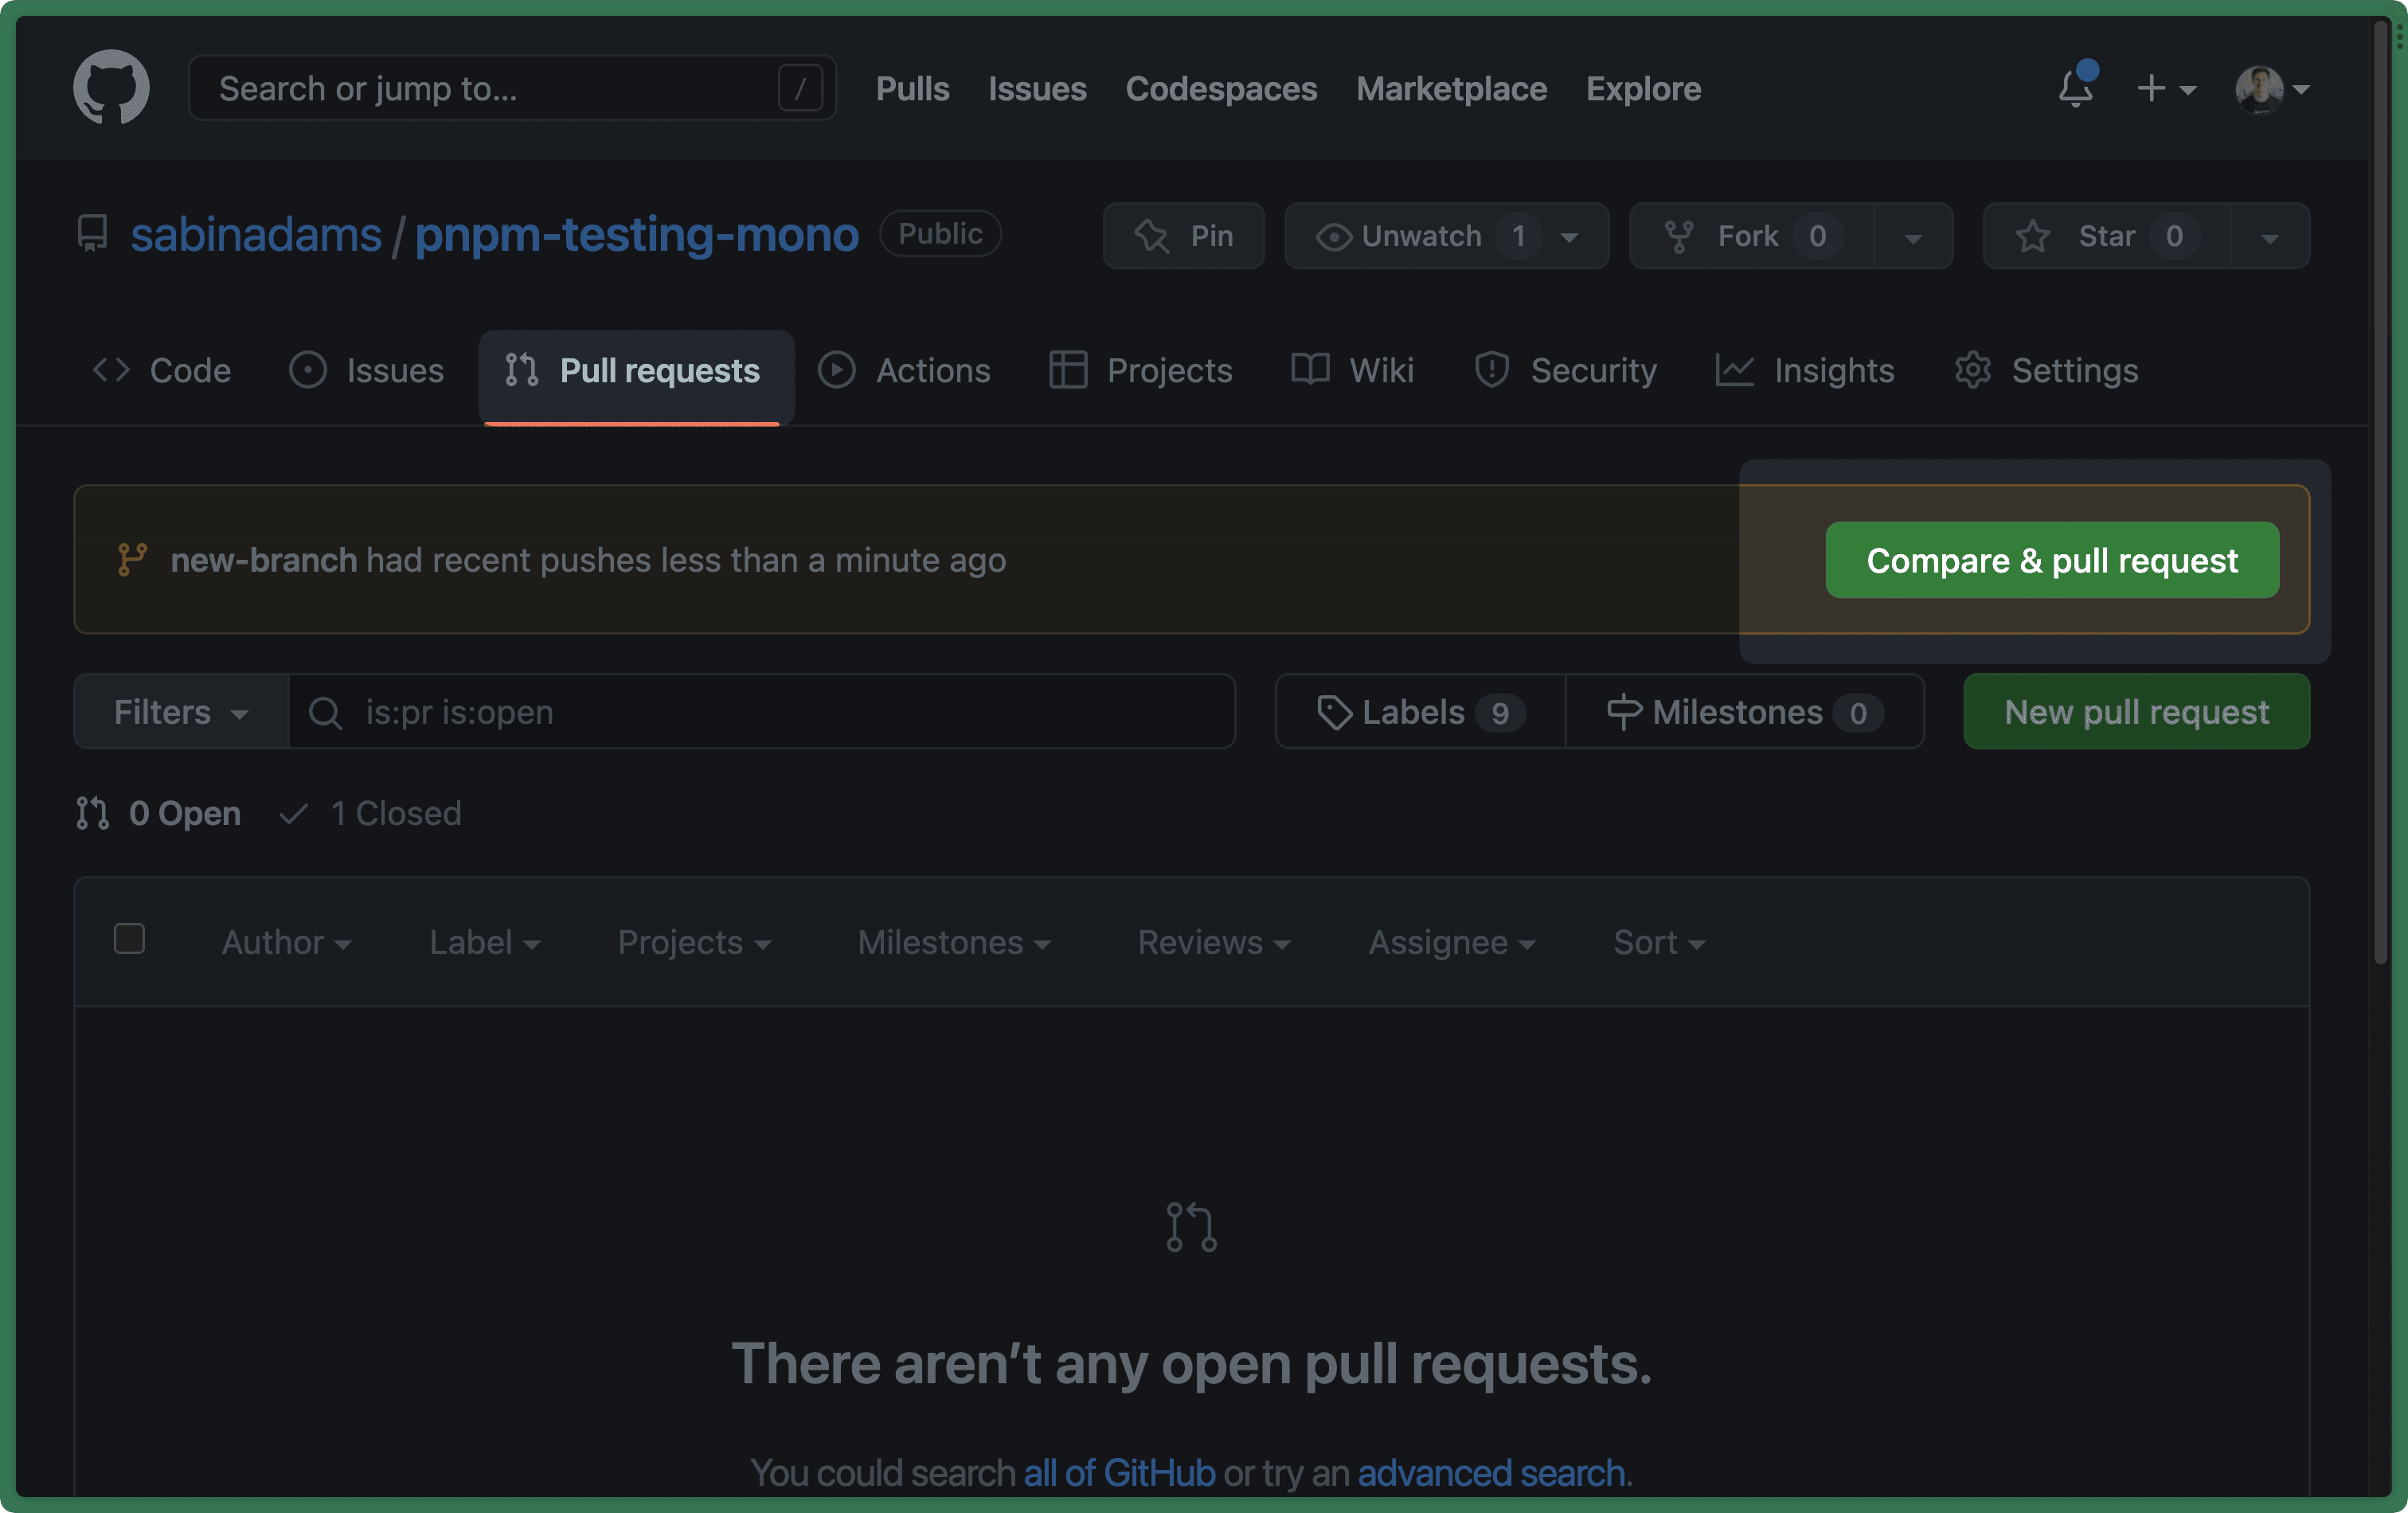
git push -u origin new-branchThe new branch is now available on the remote repository. Create a pull request to merge this branch into the main branch.
Head to the repository in your browser. In the Pull requests tab at the top of the page, you should see a Compare & pull request button because new-branch had a recent push:
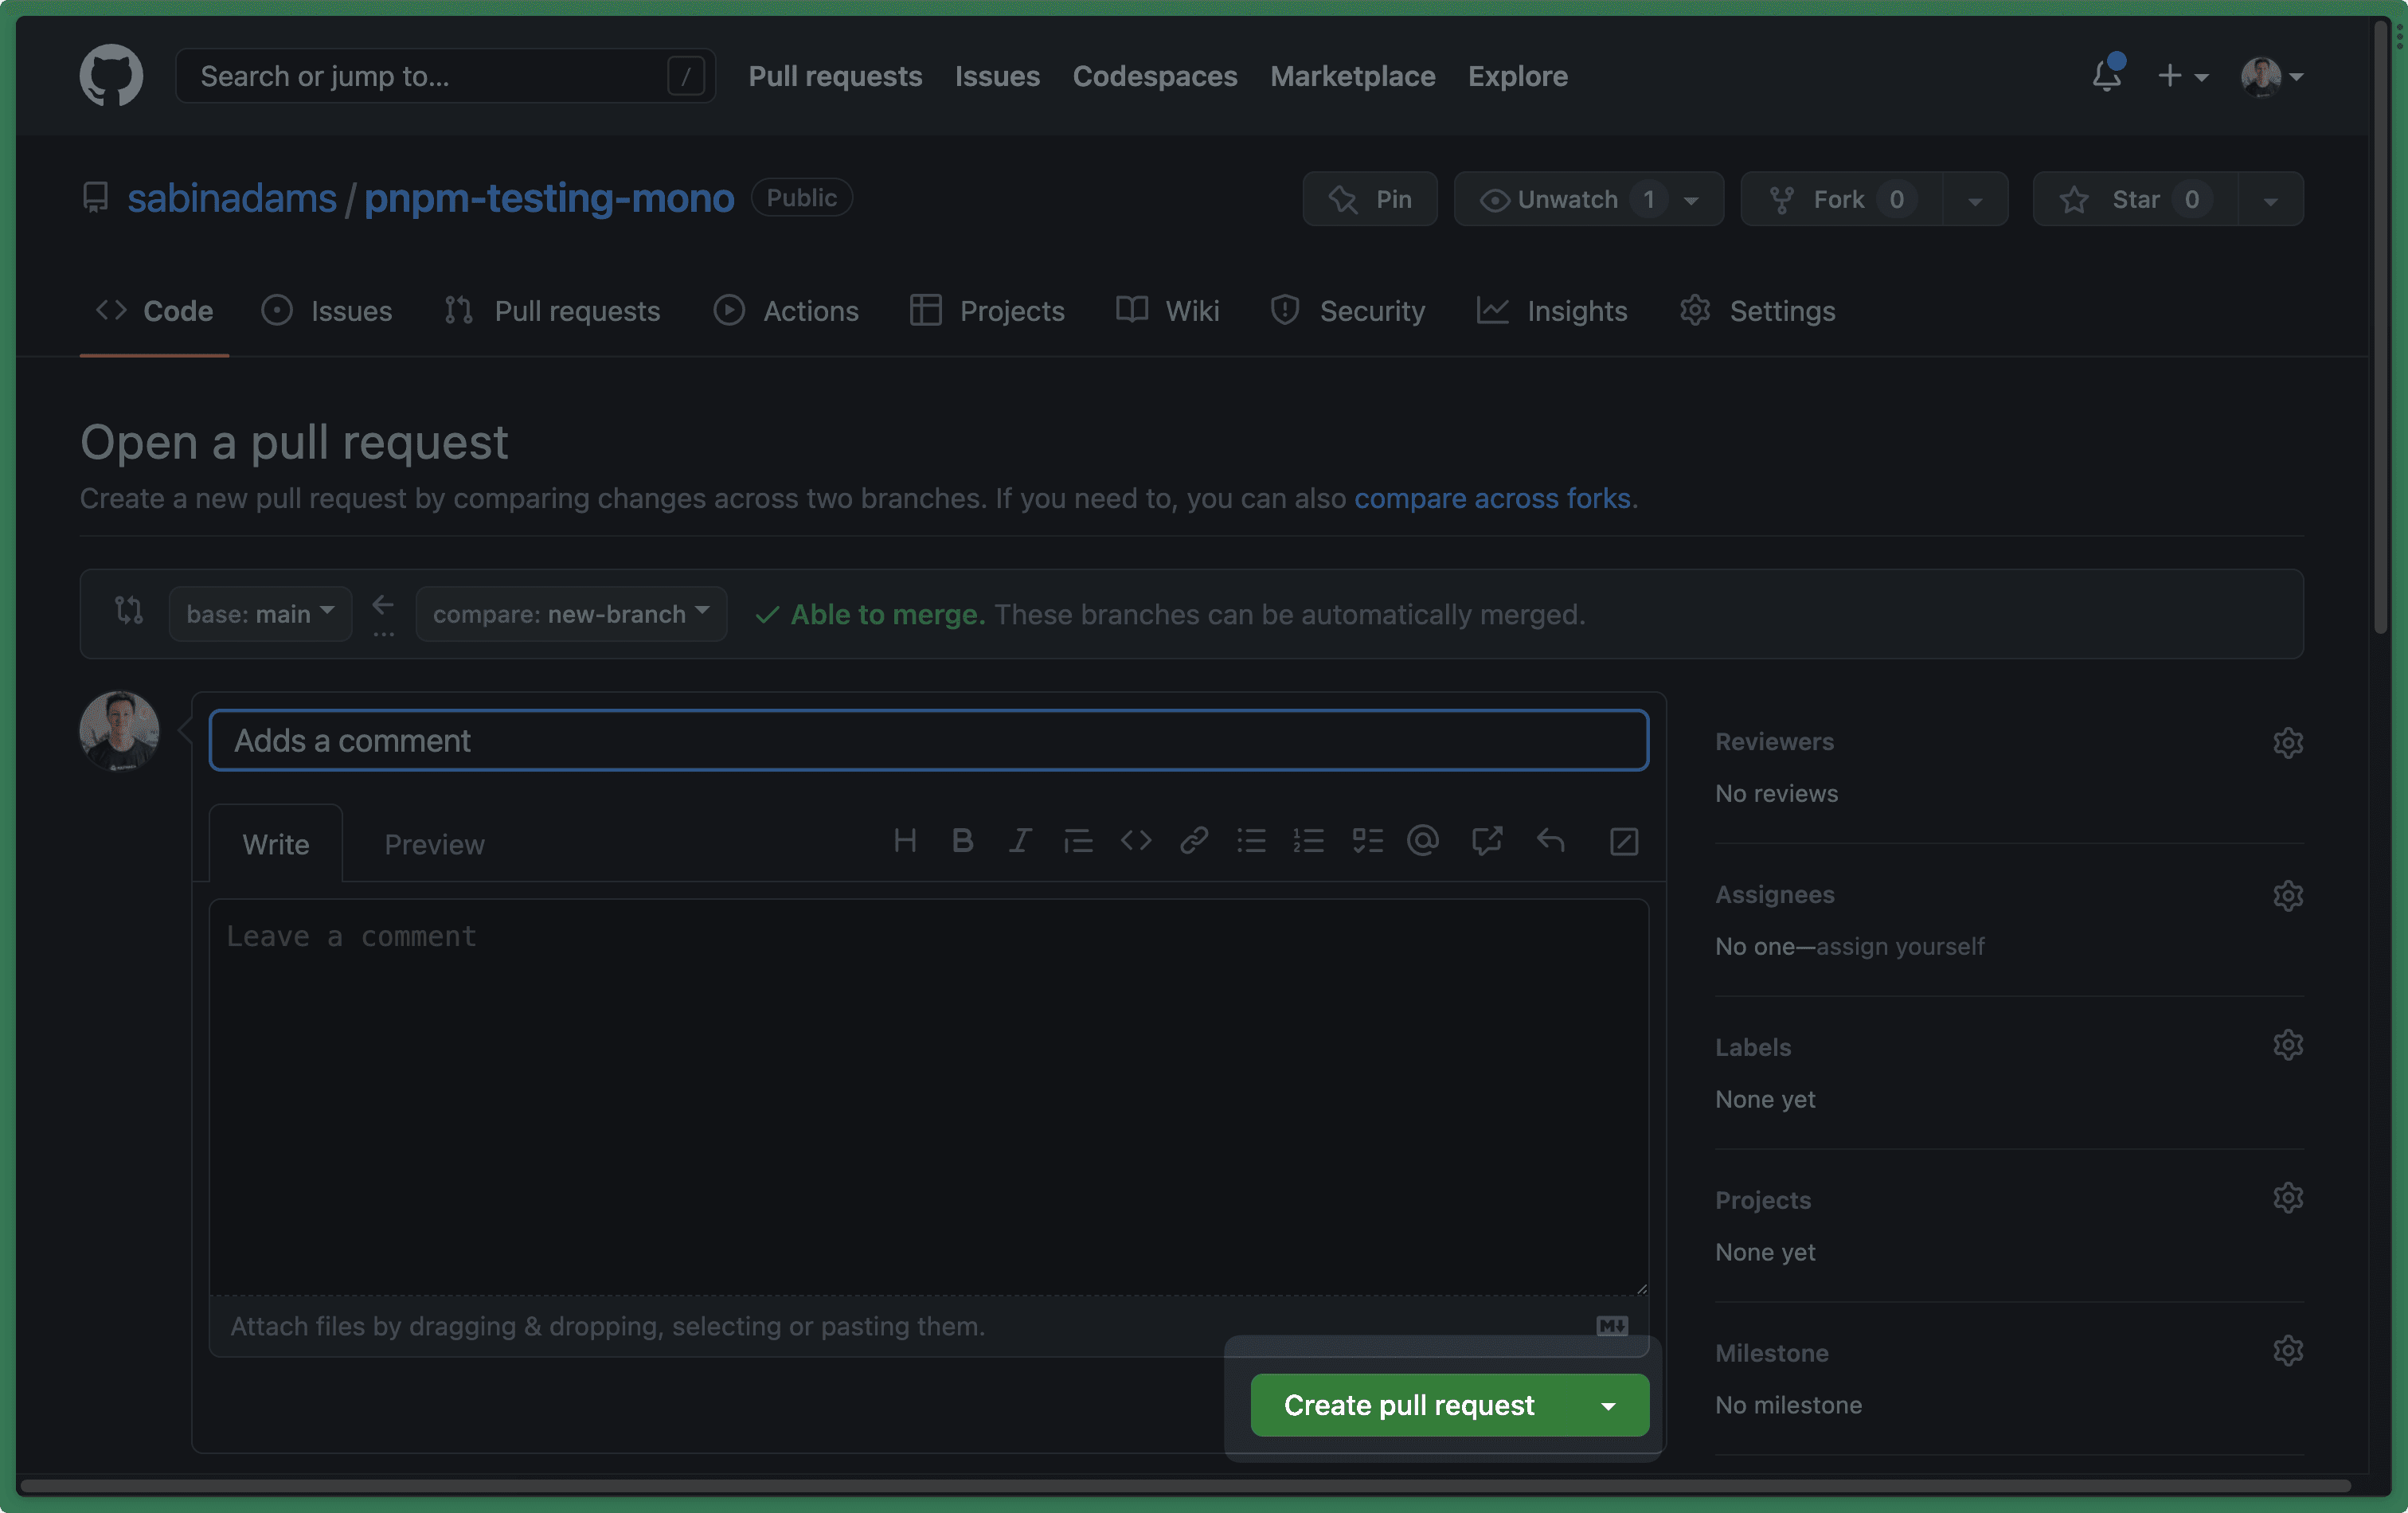
Click that button to open a pull request. You should be navigated to a new page. On that new page, click the Create pull request button to open a pull request:
After opening the pull request, you should see a yellow box show up above the Merge pull request button that shows your Tests job running:
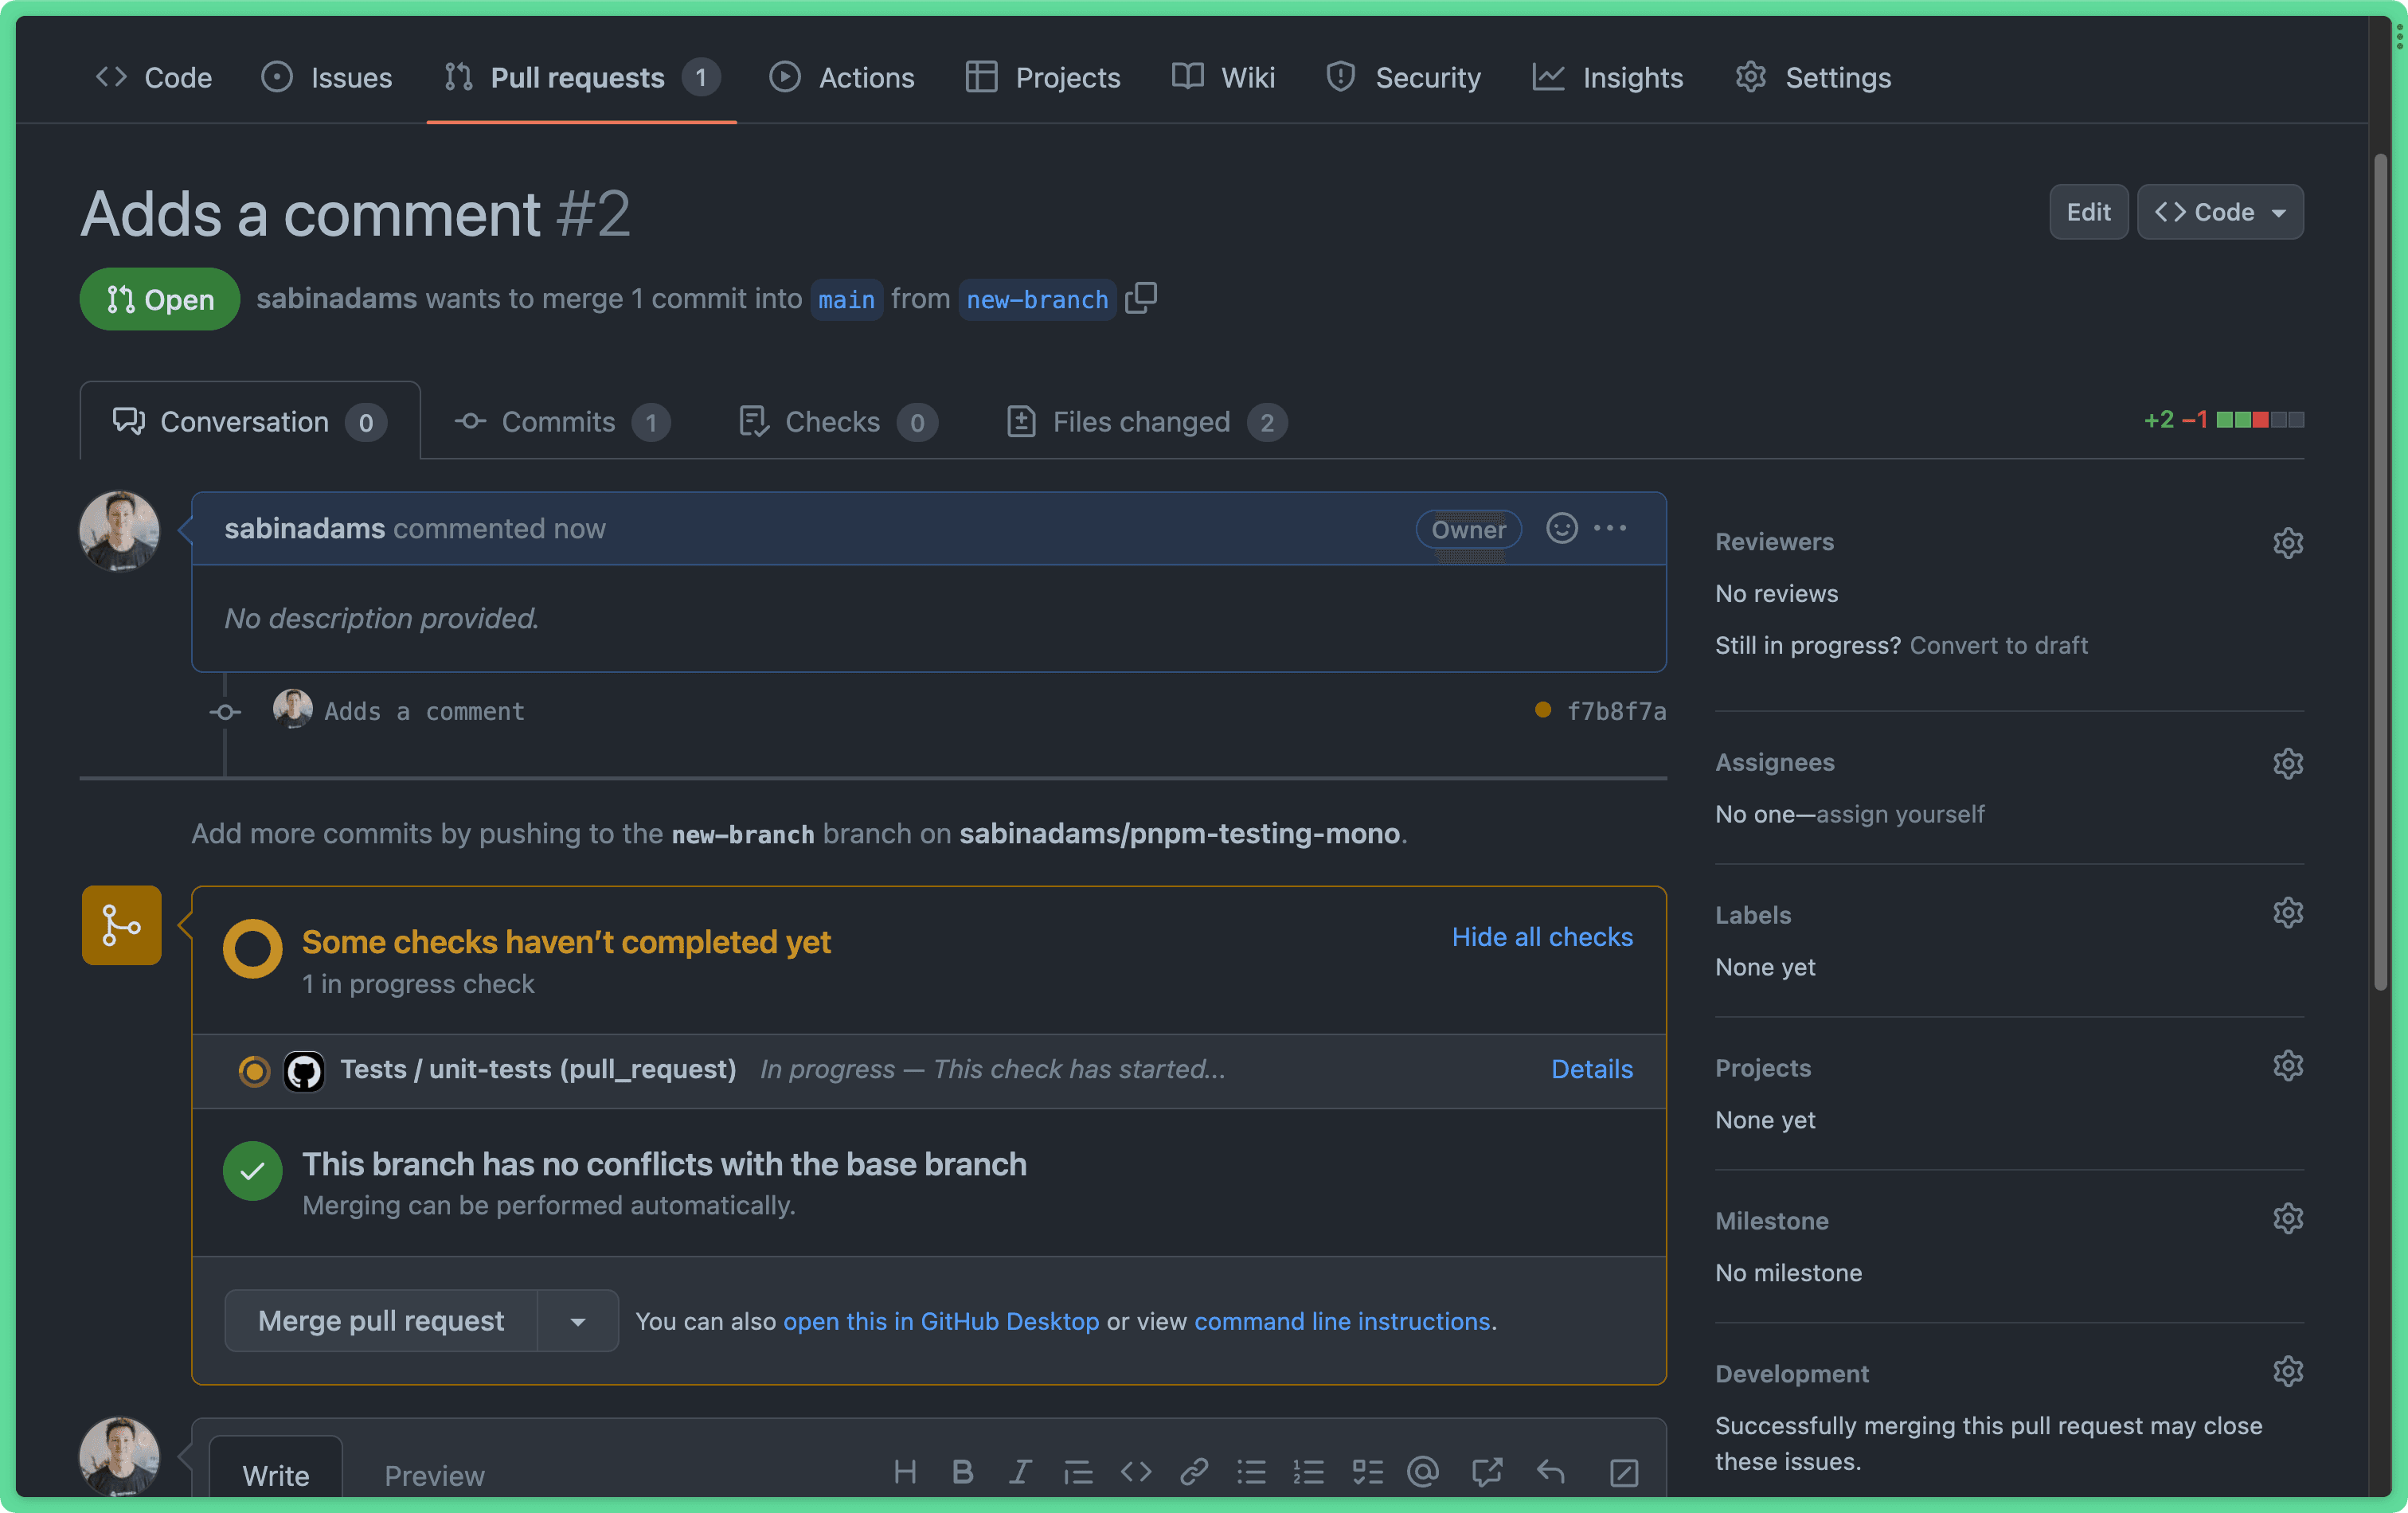
If you click on the Details button, you should see each step running along with its console output.
Once the job completes, you will be notified whether or not the checks in your workflows passed:

Now that your unit testing job is complete you will move on to creating a job that runs your integration tests.
Note: Do not merge this pull request yet! You will re-use this pull request throughout the rest of the article.
Add an integration testing job
The process of running your integration tests will be very similar to how the unit tests were run. The difference in this job is that your integration tests rely on a test database and environment variables. In this section you will set those up and define a job to run your tests.
Before beginning to make changes, you will need to check out the main branch of the repository again:
git checkout mainStart by copying the unit-tests job into a new job named integration-tests. Also, replace pnpm test:backend:unit with pnpm test:backend:int in this job's last step:
# .github/workflows/tests.yml
# ...
jobs:
  # ...
  integration-tests:
      runs-on: ubuntu-latest
      steps:
        - uses: actions/checkout@v3
        - uses: ./.github/actions/build
        - name: Run tests
          run: pnpm run test:backend:int
With this, you already have most of the pieces you need to run your tests, however running the workflow as is will trigger the scripts/run-integration.sh file to be run. That script uses Docker Compose to spin up a test database.
The virtual environment GitHub Actions use does not come with Docker Compose by default. To get this to work, you will set up another custom action that installs Docker Compose into the environment.
Create a new folder in .github/actions named docker-compose with a file inside it named action.yml:
mkdir .github/actions/docker-compose
touch .github/actions/docker-compose/action.yml
This action should do two things:
- Download the Docker Compose plugin into the virtual environment
- Make the plugin executable so the
docker-composecommand can be used
Paste the following into .github/actions/docker-compose/action.yml to handle these tasks:
# .github/actions/docker-compose/action.yml
name: 'Docker-Compose Setup'
description: 'Sets up docker-compose'
runs:
  using: 'composite'
  steps:
    - name: Download Docker-Compose plugin
      shell: bash
      run: curl -SL https://github.com/docker/compose/releases/download/v2.16.0/docker-compose-linux-x86_64 -o /usr/local/bin/docker-compose
    - name: Make plugin executable
      shell: bash
      run: sudo chmod +x /usr/local/bin/docker-compose
The first step in the snippet above downloads the Docker Compose plugin source into /usr/local/bin/docker-compose in the virtual environment. It then uses chmod to set this source as an executable file.
With the custom action complete, add it to the integration-tests job in .github/workflows/tests.yml right before the step where your tests are run:
# .github/workflows/tests.yml
# ...
jobs:
  # ...
  integration-tests:
      runs-on: ubuntu-latest
      steps:
        - uses: actions/checkout@v3
        - uses: ./.github/actions/build
        - uses: ./.github/actions/docker-compose
        - name: Run tests
          run: pnpm run test:backend:int
The last thing this test needs is a set of environment variables. The environment variables your application expects are:
DATABASE_URL: The URL of the databaseAPI_SECRET: The authentication secret used to sign JWTsVITE_API_URL: The URL of the Express API
You can add these to the virtual environment using the env keyword. Environment variables can be added at the workflow level, which applies them to every job, or to a specific job. In your case, you will add them at the workflow level so the variables are available in each job.
Note: It would normally be best practice to only expose the required environment variables to each job individually. In this article, the variables will be exposed to every job for simplicity.
Add the env key to your workflow and define the three variables you need:
# .github/workflows/tests.yml
name: Tests
on:
  pull_request:
    branches:
      - main
env:
  DATABASE_URL: postgres://postgres:postgres@localhost:5432/quotes
  VITE_API_URL: http://localhost:3000
  API_SECRET: secretvalue
# ...
At this point you can commit and push these changes to the main branch to publish the changes to the workflow:
git add .
git commit -m "Adds integration tests to the workflow"
git push
Then merge those changes into the new-branch branch by running the following to trigger the new run of the workflow:
git checkout new-branch
git merge main
git pushNote: At the
git merge mainstep you will enter an editor in the terminal. Hit:qaandenterto exit that editor.
This job will take quite a bit longer than the unit tests job because it has to install Docker Compose, spin up a database and then perform all of the tests.
Once the job completes you should see the following success messages:
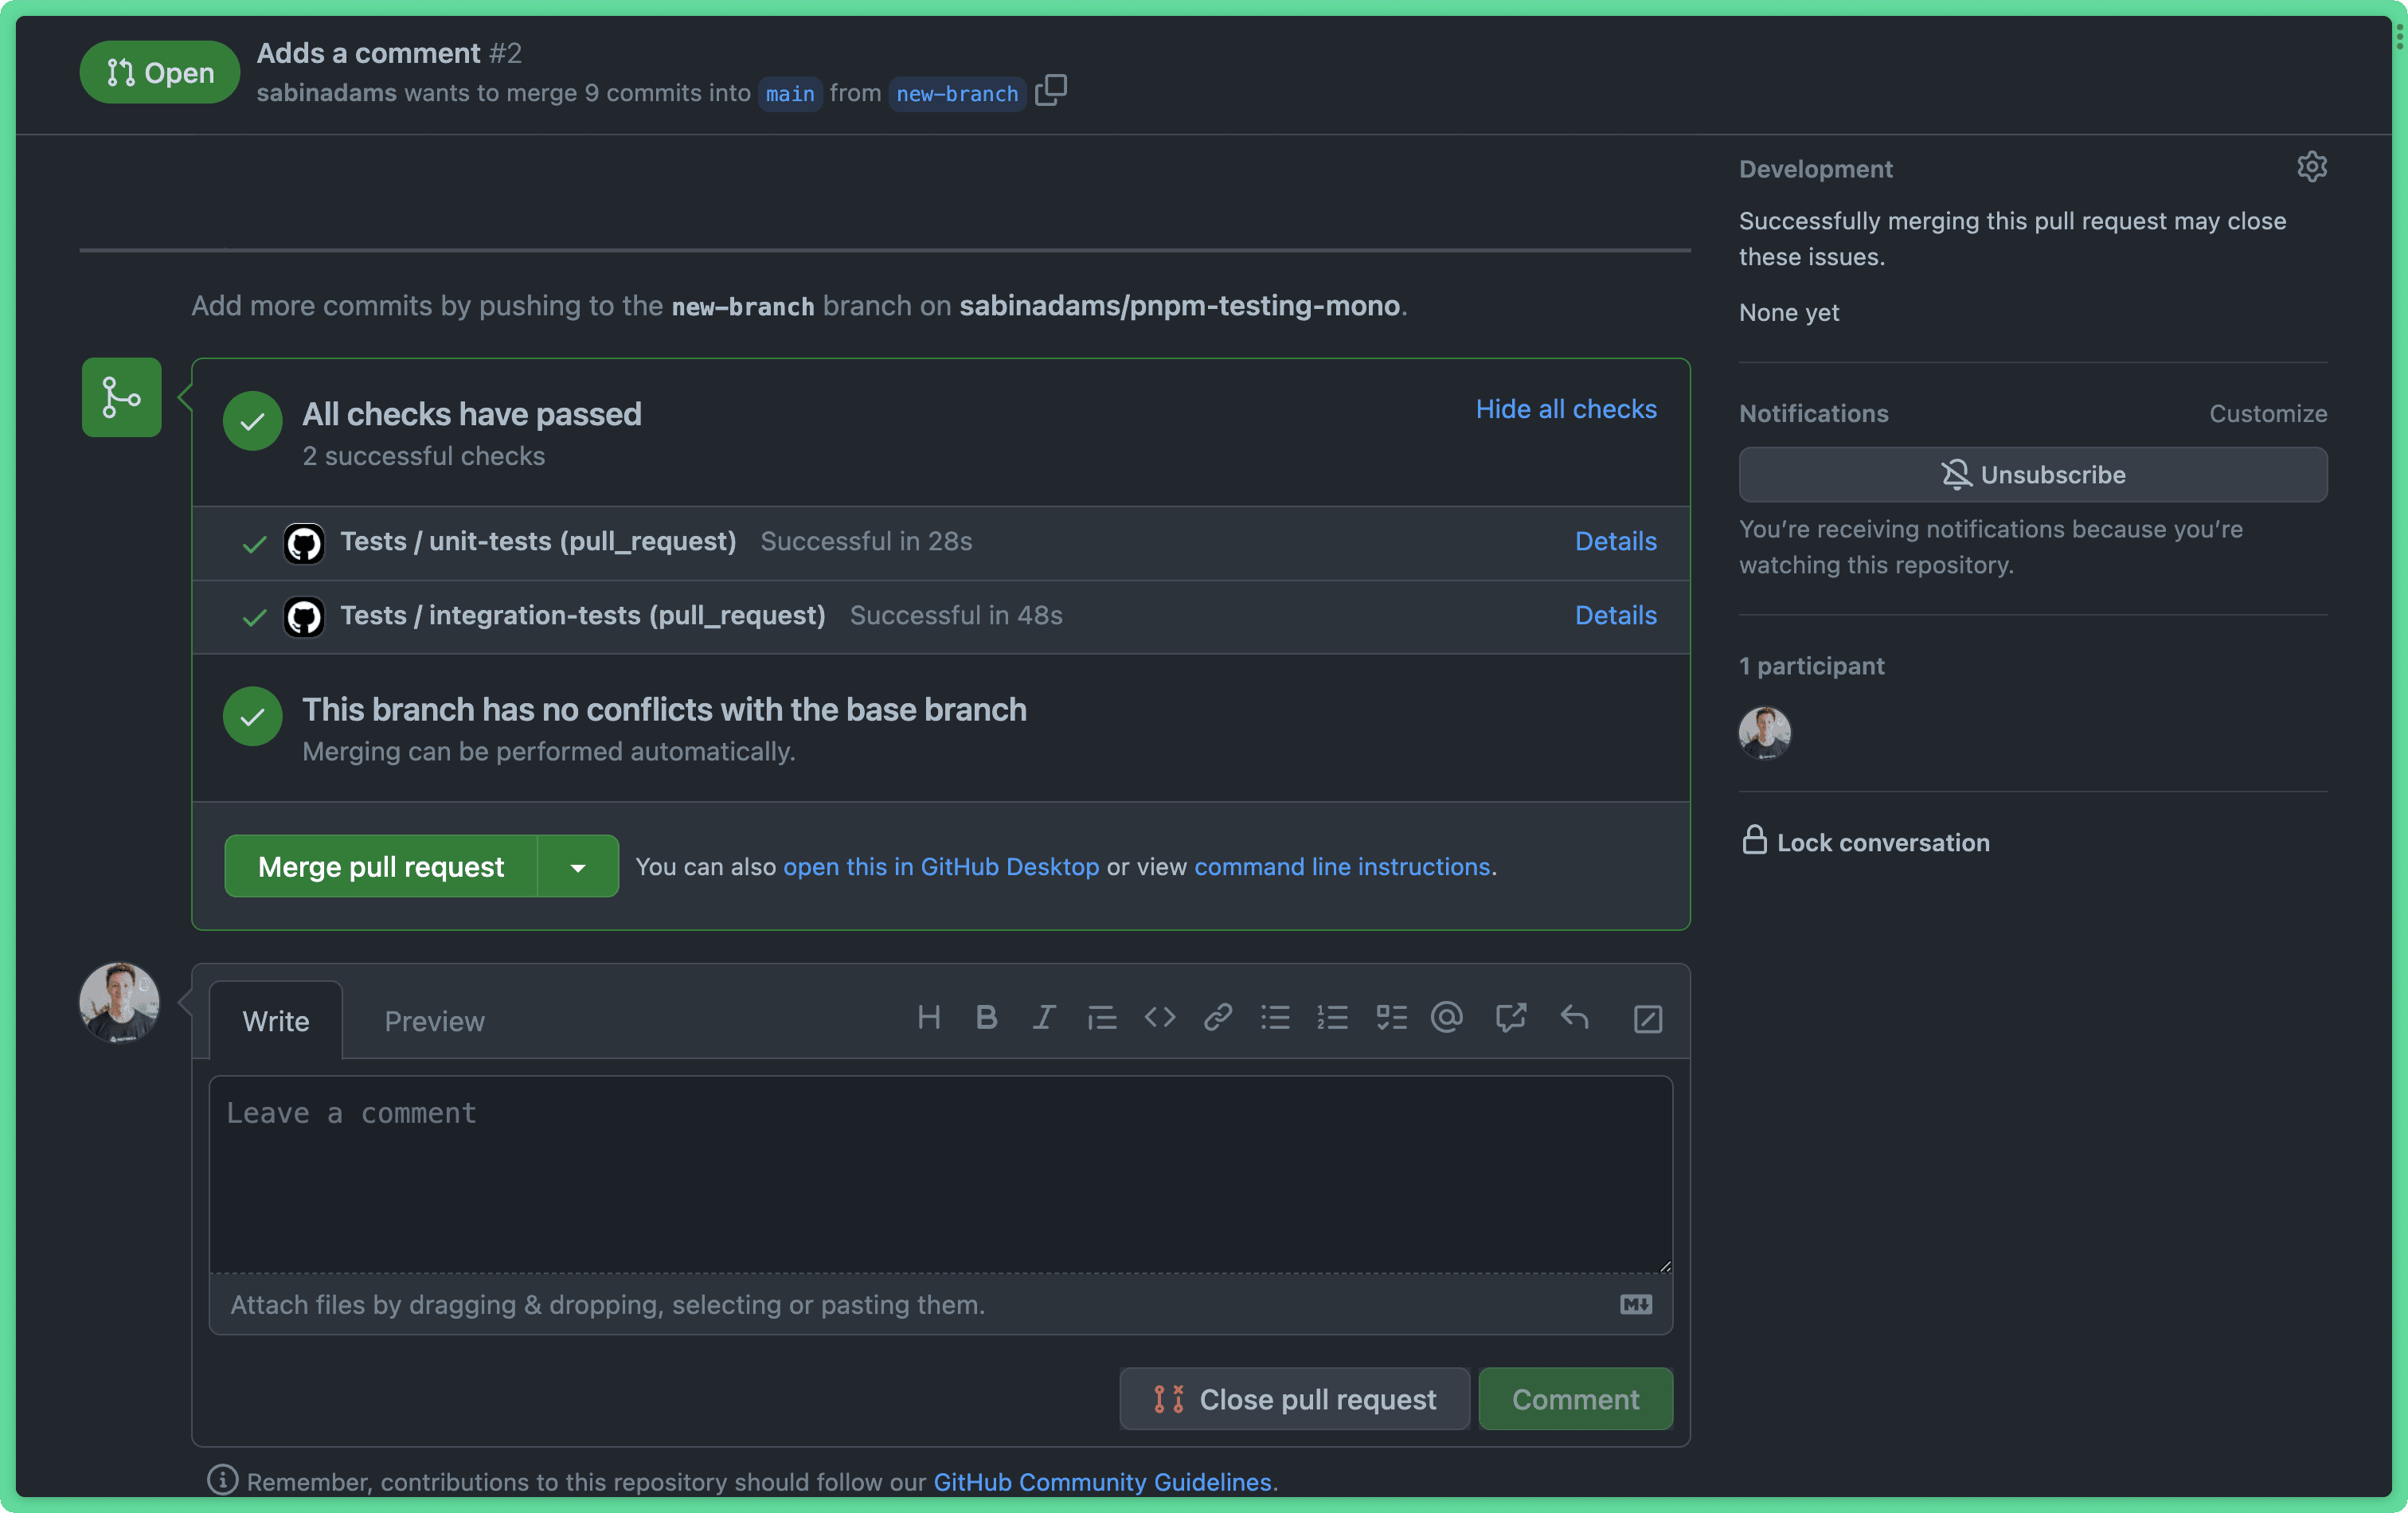
Add an end-to-end testing job
Now that the unit and integration tests are running in the workflow, the last set of tests to define is the end-to-end tests.
First, check out the main branch again to make changes to the workflow file:
git checkout mainSimilar to how the previous section began, copy the contents of the integration-tests job into a new job named e2e-tests, replacing the pnpm backend:tests:int with pnpm test:e2e:
# .github/workflows/tests.yml
# ...
jobs:
  # ...
  e2e-tests:
    runs-on: ubuntu-latest
    steps:
      - uses: actions/checkout@v3
      - uses: ./.github/actions/build
      - uses: ./.github/actions/docker-compose
      - name: Run tests
        run: pnpm test:e2e
Before committing the new job, there are a few things to do:
- Install Playwright and its testing browsers in the virtual environment
- Update
scripts/run-e2e.sh
Right after the step in this job that installs Docker Compose, add two new steps that download Playwright and install its testing browsers in the e2e folder of the project:
# .github/workflows/tests.yml
# ...
jobs:
  # ...
  e2e-tests:
    runs-on: ubuntu-latest
    steps:
      - uses: actions/checkout@v3
      - uses: ./.github/actions/build
      - uses: ./.github/actions/docker-compose
      - name: Install Playwright
        run: cd e2e && npx playwright install --with-deps
      - run: cd e2e && npx playwright install
      - name: Run tests
        run: pnpm test:e2e
You will also need to add two new environment variables to the env section that Playwright will use when installing Playwright:
# .github/workflows/tests.yml
name: Tests
on:
  pull_request:
    branches:
      - main
env:
  DATABASE_URL: postgres://postgres:postgres@localhost:5432/quotes
  VITE_API_URL: http://localhost:3000
  API_SECRET: secretvalue
  PLAYWRIGHT_SKIP_BROWSER_DOWNLOAD: 1
  PLAYWRIGHT_BROWSERS_PATH: 0
# ...
Now, when the workflow is run Playwright should be installed and configured properly to allow your tests to run.
The next thing to change is the way the scripts/run-e2e.sh script runs the end-to-end tests.
Currently, when the end-to-end tests are finished running, the script will automatically serve the resulting report using npx playwright show-report. In the CI environment, you do not want this to happen as it would cause the job to endlessly run until manually cancelled.
Remove that line from the script:
# scripts/run-e2e.sh
# ...
-npx playwright show-report
With that problem solved, you are now ready to push your changes to main and merge those changes into the new-branch branch:
git add .
git commit -m "Adds end-to-end tests to the workflow"
git push
git checkout new-branch
git merge main
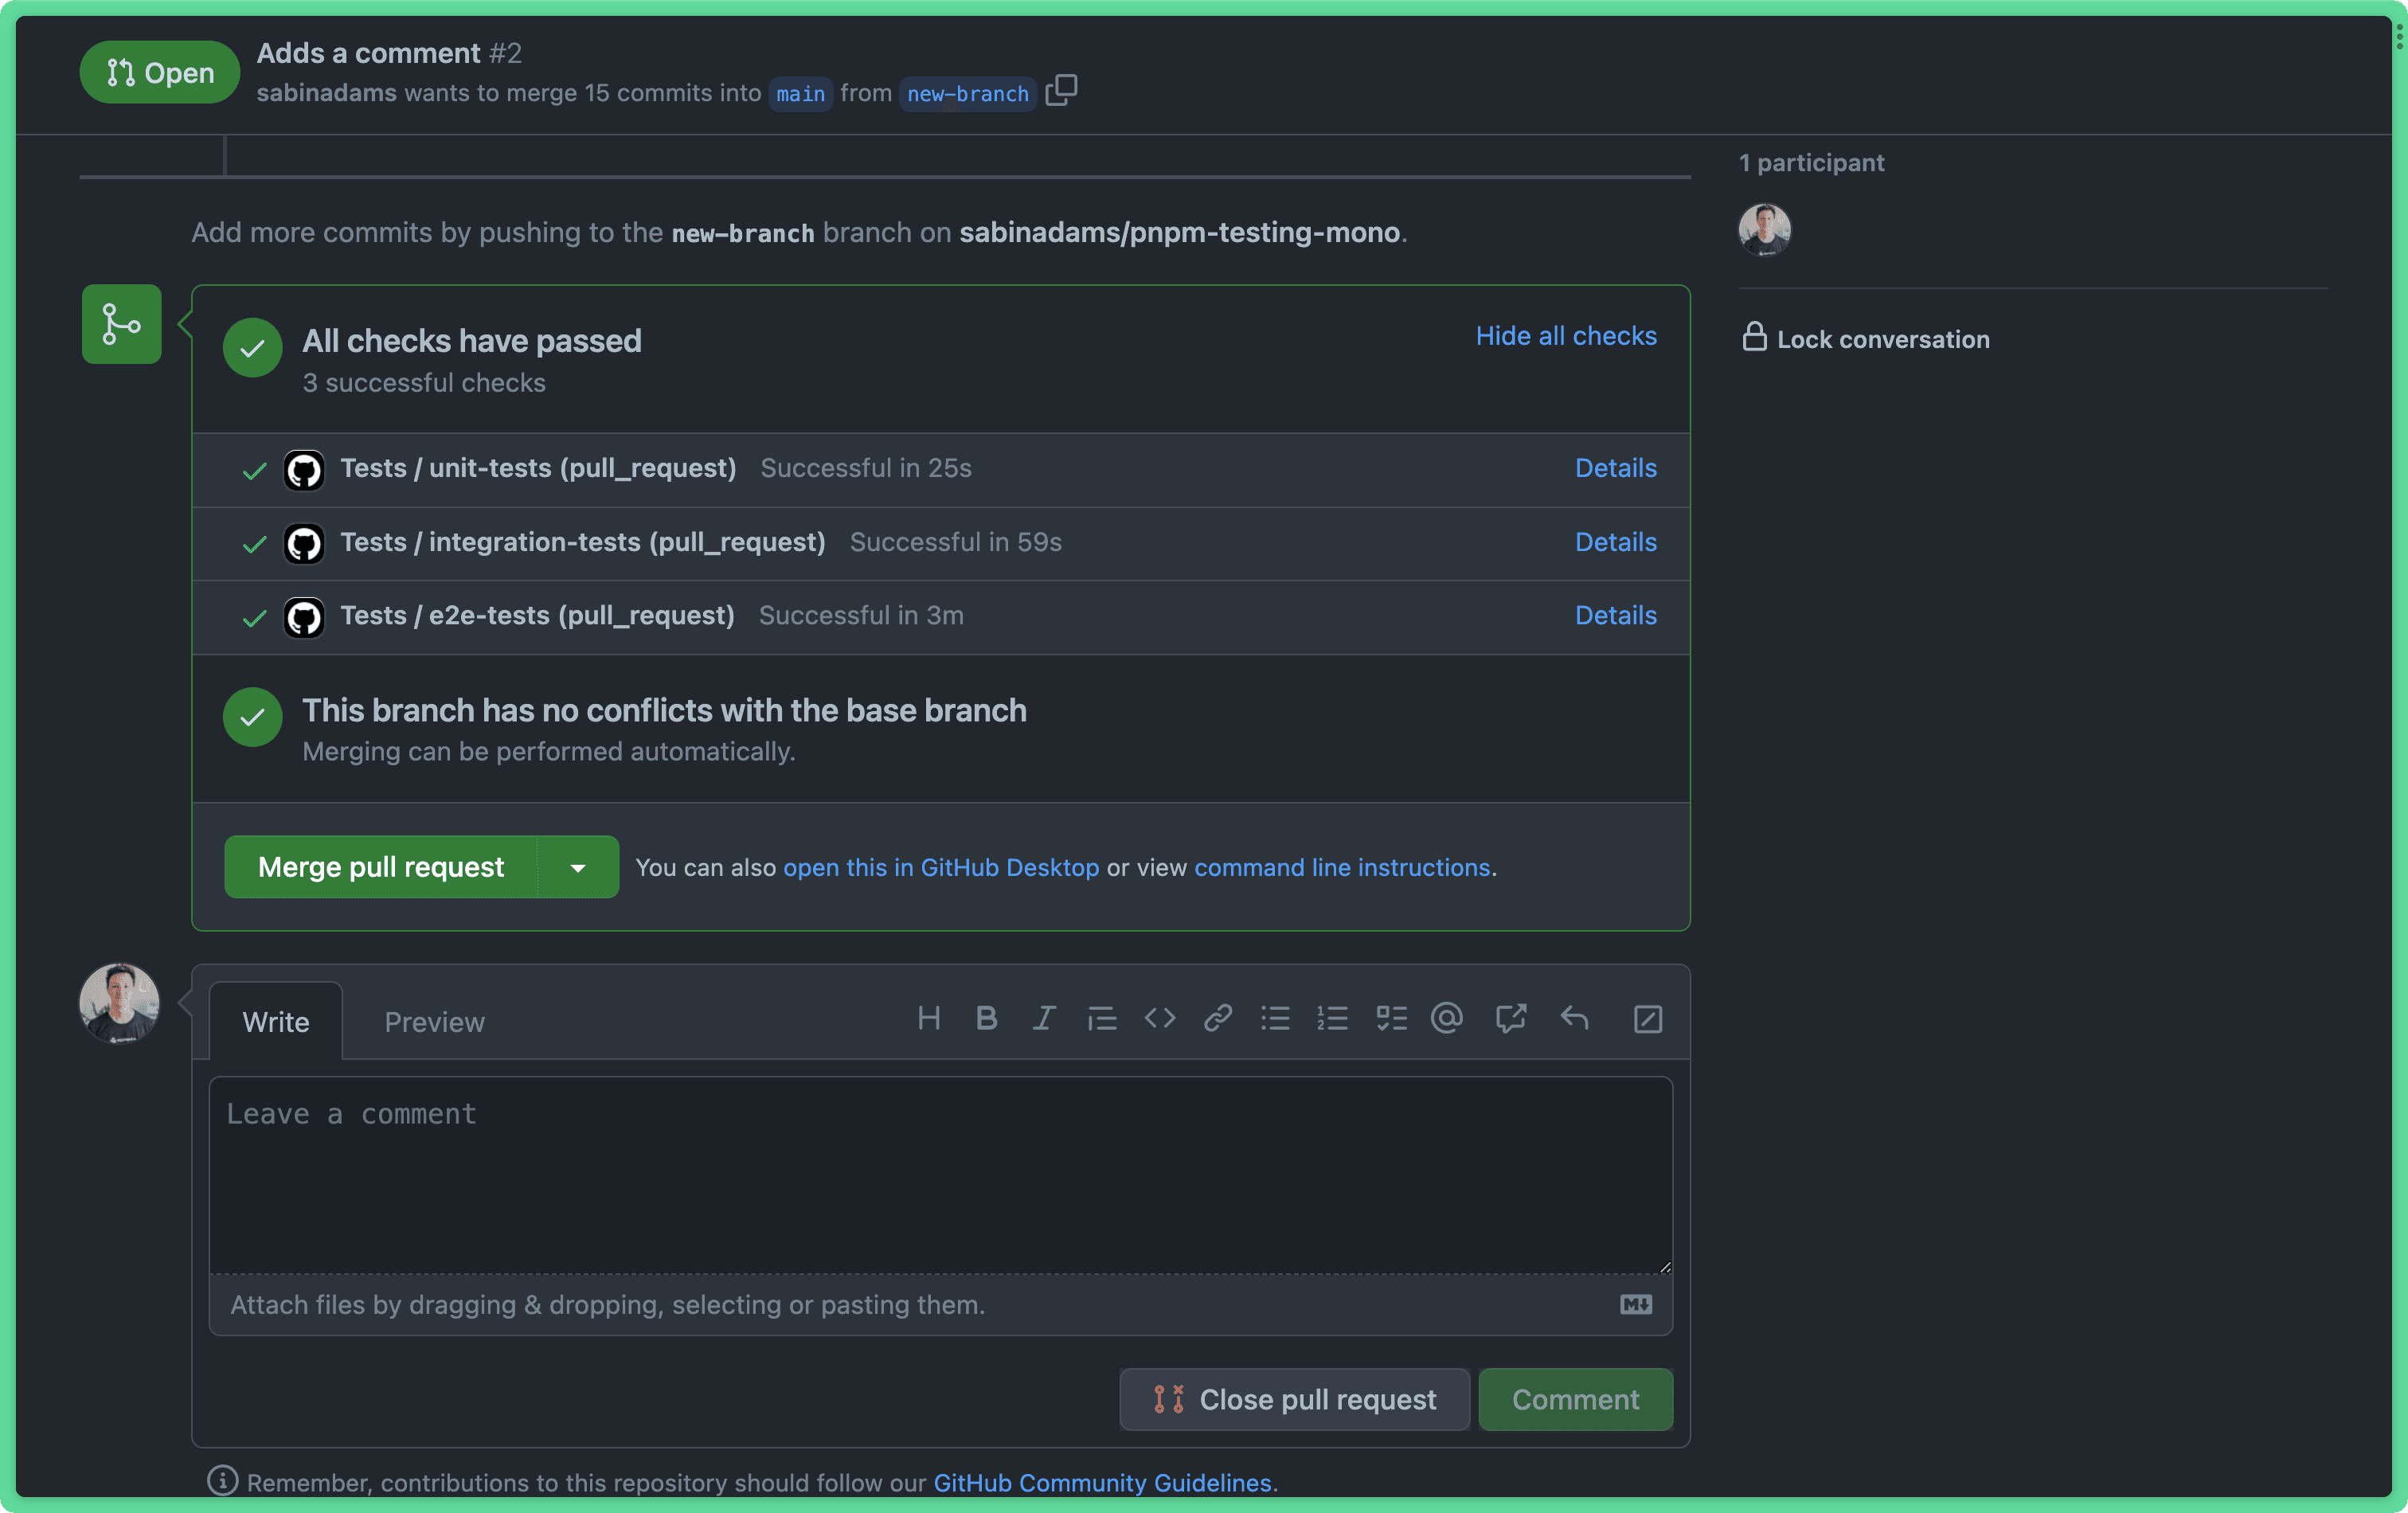
git pushIf you head back into your browser to the pull request, you should now see three jobs running in the checks.
The new job will take a long time to complete as it has to download Docker Compose and Playwright's browser, spin up the database and perform all of the tests.
Once the job completes, you should see your completed list of successful tests:
Summary & Final thoughts
In this article, you learned about continuous integration. More specifically, you learned:
- What continuous integration is
- Why it can be useful in your project
- How to use GitHub Actions to set up a CI pipeline
In the end, you had a CI pipeline that automatically ran your entire suite of tests against any branch that was associated with a pull request against the main branch.
This is powerful as it allows you to set up checks on each pull request to ensure the changes in the related branch work as intended. Using GitHub's security settings, you can also prevent merges into main when these checks are not successful.
Over the course of this series you learned all about the various kinds of tests you can run against your applications, how to write those tests against functions and apps that use Prisma to interact with a database and how to put those tests to use in your project.
If you have any questions about anything covered in this series, please feel free to reach out to me on Twitter.
Build your next app with Prisma
Start free. Scale when you’re ready.