Build A Fullstack App with Remix, Prisma & MongoDB: Authentication

Welcome to the second article of this series where you are learning how to build a full-stack application from the ground up using MongoDB, Prisma, and Remix! In this part, you will set up session-based authentication for your Remix application.
Table Of Contents
- Introduction
- Set up a login route
- Create a re-usable layout component
- Create the sign in form
- Add a sign up form
- The authentication flow
- Build the register function
- Build the login function
- Add session management
- Handle the login and register form submissions
- Authorize users on private routes
- Add form validation
- Summary & What's next
Introduction
In the last part of this series you set up your Remix project and got a MongoDB database up and running. You also configured TailwindCSS and Prisma and began to model out a User collection in your schema.prisma file.
In this part you will implement authentication in your application, allowing a user to create an account and sign in via sign in and sign up forms.
Note: The starting point for this project is available in the part-1 branch of the GitHub repository. If you'd like to see the final result of this part, head over to the part-2 branch.
Development environment
In order to follow along with the examples provided, you will be expected to ...
- ... have Node.js installed.
- ... have Git installed.
- ... have the TailwindCSS VSCode Extension installed. (optional)
- ... have the Prisma VSCode Extension installed. (optional)
Note: The optional extensions add some really nice intellisense and syntax highlighting for Tailwind and Prisma.
Set up a login route
The very first thing you need to do to kick things off is set up a /login route where your sign in and sign up forms will live.
To create a route within the Remix framework, add a file to the app/routes folder. The name of that file will be used as the name of the route. For more info on how routing works in Remix, check out their docs.
Create a new file in app/routes named login.tsx with the following contents:
// app/routes/login.tsx
export default function Login() {
  return (
    <div className="h-screen flex justify-center items-center">
      <h2 className="text-yellow-300 font-extrabold text-5xl">Login Route</h2>
    </div>
  )
}
The default export of a route file is the component Remix renders into the browser.
Start the development server using npm run dev and navigate to http://localhost:3000/login, and you should see the route rendered.
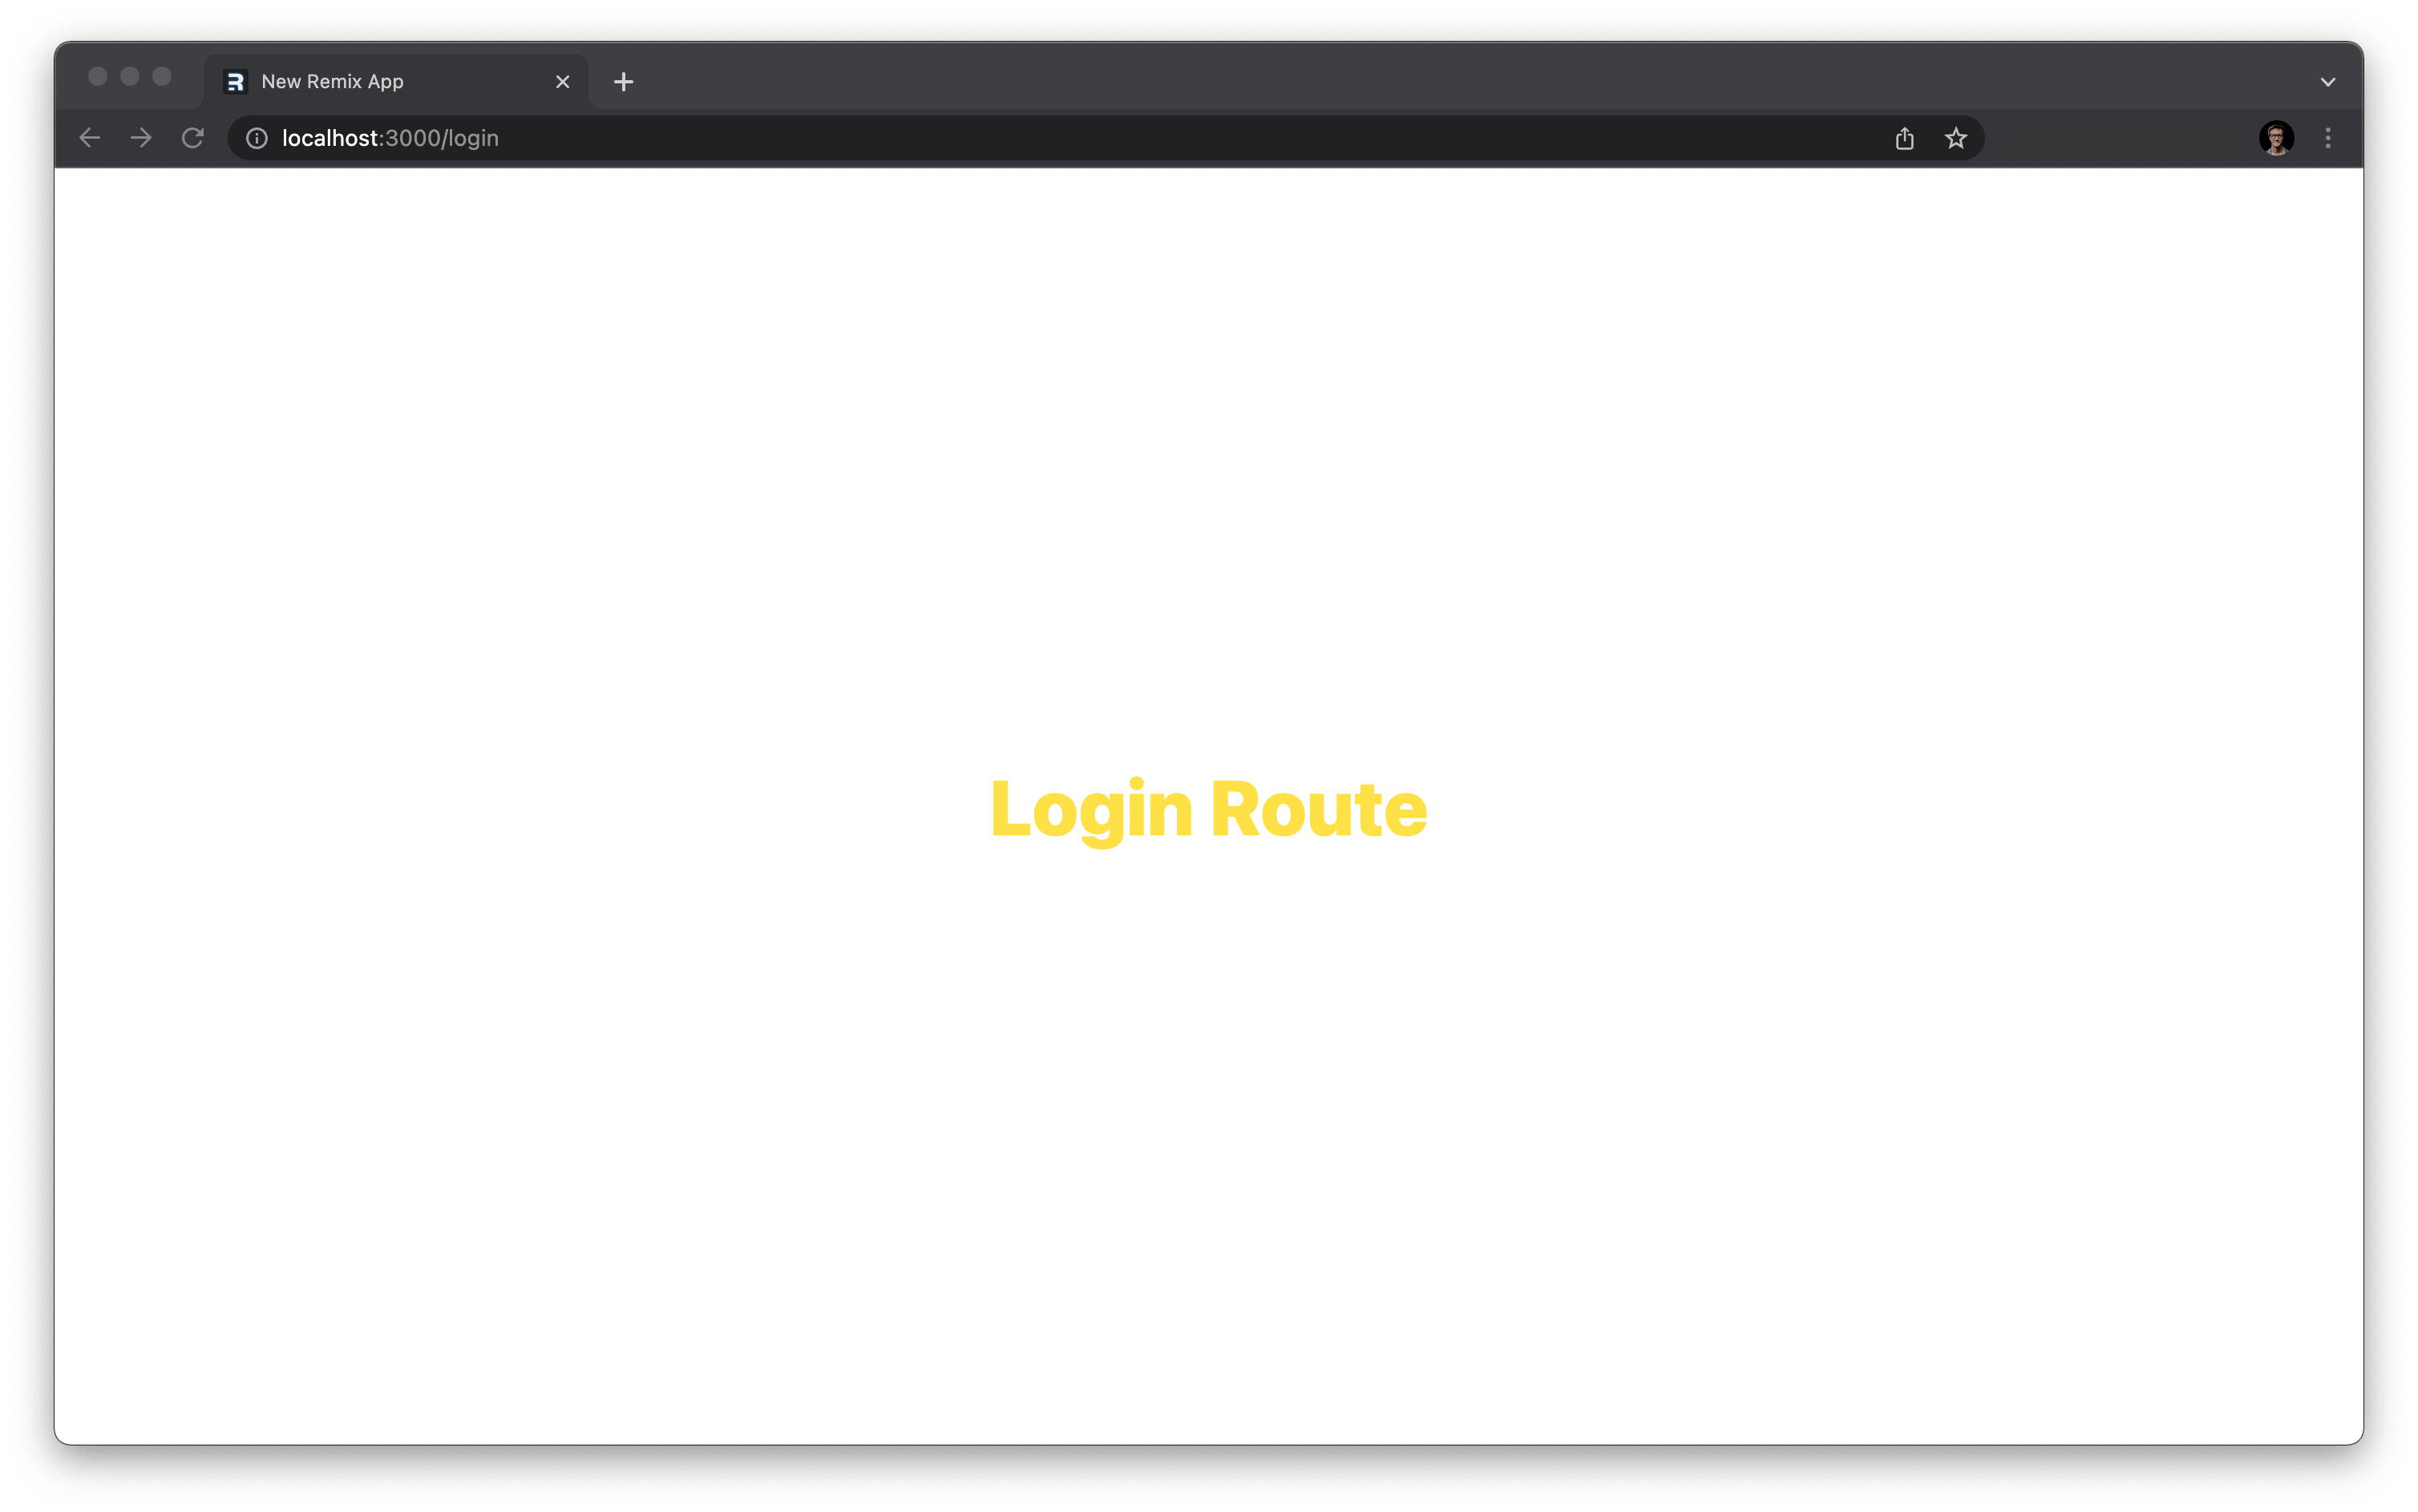
This works, but doesn't look very nice yet... Next you will spruce it up a bit by adding an actual sign in form.
Create a re-usable layout component
First, create a component you will wrap your routes in to provide some shared formatting and styling. You will use the composition pattern to create this Layout component.
To see this in action, create a new folder inside the app folder named components. Inside of that folder create a new file named layout.tsx.
In that file, export the following function component:
// app/components/layout.tsx
export function Layout({ children }: { children: React.ReactNode }) {
  return <div className="h-screen w-full bg-blue-600 font-mono">{children}</div>
}
This component uses Tailwind classes to specify you want anything wrapped in the component to take up the full width and height of the screen, use the mono font, and show a moderately dark blue as the background.
Notice the children prop is rendered inside the <div>. To see how this will get rendered when put to use, check out the snippets below:
<Layout>
  <p>Child Element</p>
</Layout><div className="h-screen w-full bg-blue-600 font-mono">
<p>Child Element</p>
</div>Create the sign in form
Now you can import that component into the app/routes/login.tsx file and wrap your <h2> tag inside of the new Layout component instead of the <div> where it currently lives:
// app/routes/login.tsx
import { Layout } from '~/components/layout'

export default function Login() {
  return (
    <Layout>
      <h2 className="text-yellow-300 font-extrabold text-5xl">Login Route</h2>
    </Layout>
  )
}
Build the form
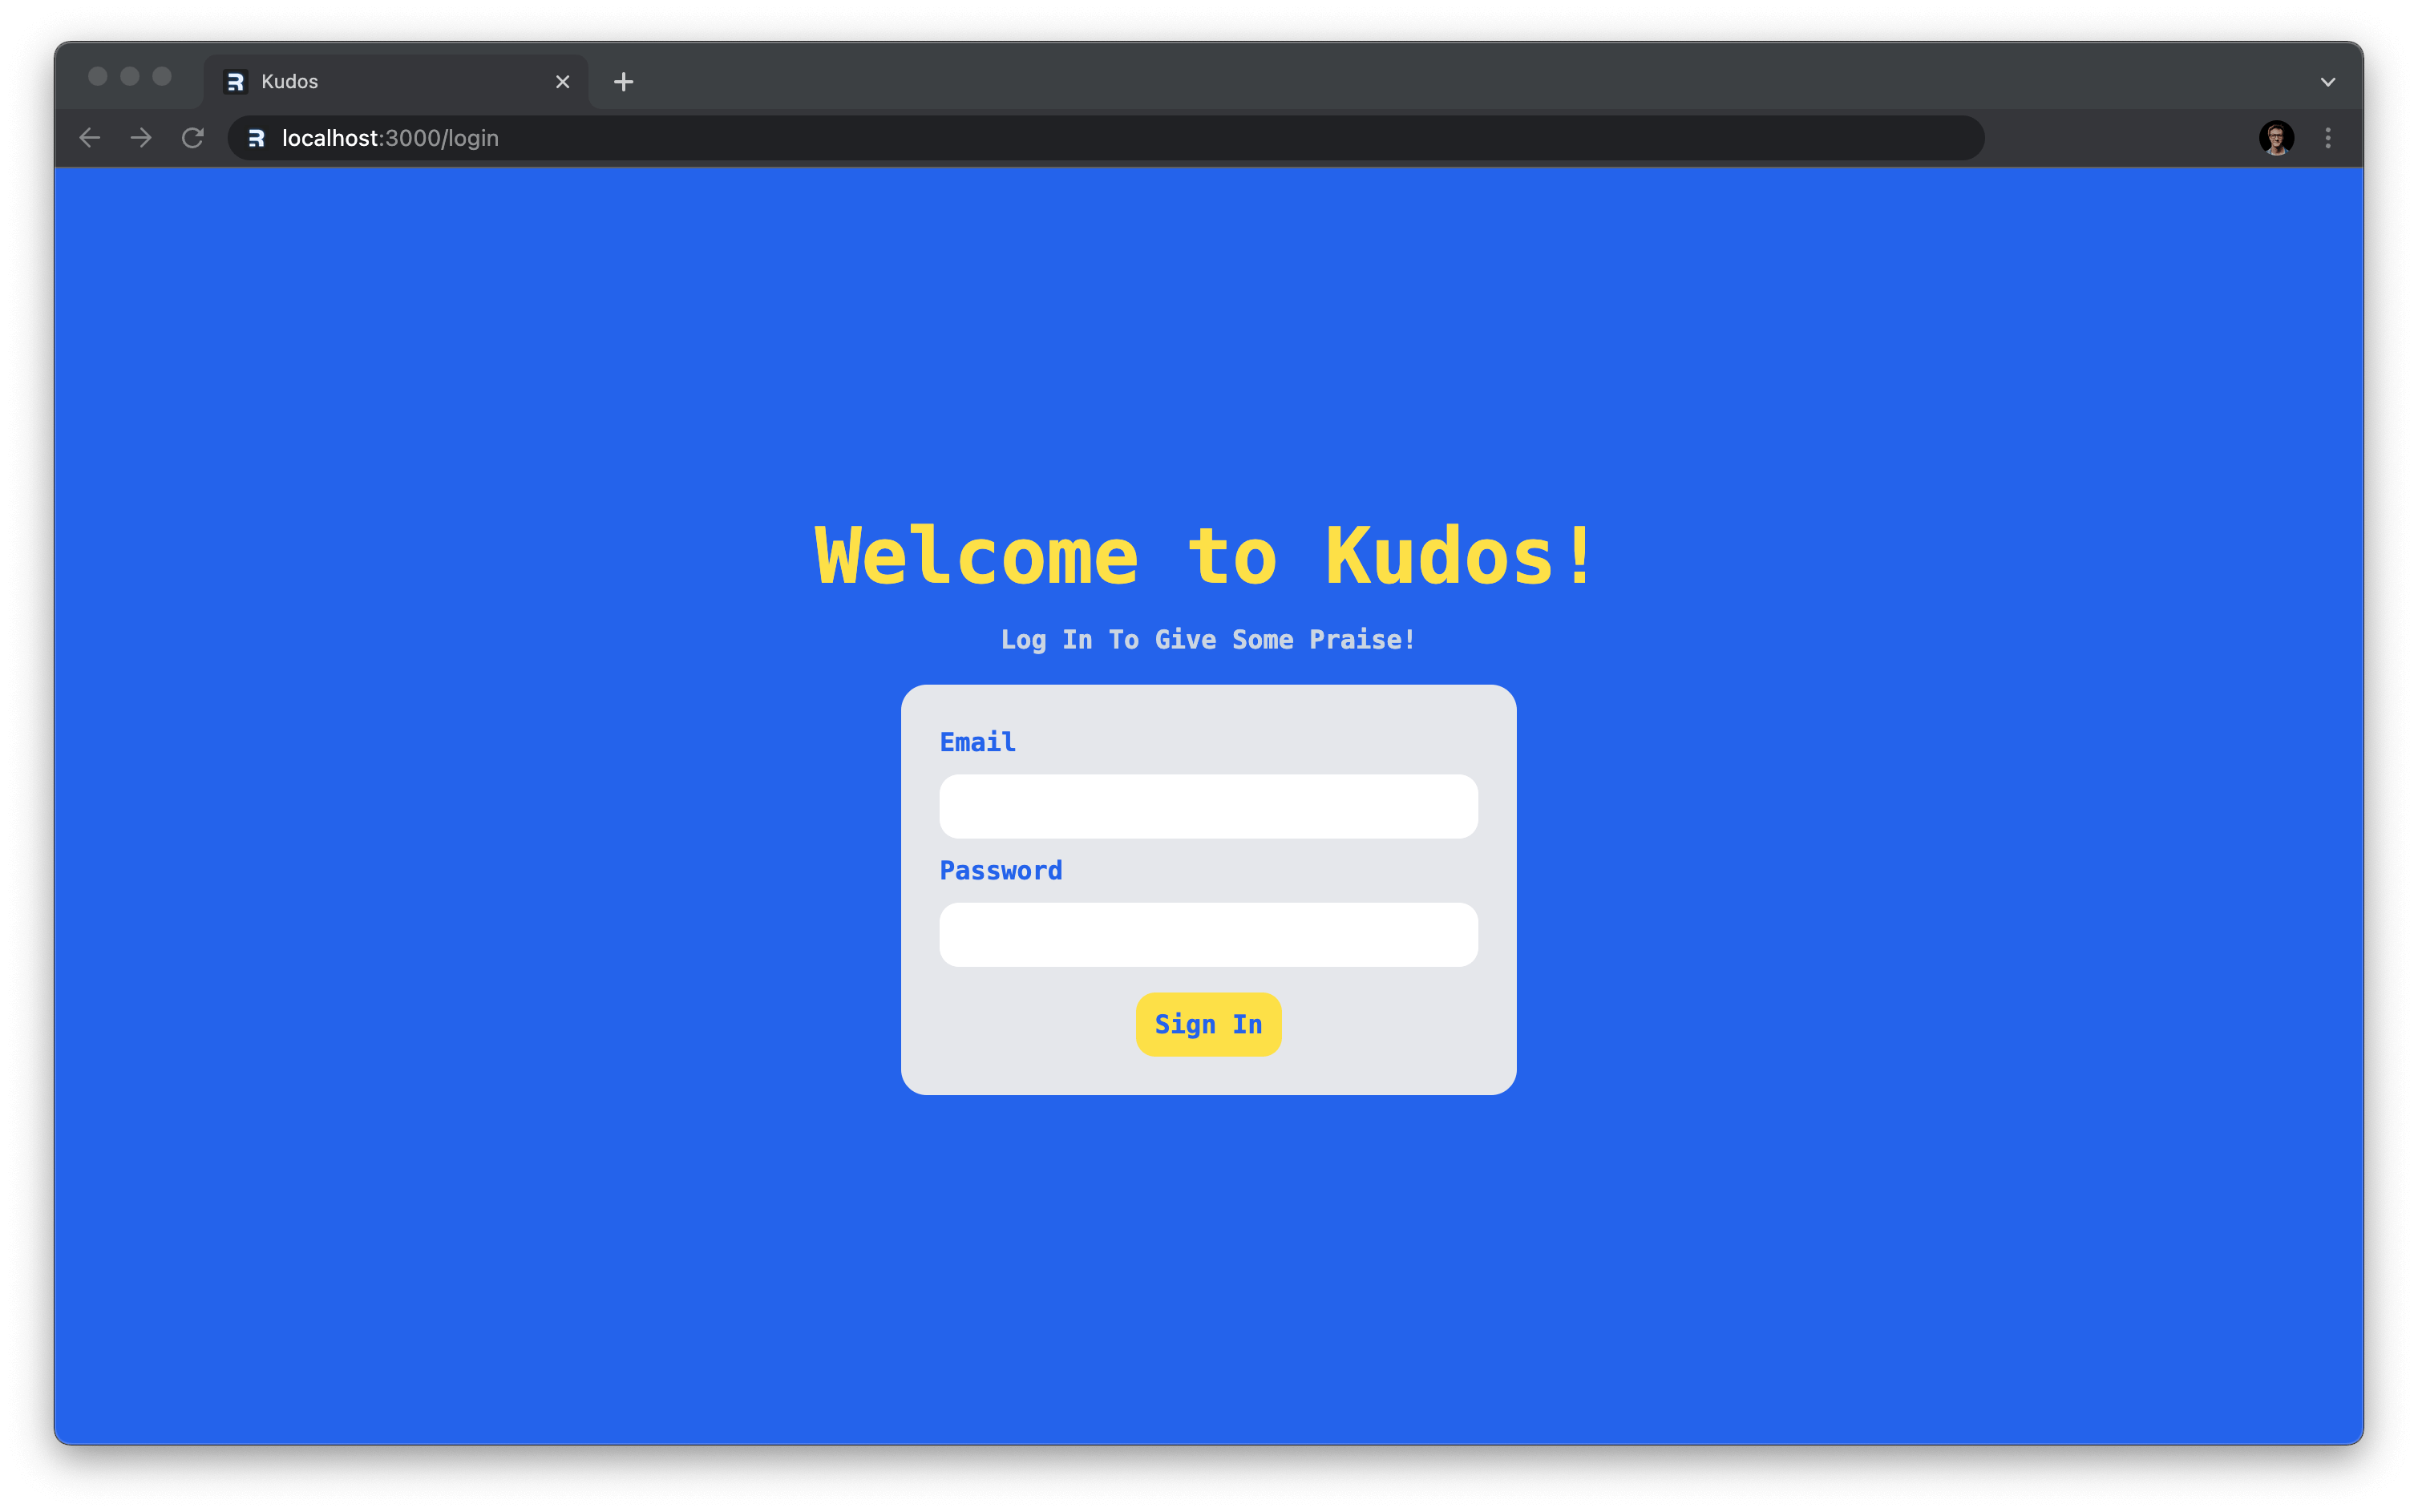
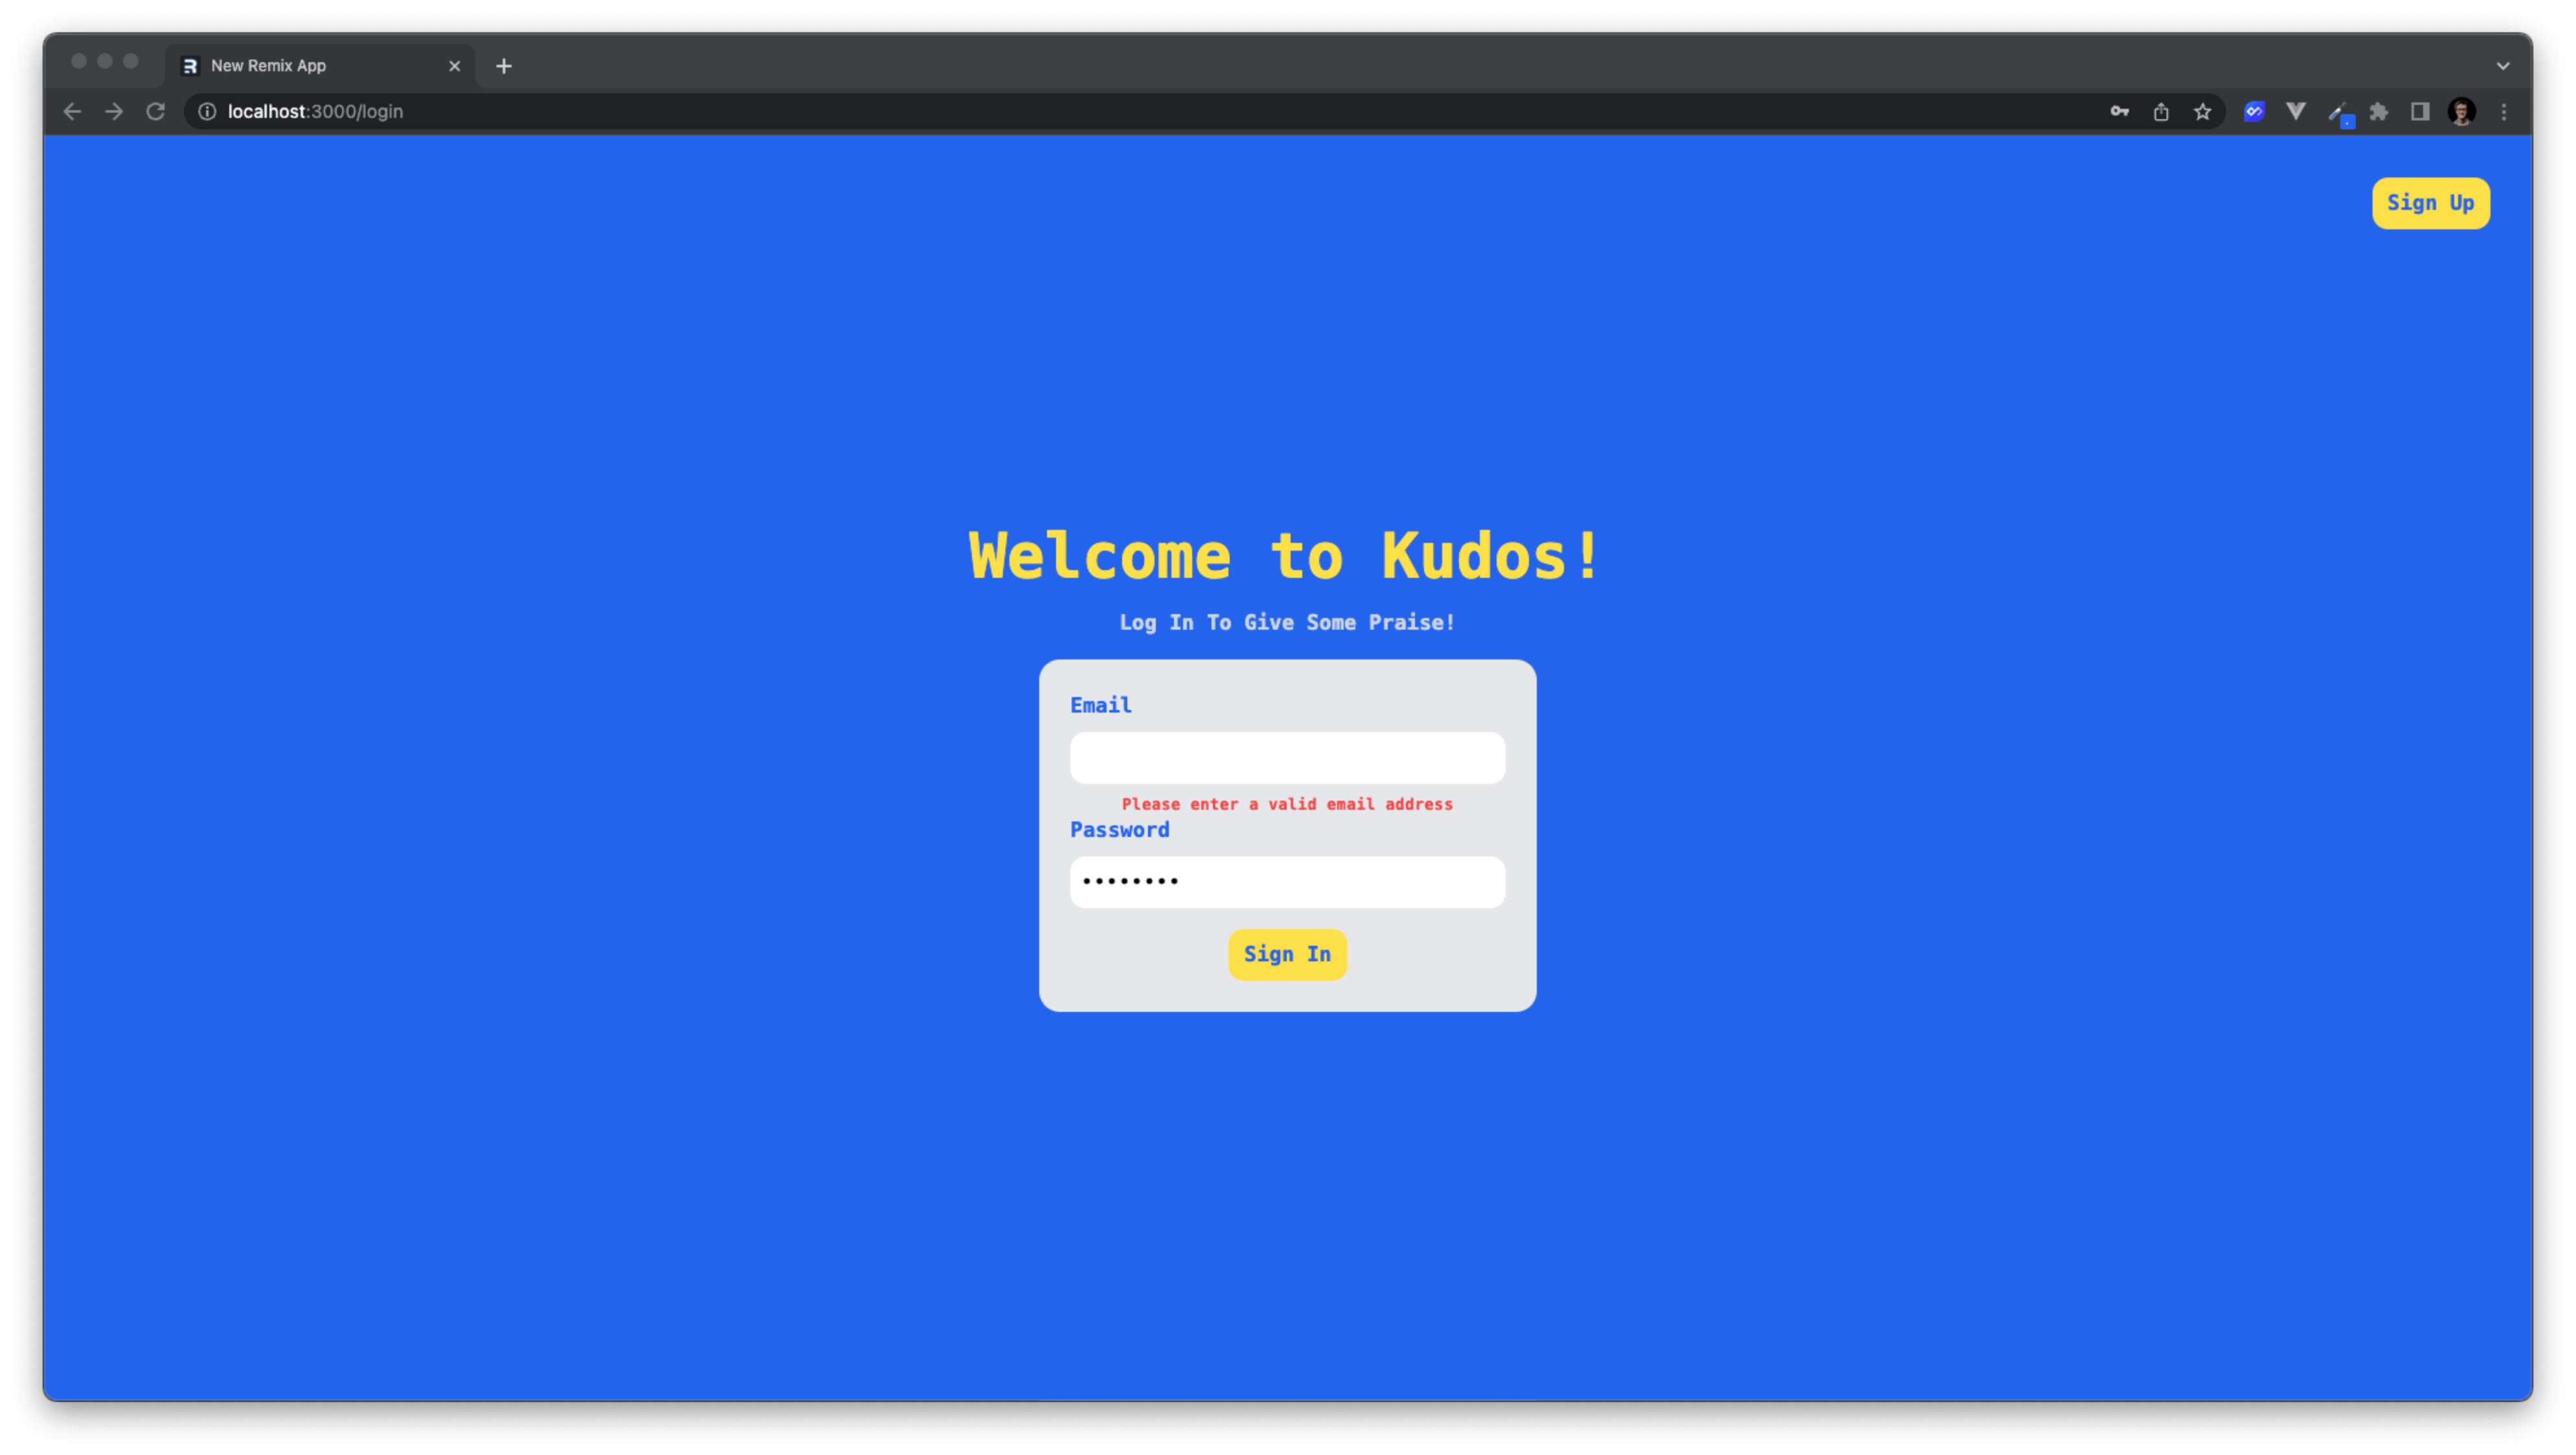
Next add a sign in form that takes in email and password inputs and displays a submit button. Add a nice welcome message at the top to greet users when they enter your site and center the entire form on the screen using Tailwind's flex classes.
// app/routes/login.tsx
import { Layout } from '~/components/layout'

export default function Login() {
  return (
    <Layout>
      <div className="h-full justify-center items-center flex flex-col gap-y-4">
        <h2 className="text-5xl font-extrabold text-yellow-300">Welcome to Kudos!</h2>
        <p className="font-semibold text-slate-300">Log In To Give Some Praise!</p>

        <form method="post" className="rounded-2xl bg-gray-200 p-6 w-96">
          <label htmlFor="email" className="text-blue-600 font-semibold">
            Email
          </label>
          <input type="text" id="email" name="email" className="w-full p-2 rounded-xl my-2" />

          <label htmlFor="password" className="text-blue-600 font-semibold">
            Password
          </label>
          <input type="password" id="password" name="password" className="w-full p-2 rounded-xl my-2" />

          <div className="w-full text-center">
            <input
              type="submit"
              className="rounded-xl mt-2 bg-yellow-300 px-3 py-2 text-blue-600 font-semibold transition duration-300 ease-in-out hover:bg-yellow-400 hover:-translate-y-1"
              value="Sign In"
            />
          </div>
        </form>
      </div>
    </Layout>
  )
}
At this point, you don't need to worry about where the <form>'s action is pointing, just that it has a method value of "post". Later on you will check out some cool Remix magic that sets up the action for us!
Create a form field component
The input fields and their labels will be re-written quite a bit throughout this application as you add more forms, so break those out into a controlled component called FormField to avoid code duplication.
Create a new file in app/components named form-field.tsx where you will build the FormField component. Then add the following code to get it started:
// app/components/form-field.tsx
interface FormFieldProps {
  htmlFor: string
  label: string
  type?: string
  value: any
  onChange?: (...args: any) => any
}

export function FormField({ htmlFor, label, type = 'text', value, onChange = () => {} }: FormFieldProps) {
  return (
    <>
      <label htmlFor={htmlFor} className="text-blue-600 font-semibold">
        {label}
      </label>
      <input
        onChange={onChange}
        type={type}
        id={htmlFor}
        name={htmlFor}
        className="w-full p-2 rounded-xl my-2"
        value={value}
      />
    </>
  )
}
This will define and export the exact same label and input combination you had before in the sign in form, except this component will have configurable options:
htmlFor: The value to use for theidandnameattributes of the input field, and thehtmlForattribute of the label.label: The text to show in the label.value: The current controlled value of the input field.type: optional Allows you to set the input field'stypeattribute, but defaults to a value of'text'.onChange: optional Allows you to provide a function to run when the input field's value is changed. Defaults to an empty function call.
You may now replace the existing labels and inputs with this component:
// app/routes/login.tsx
import { useState } from 'react'
import { Layout } from '~/components/layout'
import { FormField } from '~/components/form-field'

export default function Login() {
  const [formData, setFormData] = useState({
    email: '',
    password: '',
  })

  // Updates the form data when an input changes
  const handleInputChange = (event: React.ChangeEvent<HTMLInputElement>, field: string) => {
    setFormData(form => ({ ...form, [field]: event.target.value }))
  }

  return (
    <Layout>
      <div className="h-full justify-center items-center flex flex-col gap-y-4">
        <h2 className="text-5xl font-extrabold text-yellow-300">Welcome to Kudos!</h2>
        <p className="font-semibold text-slate-300">Log In To Give Some Praise!</p>

        <form method="POST" className="rounded-2xl bg-gray-200 p-6 w-96">
          <FormField
            htmlFor="email"
            label="Email"
            value={formData.email}
            onChange={e => handleInputChange(e, 'email')}
          />
          <FormField
            htmlFor="password"
            type="password"
            label="Password"
            value={formData.password}
            onChange={e => handleInputChange(e, 'password')}
          />
          <div className="w-full text-center">
            <input
              type="submit"
              className="rounded-xl mt-2 bg-yellow-300 px-3 py-2 text-blue-600 font-semibold transition duration-300 ease-in-out hover:bg-yellow-400 hover:-translate-y-1"
              value="Sign In"
            />
          </div>
        </form>
      </div>
    </Layout>
  )
}
This will import the new FormField component whose state will be managed by the parent (the sign in form in this case). Any updates to the values will be tracked using the handleInputChange function.
You will come back to the FormField component a little bit later to add error message handling, but this will do what it needs to for now!
Add a sign up form
You will also need a way for the user to sign up for an account, which means you'll need another form. This form will take in four values:
emailpasswordfirstNamelastName
To avoid having to create a new /signup route that looks almost identical to the /login route, repurpose the sign in form so that it can be toggled between two different actions: login and register.
Store the form action in state
First you'll need some way for the user to be able to switch between forms and for your code to be able to differentiate between the forms.
At the top of the Login component, create another variable in state to hold your action.
// app/routes/login.tsx
export default function Login() {
  const [action, setAction] = useState('login')
  // ...
}Note: The default state will be the login screen.
Next you will need some way to switch change which state you want to view. Above the "Welcome to Kudos" message, add the following button:
// app/routes/login.tsx
return (
  <Layout>
    <div className="h-full justify-center items-center flex flex-col gap-y-4">
      <button
        onClick={() => setAction(action == 'login' ? 'register' : 'login')}
        className="absolute top-8 right-8 rounded-xl bg-yellow-300 font-semibold text-blue-600 px-3 py-2 transition duration-300 ease-in-out hover:bg-yellow-400 hover:-translate-y-1"
      >
        {action === 'login' ? 'Sign Up' : 'Sign In'}
      </button>
      {/* ... */}
    </div>
  </Layout>
)
This button's text will change based on the action state. The onClick method will toggle the state back and forth between 'login' and 'register' values.
There are a few places with static text on this page that you will want to adjust depending on which form you are viewing. Specifically the "Log In To Give Some Praise!" sub-header and the "Sign In" button within the form itself.
Change the form's sub-header to show a different message on each form:
diff // app/routes/login.tsx
- <p className="font-semibold text-slate-300">Log In To Give Some Praise!</p>
+ <p className="font-semibold text-slate-300">
+  {action === 'login' ? 'Log In To Give Some Praise!' : 'Sign Up To Get Started!'}
+ </p>
Get rid of the Sign In button altogether and replace it with the following <button>:
diff // app/routes/login.tsx
- <input
-   type="submit"
-   className="rounded-xl mt-2 bg-yellow-300 px-3 py-2 text-blue-600 font-semibold transition duration-300 ease-in-out hover:bg-yellow-400 hover:-translate-y-1"
-   value="Sign In"
- />
+ <button type="submit" name="_action" value={action} className="rounded-xl mt-2 bg-yellow-300 px-3 py-2 text-blue-600 font-semibold transition duration-300 ease-in-out hover:bg-yellow-400 hover:-translate-y-1">
+    {
+        action === 'login' ? "Sign In" : "Sign Up"
+    }
+ </button>
This new button has a name and a value attribute. The value is set to whatever the state's action is. When your form is submitted, this value will be passed as along with the form data as _action.
Note: This trick only works on a
<button>if thenameattribute begins with an underscore.
Depending on the form you have selected, you should now see updated messages. Give this a try by clicking the "Sign Up" and "Sign In" buttons a few times.

Add toggleable fields
The text on this page looks great, but the same input fields are being shown on both forms. The last thing you will need is to add a few more fields when the sign up form is being shown.
Add the following fields after the password field, and be sure to add the new fields to the formData object.
// app/routes/login.tsx

// ...

export default function Login() {
  // ...
  // 1
  const [formData, setFormData] = useState({
    email: '',
    password: '',
    // 👇 New fields
    firstName: '',
    lastName: '',
  })
  // ...

  return (
    <Layout>
      <div className="h-full justify-center items-center flex flex-col gap-y-4">
        {/* ... */}
        <form method="POST" className="rounded-2xl bg-gray-200 p-6 w-96">
          {/* Other input fields ... */}
          {/* 2 */}
          {action === 'register' && (
            <>
              <FormField
                htmlFor="firstName"
                label="First Name"
                onChange={e => handleInputChange(e, 'firstName')}
                value={formData.firstName}
              />
              <FormField
                htmlFor="lastName"
                label="Last Name"
                onChange={e => handleInputChange(e, 'lastName')}
                value={formData.lastName}
              />
            </>
          )}
          {/* ... */}
        </form>
      </div>
    </Layout>
  )
}
Two changes were made here:
- You added two new keys to the
formDatastate. - You added two fields that are conditionally rendered depending on whether you are viewing the sign in or sign up form.
Your sign in and sign up forms are now visually complete! It's time to move on to the next piece: making the form functional.
The authentication flow
This section is the fun part where you will get to make everything you've been designing and building actually work!
Before moving on, however, you will need a new dependency in your project. Run the following command:
npm i bcryptjs && npm i -D @types/bcryptjsThis installs the bcryptjs library and its type definitions. You will use this later on to hash and compare passwords.
Authentication will be session-based, following the same patterns used in the authentication for Remix's Jokes App tutorial.
To better visualize what the flow of your app's authentication will look like, take a look at the graphic below.
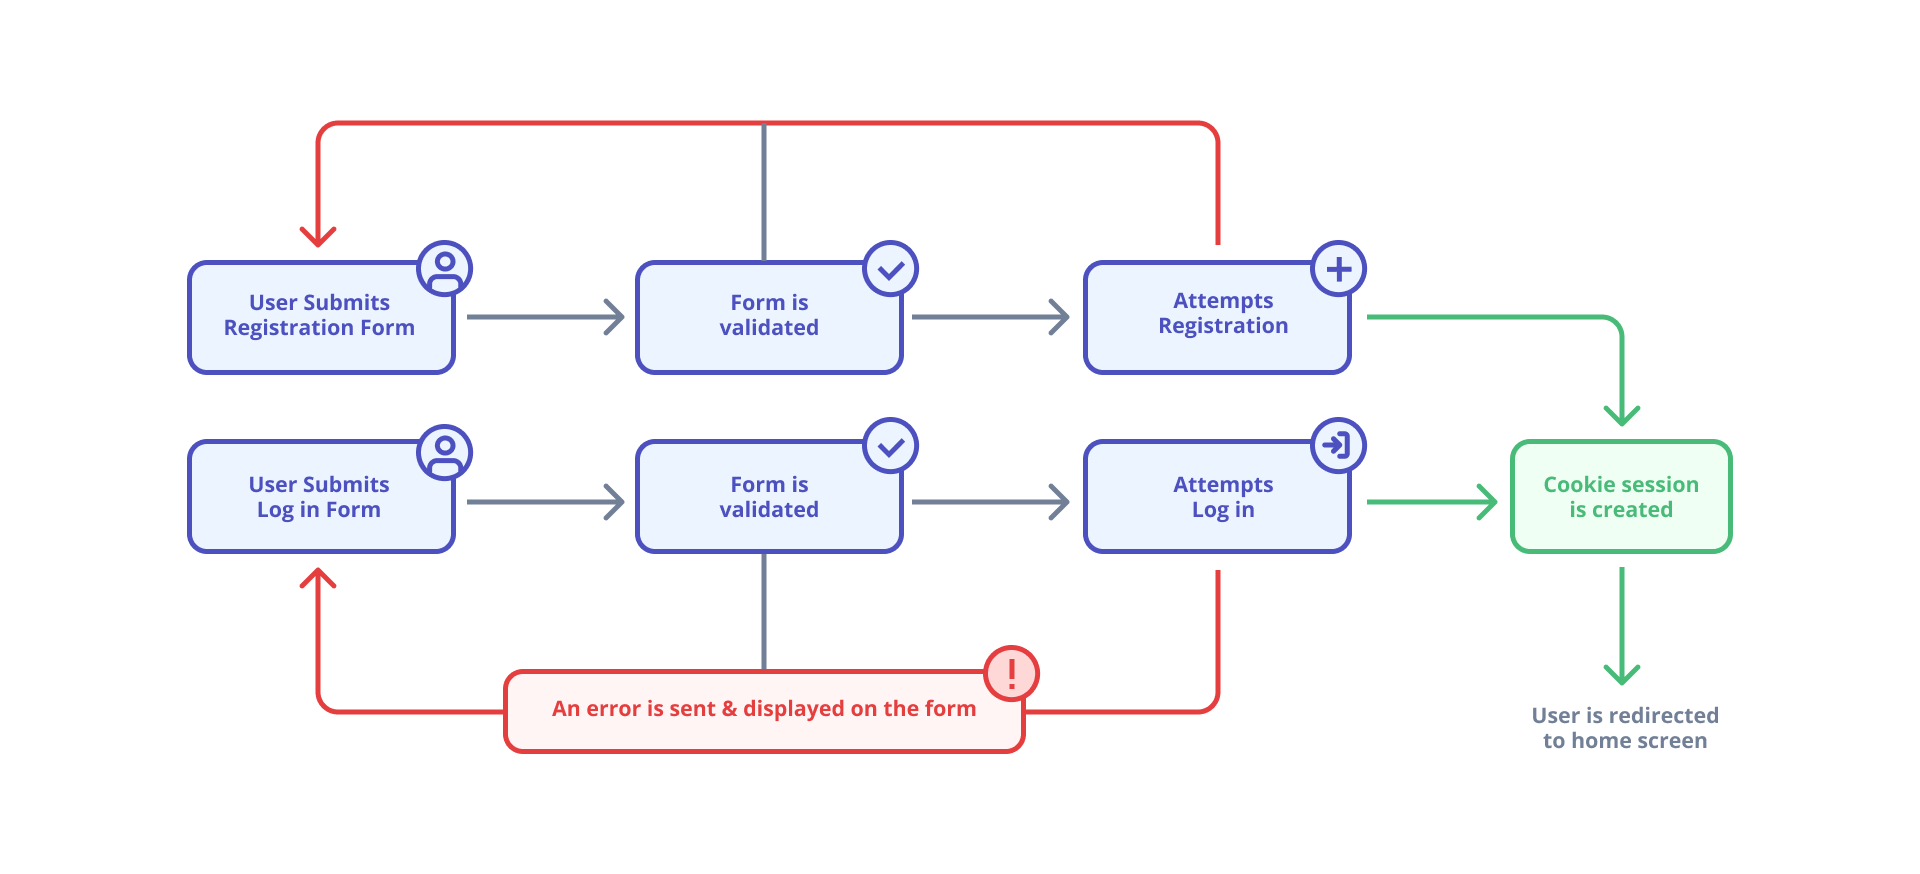
There will be a series of steps to take in order to authenticate a user, with two potential pathways (sign in and sign up):
- The user will attempt to sign in or sign up.
- The form will be validated.
- A
loginorregisterfunction will be called. - If logging in, the server-side code will ensure a user exists with the provided login details. If registering for an account, it will make sure an account does not already exist with the provided email.
- If the above steps passed, a new cookie session will be created and the user will be redirected to the home page.
- If a step did not pass and there was an issue, the user will be sent back to the login or register screen and an error will be displayed.
To start this off, create a folder within the app directory named utils. Here you will store any helpers, services and configuration files.
Inside that new folder, create a file named auth.server.ts where you will write your authentication and session-related methods.
Note: Remix will not bundle files with
.serverbefore its file type with the code that is sent to the browser.
Build the register function
The first function you will build is the register function, which will allow a user to create a new account.
Export an async function from app/utils/auth.server.ts named register:
// app/utils/auth.server.ts
export async function register() {}
Create and export a type defining the fields the register form will provide in another new file within app/utils named types.server.ts.
// app/utils/types.server.ts
export type RegisterForm = {
  email: string
  password: string
  firstName: string
  lastName: string
}
Import that type into app/utils/auth.server.ts and use it in the register function to describe a user parameter, which will contain the sign up form's data:
// app/utils/auth.server.ts
import type { RegisterForm } from './types.server'
export async function register(user: RegisterForm) {}
When this register function is called and supplied a user, the first thing you will need to check is whether or not a user already exists with the email provided.
Note: Remember, the
Create an instance of PrismaClient
You will be using PrismaClient to perform database queries, however there is not yet an instance of it available to your application.
Create a new file in the app/utils folder named prisma.server.ts where you will create and export an instance of Prisma Client:
// app/utils/prisma.server.ts
import { PrismaClient } from '@prisma/client'

let prisma: PrismaClient
declare global {
  var __db: PrismaClient | undefined
}

if (process.env.NODE_ENV === 'production') {
  prisma = new PrismaClient()
  prisma.$connect()
} else {
  if (!global.__db) {
    global.__db = new PrismaClient()
    global.__db.$connect()
  }
  prisma = global.__db
}

export { prisma }Note: There are precautions put into place above that prevent live-reloads from saturating your database with connections while developing.
You now have a way to access your database. In app/utils/auth.server.ts, import the instantiated PrismaClient and add the following to the register function:
// app/utils/auth.server.ts

import type { RegisterForm } from './types.server'
import { prisma } from './prisma.server'
import { json } from '@remix-run/node'

export async function register(user: RegisterForm) {
  const exists = await prisma.user.count({ where: { email: user.email } })
  if (exists) {
    return json({ error: `User already exists with that email` }, { status: 400 })
  }
}
The register funciton will now query for any user in your database with the email provided.
The count function was used here becuase it returns a numeric value. If there are no records matching the query, it will return 0 which evaluates to false. Otherwise, a value greater than 0 will be returned which evaluates to true.
If a user is found, the function will return a json response with a 400 status code.
Update your data model
Now you can be sure when a user attempts to sign up that another user will not already exist with the provided email. Next the register function should create a new user. There are a few fields we will be storing, however, that do not yet exist in the Prisma schema (firstName and lastName).
You will store this data in a field containing an embedded document within the User model named profile.
Open your prisma/schema.prisma file and add the following type block:
// ./prisma/schema.prisma

// ...

type Profile {
  firstName String
  lastName  String
}
The type keyword is used to define a composite type – allowing you to define a document inside the document. The benefit of using a composite type over a JSON type is that you get type-safety when querying documents.
This is super helpful as it gives you the capability of explicitly defining the shape of data that would otherwise have been fluid and capable of containing anything due to MongoDB's flexible nature.
You have not yet used this new composite type (another name for an embedded document) to describe a field. In your User model, add a new profile field and use the Profile type as its data type:
// ./prisma/schema.prisma

// ...

model User {
  id        String   @id @default(auto()) @map("_id") @db.ObjectId
  createdAt DateTime @default(now())
  updatedAt DateTime @updatedAt
  email     String   @unique
  password  String
  profile   Profile  // 👈
}

// ...
Awesome, your User model will now contain a profile embedded document. Re-generate Prisma Client to account for these new changes:
npx prisma generateNote: You do not need to run
prisma db pushbecause you have not added any new collections or indexes.
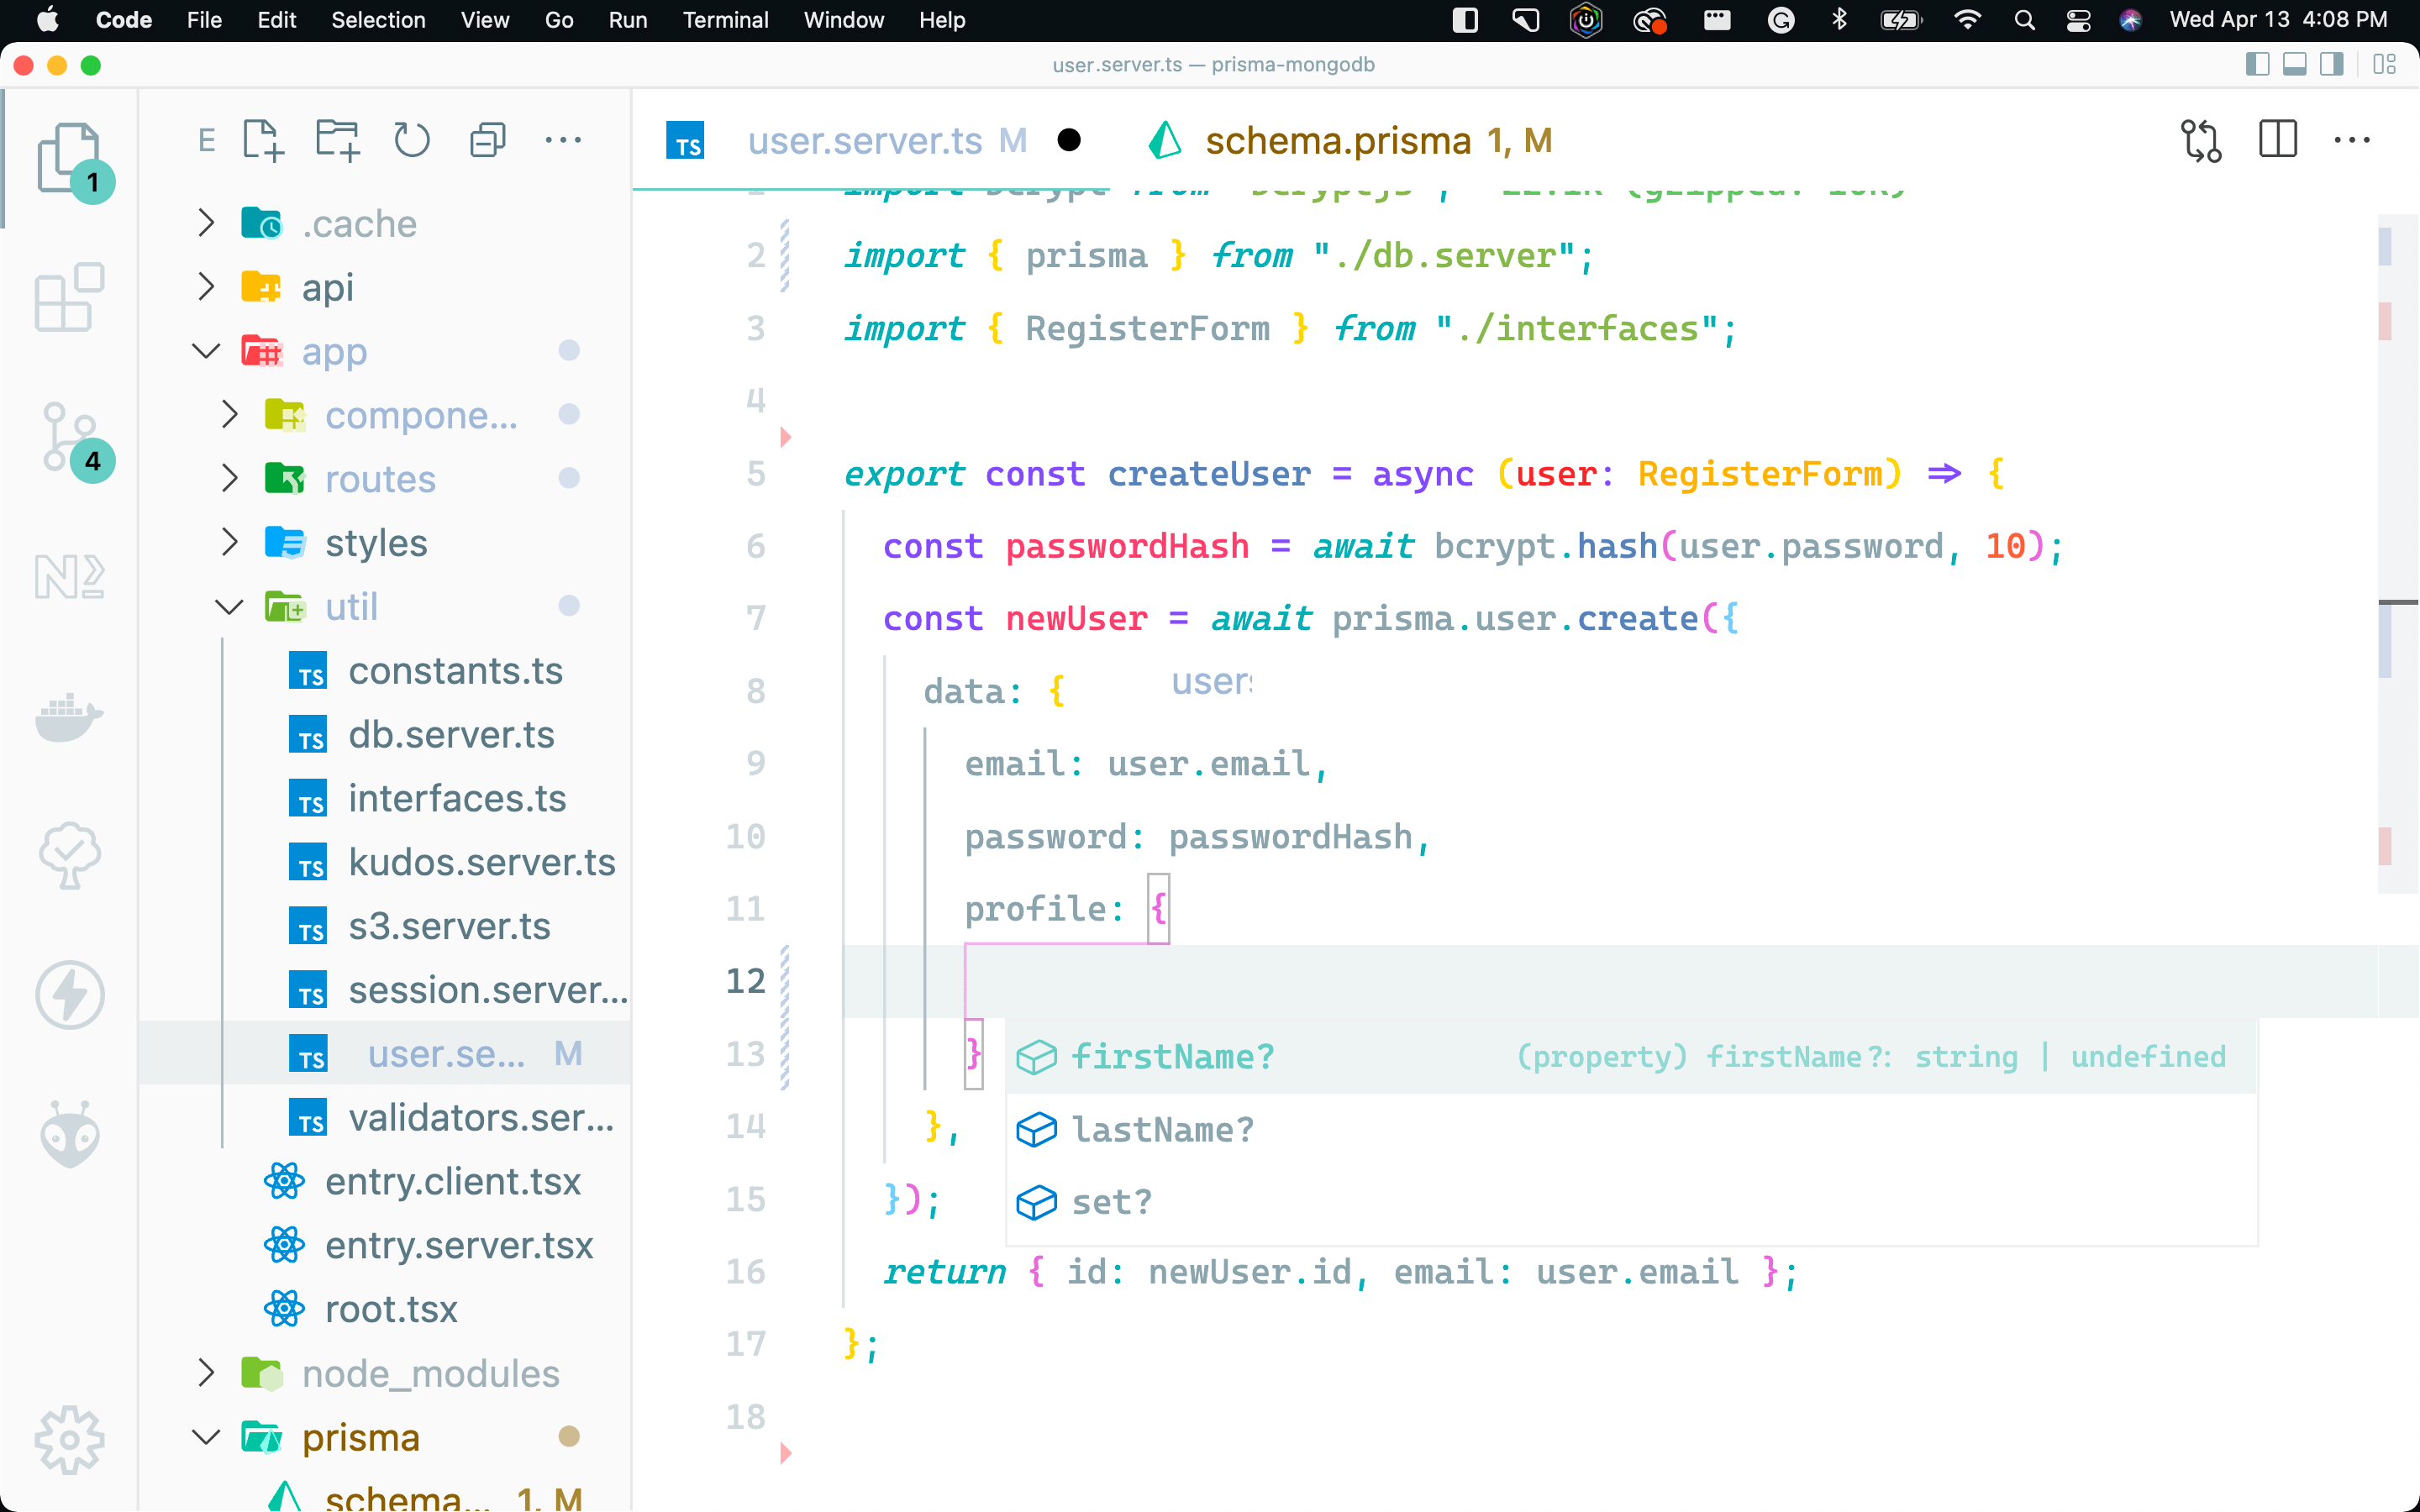
Add a user service
Create another file in app/utils named user.server.ts where any user-specific functions will be written. In that file add the following function and imports:
// app/utils/user.server.ts
import bcrypt from 'bcryptjs'
import type { RegisterForm } from './types.server'
import { prisma } from './prisma.server'

export const createUser = async (user: RegisterForm) => {
  const passwordHash = await bcrypt.hash(user.password, 10)
  const newUser = await prisma.user.create({
    data: {
      email: user.email,
      password: passwordHash,
      profile: {
        firstName: user.firstName,
        lastName: user.lastName,
      },
    },
  })
  return { id: newUser.id, email: user.email }
}
This createUser function does a couple of things:
- It hashes the password provided in the registration form because you should not store it as plain-text.
- It stores the new
Userdocument using Prisma. - It returns the
idandemailof the new user.
Note: You were able to fill in the details of the
profileembedded document directly in this query by passing in a JSON object, and you will see some nice autocompletion because of the typings Prisma generates.
This function will be used in your register function to handle the actual creation of a user. Over in app/utils/auth.server.ts import the new createUser function and invoke it within the register function.
diff // app/utils/auth.server.ts

import { json } from '@remix-run/node'
import type { RegisterForm } from './types.server'
import { prisma } from './prisma.server'
+import { createUser } from './user.server'


export async function register(user: RegisterForm) {
  const exists = await prisma.user.count({ where: { email: user.email } })
  if (exists) {
    return json({ error: `User already exists with that email` }, { status: 400 })
  }


+  const newUser = await createUser(user)
+  if (!newUser) {
+    return json(
+      {
+        error: `Something went wrong trying to create a new user.`,
+        fields: { email: user.email, password: user.password },
+      },
+      { status: 400 },
+    )
+  }
}
Now, when a user registers, if another user does not already exist with the provided email a new one will be created. If something goes wrong during the creation of the user, an error will be returned to the client along with the values that were passed in for the email and password.
Build the login function
The login function will take in an email and a password, so to start this function off, create a new LoginForm type to describe that data in app/utils/types.server.ts:
// app/utils/types.server.ts

// ...

export type LoginForm = {
  email: string
  password: string
}
Then create the login function by adding the following to app/utils/auth.server.ts:
// app/utils/auth.server.ts

// 1
import { RegisterForm, LoginForm } from './types.server'
import bcrypt from 'bcryptjs'

//...

export async function login({ email, password }: LoginForm) {
  // 2
  const user = await prisma.user.findUnique({
    where: { email },
  })

  // 3
  if (!user || !(await bcrypt.compare(password, user.password)))
    return json({ error: `Incorrect login` }, { status: 400 })

  // 4
  return { id: user.id, email }
}
The code above ...
- ... imports the new
typeand thebcryptjslibrary. - ... queries for a user with a matching email.
- ... returns a
nullvalue if no user is found or the password provided doesn't match the hashed value in the database. - ... returns the user's
idandemailif all goes well.
This will ensure the correct credentials were provided and will give you back the data needed to create a new cookie session.
Add session management
You now need a way to generate a cookie session for the user when they sign in or register for an account. Remix provides an easy way to store those cookie sessions with their createCookieSessionStorage function.
Import that function into app/utils/auth.server.ts and add a new cookie session storage directly after your imports:
// app/utils/auth.server.ts

// Added the createCookieSessionStorage function 👇
import { json, createCookieSessionStorage } from '@remix-run/node'

// ...

const sessionSecret = process.env.SESSION_SECRET
if (!sessionSecret) {
  throw new Error('SESSION_SECRET must be set')
}

const storage = createCookieSessionStorage({
  cookie: {
    name: 'kudos-session',
    secure: process.env.NODE_ENV === 'production',
    secrets: [sessionSecret],
    sameSite: 'lax',
    path: '/',
    maxAge: 60 * 60 * 24 * 30,
    httpOnly: true,
  },
})

// login & register functions...
The code above creates a session storage with a couple of settings:
name: The name of the cookie.secure: Iftrue, only allows the cookie to be sent over HTTPS.secrets: The session's secret.sameSite: Specifies whether or not the cookie may be sent over cross-site requests.path: A path that must exist in the URL to send a cookie.maxAge: Defines a period of time the cookie is allowed to live before being automatically deleted.httpOnly: Iftrue, does not allow JavaScript to access the cookie.
Note: Learn more about the different cookie options here.
You will also need to set up a session secret in the .env file. Add a variable named SESSION_SECRET with a secret value. For example:
// .env
SESSION_SECRET="supersecretvalue"
The session storage is now set up. Create one more function in app/utils/auth.server.ts that will actually create the cookie session:
// app/utils/auth.server.ts

// 👇 Added the redirect function
import { redirect, json, createCookieSessionStorage } from '@remix-run/node'

// ...

export async function createUserSession(userId: string, redirectTo: string) {
  const session = await storage.getSession()
  session.set('userId', userId)
  return redirect(redirectTo, {
    headers: {
      'Set-Cookie': await storage.commitSession(session),
    },
  })
}
This function ...
- ... creates a new session.
- ... sets the
userIdof that session to theidof the logged in user. - ... redirects the user to a route you can specify when calling this function.
- ... commits the session when setting the cookie header.
The createUserSession function can now be used in the register and login functions when a user successfully registers or signs in.
diff // app/utils/auth.server.ts
export async function register(user: RegisterForm) {
  const exists = await prisma.user.count({ where: { email: user.email } });
  if (exists) {
    return json(
      { error: `User already exists with that email` },
      { status: 400 }
    );
  }

  const newUser = await createUser(user);
  if (!newUser) {
    return json(
      {
        error: `Something went wrong trying to create a new user.`,
        fields: { email: user.email, password: user.password },
      },
      { status: 400 }
    );
  }

+  return createUserSession(newUser.id, '/');
}

export async function login({ email, password }: LoginForm) {
  const user = await prisma.user.findUnique({
    where: { email },
  });


  if (!user || !(await bcrypt.compare(password, user.password)))
    return json({ error: `Incorrect login` }, { status: 400 });


-  return { id: user.id, email }
+  return createUserSession(user.id, "/");
}
Handle the login and register form submissions
You have created all of the functions needed to create new users and log them in. Now you will put those to use in the forms you built.
In app/routes/login.tsx, export an action function.
// app/routes/login.tsx

// ...

import { ActionFunction } from '@remix-run/node'
export const action: ActionFunction = async ({ request }) => {}

// ...Note: Remix looks for an exported function named
actionto set up a POST request on the route you are defining.
Now create a couple of validator functions in a new file inside of app/utils named validators.server.ts that will be used to validate the form input.
// app/utils/validators.server.ts

export const validateEmail = (email: string): string | undefined => {
  var validRegex = /^[a-zA-Z0-9.!#$%&'*+/=?^_`{|}~-]+@[a-zA-Z0-9-]+(?:\.[a-zA-Z0-9-]+)*$/;
  if (!email.length || !validRegex.test(email)) {
    return "Please enter a valid email address"
  }
}

export const validatePassword = (password: string): string | undefined => {
  if (password.length < 5) {
    return "Please enter a password that is at least 5 characters long"
  }
}

export const validateName = (name: string): string | undefined => {
  if (!name.length) return `Please enter a value`
}
Within the action function in app/routes/login.tsx, grab the form data from the request and validate it is of the correct format.
// app/routes/login.tsx
// ...
// Added the json function 👇
import { ActionFunction, json } from '@remix-run/node'
import { validateEmail, validateName, validatePassword } from '~/utils/validators.server'

export const action: ActionFunction = async ({ request }) => {
  const form = await request.formData()
  const action = form.get('_action')
  const email = form.get('email')
  const password = form.get('password')
  let firstName = form.get('firstName')
  let lastName = form.get('lastName')

  if (typeof action !== 'string' || typeof email !== 'string' || typeof password !== 'string') {
    return json({ error: `Invalid Form Data`, form: action }, { status: 400 })
  }

  if (action === 'register' && (typeof firstName !== 'string' || typeof lastName !== 'string')) {
    return json({ error: `Invalid Form Data`, form: action }, { status: 400 })
  }

  const errors = {
    email: validateEmail(email),
    password: validatePassword(password),
    ...(action === 'register'
      ? {
          firstName: validateName((firstName as string) || ''),
          lastName: validateName((lastName as string) || ''),
        }
      : {}),
  }

  if (Object.values(errors).some(Boolean))
    return json({ errors, fields: { email, password, firstName, lastName }, form: action }, { status: 400 })
}

// ...
The code above may look a bit scary, but in a nutshell it ...
- ... pulls the form data out of the request object.
- ... ensures an
emailandpasswordwere provided. - ... ensures
firstNameandlastNamewere provided if the_actionvalue is"register". - ... returns an error along with the form field values if any problems occur so you can re-populate the form with the user's input and an error message later on if any of those fields are invalid.
The last thing you will need is to actually run your register and login functions if the inputs look good.
// app/routes/login.tsx
// ...
import { login, register } from '~/utils/auth.server'
export const action: ActionFunction = async ({ request }) => {

  // validation ...

  switch (action) {
    case 'login': {
        return await login({ email, password })
    }
    case 'register': {
        firstName = firstName as string
        lastName = lastName as string
        return await register({ email, password, firstName, lastName })
    }
    default:
        return json({ error: `Invalid Form Data` }, { status: 400 });
  }

// ...
The switch statement will allow you to conditionally run the login and register functions depending on what the _action value from the form contains.
In order to actually trigger this action, the forms need to post to this route. Fortunately, Remix will take care of this, as it automatically configures POST requests to the /login route when it recognizes the exported action function.
If you try to log in or create an account, you should see you are sent to the main screen afterwards. Success! 🎉
Authorize users on private routes
The next thing you will do to make the user's experience much nicer is automatically redirect users to the home or login page depending on whether or not they have a valid session.
In app/utils/auth.server.ts you will need to add a few helper functions.
// app/utils/auth.server.ts
// ...

export async function requireUserId(request: Request, redirectTo: string = new URL(request.url).pathname) {
  const session = await getUserSession(request)
  const userId = session.get('userId')
  if (!userId || typeof userId !== 'string') {
    const searchParams = new URLSearchParams([['redirectTo', redirectTo]])
    throw redirect(`/login?${searchParams}`)
  }
  return userId
}

function getUserSession(request: Request) {
  return storage.getSession(request.headers.get('Cookie'))
}

async function getUserId(request: Request) {
  const session = await getUserSession(request)
  const userId = session.get('userId')
  if (!userId || typeof userId !== 'string') return null
  return userId
}

export async function getUser(request: Request) {
  const userId = await getUserId(request)
  if (typeof userId !== 'string') {
    return null
  }

  try {
    const user = await prisma.user.findUnique({
      where: { id: userId },
      select: { id: true, email: true, profile: true },
    })
    return user
  } catch {
    throw logout(request)
  }
}

export async function logout(request: Request) {
  const session = await getUserSession(request)
  return redirect('/login', {
    headers: {
      'Set-Cookie': await storage.destroySession(session),
    },
  })
}
This is a lot of new functionality. Here is what the functions above will do:
requireUserIdchecks for a user's session. If one exists, it is a success and just returns theuserId. If it fails, however, it will redirect the user to the login screen.getUserSessiongrabs the current user's session based on the request's cookie.getUserIdreturns the current user'sidfrom the session storage.getUserreturns the wholeuserdocument associated with the current session. If one is not found, the user is logged out.logoutdestroys the current session and redirects the user to the login screen.
With these in place, you can implement some nice authorization on your private routes.
In app/routes/index.tsx, return the user to the login screen if they are not logged in by adding the following:
// app/routes/index.tsx

import { LoaderFunction } from '@remix-run/node'
import { requireUserId } from '~/utils/auth.server'

export const loader: LoaderFunction = async ({ request }) => {
  await requireUserId(request)
  return null
}

// ...Note: Remix runs the
loaderfunction before serving your page. This means any redirects in a loader will trigger before your page can be served.
If you try to navigate to the base route (/) of your application while not logged in you should be redirected to the login screen with a redirectTo param in the URL.
Note: You may need to clear your cookies if you already logged in.
Next, do essentially the opposite. If a logged in user tries to get to the login page, they should be redirected to the home page because they are already logged in. Add the following code to app/routes/login.tsx:
// app/routes/login.tsx
// ...
import { ActionFunction, json, LoaderFunction, redirect } from '@remix-run/node'
import { login, register, getUser } from '~/utils/auth.server'

export const loader: LoaderFunction = async ({ request }) => {
  // If there's already a user in the session, redirect to the home page
  return (await getUser(request)) ? redirect('/') : null
}
// ...
Add form validation
Great! Your sign in and sign up forms are working and you have set up authorization and redirects on your private routes. You're almost at the finish line!
The last thing to do is add form validation and display error messages that are returned from the action function.
Update the FormField component so it will be able to handle error messages.
diff // app/components/form-field.tsx

+import { useEffect, useState } from "react"

interface FormFieldProps {
    htmlFor: string,
    label: string,
    type?: string,
    value: any,
    onChange?: (...args: any) => any,
+    error?: string
}

export function FormField({
    htmlFor,
    label,
    type = "text",
    value,
    onChange = () => { },
+    error = ""
}: FormFieldProps) {
+    const [errorText, setErrorText] = useState(error)

+    useEffect(() => {
+        setErrorText(error)
+    }, [error])

    return <>
        <label htmlFor={htmlFor} className="text-blue-600 font-semibold">{label}</label>
-        <input onChange={onChange} type={type} id={htmlFor} name={htmlFor} className="w-full p-2 rounded-xl my-2" value={value} />
+        <input onChange={e => {
+            onChange(e)
+            setErrorText('')
+        }} type={type} id={htmlFor} name={htmlFor} className="w-full p-2 rounded-xl my-2" value={value} />
+        <div className="text-xs font-semibold text-center tracking-wide text-red-500 w-full">
+            {errorText || ''}
+        </div>
    </>
}
This component will now take in an error message. When the user starts to type in that field, if any error message was being shown it will be cleared out.
In the login form you will need to get access to the data returned from the action using Remix's useActionData hook in order to pull out the error messages.
// app/routes/login.tsx

// ...
import { useActionData } from '@remix-run/react'
import { useRef, useEffect } from 'react'
// ...
export default function Login() {
  // ...
  // 1
  const actionData = useActionData()
  // 2
  const firstLoad = useRef(true)
  const [errors, setErrors] = useState(actionData?.errors || {})
  const [formError, setFormError] = useState(actionData?.error || '')
  // 3
  const [formData, setFormData] = useState({
    email: actionData?.fields?.email || '',
    password: actionData?.fields?.password || '',
    firstName: actionData?.fields?.lastName || '',
    lastName: actionData?.fields?.firstName || '',
  })
  // ...
}
This code adds the following:
- Hooks into the data returned from the
actionfunction. - Sets up an
errorsvariable which will hold field-specific errors, such as "Invalid Email", in an object. It also sets up aformErrorvariable which will hold error messages to display form messages such as "Incorrect Login". - Updates the
formDatastate variables to default to any values returned by theactionfunction if available.
If the user is shown an error and switches forms, you will need to clear out the form and any errors being shown. Use these effects to achieve this:
// app/routes/login.tsx
// ...
export default function Login() {
  // ...
  useEffect(() => {
    if (!firstLoad.current) {
      const newState = {
        email: '',
        password: '',
        firstName: '',
        lastName: '',
      }
      setErrors(newState)
      setFormError('')
      setFormData(newState)
    }
  }, [action])

  useEffect(() => {
    if (!firstLoad.current) {
      setFormError('')
    }
  }, [formData])

  useEffect(() => { firstLoad.current = false }, [])
}
// ...
With those in place, you can finally let your form and fields know which errors to display.
diff // app/routes/login.tsx

// ...
<form method="POST" className="rounded-2xl bg-gray-200 p-6 w-96">
+ <div className="text-xs font-semibold text-center tracking-wide text-red-500 w-full">{formError}</div>
  <FormField
    htmlFor="email"
    label="Email"
    value={formData.email}
    onChange={e => handleInputChange(e, 'email')}
+    error={errors?.email}
  />
  <FormField
    htmlFor="password"
    type="password"
    label="Password"
    value={formData.password}
    onChange={e => handleInputChange(e, 'password')}
+    error={errors?.password}
  />

  {action === 'register' && (
    <>
      {/* First Name */}
      <FormField
        htmlFor="firstName"
        label="First Name"
        onChange={e => handleInputChange(e, 'firstName')}
        value={formData.firstName}
+        error={errors?.firstName}
      />
      {/* Last Name */}
      <FormField
        htmlFor="lastName"
        label="Last Name"
        onChange={e => handleInputChange(e, 'lastName')}
        value={formData.lastName}
+        error={errors?.lastName}
      />
    </>
  )}

  {/* ... */}
</form>
// ...
Now you should see error messages and form resets working properly on your sign up and sign in forms!
Summary & What's next
Kudos (😉) to you for sticking around until the end of this section! There was as lot to cover, but hopefully you were able to walk away with an understanding of:
- How to set up routes in Remix.
- How to build a sign in and sign up form with validation.
- How session-based authentication works.
- How to protect privates routes by implementing authorization.
- How to store and query your data using Prisma when creating and authenticating users.
In the next section of this series you will build the home page of Kudos and the kudos-sharing functionality. You will also add searching and filtering capabilities to the kudos feed.
Build your next app with Prisma
Start free. Scale when you’re ready.