Build A Fullstack App with Remix, Prisma & MongoDB: CRUD, Filtering & Sorting

Welcome to the third article of this series where you are learning how to build a full-stack application from the ground up using MongoDB, Prisma, and Remix! In this part, you will build out the main piece of the application which displays a user's kudos feed and allows them to send kudos to other users.
Table Of Contents
- Introduction
- Build a home route
- Add the user list panel
- Build the user display component
- Add the ability to log out
- Add the ability to send kudos
- Build the form
- Add a kudo display component
- Build the action to send kudos
- Build a kudos feed
- Build a search bar
- Display the most recent kudos
- Summary & What's next
Introduction
In the last part of this series you built your application's sign in and sign up forms and implemented session-based authentication. You also updated your Prisma schema to account for a new embedded document in the User model that will hold a user's profile data.
In this part you will build the main functionality of the application: the kudos feed. Each user will have a feed of kudos other users have sent them. Users will also be able to send other users kudos.
In addition, you will implement some searching and filtering to make it easier to find kudos in the feed.
The starting point for this project is available in the part-2 branch of the GitHub repository. If you'd like to see the final result of this part, head over to the part-3 branch.
Development environment
In order to follow along with the examples provided, you will be expected to ...
- ... have Node.js installed.
- ... have Git installed.
- ... have the TailwindCSS VSCode Extension installed. (optional)
- ... have the Prisma VSCode Extension installed. (optional)
Note: The optional extensions add some really nice intellisense and syntax highlighting for Tailwind and Prisma.
Build a home route
The main section of your application will live in a /home route. Set up that route by adding a home.tsx file in the app/routes folder.
This new file should export a function component called Home for now, along with a loader function that redirects to the user to the login screen they are not logged in.
// app/routes/home.tsx
import { LoaderFunction } from '@remix-run/node'
import { requireUserId } from '~/utils/auth.server'
export const loader: LoaderFunction = async ({ request }) => {
await requireUserId(request)
return null
}
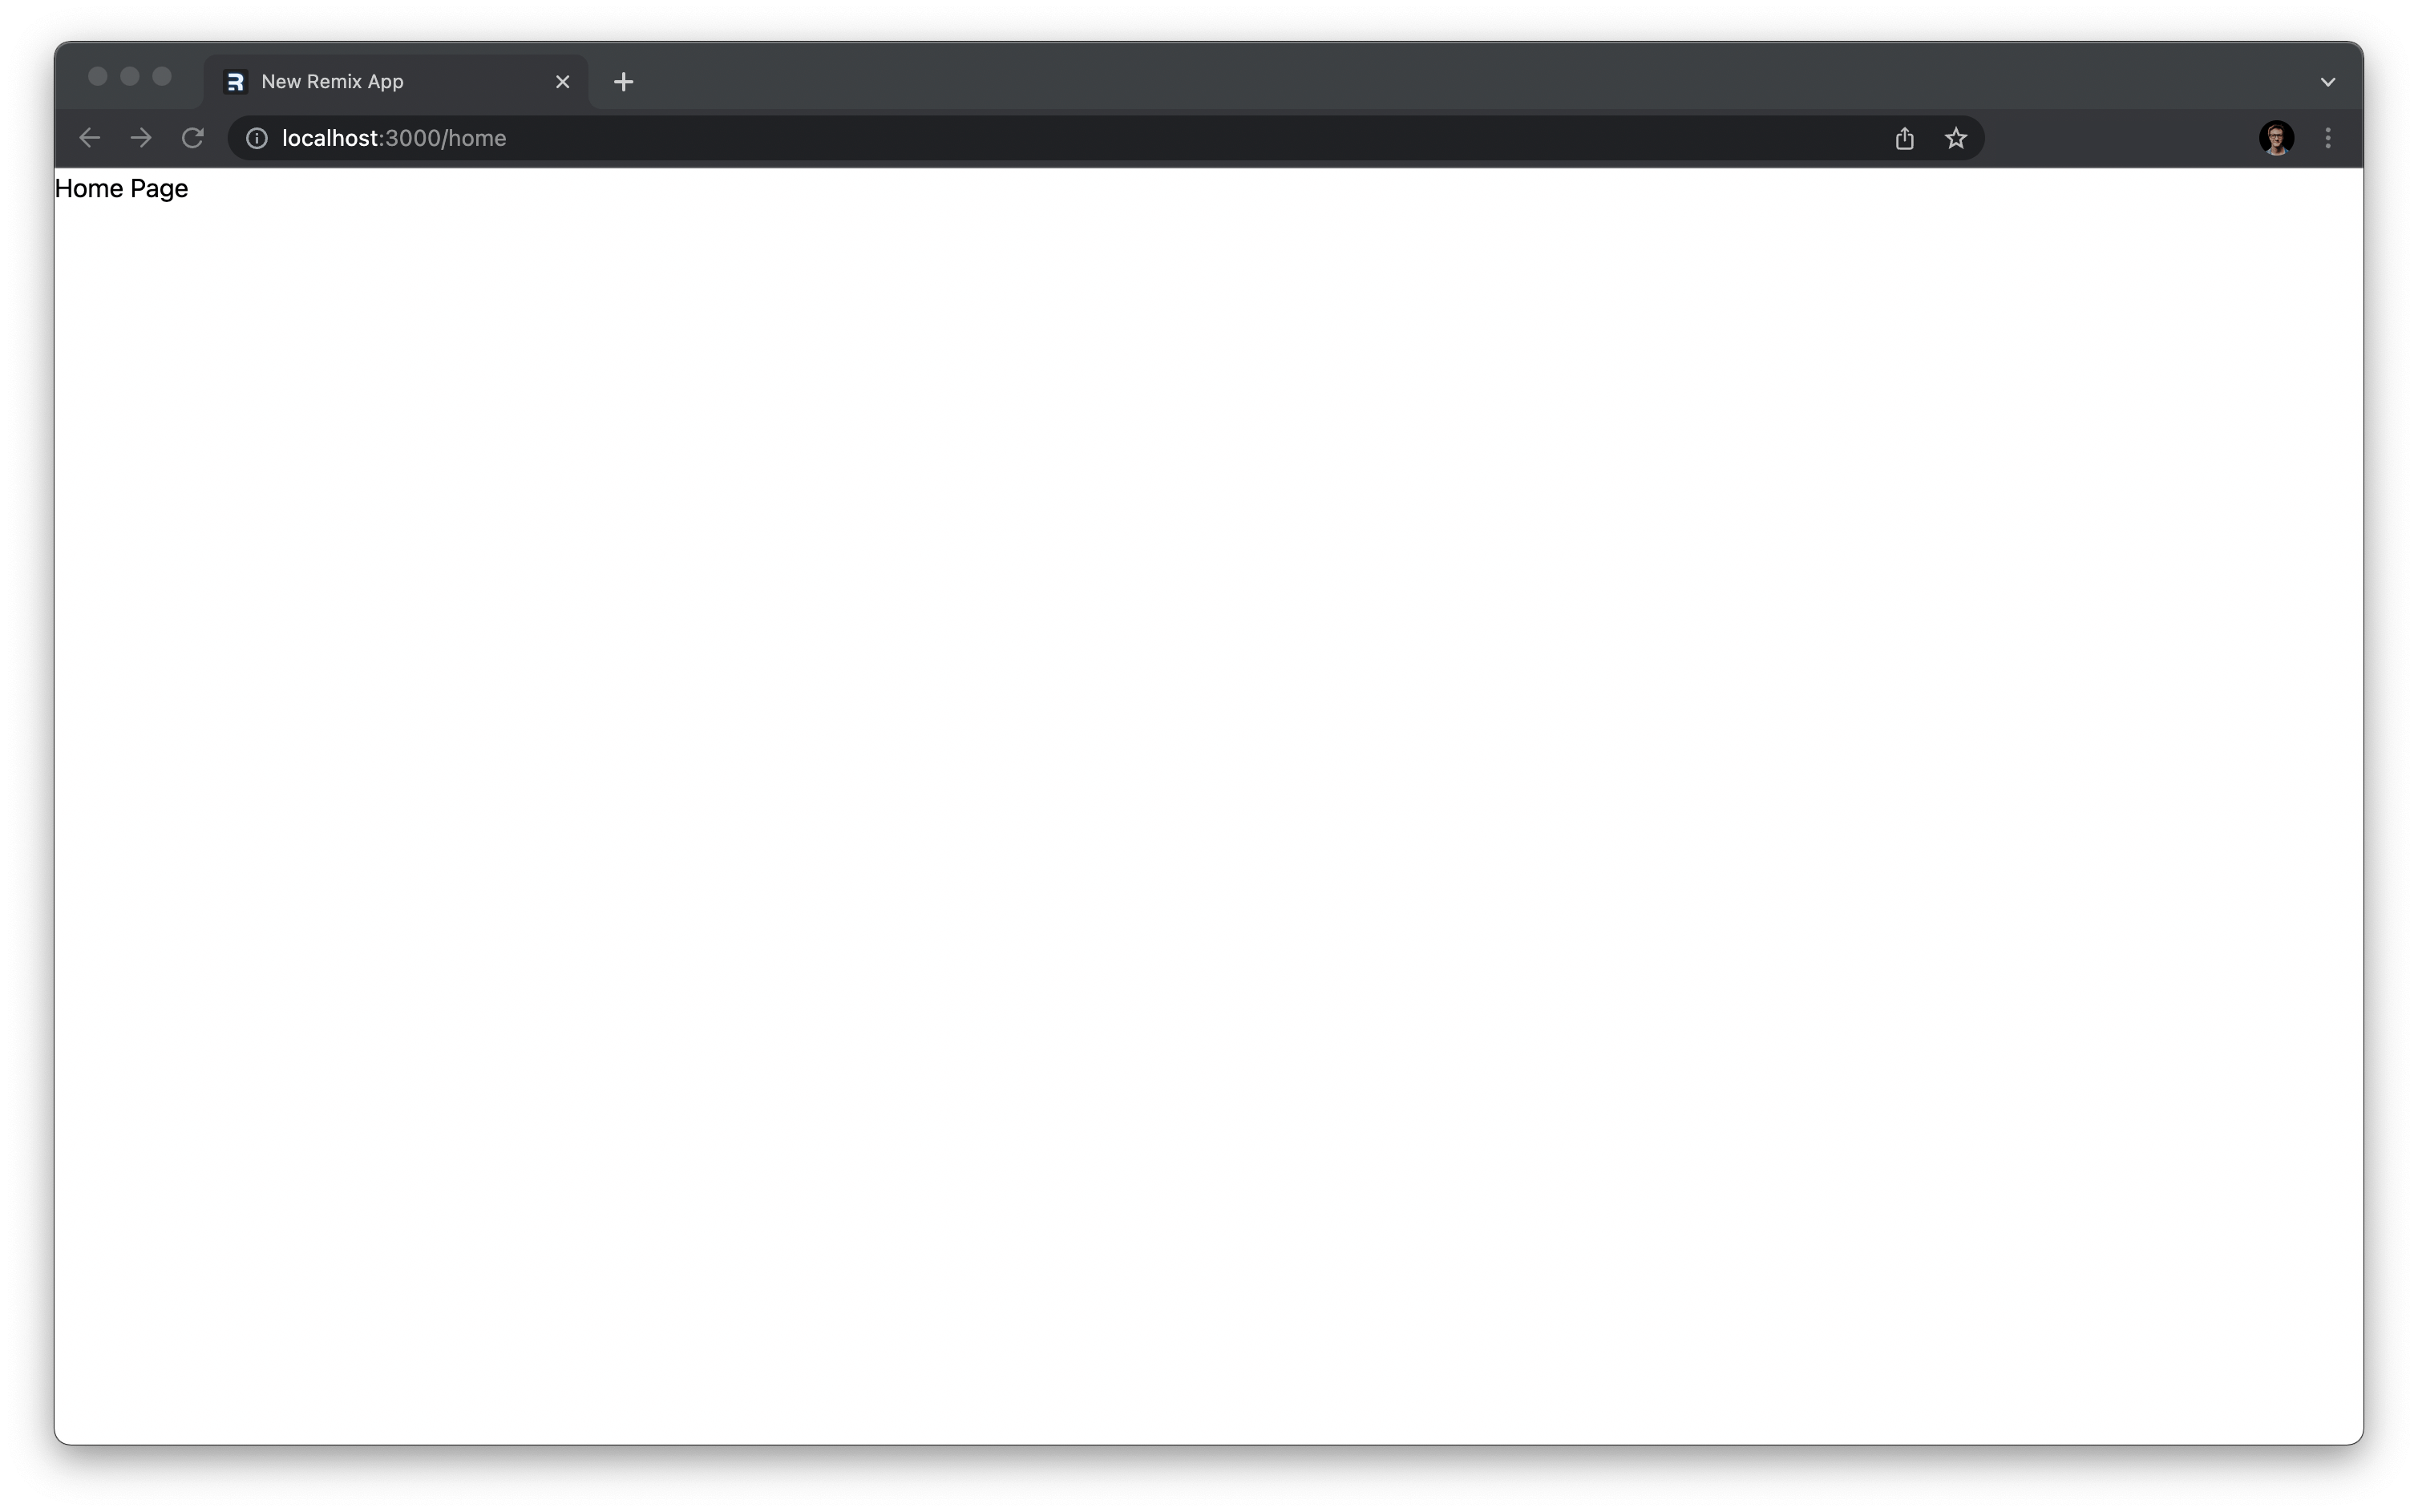
export default function Home() {
return <h2>Home Page</h2>
}This /home route will act as the main page of your application rather than the base url.
Currently, the app/routes/index.tsx file (the / route) renders a React component. That route should only ever redirect a user: either to the /home or /login route. Set up a resource route in its place to achieve that functionality.
Resource routes
A resource route is a route that does not render a component, but can instead respond with any type of response. Think of it as a simple API endpoint. In your / route's case, you will want it to return a redirect response with a 302 status code.
Delete the existing app/routes/index.tsx file and replace it with an index.ts file where you will define the resource route:
// app/routes/index.ts

import { LoaderFunction, redirect } from '@remix-run/node'
import { requireUserId } from '~/utils/auth.server'

export const loader: LoaderFunction = async ({ request }) => {
  await requireUserId(request)
  return redirect('/home')
}Note: The file's extension was changed to
.tsbecause this route will never render a component.
The loader above will first check if a user is logged in when they hit the / route. The requireUserId function will redirect to /login if there isn't a valid session.
If there is a valid session, the loader returns a redirect to the /home page.
Add the user list panel
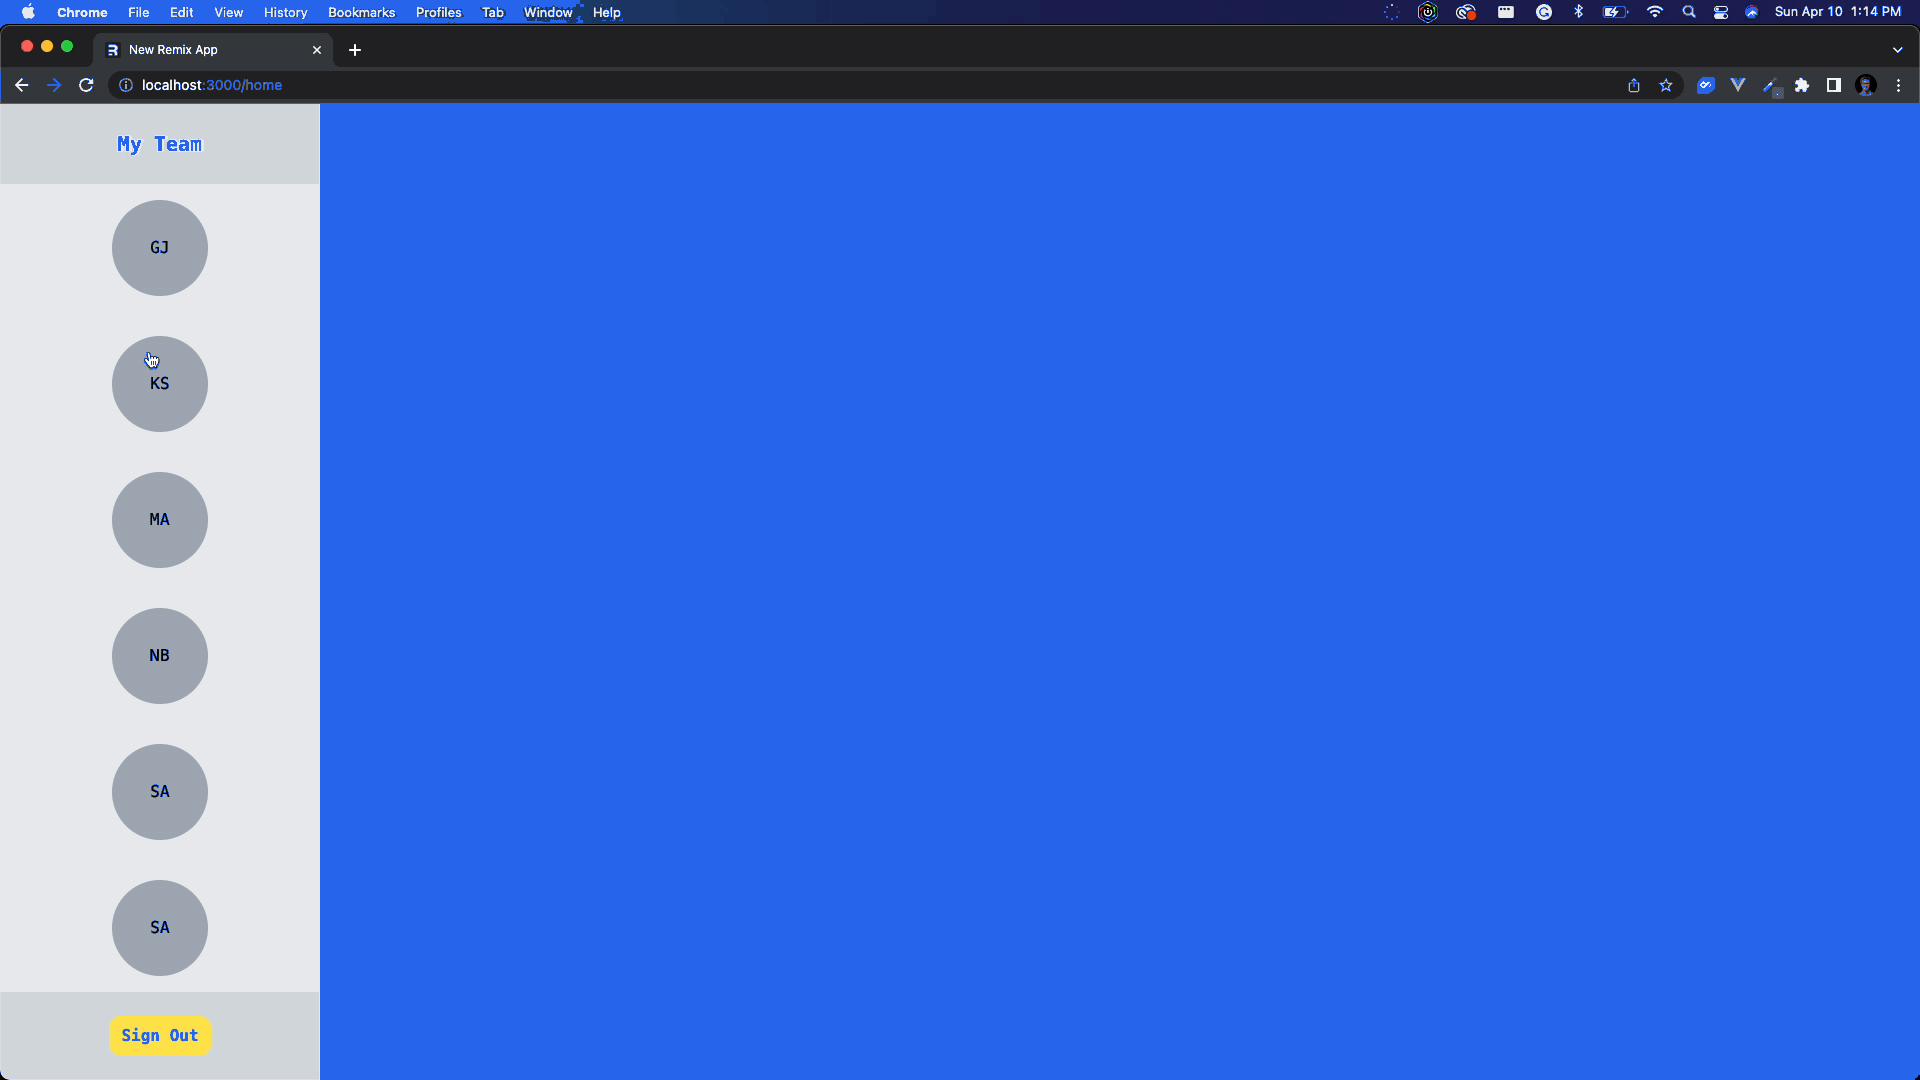
Start off your home page by building a component that will list the site's users on the left side of the screen.
Create a new file in the app/components folder named user-panel.tsx:
// app/components/user-panel.tsx
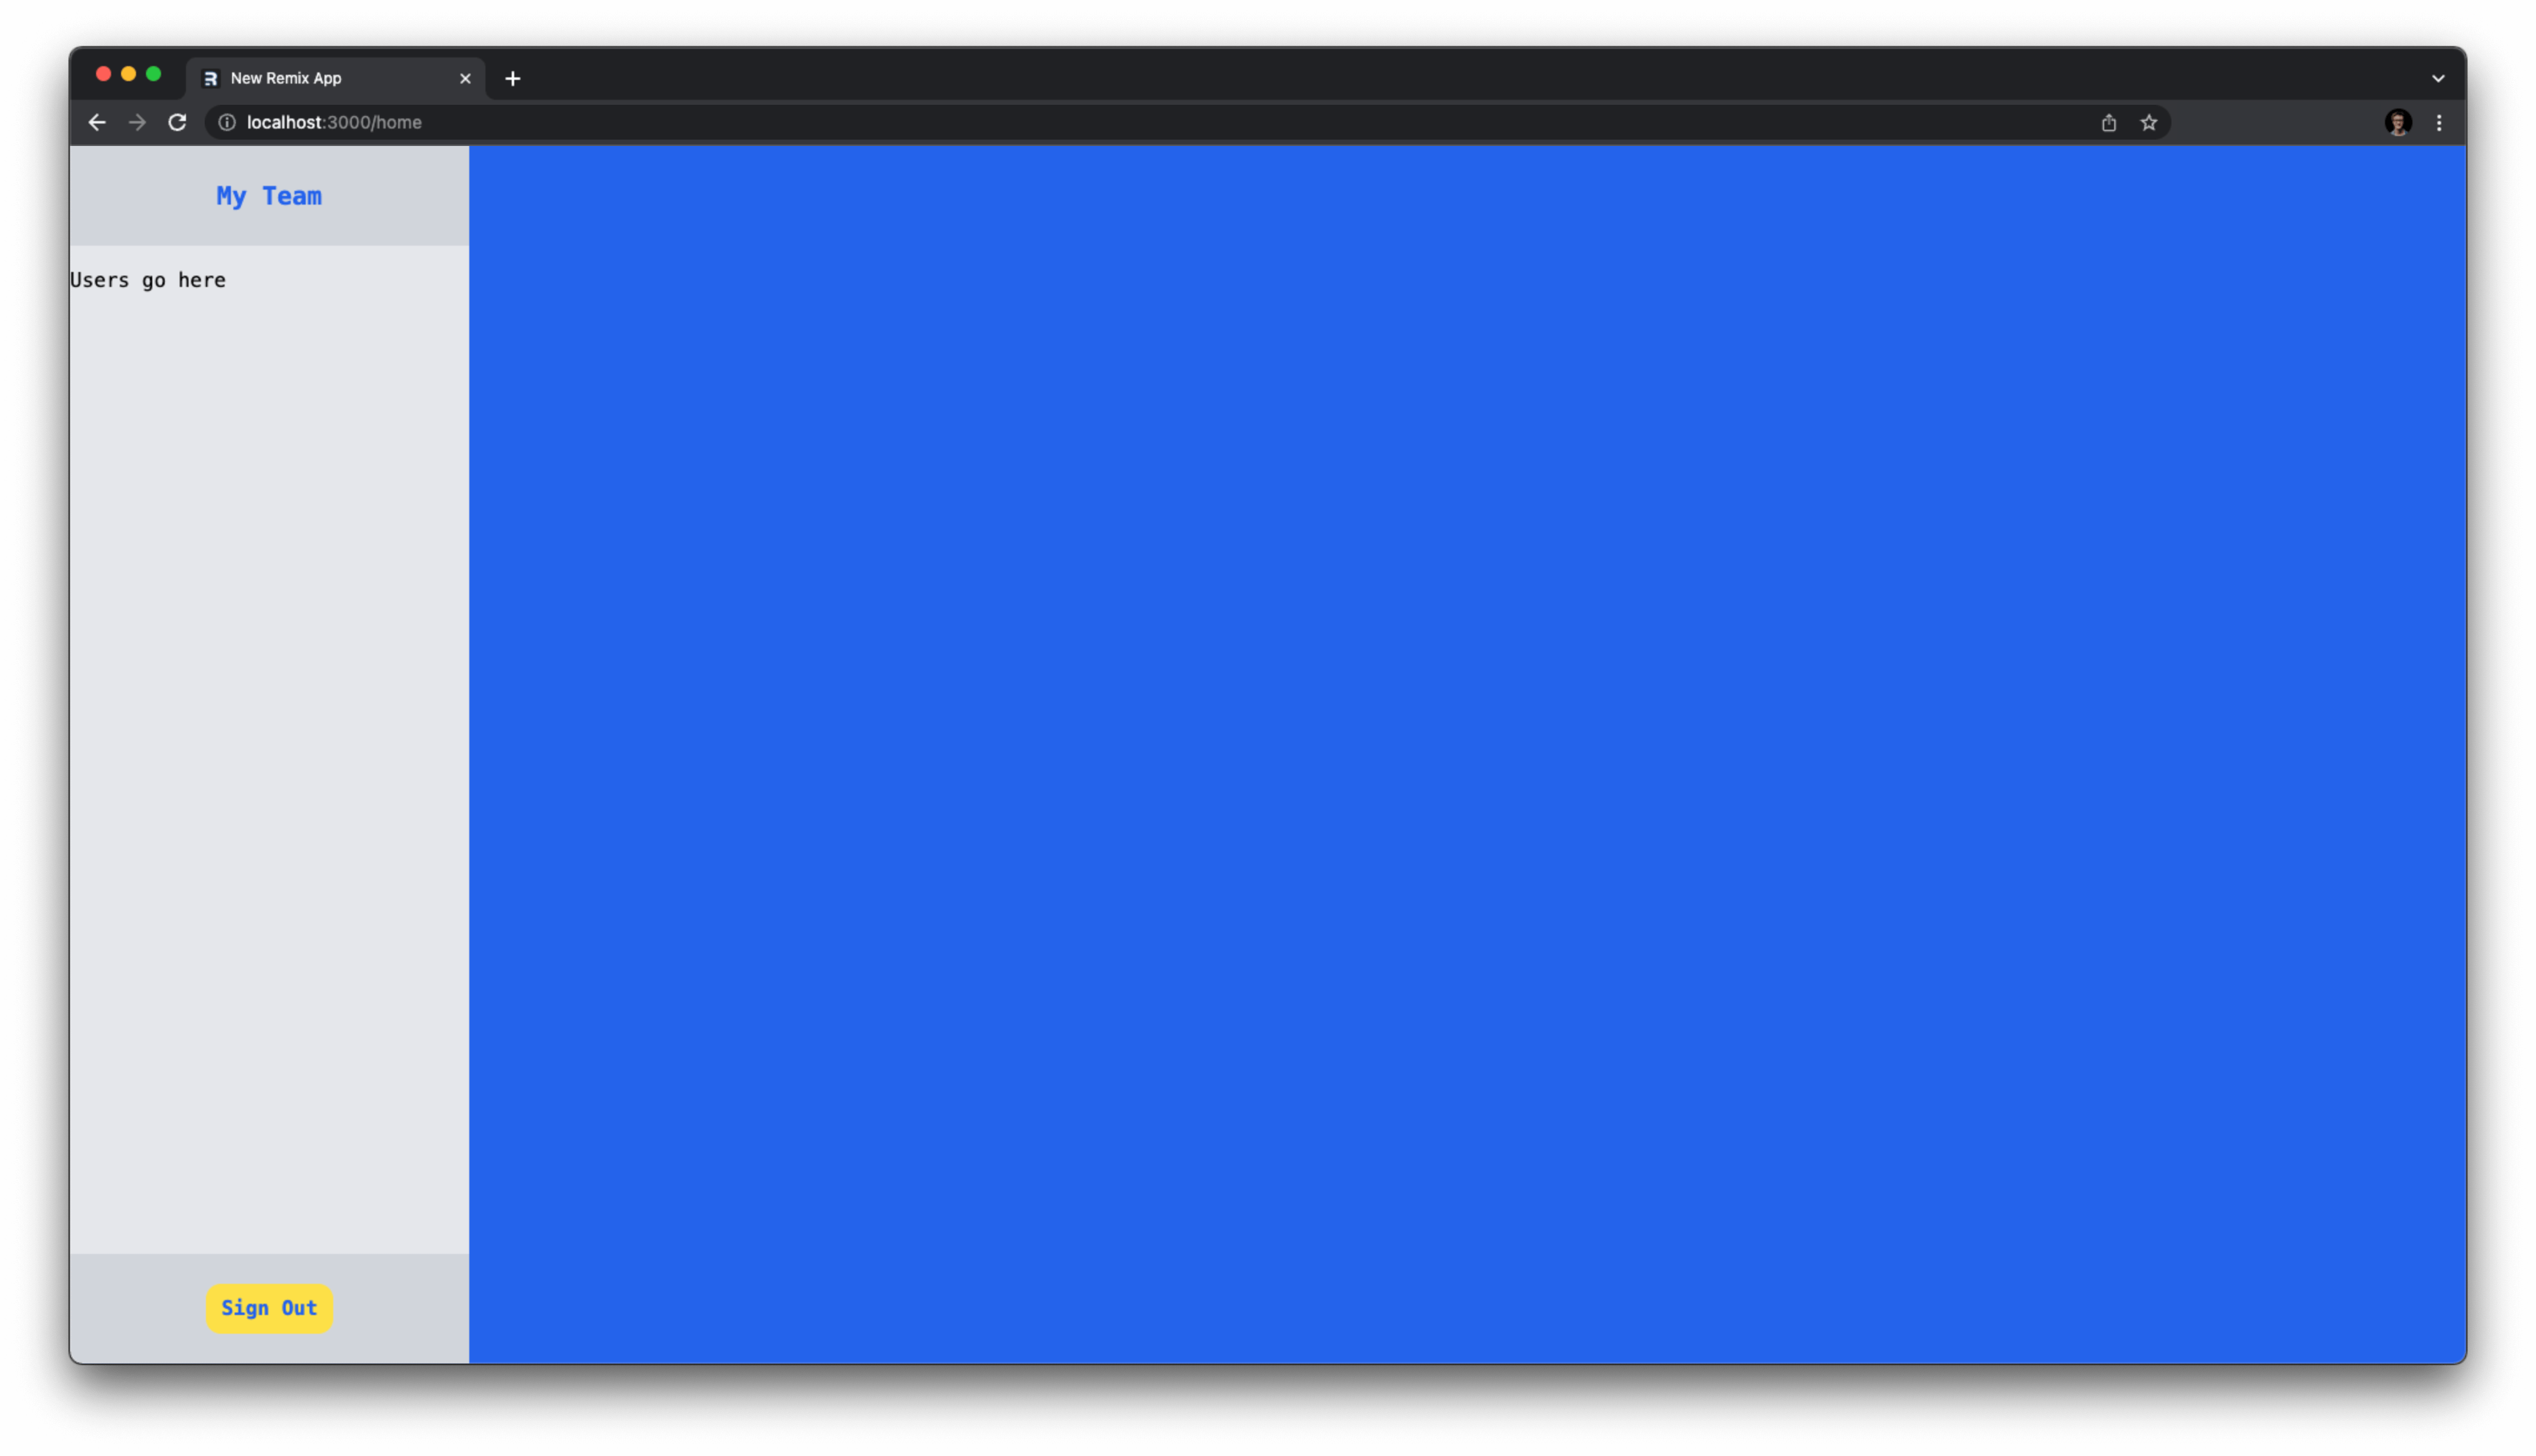
export function UserPanel() {
return (
<div className="w-1/6 bg-gray-200 flex flex-col">
<div className="text-center bg-gray-300 h-20 flex items-center justify-center">
<h2 className="text-xl text-blue-600 font-semibold">My Team</h2>
</div>
<div className="flex-1 overflow-y-scroll py-4 flex flex-col gap-y-10">
<p>Users go here</p>
</div>
<div className="text-center p-6 bg-gray-300">
<button
type="submit"
className="rounded-xl bg-yellow-300 font-semibold text-blue-600 px-3 py-2 transition duration-300 ease-in-out hover:bg-yellow-400 hover:-translate-y-1"
>
Sign Out
</button>
</div>
</div>
)
}This creates the side panel that will contain the list of users. The component is static though, meaning it does not perform any actions or vary in any way.
Before making this component more dynamic by adding a list of users, import it into the app/routes/home.tsx page and render it onto the page.
// app/routes/home.tsx
import { LoaderFunction } from '@remix-run/node'
import { requireUserId } from '~/utils/auth.server'
import { Layout } from '~/components/layout'
import { UserPanel } from '~/components/user-panel'

export const loader: LoaderFunction = async ({ request }) => {
  await requireUserId(request)
  return null // <- A loader always has to return some value, even if that is null
}

export default function Home() {
  return (
    <Layout>
      <div className="h-full flex">
        <UserPanel />
      </div>
    </Layout>
  )
}
The code above imports the new component and the Layout component, then renders the new component within the layout.
Query for all users and sort the results
Now you need to actually show the list of users within the panel. You should already have a file where user-related functions will live: app/utils/user.server.ts.
Add a new function to that file that queries for any users in your database. This function should take in a userId parameter and sort the results by the user's first name in ascending order:
// app/utils/user.server.ts

//...

export const getOtherUsers = async (userId: string) => {
  return prisma.user.findMany({
    where: {
      id: { not: userId },
    },
    orderBy: {
      profile: {
        firstName: 'asc',
      },
    },
  })
}
The where filter excludes any documents whose id matches the userId parameter. This will be used to grab every user except the currently logged in user.
Note: Notice how easy it is to sort by fields within an embedded document?
In app/routes/home.tsx, import that new function and invoke it within the loader. Then return the user list using Remix's json helper:
diff // app/routes/home.tsx

// ...

import {
+  json,
  LoaderFunction
} from '@remix-run/node'
+import { getOtherUsers } from '~/utils/user.server'


export const loader: LoaderFunction = async ({ request }) => {
-    await requireUserId(request)
-    return null
+    const userId = await requireUserId(request)
+    const users = await getOtherUsers(userId)
+    return json({ users })
}

// ...Note: Any code that is run within a
loaderfunction is not exposed to the client-side code. You can thank Remix for this awesome feature!
If you had any users in your database and outputted the users variable inside of the loader, you should see a list of all users except yourself.
Note: The entire
profileembedded document was retrieved as a nested object without having to explicitly include it.
You will now have the data available. It's time to do something with it!
Provide the users to the user panel
Set up a new users prop in the UserPanel component.
// app/components/user-panel.tsx
import { User } from '@prisma/client'

export function UserPanel({ users }: { users: User[] }) {
  // ...
}
The User type used here was generated by Prisma and is available via Prisma Client. Remix works very nicely with Prisma because it is extremely easy to achieve end-to-end type safety in a fullstack framework.
Note: End-to-end type safety occurs when the types across your entire stack are kept in sync as the shape of your data changes.
In app/routes/home.tsx you may now supply the users to the UserPanel component. Import the useLoaderData hook provided by Remix which gives you access to any data returned from the loader function and use it to access the users data:
// app/routes/home.tsx
import { useLoaderData } from '@remix-run/react'
// ...
export default function Home() {
  const { users } = useLoaderData()
  return (
    <Layout>
      <div className="h-full flex">
        <UserPanel users={users} />
        <div className="flex-1"></div>
      </div>
    </Layout>
  )
}
// ...
The component will now have the users to work with. Now it needs to display them.
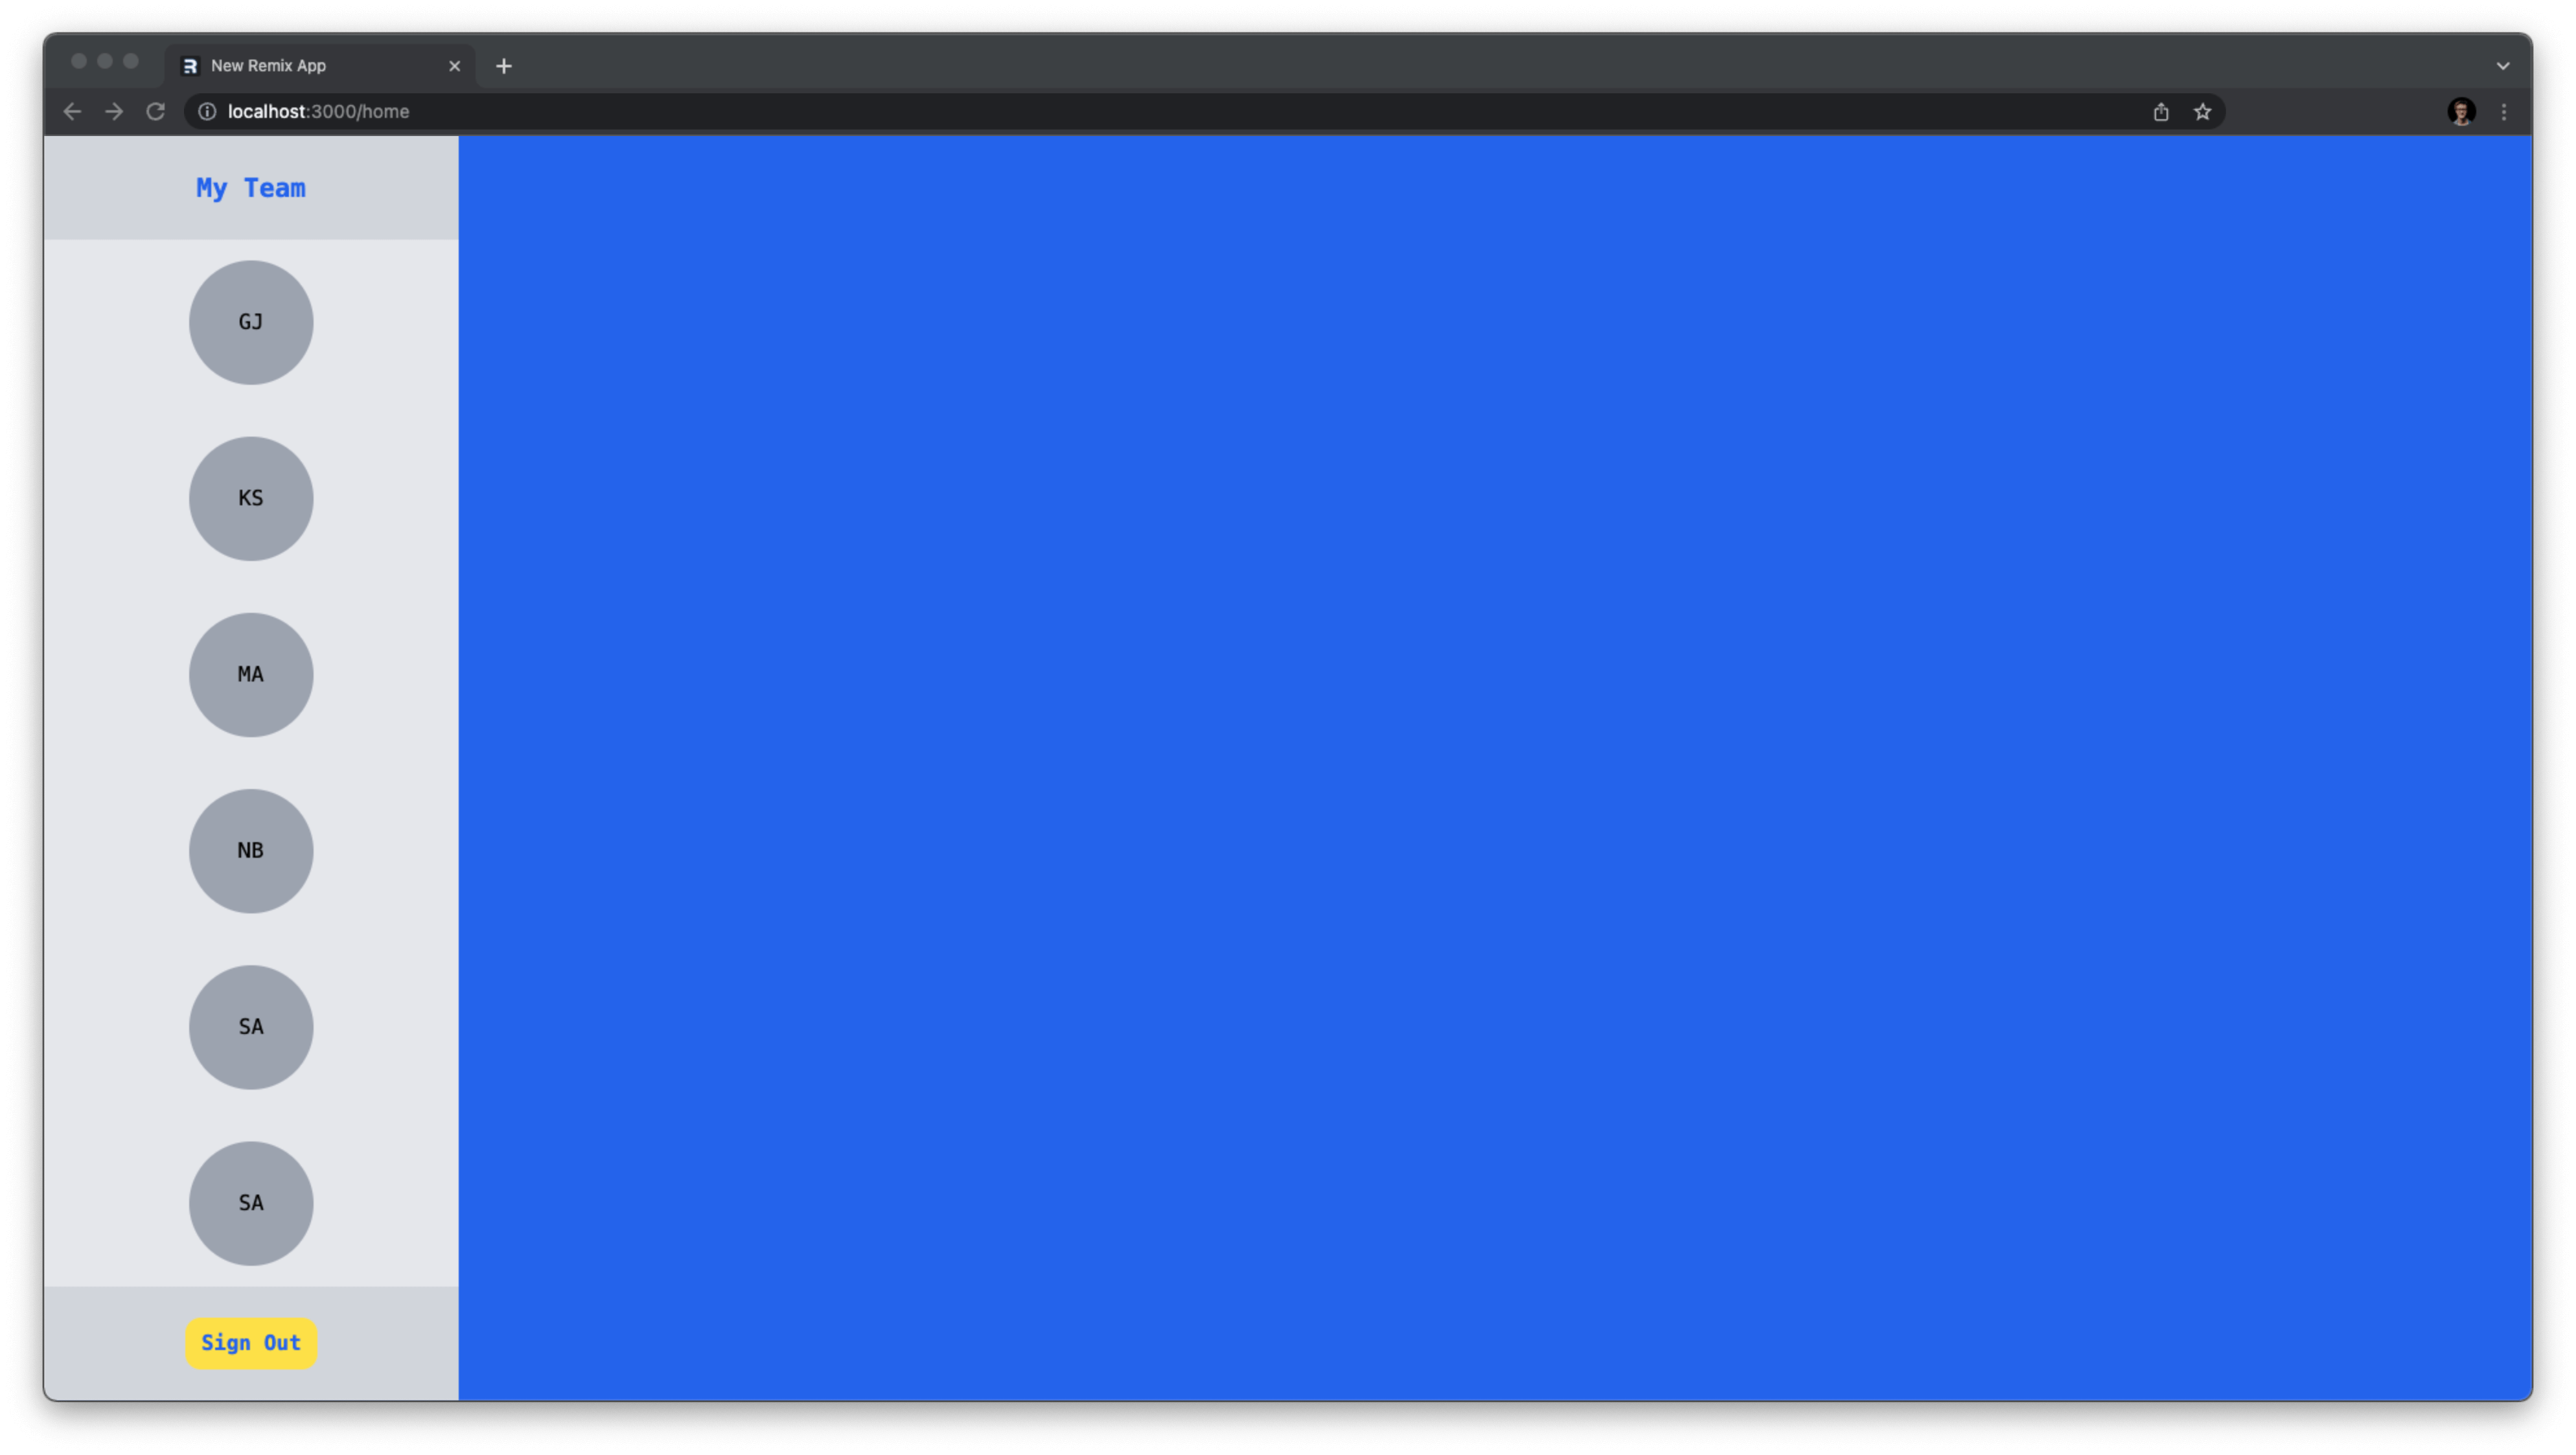
Build the user display component
The list items will be displayed as a circle with the first letter of the user's first and last names for now.
Create a new file in app/components named user-circle.tsx and add the following component to it:
// app/components/user-circle.tsx
import { Profile } from '@prisma/client'

interface props {
  profile: Profile
  className?: string
  onClick?: (...args: any) => any
}

export function UserCircle({ profile, onClick, className }: props) {
  return (
    <div
      className={`${className} cursor-pointer bg-gray-400 rounded-full flex justify-center items-center`}
      onClick={onClick}
    >
      <h2>
        {profile.firstName.charAt(0).toUpperCase()}
        {profile.lastName.charAt(0).toUpperCase()}
      </h2>
    </div>
  )
}
This component uses the Profile type generated by Prisma because you will be passing in only the profile data from the user documents.
It also has some configurable options that allow you to provide a click action and add additional classes to customize its style.
In app/components/user-panel.tsx, import this new component and render one for each user instead of rendering <p>Users go here</p>:
diff // app/components/user-panel.tsx
import { User } from '@prisma/client'
+import { UserCircle } from '~/components/user-circle'
export function UserPanel({ users }: { users: User[] }) {
return (
{/* ... */}
- <p>Users go here</p>
+ {users.map(user => (
+ <UserCircle key={user.id} profile={user.profile} className="h-24 w-24 mx-auto flex-shrink-0" />
+ ))}
{/* ... */}
)
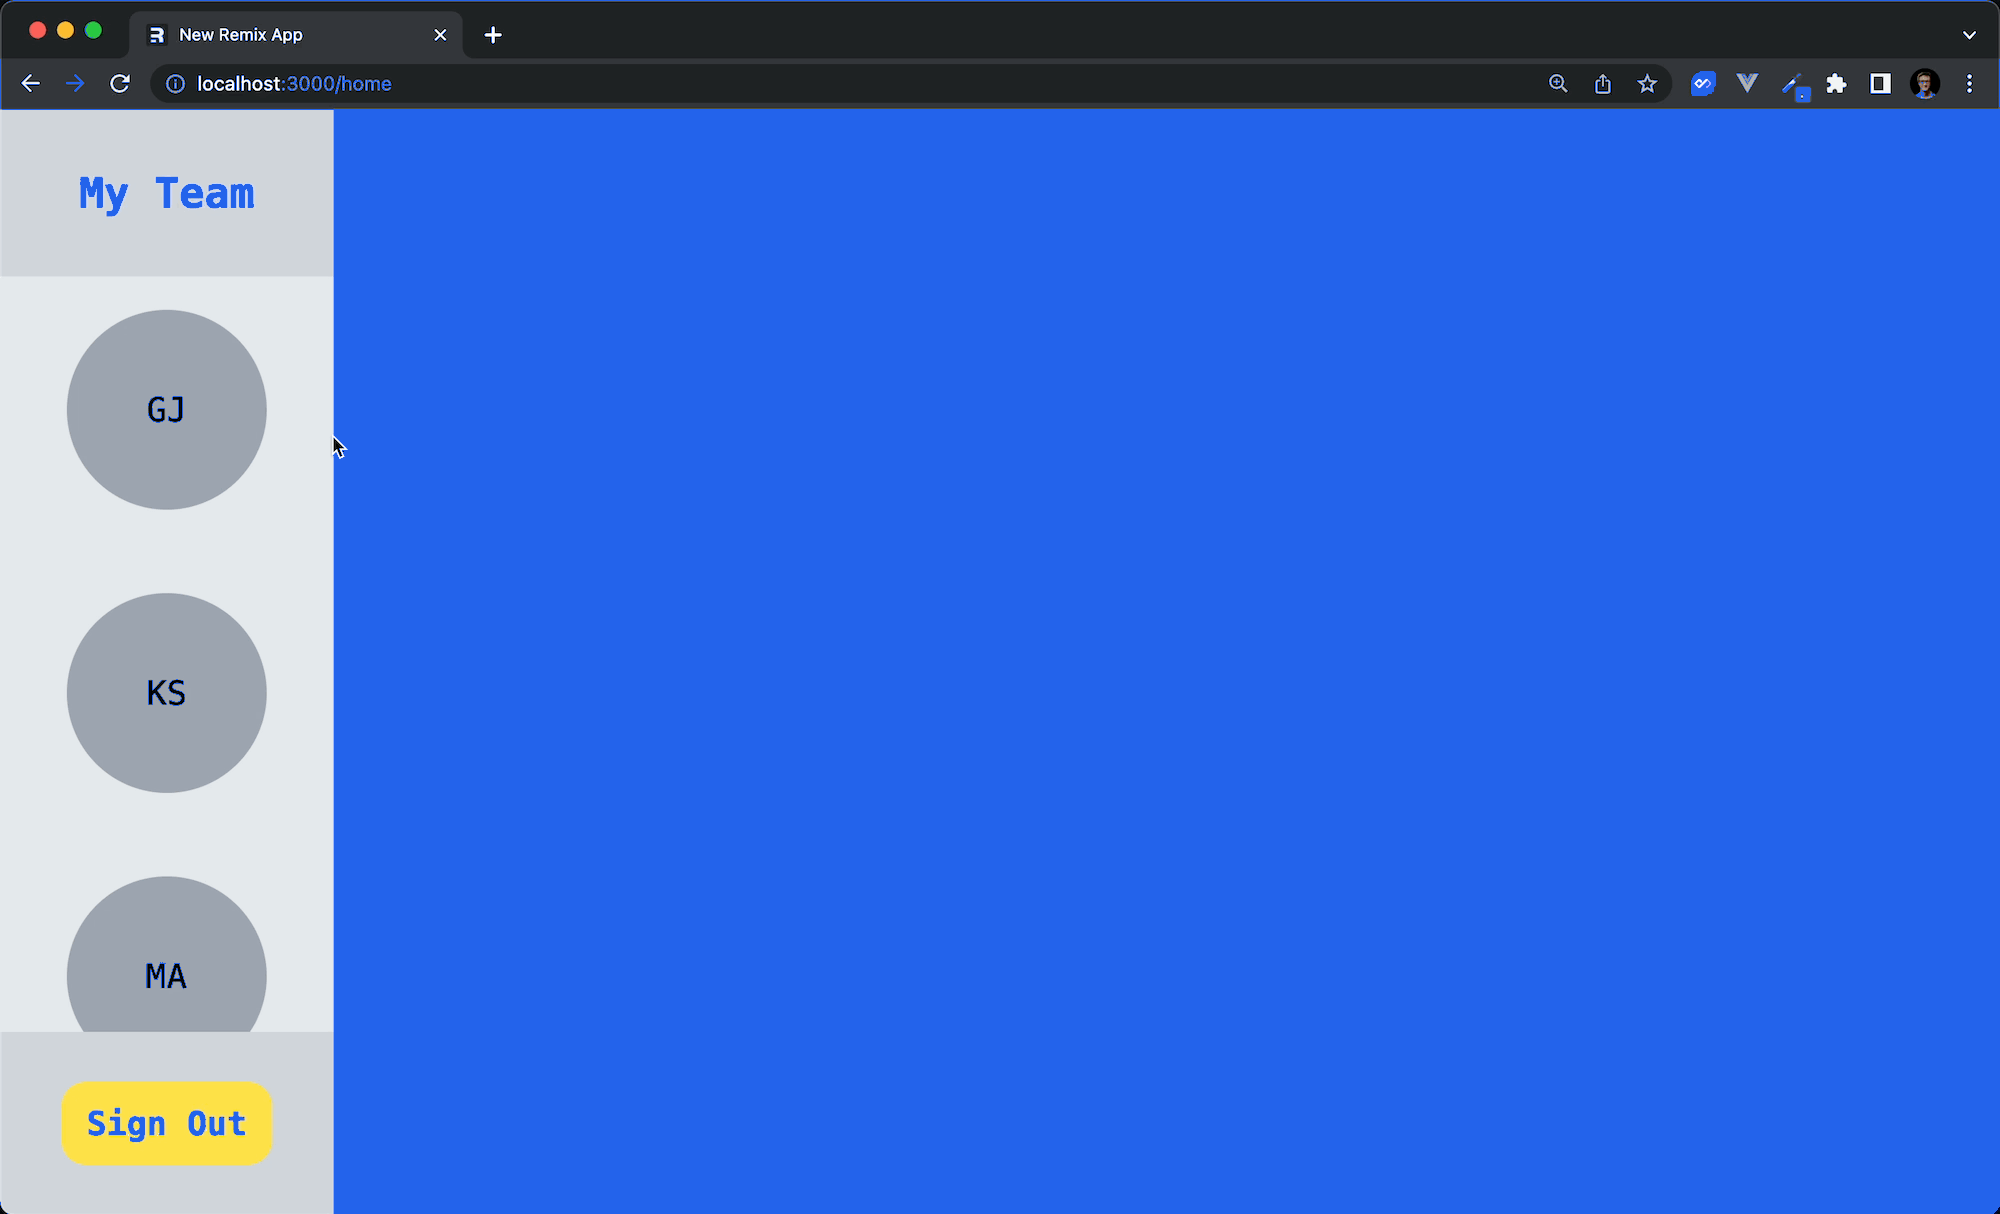
}Beautiful! Your users will now be rendered in a nice column on the left side of the home page. The only non-functional piece of the side panel at this point is the sign out button.
Add the ability to log out
Add another resource route in app/routes called logout.ts which will perform a logout action when invoked:
// app/routes/logout.ts
import type { ActionFunction, LoaderFunction } from "@remix-run/node";
import { redirect } from "@remix-run/node";
import { logout } from "~/utils/auth.server";

export const action: ActionFunction = async ({ request }) => logout(request);
export const loader: LoaderFunction = async () => redirect("/");
This route handles two possible actions: POST and GET
POST: This will trigger thelogoutfunction written in the previous part of this series.GET: If aGETrequest is made, the user will be sent to the home page.
Add a form around your sign out button in app/components/user-panel.ts that will post to this route when submitted.
diff // app/components/user-panel.ts

// ...

export function UserPanel({ users }: props) {
    return (
        <div className="w-1/6 bg-gray-200 flex flex-col">
            {/* ... */}
            <div className="text-center p-6 bg-gray-300">
+                <form action="/logout" method="post">
                    <button type="submit" className="rounded-xl bg-yellow-300 font-semibold text-blue-600 px-3 py-2 transition duration-300 ease-in-out hover:bg-yellow-400 hover:-translate-y-1">
                        Sign Out
                    </button>
+                </form>
            </div>
        </div>
    )
}
Your users can now sign out of the application! The user whose session is associated with the POST request will be signed out and their session destroyed.
Add the ability to send kudos
When a user in the user list is clicked a modal should pop up that provides a form. Submitting this form will save a kudo in the database.
This form will have the following features:
- A display of which user you are giving kudos to.
- A text area where you can fill out a message to the user.
- Styling options that allow you to pick the post's background color and text color.
- An emoji selector where you can add an emoji to the post.
- An accurate preview of what your post will look like.
Update the Prisma schema
There are a couple of data points you will be saving and displaying that are not yet defined in your schema. Here's a list of what needs to change:
- Add a
Kudomodel with an embedded document to hold the style customizations - Add a 1 relation in the
Usermodel that defines the kudos a user is the author of. Also add a similar relation that defines the kudos a user is a recipient of. - Add
enums for emojis, departments, and colors to define the available options.
// prisma/schema.prisma

// ...

enum Emoji {
  THUMBSUP
  PARTY
  HANDSUP
}

enum Department {
  MARKETING
  SALES
  ENGINEERING
  HR
}

enum Color {
  RED
  GREEN
  YELLOW
  BLUE
  WHITE
}

type KudoStyle {
  backgroundColor Color @default(YELLOW)
  textColor       Color @default(WHITE)
  emoji           Emoji @default(THUMBSUP)
}

model Kudo {
  id          String     @id @default(auto()) @map("_id") @db.ObjectId
  message     String
  createdAt   DateTime   @default(now())
  style       KudoStyle?
}
diff // prisma/schema.prisma
model User {
// ...
+ authoredKudos Kudo[] @relation("AuthoredKudos")
+ kudos Kudo[] @relation("RecievedKudos")
}
model Kudo {
// ...
+ author User @relation(references: [id], fields: [authorId], "AuthoredKudos")
+ authorId String @db.ObjectId
+ recipient User @relation(references: [id], fields: [recipientId], "RecievedKudos")
+ recipientId String @db.ObjectId
}Note: After applying
@defaultto a field, if a record in your collection does not have the new required field if will be updated to include that field with the default value the next time it is read.
That's all you'll need to update for now. Run npx prisma db push, which will automatically re-generate PrismaClient.
Nested routes
You will use a nested route to create the modal that will hold your form. This will allow you to set up a sub-route that will be rendered onto the parent route at an Outlet that you define.
When a user navigates to this nested route, a modal will be rendered onto the screen without having to re-render the entire page.
To create the nested route, first add a new folder in app/routes named home.
Note: The naming of that folder is important. Because you have a
home.tsxfile, Remix will recognize any files in the newhomefolder as sub-routes of/home.
Within the new app/routes/home directory, create a new file named kudo.$userId.tsx. This will allow you to handle the modal component as if it were its own route.
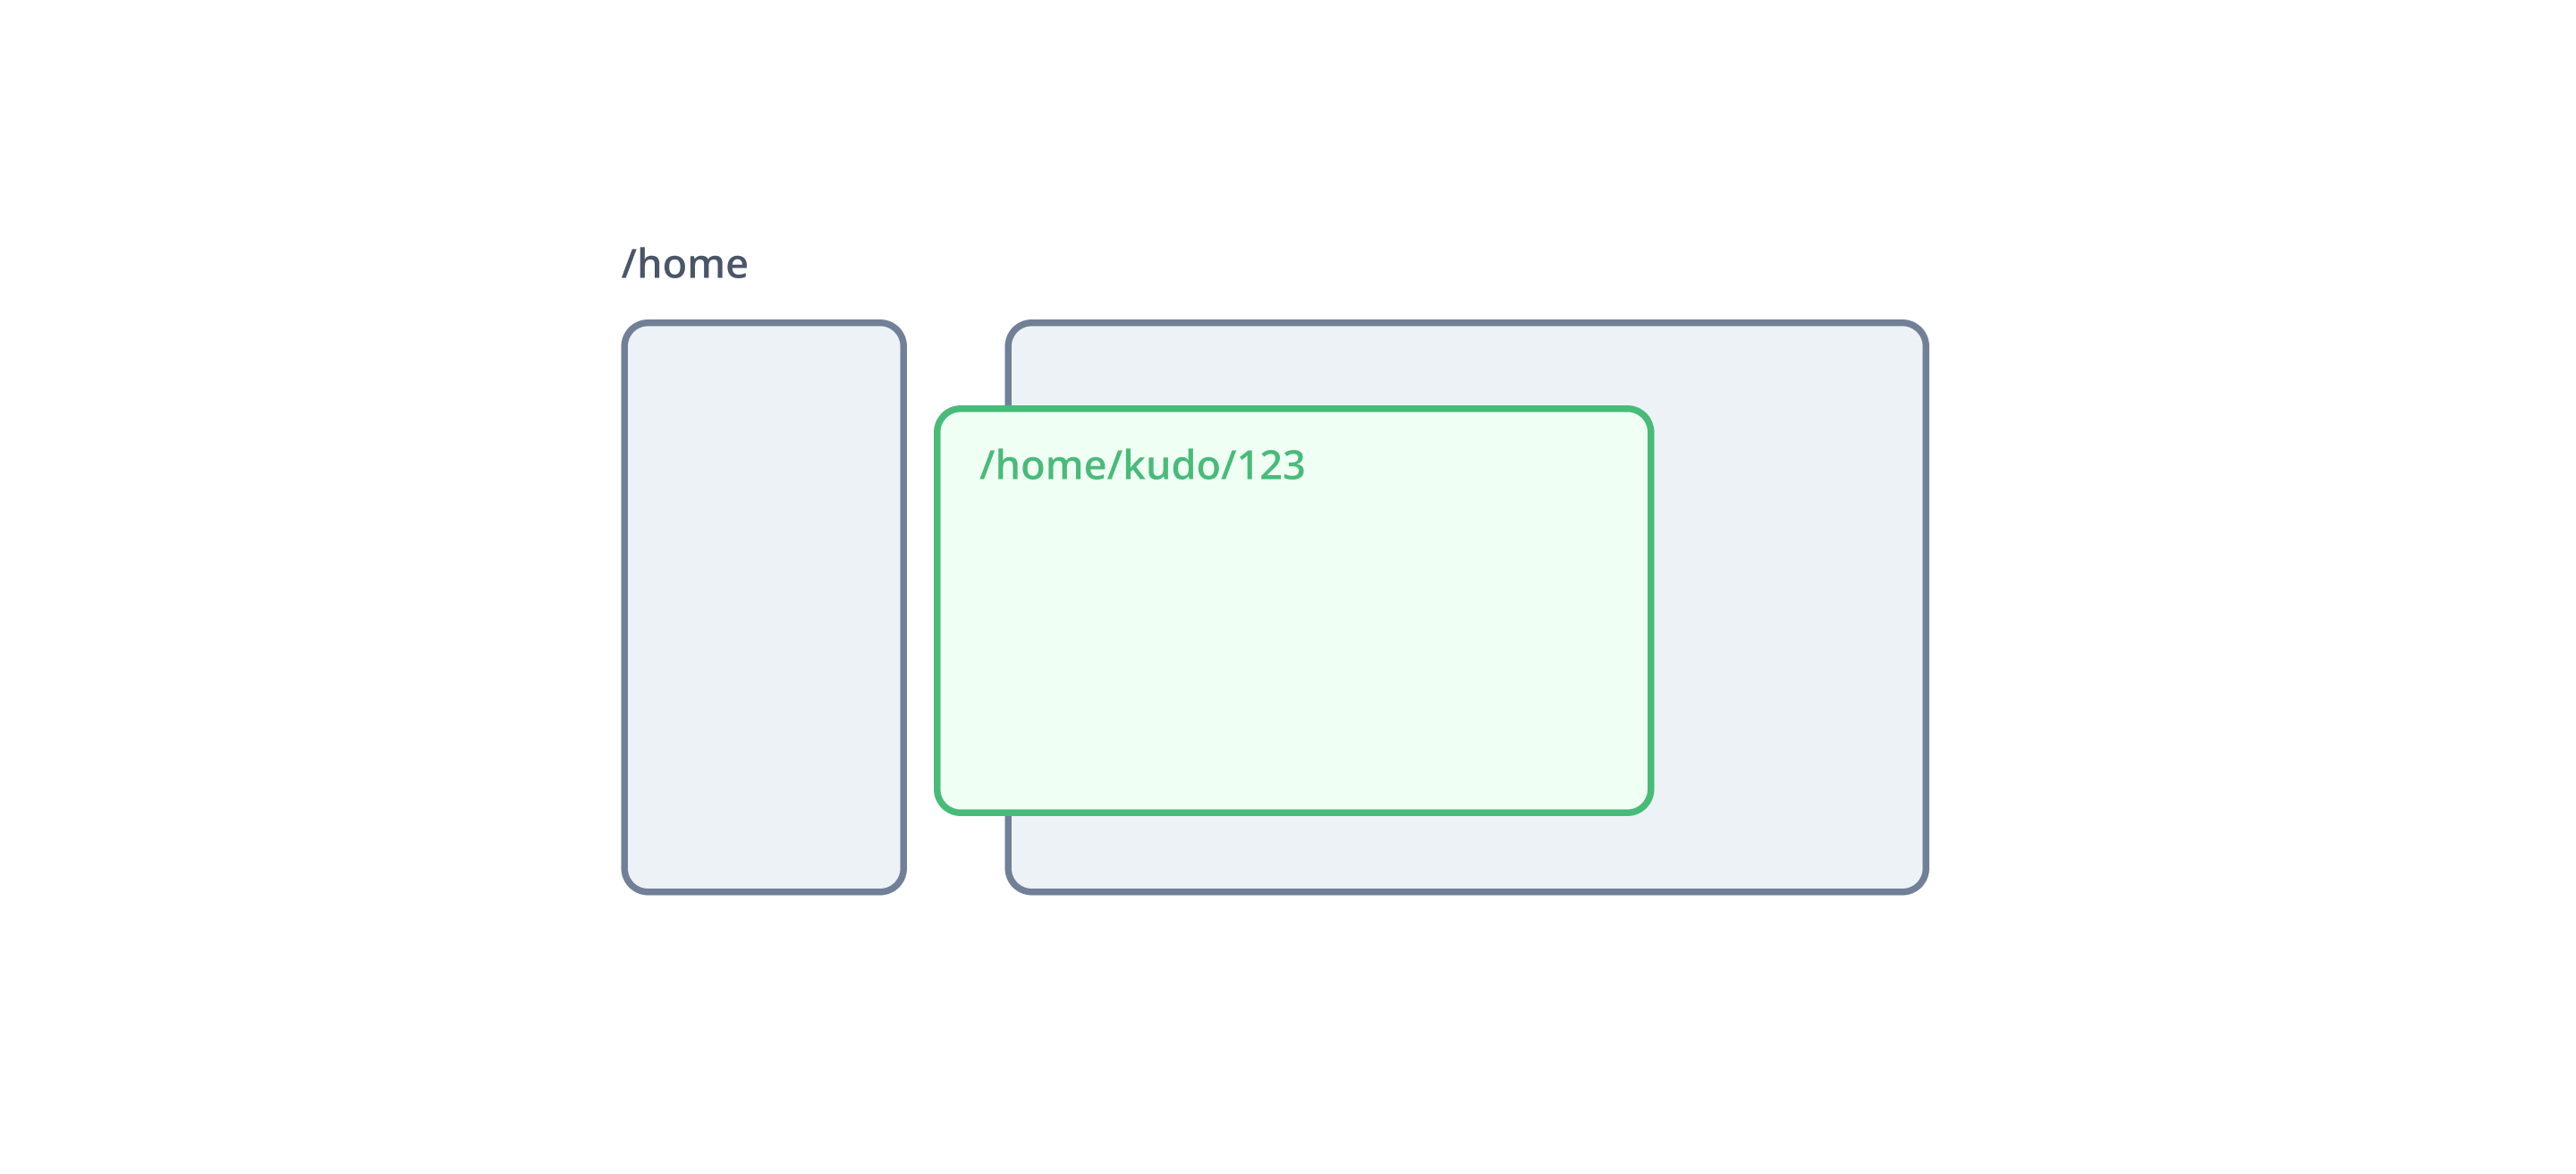
The $userId portion of this file name is a route param, which acts as a dynamic value you can provide your application via the URL. Remix will then translate that file name to the route: /home/kudos/$userId where $userId can be any value.

In that new file export a loader function and a React component that renders some text to make sure the dynamic value is working:
// app/routes/home/kudo.$userId.tsx

import { json, LoaderFunction } from '@remix-run/node'
import { useLoaderData } from '@remix-run/react'

// 1
export const loader: LoaderFunction = async ({ request, params }) => {
  // 2
  const { userId } = params
  return json({ userId })
}

export default function KudoModal() {
  // 3
  const data = useLoaderData()
  return <h2> User: {data.userId} </h2>
}
The code above does a few things:
- It pulls the
paramsfield from the loader function. - It then grabs the
userIdvalue. - Finally, it retrieves the data from the
loaderfunction using Remix'suserLoaderDatahook and renders theuserIdonto the screen.
Because this is a nested route, in order to display it you will need to define where the route should be outputted in its parent.
Use Remix's Outlet component to specify you want the child route to be rendered as a direct child of the Layout component in app/routes/home.tsx:
diff // app/routes/home.tsx
// ...
import {
useLoaderData,
+ Outlet
} from '@remix-run/react';
// ...
export default function Home() {
const { users } = useLoaderData()
return <Layout>
+ <Outlet />
{/* ... */}
</Layout>
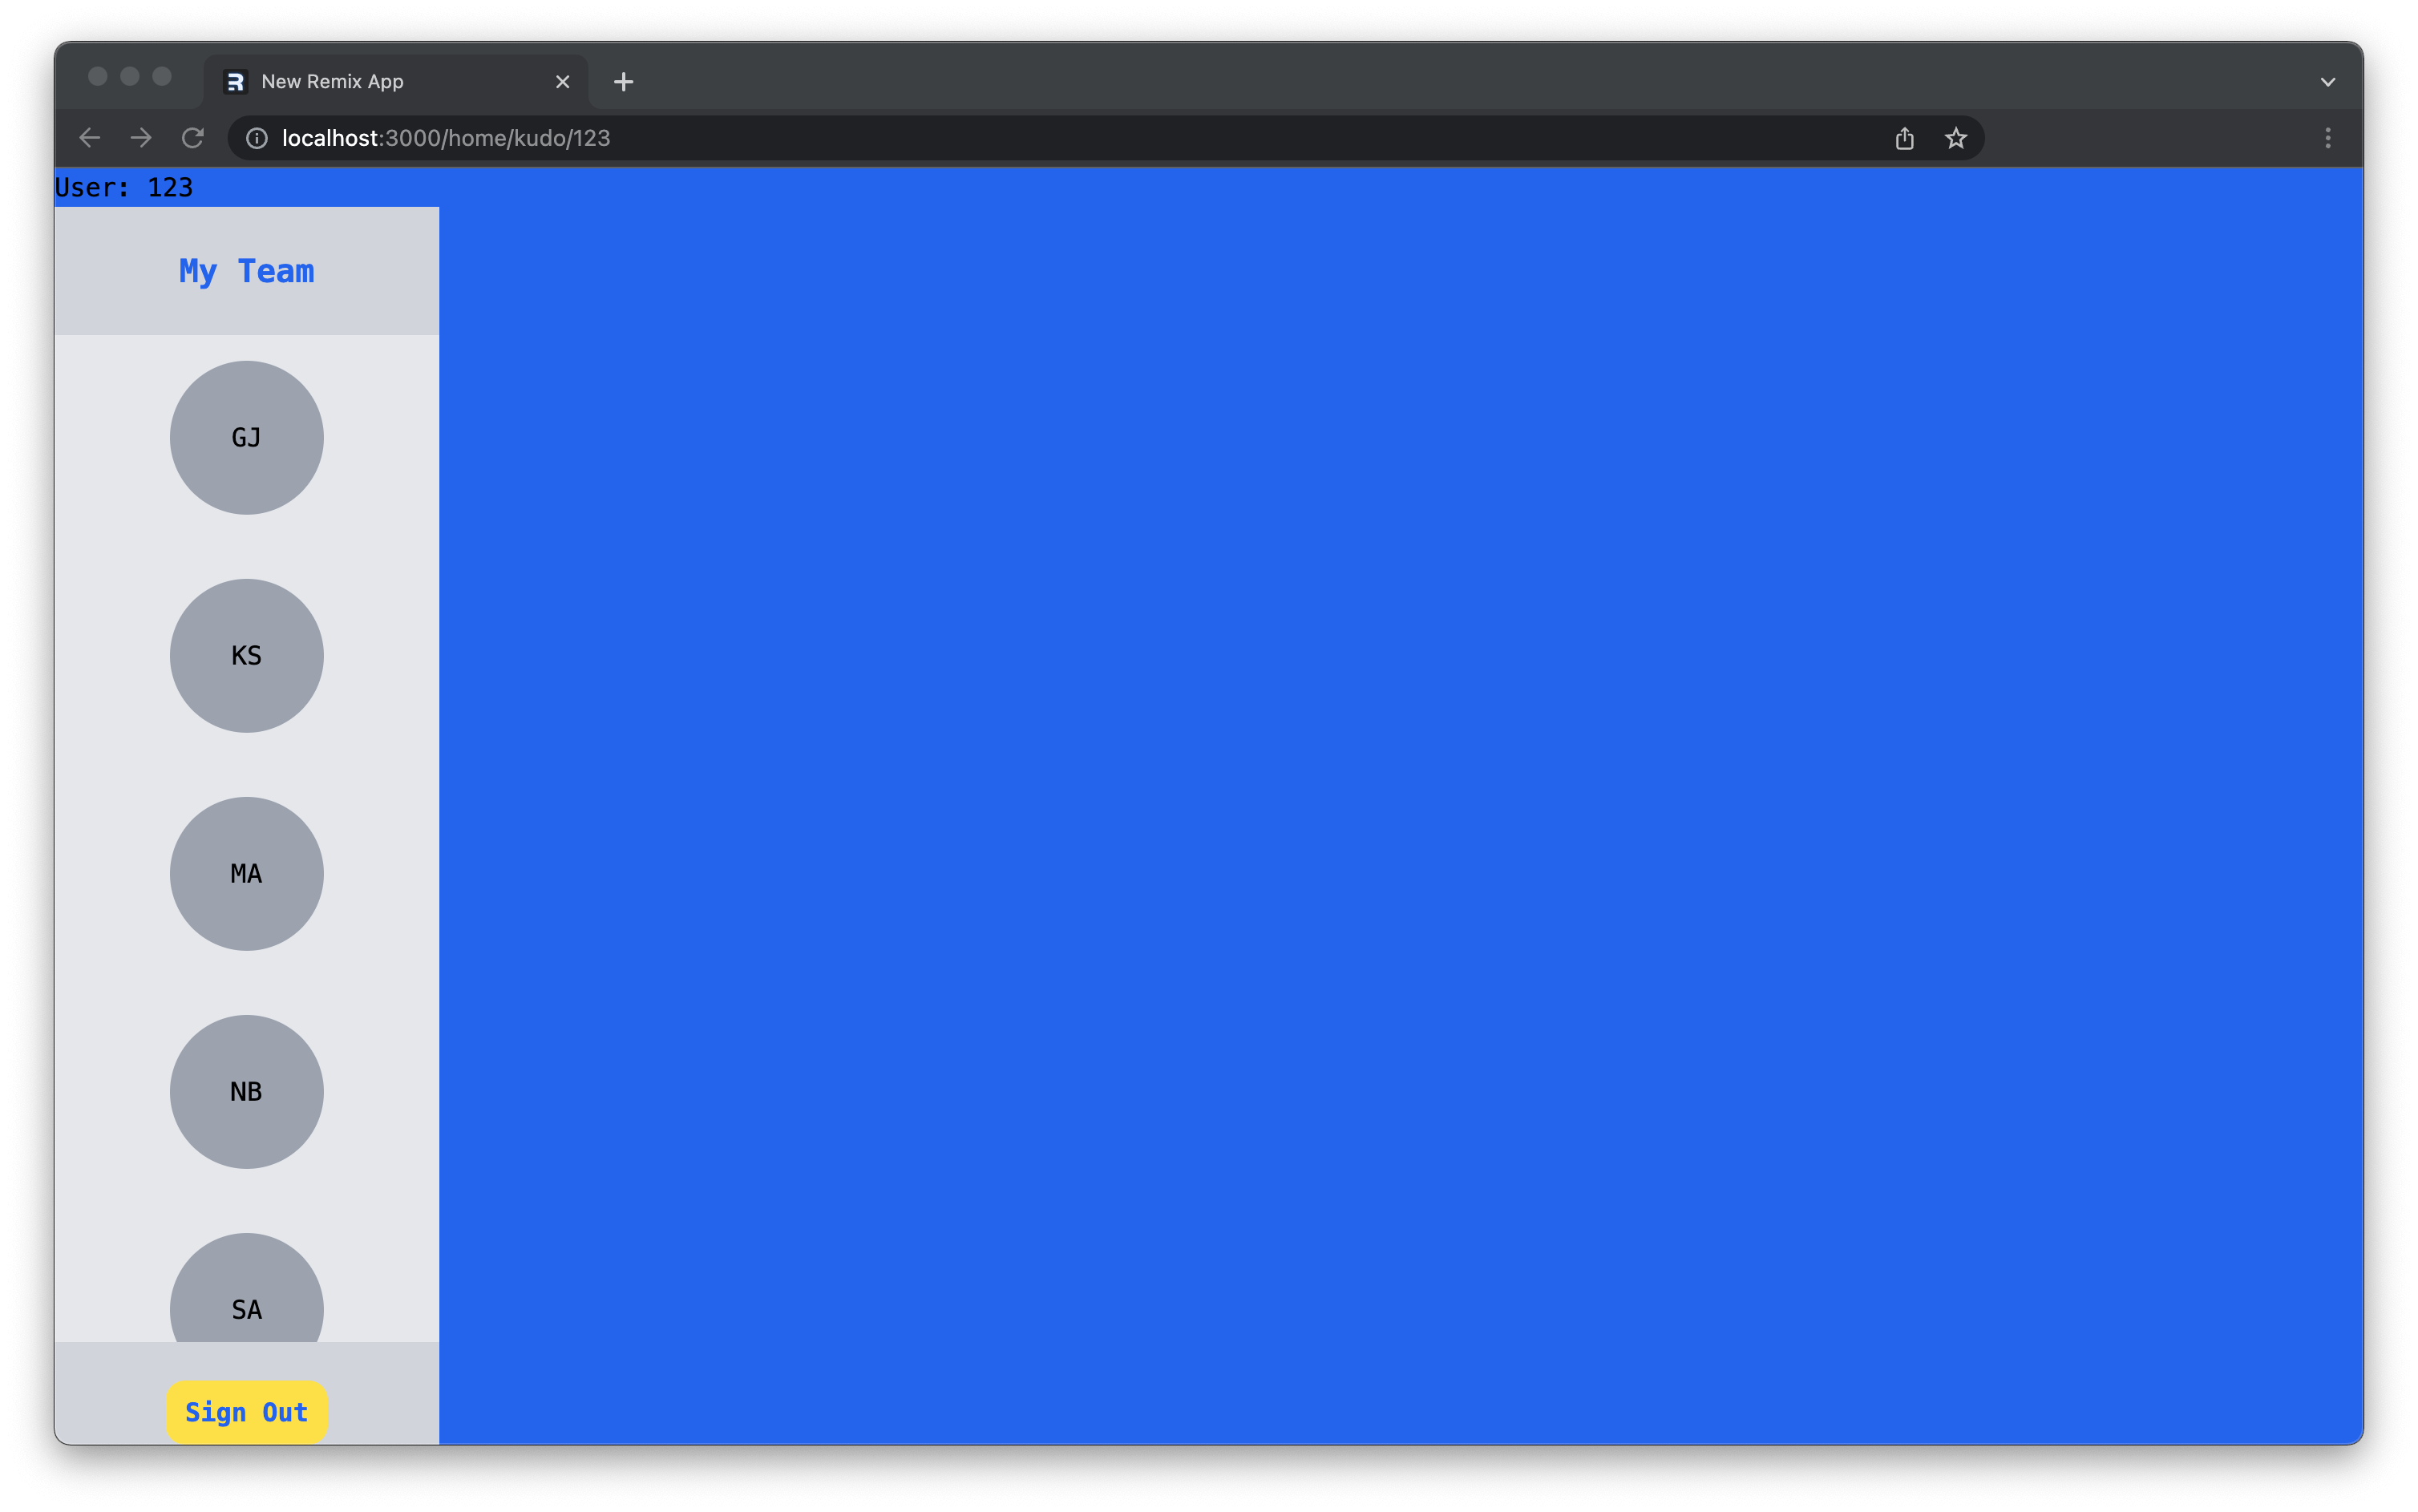
}If you head over to http://localhost/home/kudo/123, you should now see the text "User: 123" displayed at the very top of the page. If you change the value in the URL to something other than 123 you should see that change reflected on the screen.
Fetch a user by their id
Your nested route is working, but you still need to retrieve a user's data using the userId. Create a new function in app/utils/user.server.ts that returns a single user based on their id:
// app/utils/user.server.ts

// ...

export const getUserById = async (userId: string) => {
  return await prisma.user.findUnique({
    where: {
      id: userId,
    },
  })
}
The query above finds the unique record in the database with the given id. The findUnique function allows you to filter your query using uniquely identifying fields, or fields with values that must be unique to that record within your database.
Next:
- Call that function in the loader exported by
app/routes/home/kudo.$userId.tsx. - Return the results from that loader using the
jsonfunction.
// app/routes/home/kudo.$userId.tsx
import { json, LoaderFunction, redirect } from '@remix-run/node'
import { useLoaderData } from '@remix-run/react'
import { getUserById } from '~/utils/user.server'

export const loader: LoaderFunction = async ({ request, params }) => {
  const { userId } = params

  if (typeof userId !== 'string') {
    return redirect('/home')
  }

  const recipient = await getUserById(userId)
  return json({ recipient })
}
// ...
Next, you need a way to navigate to a nested route with a valid id.
In app/components/user-panel.tsx, the file where you are rendering the user list, import the useNavigation hook Remix provides and use it to navigate to the nested route when a user is clicked.
diff // app/components/user-panel.tsx

+import { useNavigate } from '@remix-run/react'


// ...

export function UserPanel({ users }: props) {
+    const navigate = useNavigate()
    return (
      {/*...*/}
       <UserCircle
          key={user.id}
          profile={user.profile}
          className="h-24 w-24 mx-auto flex-shrink-0"
+          onClick={() => navigate(`kudo/${user.id}`)}
      />
      {/*...*/}
    )
}
Now when your users click on another user in that panel, they will be navigated to a sub-route with that user's information.
If that all looks good, the next step is building the modal component that will display your form.
Open a portal
To build this modal you will first need to build a helper component that creates a portal, which allows you to render a child component somewhere outside of the parent's document object model (DOM) branch while still allowing the parent component to manage it as if it were a direct child.

Note: This portal will be important because it will allow you to render the modal in a location that does not have any inherited styles or positioning from a parent that could affect the positioning of the modal.
In app/components create a new file named portal.tsx with the following contents:
// app/components/portal.tsx

import { createPortal } from 'react-dom'
import { useState, useEffect } from 'react'

interface props {
  children: React.ReactNode
  wrapperId: string
}

// 1
const createWrapper = (wrapperId: string) => {
  const wrapper = document.createElement('div')
  wrapper.setAttribute('id', wrapperId)
  document.body.appendChild(wrapper)
  return wrapper
}

export const Portal: React.FC<props> = ({ children, wrapperId }) => {
  const [wrapper, setWrapper] = useState<HTMLElement | null>(null)

  useEffect(() => {
    // 2
    let element = document.getElementById(wrapperId)
    let created = false

    if (!element) {
      created = true
      element = createWrapper(wrapperId)
    }

    setWrapper(element)

    // 3
    return () => {
      if (created && element?.parentNode) {
        element.parentNode.removeChild(element)
      }
    }
  }, [wrapperId])

  if (wrapper === null) return null

  // 4
  return createPortal(children, wrapper)
}
Here's an explanation of what is going on in this component:
- A function is defined that generates a
divwith anid. That element is then attached to the document'sbody. - If an element with the provided
iddoes not already exist, invoke thecreateWrapperfunction to create one. - When the
Portalcomponent is un-mounted, this will destroy the element. - Creates a portal to the newly generated
div.
The result will be that any element or component wrapped in this Portal will be rendered as a direct child of the body tag, rather than in the current DOM branch as a child of its parent.
Give this a try to see it in action. In app/routes/home/kudos.$userId.tsx, import the new Portal component and wrap the the returned component with it:
diff // app/routes/home/kudo.$userId.tsx
// ...
+import { Portal } from '~/components/portal'
// ... loader ...
export default function KudoModal() {
const { recipient } = useLoaderData()
- return ( /* ... */ )
+ return <Portal wrapperId="kudo-modal">{/* ... */}</Portal>
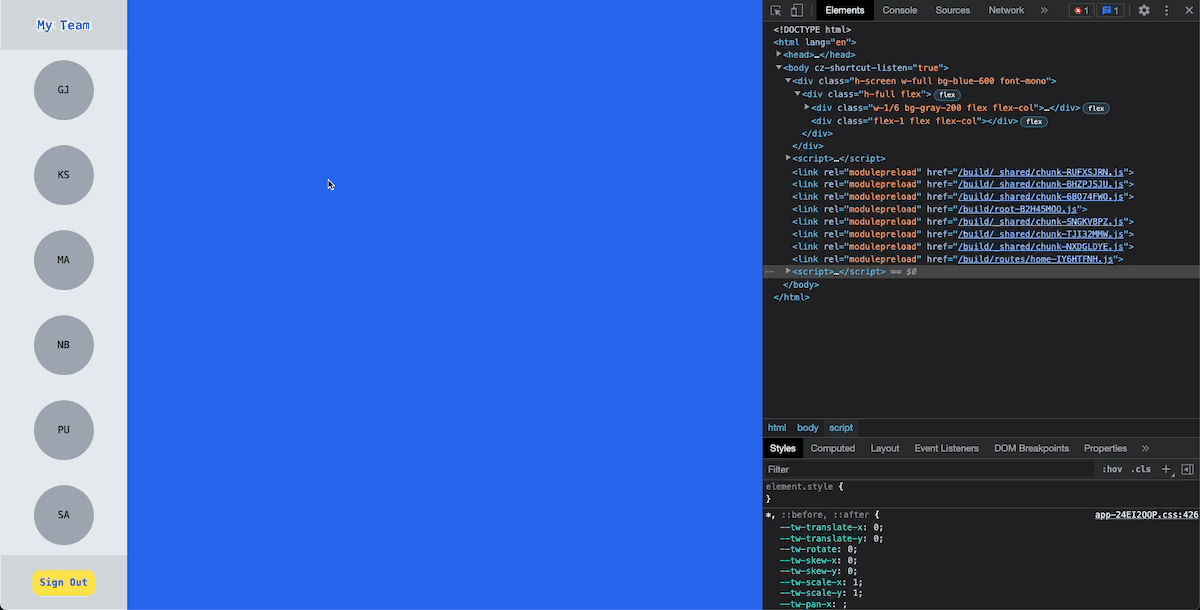
}If you navigate to your nested route, you will see a div with an id of "kudo-modal" is now rendered as a direct child of the body rather than where the nested route is being rendered in the DOM tree.
Build the modal component
Now that you have a portal to a safe, begin building the modal component itself. There will be two modals in this application, so build the component in a way that is reusable.
Create a new file at app/components/modal.tsx. This file should export a component with the following props:
children: The elements to render within the modal.isOpen: A flag that determines whether or not the modal is being displayed.ariaLabel: (optional) A string to be used as an aria label.className: (optional) A string that allows you to add additional classes to the modal's contents.
Add the following code to create the Modal component:
// app/components/modal.tsx
import { Portal } from './portal'
import { useNavigate } from '@remix-run/react'

interface props {
  children: React.ReactNode
  isOpen: boolean
  ariaLabel?: string
  className?: string
}

export const Modal: React.FC<props> = ({ children, isOpen, ariaLabel, className }) => {
  const navigate = useNavigate()
  if (!isOpen) return null

  return (
    <Portal wrapperId="modal">
      <div
        className="fixed inset-0 overflow-y-auto bg-gray-600 bg-opacity-80"
        aria-labelledby={ariaLabel ?? 'modal-title'}
        role="dialog"
        aria-modal="true"
        onClick={() => navigate('/home')}
      ></div>
      <div className="fixed inset-0 pointer-events-none flex justify-center items-center max-h-screen overflow-scroll">
        <div className={`${className} p-4 bg-gray-200 pointer-events-auto max-h-screen md:rounded-xl`}>
          {/* This is where the modal content is rendered  */}
          {children}
        </div>
      </div>
    </Portal>
  )
}
The Portal component is imported and wraps the entirety of the modal to ensure it is rendered in a safe location.
The modal is then defined as a fixed element on the screen with an opaque backdrop using various TailwindCSS helpers.
When the backdrop (anywhere off of the modal itself) is clicked, the user will be navigated to the /home route causing the modal to close.
Build the form
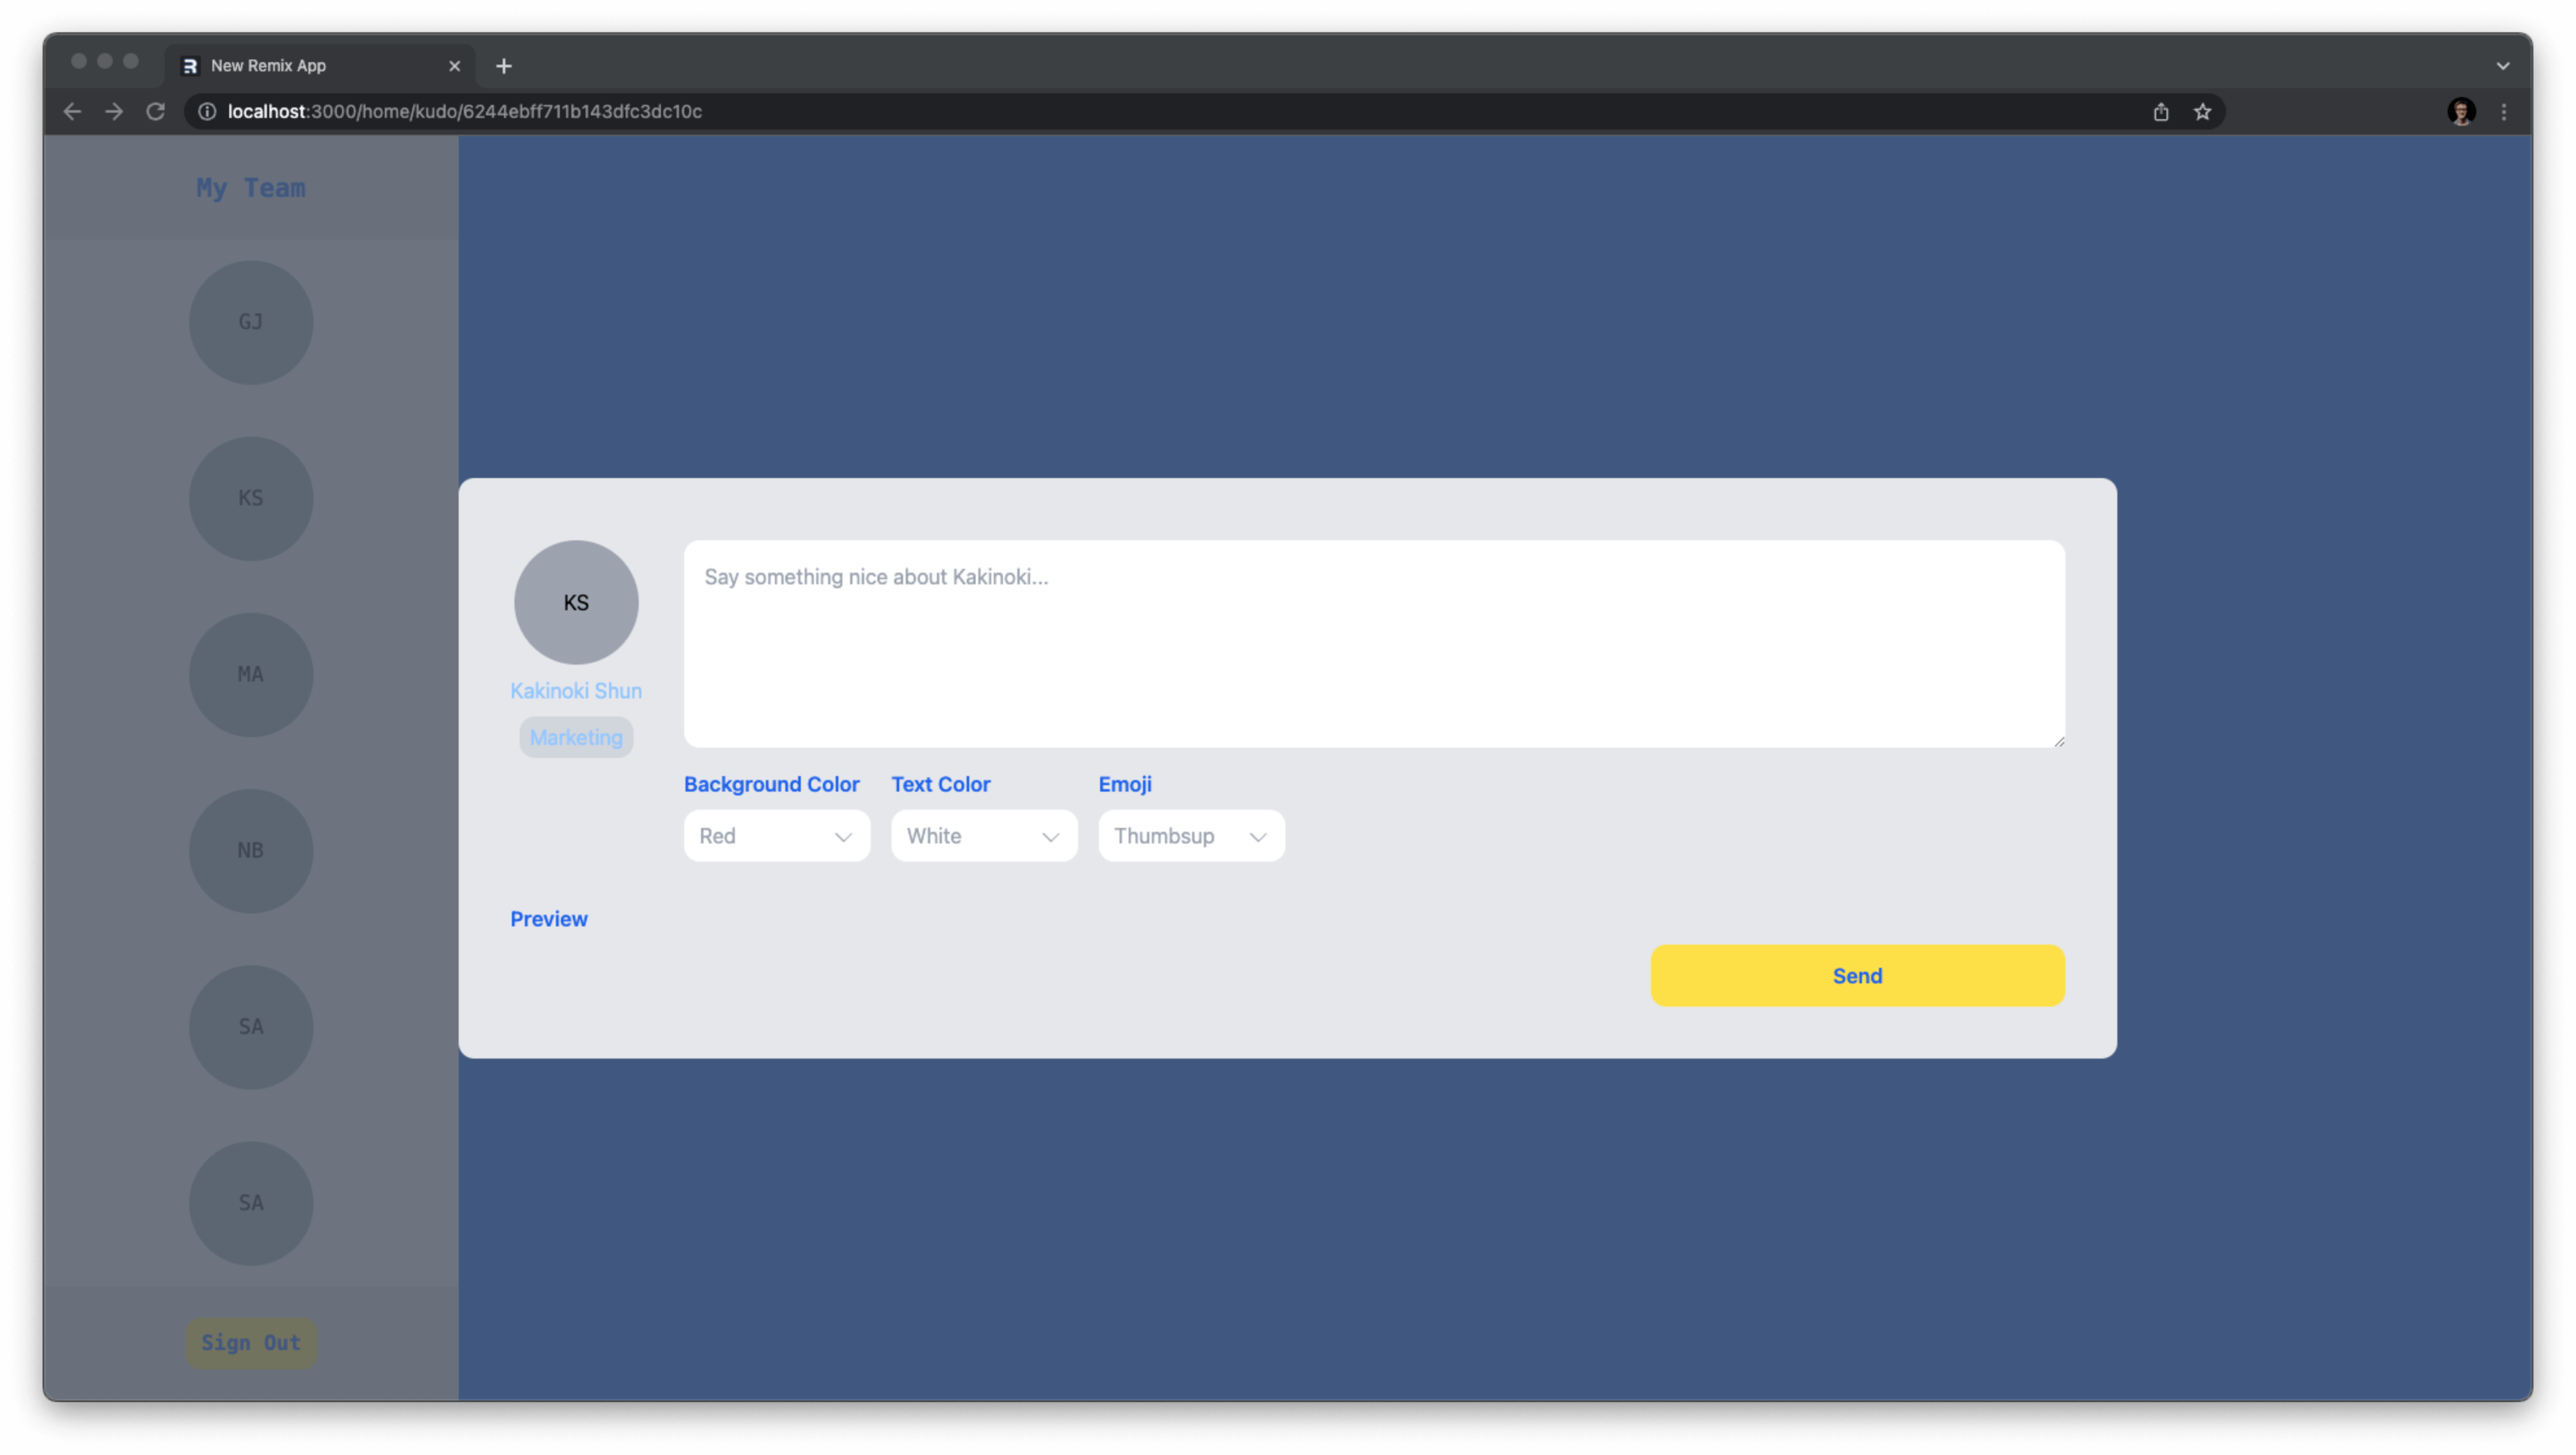
In app/routes/home/kudo.$userId.tsx import the new Modal component and render a Modal instead of the Portal currently being rendered:
// app/routes/home/kudo.$userId.tsx
- import { Portal } from '~/components/portal';
+ import { Modal } from '~/components/modal';


// ...

export default function KudoModal() {
  // ...
  return (
-    <Portal wrapperId="kudo-modal">
+    <Modal isOpen={true} className="w-2/3 p-10">
        <h2> User: {recipient.profile.firstName} {recipient.profile.lastName} </h2>
+    </Modal>
-    </Portal>
  )
}
The modal should now open up when a user from the side panel is clicked.
Your form will need the logged in user's information when it displays a preview of the message, so before building the form add that data to the response from the loader function:
diff // app/routes/home/kudo.$userId.tsx

+import { getUser } from '~/utils/auth.server'
// ...
export const loader: LoaderFunction = async ({ request, params }) => {
    // ...
+    const user = await getUser(request)
-    return json({ recipient })
+    return json({ recipient, user })
}
// ...
Then make the following changes to the KudoModal function in that file:
// app/routes/home/kudo.$userId.tsx

// 1
import {
  useLoaderData,
  useActionData
} from '@remix-run/react'
import { UserCircle } from '~/components/user-circle'
import { useState } from 'react'
import { KudoStyle } from '@prisma/client'

// ...

export default function KudoModal() {
// 2
const actionData = useActionData()
const [formError] = useState(actionData?.error || '')
const [formData, setFormData] = useState({
  message: '',
  style: {
    backgroundColor: 'RED',
    textColor: 'WHITE',
    emoji: 'THUMBSUP',
  } as KudoStyle,
})

  // 3
const handleChange = (e: React.ChangeEvent<HTMLInputElement | HTMLTextAreaElement>, field: string) => {
  setFormData(data => ({ ...data, [field]: e.target.value }))
}

  const {
    recipient,
    user
  } = useLoaderData()

  // 4
  return (
    <Modal isOpen={true} className="w-2/3 p-10">
      <div className="text-xs font-semibold text-center tracking-wide text-red-500 w-full mb-2">{formError}</div>
      <form method="post">
        <input type="hidden" value={recipient.id} name="recipientId" />
        <div className="flex flex-col md:flex-row gap-y-2 md:gap-y-0">
          <div className="text-center flex flex-col items-center gap-y-2 pr-8">
            <UserCircle profile={recipient.profile} className="h-24 w-24" />
            <p className="text-blue-300">
              {recipient.profile.firstName} {recipient.profile.lastName}
            </p>
            {recipient.profile.department && (
              <span className="px-2 py-1 bg-gray-300 rounded-xl text-blue-300 w-auto">
                {recipient.profile.department[0].toUpperCase() + recipient.profile.department.toLowerCase().slice(1)}
              </span>
            )}
          </div>
          <div className="flex-1 flex flex-col gap-y-4">
            <textarea
              name="message"
              className="w-full rounded-xl h-40 p-4"
              value={formData.message}
              onChange={e => handleChange(e, 'message')}
              placeholder={`Say something nice about ${recipient.profile.firstName}...`}
            />
            <div className="flex flex-col items-center md:flex-row md:justify-start gap-x-4">
              {/* Select Boxes Go Here */}
            </div>
          </div>
        </div>
        <br />
        <p className="text-blue-600 font-semibold mb-2">Preview</p>
        <div className="flex flex-col items-center md:flex-row gap-x-24 gap-y-2 md:gap-y-0">
          {/* The Preview Goes Here */}
          <div className="flex-1" />
          <button
            type="submit"
            className="rounded-xl bg-yellow-300 font-semibold text-blue-600 w-80 h-12 transition duration-300 ease-in-out hover:bg-yellow-400 hover:-translate-y-1"
          >
            Send
          </button>
        </div>
      </form>
    </Modal>
  )
}
This was a big chunk of new code, so take a look at what changes were made:
- Imports a few components and hooks you will need.
- Sets up the various form variables you will need to handle the form data and errors.
- Creates the function that will handle input changes.
- Renders the basic layout of the form component in place of what was the
<h2>tag.
Allow the user to customize their kudo
This form also needs to allow the user to select custom styles using select boxes.
Create a new file in app/components named select-box.tsx that exports a SelectBox component:
// app/components/select-box.tsx

interface props {
  options: {
    name: string
    value: any
  }[]
  className?: string
  containerClassName?: string
  id?: string
  name?: string
  label?: string
  value?: any
  onChange?: (...args: any) => any
}

export function SelectBox({
  options = [],
  onChange = () => {},
  className = '',
  containerClassName = '',
  name,
  id,
  value,
  label,
}: props) {
  return (
    <div>
      <label htmlFor={id} className="text-blue-600 font-semibold">
        {label}
      </label>
      <div className={`flex items-center ${containerClassName} my-2`}>
        <select className={`${className} appearance-none`} id={id} name={name} onChange={onChange} value={value || ''}>
          {options.map(option => (
            <option key={option.name} value={option.value}>
              {option.name}
            </option>
          ))}
        </select>
        <svg
          className="w-4 h-4 fill-current text-gray-400 -ml-7 mt-1 pointer-events-none"
          viewBox="0 0 140 140"
          xmlns="http://www.w3.org/2000/svg"
        >
          <g>
            <path d="m121.3,34.6c-1.6-1.6-4.2-1.6-5.8,0l-51,51.1-51.1-51.1c-1.6-1.6-4.2-1.6-5.8,0-1.6,1.6-1.6,4.2 0,5.8l53.9,53.9c0.8,0.8 1.8,1.2 2.9,1.2 1,0 2.1-0.4 2.9-1.2l53.9-53.9c1.7-1.6 1.7-4.2 0.1-5.8z" />
          </g>
        </svg>
      </div>
    </div>
  )
}
This component is similar to the FormField component in that it is a controlled component that takes in some configuration and allows its state to be managed by its parent.
These select boxes will need to be populated with the color and emoji options. Create a helper file to hold the possible options at app/utils/constants.ts:
// app/utils/constants.ts

export const colorMap = {
  RED: 'text-red-400',
  GREEN: 'text-green-400',
  BLUE: 'text-blue-400',
  WHITE: 'text-white',
  YELLOW: 'text-yellow-300',
}

export const backgroundColorMap = {
  RED: 'bg-red-400',
  GREEN: 'bg-green-400',
  BLUE: 'bg-blue-400',
  WHITE: 'bg-white',
  YELLOW: 'bg-yellow-300',
}

export const emojiMap = {
  THUMBSUP: '👍',
  PARTY: '🎉',
  HANDSUP: '🙌🏻',
}
Now in app/routes/home/kudo.$userId.tsx, import the SelectBox component and the constants. Also add the variables and functions requried to hook them up to the form's state and render the SelectBox components in place of the {/* Select Boxes Go Here */} comment:
diff // app/routes/home/kudo.$userId.tsx

//...

+import { SelectBox } from '~/components/select-box'
+import { colorMap, emojiMap } from "~/utils/constants";


// ...

export default function KudoModal() {

  // ...

+  const handleStyleChange = (e: React.ChangeEvent<HTMLInputElement | HTMLTextAreaElement>, field: string) => {
+      setFormData(data => ({
+          ...data, style: {
+              ...data.style,
+              [field]: e.target.value
+          }
+      }))
+  }


+  const getOptions = (data: any) => Object.keys(data).reduce((acc: any[], curr) => {
+      acc.push({
+          name: curr.charAt(0).toUpperCase() + curr.slice(1).toLowerCase(),
+          value: curr
+      })
+      return acc
+  }, [])


+  const colors = getOptions(colorMap)
+  const emojis = getOptions(emojiMap)


  return (
      {/* ... */}
-      {/* Select Boxes Go Here */}
+      <SelectBox
+          options={colors}
+          name="backgroundColor"
+          value={formData.style.backgroundColor}
+          onChange={e => handleStyleChange(e, 'backgroundColor')}
+          label="Background Color"
+          containerClassName="w-36"
+          className="w-full rounded-xl px-3 py-2 text-gray-400"
+      />
+      <SelectBox
+          options={colors}
+          name="textColor"
+          value={formData.style.textColor}
+          onChange={e => handleStyleChange(e, 'textColor')}
+          label="Text Color"
+          containerClassName="w-36"
+          className="w-full rounded-xl px-3 py-2 text-gray-400"
+      />
+      <SelectBox
+          options={emojis}
+          label="Emoji"
+          name="emoji"
+          value={formData.style.emoji}
+          onChange={e => handleStyleChange(e, 'emoji')}
+          containerClassName="w-36"
+          className="w-full rounded-xl px-3 py-2 text-gray-400"
+      />
      {/* ... */}
  )
}
The select boxes will now appear with all of the possible options.
Add a kudo display component
This form will have a preview section where the user can see an actual rendering of the component the recipient will see.
Create a new file at app/components named kudo.tsx:
// app/components/kudo.tsx

import { UserCircle } from '~/components/user-circle'
import { Profile, Kudo as IKudo } from '@prisma/client'
import { colorMap, backgroundColorMap, emojiMap } from '~/utils/constants'

export function Kudo({ profile, kudo }: { profile: Profile; kudo: Partial<IKudo> }) {
  return (
    <div
      className={`flex ${
        backgroundColorMap[kudo.style?.backgroundColor || 'RED']
      } p-4 rounded-xl w-full gap-x-2 relative`}
    >
      <div>
        <UserCircle profile={profile} className="h-16 w-16" />
      </div>
      <div className="flex flex-col">
        <p className={`${colorMap[kudo.style?.textColor || 'WHITE']} font-bold text-lg whitespace-pre-wrap break-all`}>
          {profile.firstName} {profile.lastName}
        </p>
        <p className={`${colorMap[kudo.style?.textColor || 'WHITE']} whitespace-pre-wrap break-all`}>{kudo.message}</p>
      </div>
      <div className="absolute bottom-4 right-4 bg-white rounded-full h-10 w-10 flex items-center justify-center text-2xl">
        {emojiMap[kudo.style?.emoji || 'THUMBSUP']}
      </div>
    </div>
  )
}
This component takes in the props:
profile: Theprofiledata from the recipientsuserdocument.kudo: TheKudo's data and styling options.
The constants with color and emoji options are imported and used to render the customized styles.
You can now import this component into app/routes/home/kudo.$userId.tsx and render it in place of the {/* The Preview Goes Here */} comment:
diff // app/routes/home/kudo.$userId.tsx

// ...

+import { Kudo } from '~/components/kudo'


// ...

export default function KudoModal() {
  // ...

  return (
    <Modal isOpen={true} className="w-2/3 p-10">
      {/* ... */}
-      {/* The Preview Goes Here */}
+      <Kudo profile={user.profile} kudo={formData} />
      {/* ... */}
    </Modal>
  )
}
The preview will now be rendered, displaying the currently logged in user's information and the styled message they are going to send.
Build the action to send kudos
The form is now visually complete and the only piece that remains is making it functional!
Create a new file in app/utils named kudos.server.ts where you will write any functions related to querying or storing kudos.
In this file, export a createKudo method that takes in the kudo form data, the author's id and the recipient's id. Then store that data using Prisma:
// app/utils/kudos.server.ts

import { prisma } from './prisma.server'
import { KudoStyle } from '@prisma/client'

export const createKudo = async (message: string, userId: string, recipientId: string, style: KudoStyle) => {
  await prisma.kudo.create({
    data: {
      // 1
      message,
      style,
      // 2
      author: {
        connect: {
          id: userId,
        },
      },
      recipient: {
        connect: {
          id: recipientId,
        },
      },
    },
  })
}
The query above does the following:
- Passes in the
messagestring andstyleembedded document. - Connects the new kudo to the appropriate author and recipient using the ids passed to the function.
Import this new function into the app/routes/home/kudo.$userId.tsx file and create an action function to handle the form data and the invocation of the createKudo function:
diff // app/routes/home/kudo.$userId.tsx

// 1
import {
+  ActionFunction,
  json,
  LoaderFunction,
  redirect
} from '@remix-run/node'
import {
+    Color,
+    Emoji,
    KudoStyle
} from '@prisma/client'
+import { requireUserId } from '~/utils/auth.server'
+import { createKudo } from '~/utils/kudos.server'


// ...

+export const action: ActionFunction = async ({ request }) => {
+  const userId = await requireUserId(request)
+
+  // 2
+  const form = await request.formData()
+  const message = form.get('message')
+  const backgroundColor = form.get('backgroundColor')
+  const textColor = form.get('textColor')
+  const emoji = form.get('emoji')
+  const recipientId = form.get('recipientId')
+
+  // 3
+  if (
+    typeof message !== 'string' ||
+    typeof recipientId !== 'string' ||
+    typeof backgroundColor !== 'string' ||
+    typeof textColor !== 'string' ||
+    typeof emoji !== 'string'
+  ) {
+    return json({ error: `Invalid Form Data` }, { status: 400 })
+  }
+
+  if (!message.length) {
+    return json({ error: `Please provide a message.` }, { status: 400 })
+  }
+
+  if (!recipientId.length) {
+    return json({ error: `No recipient found...` }, { status: 400 })
+  }
+
+  // 4
+  await createKudo(message, userId, recipientId, {
+    backgroundColor: backgroundColor as Color,
+    textColor: textColor as Color,
+    emoji: emoji as Emoji,
+  })
+
+  // 5
+  return redirect('/home')
+}

// ...
Here's an overview of the snippet above:
- Imports the new
createKudofunction, along with a few types generated by Prisma, theActionFunctiontype from Remix, and therequireUserIdfunction you wrote previously. - Pulls out all of the form data and fields you need from the request.
- Validates all of the form data and send the appropriate errors back to the form to be displayed if something goes wrong.
- Creates the new
kudousing thecreateKudofunction. - Redirects the user to the
/homeroute, causing the modal to close.
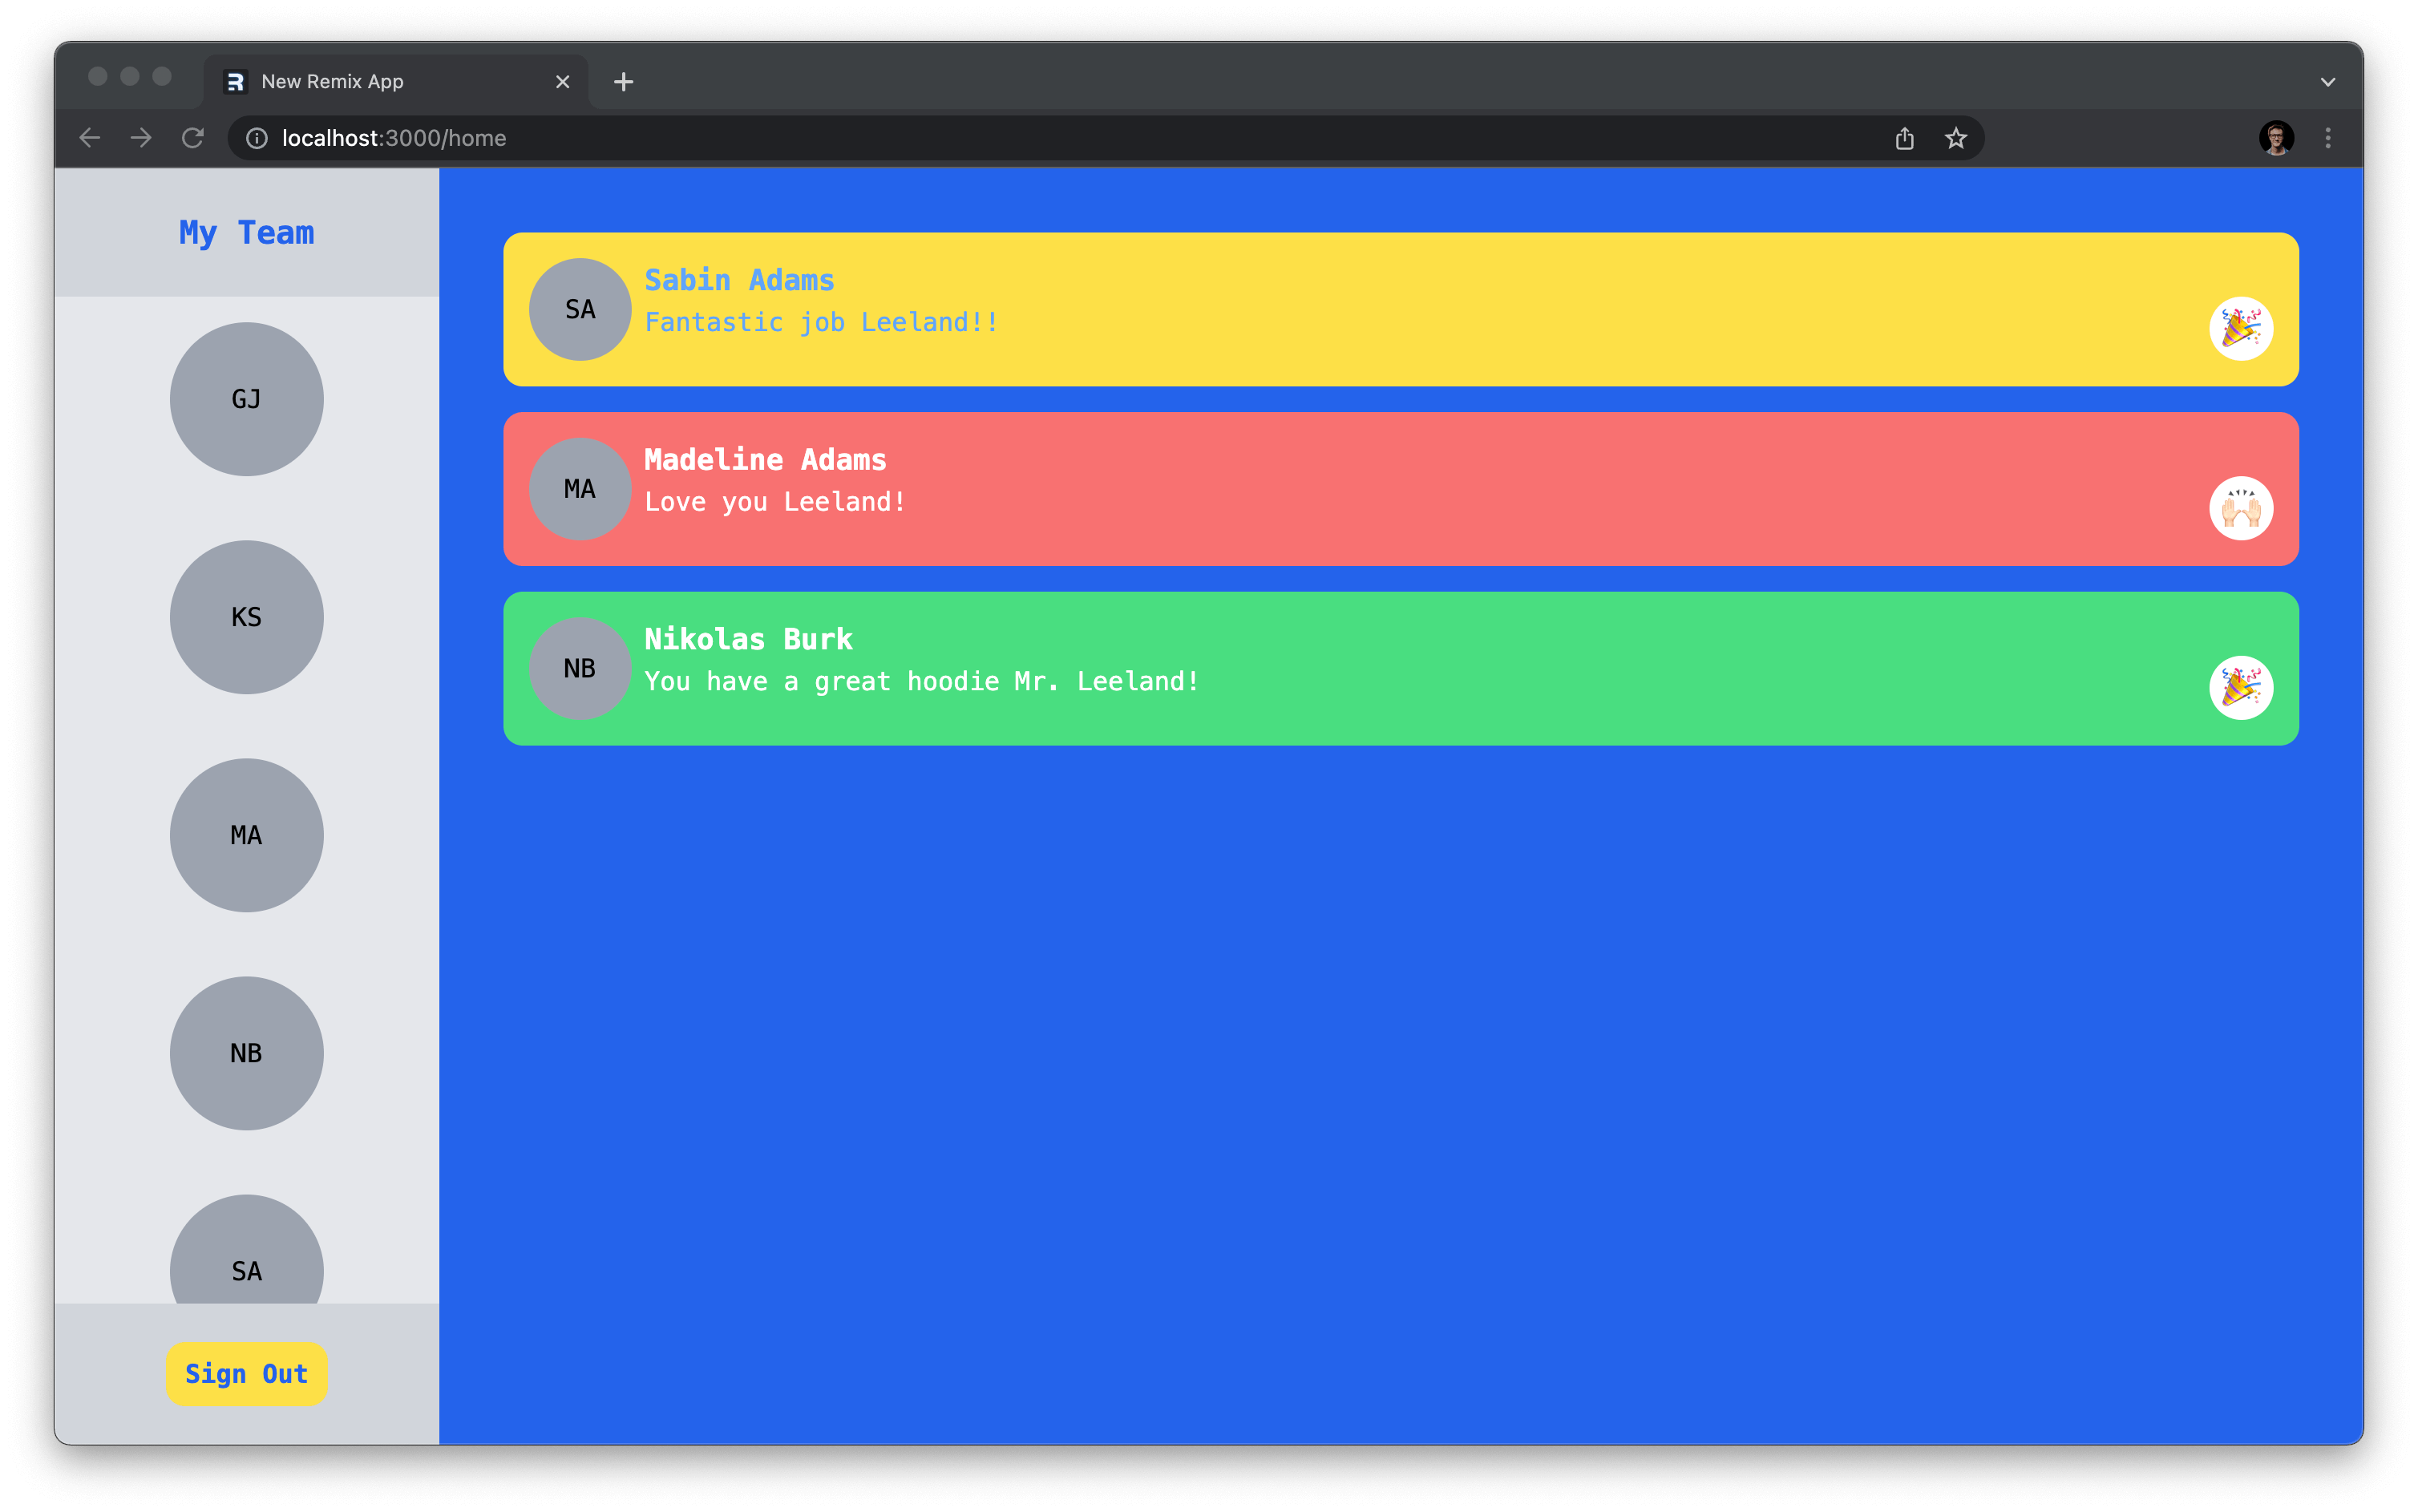
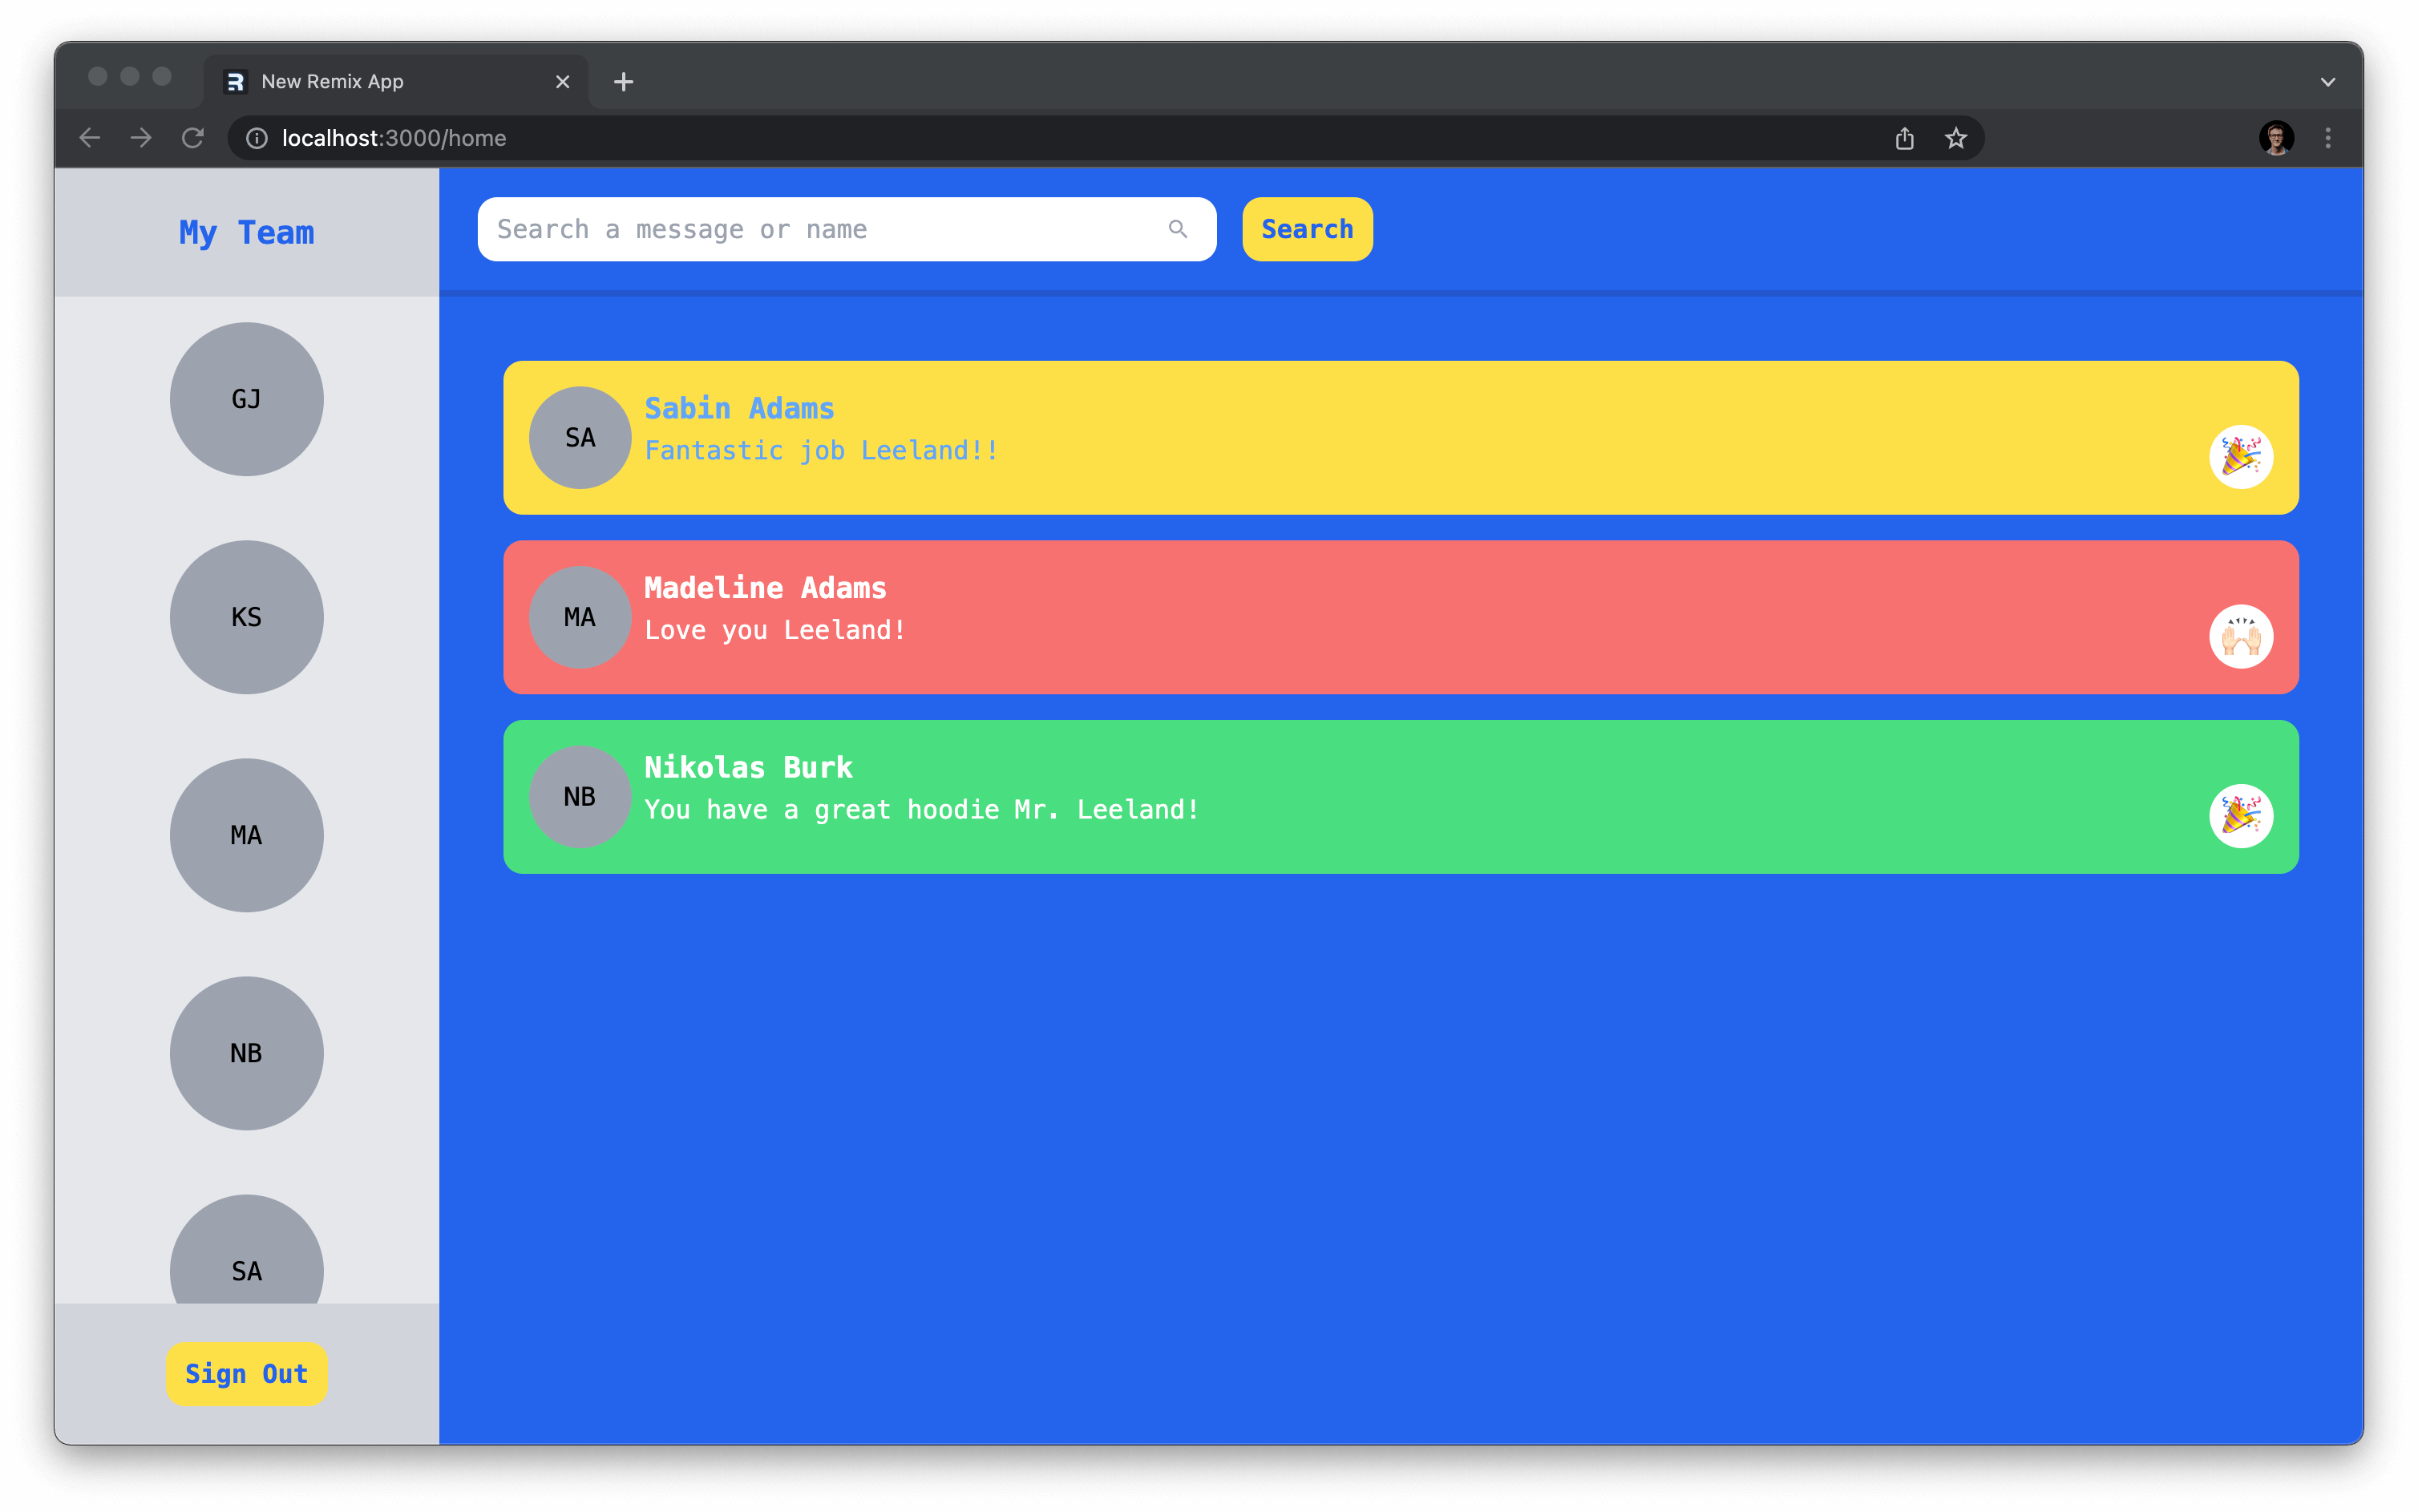
Build a kudos feed
Now that your users can send kudos to each other, you will need a way to display those kudos in the user's feed on the /home page.
You already built the kudo display component, so you simply need to retrieve and render out a list of kudos on the home page.
In app/utils/kudos.server.ts create and export a new function named getFilteredKudos.
// app/utils/kudos.server.ts

// 👇 Added the Prisma namespace in the import
import { KudoStyle, Prisma } from '@prisma/client'

// ...

export const getFilteredKudos = async (
  userId: string,
  sortFilter: Prisma.KudoOrderByWithRelationInput,
  whereFilter: Prisma.KudoWhereInput,
) => {
  return await prisma.kudo.findMany({
    select: {
      id: true,
      style: true,
      message: true,
      author: {
        select: {
          profile: true,
        },
      },
    },
    orderBy: {
      ...sortFilter,
    },
    where: {
      recipientId: userId,
      ...whereFilter,
    },
  })
}
The function above takes in a few different parameters. Here is what those are:
userId: Theidof the user whose kudos the query should retrieve.sortFilter: An object that will be passed into theorderByoption in the query to sort the results.whereFilter: An object that will be passed into thewhereoption in the query to filter the results.
Note: Prisma generates types that can be used to safely type pieces of your queries, such as the
Prisma.KudoWhereInputused above.
Now in app/routes/home.tsx, import that function and invoke it in the loader function. Also import the Kudo component and the types required to render out the feed of Kudos.
// app/routes/home.tsx
import { getFilteredKudos } from '~/utils/kudos.server'
import { Kudo } from '~/components/kudo'
import { Kudo as IKudo, Profile } from '@prisma/client'

interface KudoWithProfile extends IKudo {
  author: {
    profile: Profile
  }
}

export const loader: LoaderFunction = async ({ request }) => {
  // ...
  const kudos = await getFilteredKudos(userId, {}, {})
  return json({ users, kudos })
}

export default function Home() {
  const { users, kudos } = useLoaderData()
  return (
    <Layout>
      <Outlet />
      <div className="h-full flex">
        <UserPanel users={users} />
        <div className="flex-1 flex flex-col">
          {/* Search Bar Goes Here */}
          <div className="flex-1 flex">
            <div className="w-full p-10 flex flex-col gap-y-4">
              {kudos.map((kudo: KudoWithProfile) => (
                <Kudo key={kudo.id} kudo={kudo} profile={kudo.author.profile} />
              ))}
            </div>
            {/* Recent Kudos Goes Here */}
          </div>
        </div>
      </div>
    </Layout>
  )
}
The Kudo and Profile types generated by Prisma are combined to create a KudoWithProfile type. This is needed because your array has kudos that include the profile data from the author.
If you send a couple of kudos to an account and log in to that account, you should now see a rendered list of kudos on your feed.
You may notice when getFilteredKudos invocation is providing empty objects for the sort and filter options. This is because there is not yet a way in the UI to filter or sort the feed. Next, you will create the search bar at the top of the feed to handle this.
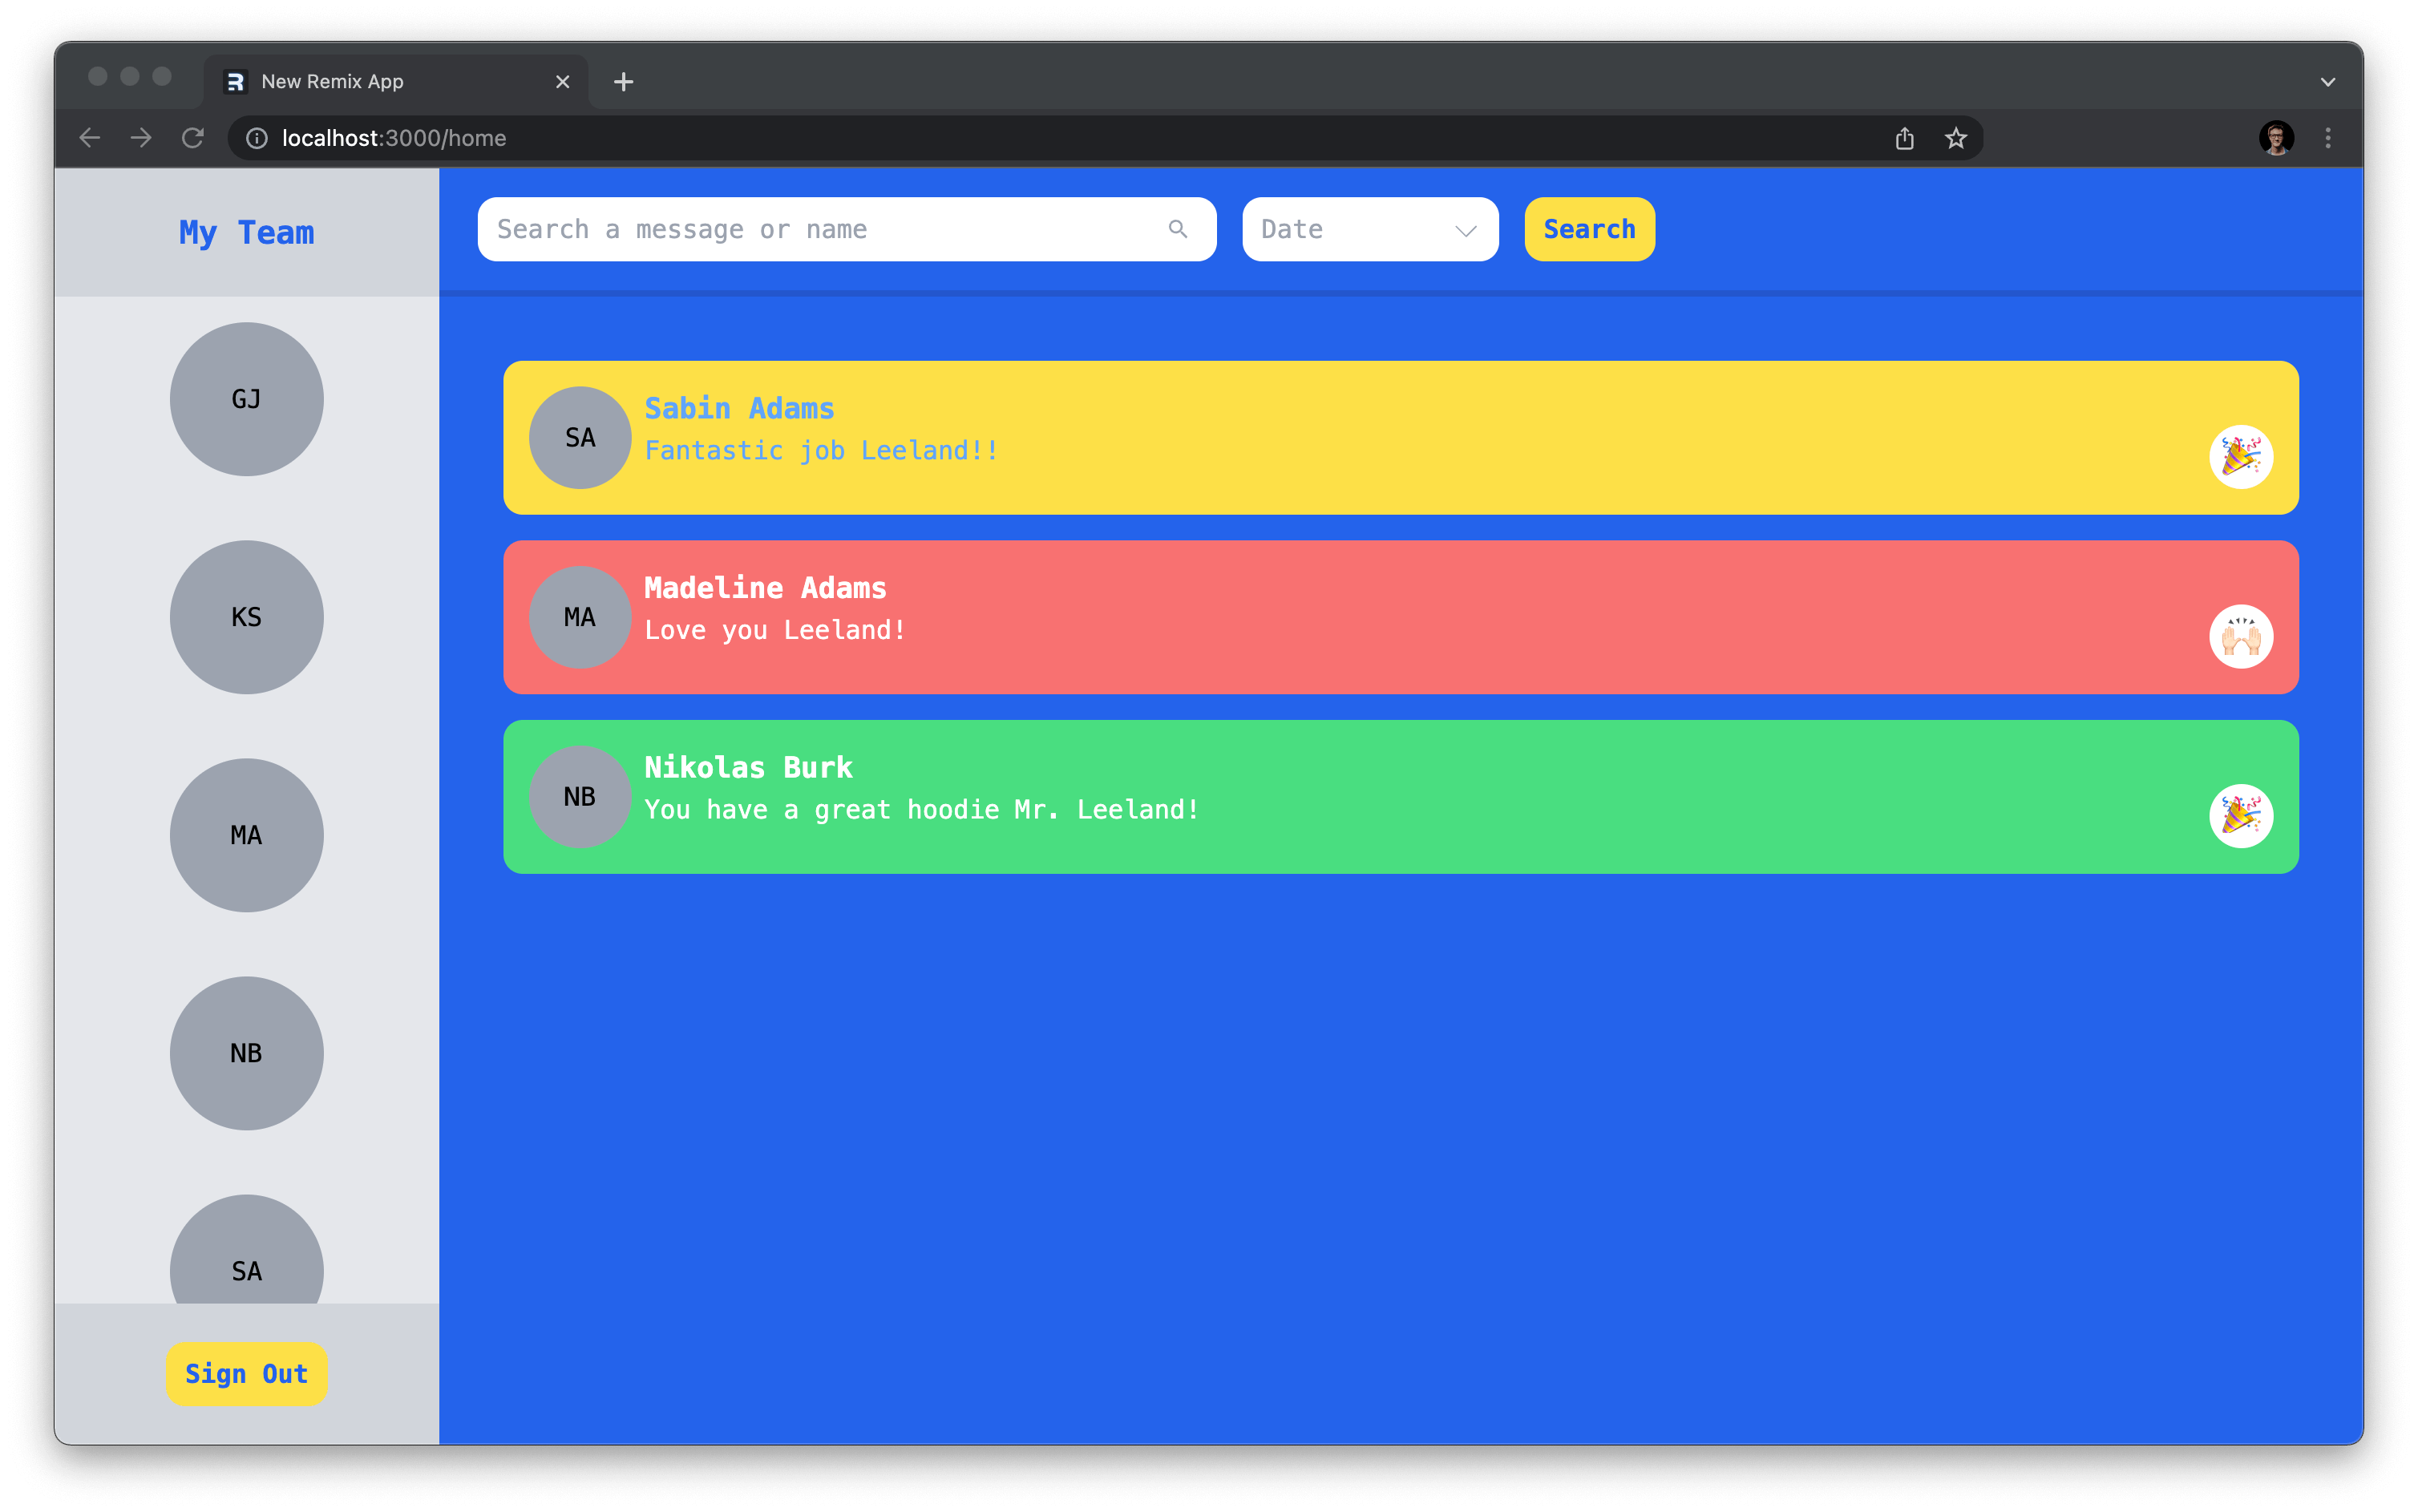
Build a search bar
Create a new file in app/components named search-bar.tsx. This component will submit a form to the /home page, passing along query parameters that will be used to build up the sort and filter objects you need.
// app/components/search-bar.tsx

import { useNavigate, useSearchParams } from '@remix-run/react'

export function SearchBar() {
  const navigate = useNavigate()
  let [searchParams] = useSearchParams()

  const clearFilters = () => {
    searchParams.delete('filter')
    navigate('/home')
  }

  return (
    <form className="w-full px-6 flex items-center gap-x-4 border-b-4 border-b-blue-900 border-opacity-30 h-20">
      <div className={`flex items-center w-2/5`}>
        <input
          type="text"
          name="filter"
          className="w-full rounded-xl px-3 py-2"
          placeholder="Search a message or name"
        />
        <svg
          className="w-4 h-4 fill-current text-gray-400 -ml-8"
          xmlns="http://www.w3.org/2000/svg"
          viewBox="0 0 24 24"
        >
          <path d="M0 0h24v24H0V0z" fill="none" />
          <path d="M15.5 14h-.79l-.28-.27C15.41 12.59 16 11.11 16 9.5 16 5.91 13.09 3 9.5 3S3 5.91 3 9.5 5.91 16 9.5 16c1.61 0 3.09-.59 4.23-1.57l.27.28v.79l5 4.99L20.49 19l-4.99-5zm-6 0C7.01 14 5 11.99 5 9.5S7.01 5 9.5 5 14 7.01 14 9.5 11.99 14 9.5 14z" />
        </svg>
      </div>
      <button
        type="submit"
        className="rounded-xl bg-yellow-300 font-semibold text-blue-600 px-3 py-2 transition duration-300 ease-in-out hover:bg-yellow-400 hover:-translate-y-1"
      >
        Search
      </button>
      {searchParams.get('filter') && (
        <button
          onClick={clearFilters}
          className="rounded-xl bg-red-300 font-semibold text-blue-600 px-3 py-2 transition duration-300 ease-in-out hover:bg-yellow-400 hover:-translate-y-1"
        >
          Clear Filters
        </button>
      )}
      <div className="flex-1" />
    </form>
  )
}
In the code above, an input and button were added to handle the text filter and submission of the search parameters.
When there is a filter variable present in the URL, the button will change to a "Clear Filters" button rather than the "Search" button.
Import that file into app/routes/home.tsx and render it in place of the {/* Search Bar Goes Here */} comment.
diff // app/routes/home.tsx
// ...

+import { SearchBar } from '~/components/search-bar'


// ...

export default function Home() {
    const { users, kudos } = useLoaderData()
    return (
        <Layout>
            <Outlet />
            <div className="h-full flex">
                <UserPanel users={users} />
                <div className="flex-1 flex flex-col">
-                    {/* Search Bar Goes Here */}
+                    <SearchBar />
                    {/* ... */}
                </div>
            </div>
        </Layout>
    )
}
These changes will handle filtering the feed, however you also want to sort the feed by various columns.
In app/utils/constants.ts add a sortOptions constant that defines the columns available.
// app/utils/constants.ts
// ...
export const sortOptions = [
  {
    name: 'Date',
    value: 'date',
  },
  {
    name: 'Sender Name',
    value: 'sender',
  },
  {
    name: 'Emoji',
    value: 'emoji',
  },
]
Now import that constant and the SelectBox component into the app/components/search-bar.tsx file and render the SelectBox with those options right before the button element.
diff // app/components/search-bar.tsx
import { useNavigate, useSearchParams } from "@remix-run/react"
+import { SelectBox } from "./select-box"
+import { sortOptions } from "~/utils/constants"

export function SearchBar() {
   // ...

    const clearFilters = () => {
         searchParams.delete('filter')
+         searchParams.delete('sort')
         navigate('/home')
    }

    return (
        <form className="w-full px-6 flex items-center gap-x-4 border-b-4 border-b-blue-900 border-opacity-30 h-20">
             {/* ... */}
+             <SelectBox
+                 className="w-full rounded-xl px-3 py-2 text-gray-400"
+                 containerClassName='w-40'
+                 name="sort"
+                 options={sortOptions}
+             />
            {/* <button ... > */}
        </form>
    )
}
Now you should see a dropdown available in the search bar with your options.
Build the search bar action
When the search form is submitted, a GET request will be made to /home with the filter and sort data passed along in the URL. In the loader function exported by app/routes/home.tsx, pull the sort and filter data from the URL and build a query with the results:
diff // app/routes/home.tsx
// ...

import {
  Kudo as IKudo,
  Profile,
+  Prisma
} from '@prisma/client'

export const loader: LoaderFunction = async ({ request }) => {
  // ...

  // 1
+  const url = new URL(request.url)
+  const sort = url.searchParams.get('sort')
+  const filter = url.searchParams.get('filter')

  // 2
+  let sortOptions: Prisma.KudoOrderByWithRelationInput = {}
+  if (sort) {
+    if (sort === 'date') {
+      sortOptions = { createdAt: 'desc' }
+    }
+    if (sort === 'sender') {
+      sortOptions = { author: { profile: { firstName: 'asc' } } }
+    }
+    if (sort === 'emoji') {
+      sortOptions = { style: { emoji: 'asc' } }
+    }
+  }

  // 3
+  let textFilter: Prisma.KudoWhereInput = {}
+  if (filter) {
+    textFilter = {
+      OR: [
+        { message: { mode: 'insensitive', contains: filter } },
+        {
+          author: {
+            OR: [
+              { profile: { is: { firstName: { mode: 'insensitive', contains: filter } } } },
+              { profile: { is: { lastName: { mode: 'insensitive', contains: filter } } } },
+            ],
+          },
+        },
+      ],
+    }
+  }
+
  // 4
-  const kudos = await getFilteredKudos(userId, {}, {})
+  const kudos = await getFilteredKudos(userId, sortOptions, textFilter)
  return json({ users, kudos })
}

// ...
The code above:
- Pulls out the URL parameters.
- Builds a
sortOptionsobject to pass into your Prisma query that may vary depending on the data passed in the URL. - Builds a
textFilterobject to pass into your Prisma query that may vary depending on the data passed in the URL. - Updates the
getFilteredKudosinvocation to include the new filters.
Now if you submit form you should see your results reflected on the feed!
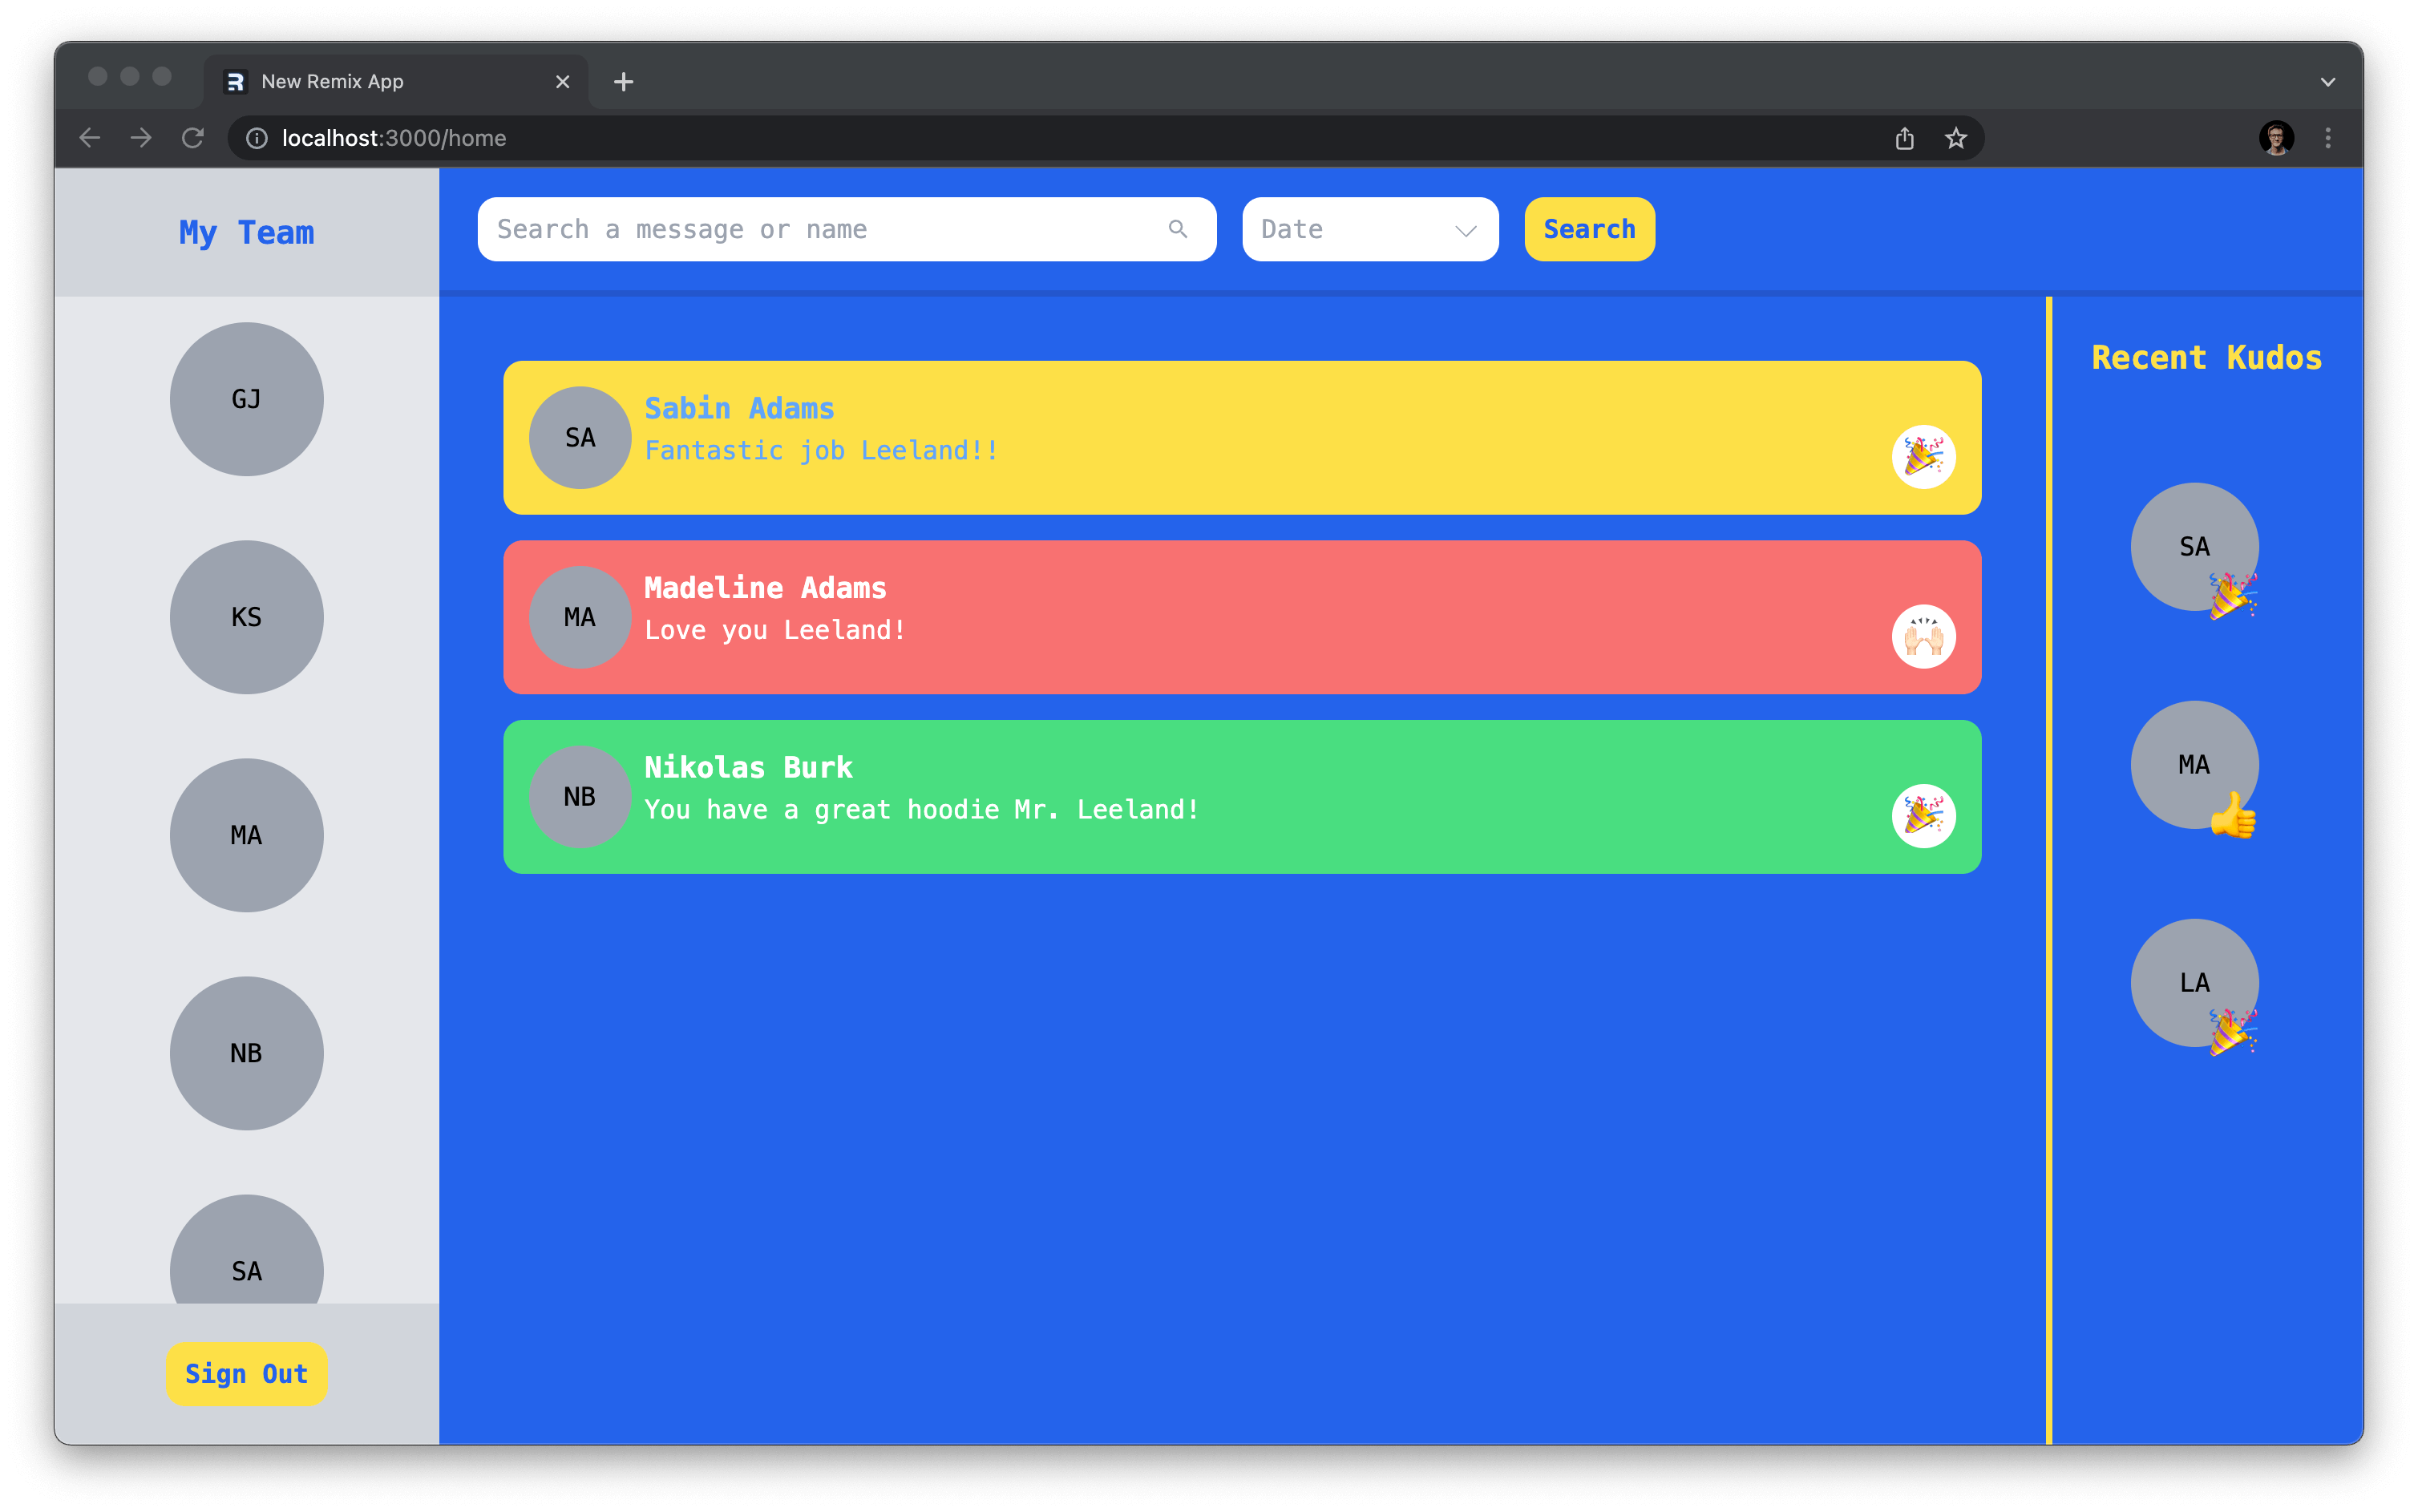
Display the most recent kudos
The last thing your feed needs is a way to display the most recently sent kudos. This component will display a UserCircle component for the three most recent recipients of kudos.
Create a new file in app/components named recent-bar.tsx with the following code:
// app/components/recent-bar.tsx

import { User, Kudo } from '@prisma/client'
import { UserCircle } from './user-circle'
import { emojiMap } from '~/utils/constants'

interface KudoWithRecipient extends Kudo {
  recipient: User
}

export function RecentBar({ kudos }: { kudos: KudoWithRecipient[] }) {
  return (
    <div className="w-1/5 border-l-4 border-l-yellow-300 flex flex-col items-center">
      <h2 className="text-xl text-yellow-300 font-semibold my-6">Recent Kudos</h2>
      <div className="h-full flex flex-col gap-y-10 mt-10">
        {kudos.map(kudo => (
          <div className="h-24 w-24 relative" key={kudo.recipient.id}>
            <UserCircle profile={kudo.recipient.profile} className="w-20 h-20" />
            <div className="h-8 w-8 text-3xl bottom-2 right-4 rounded-full absolute flex justify-center items-center">
              {emojiMap[kudo?.style?.emoji || 'THUMBSUP']}
            </div>
          </div>
        ))}
      </div>
    </div>
  )
}
This component takes in a list of the top three recent kudos and renders them out into a panel.
Now you need to write a query that grabs that data. In app/utils/kudos.server.ts add a function named getRecentKudos that returns the following query:
// app/utils/kudos.server.ts

// ...

export const getRecentKudos = async () => {
  return await prisma.kudo.findMany({
    take: 3,
    orderBy: {
      createdAt: 'desc',
    },
    select: {
      style: {
        select: {
          emoji: true,
        },
      },
      recipient: {
        select: {
          id: true,
          profile: true,
        },
      },
    },
  })
}
This query:
- Sorts the results by
createdAtin descending order to get the records from newest to oldest. - Takes only the first three from that list to get the three most recent documents.
Now you will need to:
- Import the
RecentBarcomponent andgetRecentKudosfunction into theapp/routes/home.tsxfile. - Call
getRecentKudoswithin that file'sloaderfunction. - Render the
RecentBaronto the home page in place of the{/* Recent Kudos Goes Here */}comment.
diff // app/routes/home.tsx

// ...

+import { RecentBar } from '~/components/recent-bar'
import {
  getFilteredKudos,
+  getRecentKudos
} from '~/utils/kudos.server'

export const loader: LoaderFunction = async ({ request }) => {
  // ...
+  const recentKudos = await getRecentKudos()
-  return json({ users, kudos })
+  return json({ users, kudos, recentKudos })
}

export default function Home() {
  const {
    users,
    kudos,
+    recentKudos
  } = useLoaderData()

  return (
    {/* ... */}
-    {/* Recent Kudos Goes Here */}
+    <RecentBar kudos={recentKudos} />
    {/* ... */}
  )
}
With that, your home page is complete and you should see a list of the three most recent kudos sent in your application!
Summary & What's next
In this article you built the main pieces of functionality for this application, and learned a bunch of concepts along the way including:
- Redirecting in Remix
- Using resource routes
- Filtering & sorting data with Prisma Client
- Using embedded documents in your Prisma Schema
- ... and lots more!
In the next section of this series, you will finish off this application by building out the profile settings section of the site and creating an image upload component to manage profile pictures.
Build your next app with Prisma
Start free. Scale when you’re ready.