Fullstack App With TypeScript, PostgreSQL, Next.js, Prisma & GraphQL: Deployment


This article is the final part of the course where you build a fullstack app with Next.js, GraphQL, TypeScript, Prisma, and PostgreSQL. In this article, you will learn how to deploy your app to Vercel.
Update (May 2026): This deployment chapter still works as a conceptual guide, but the Prisma Data Proxy steps are now historical. For new projects, prefer Prisma Accelerate for connection pooling and caching, use the current serverless deployment docs, and consider Prisma Postgres if you want a managed Postgres database with Prisma ORM.
Table of Contents
- Introduction
- Prerequisites
- Fork the repository
- Database access in serverless environments with the Prisma Data Proxy
- Getting started with the Prisma Data Proxy
- Update the application
- Deploy the app to Vercel
- Summary
Introduction
In this course you will learn how to build "awesome-links", a fullstack app where users can browse through a list of curated links and bookmark their favorite ones.
In part 4, you added support for image uploads using AWS S3. In this part, you will walk through the original deployment flow for the series and see why connection pooling matters in serverless environments.
Prerequisites
To follow along with this tutorial, you will need an account on GitHub and a Vercel. You will also need a hosted PostgreSQL database.
Fork the repository
You can find the complete source code for the course on GitHub. To follow along, fork the repository to your own GitHub account.
If you're following along from the previous parts, ensure you have added your code to source control and pushed it to GitHub.
Database access in serverless environments with the Prisma Data Proxy
Serverless functions are ephemeral and short-lived – stateless. When traffic to your application spikes, the number of instances of a serverless function also goes up. On the other hand, database connections are stateful and require a TCP connection between the application and the database.
When a serverless function needs to access a database, it establishes a connection to it, submits a query, and receives the response from the database. The response data is then delivered to the client that invoked the serverless function, the database connection is closed and the function is torn down again.
When there's a traffic spike, each serverless function will spawn a new database connection.
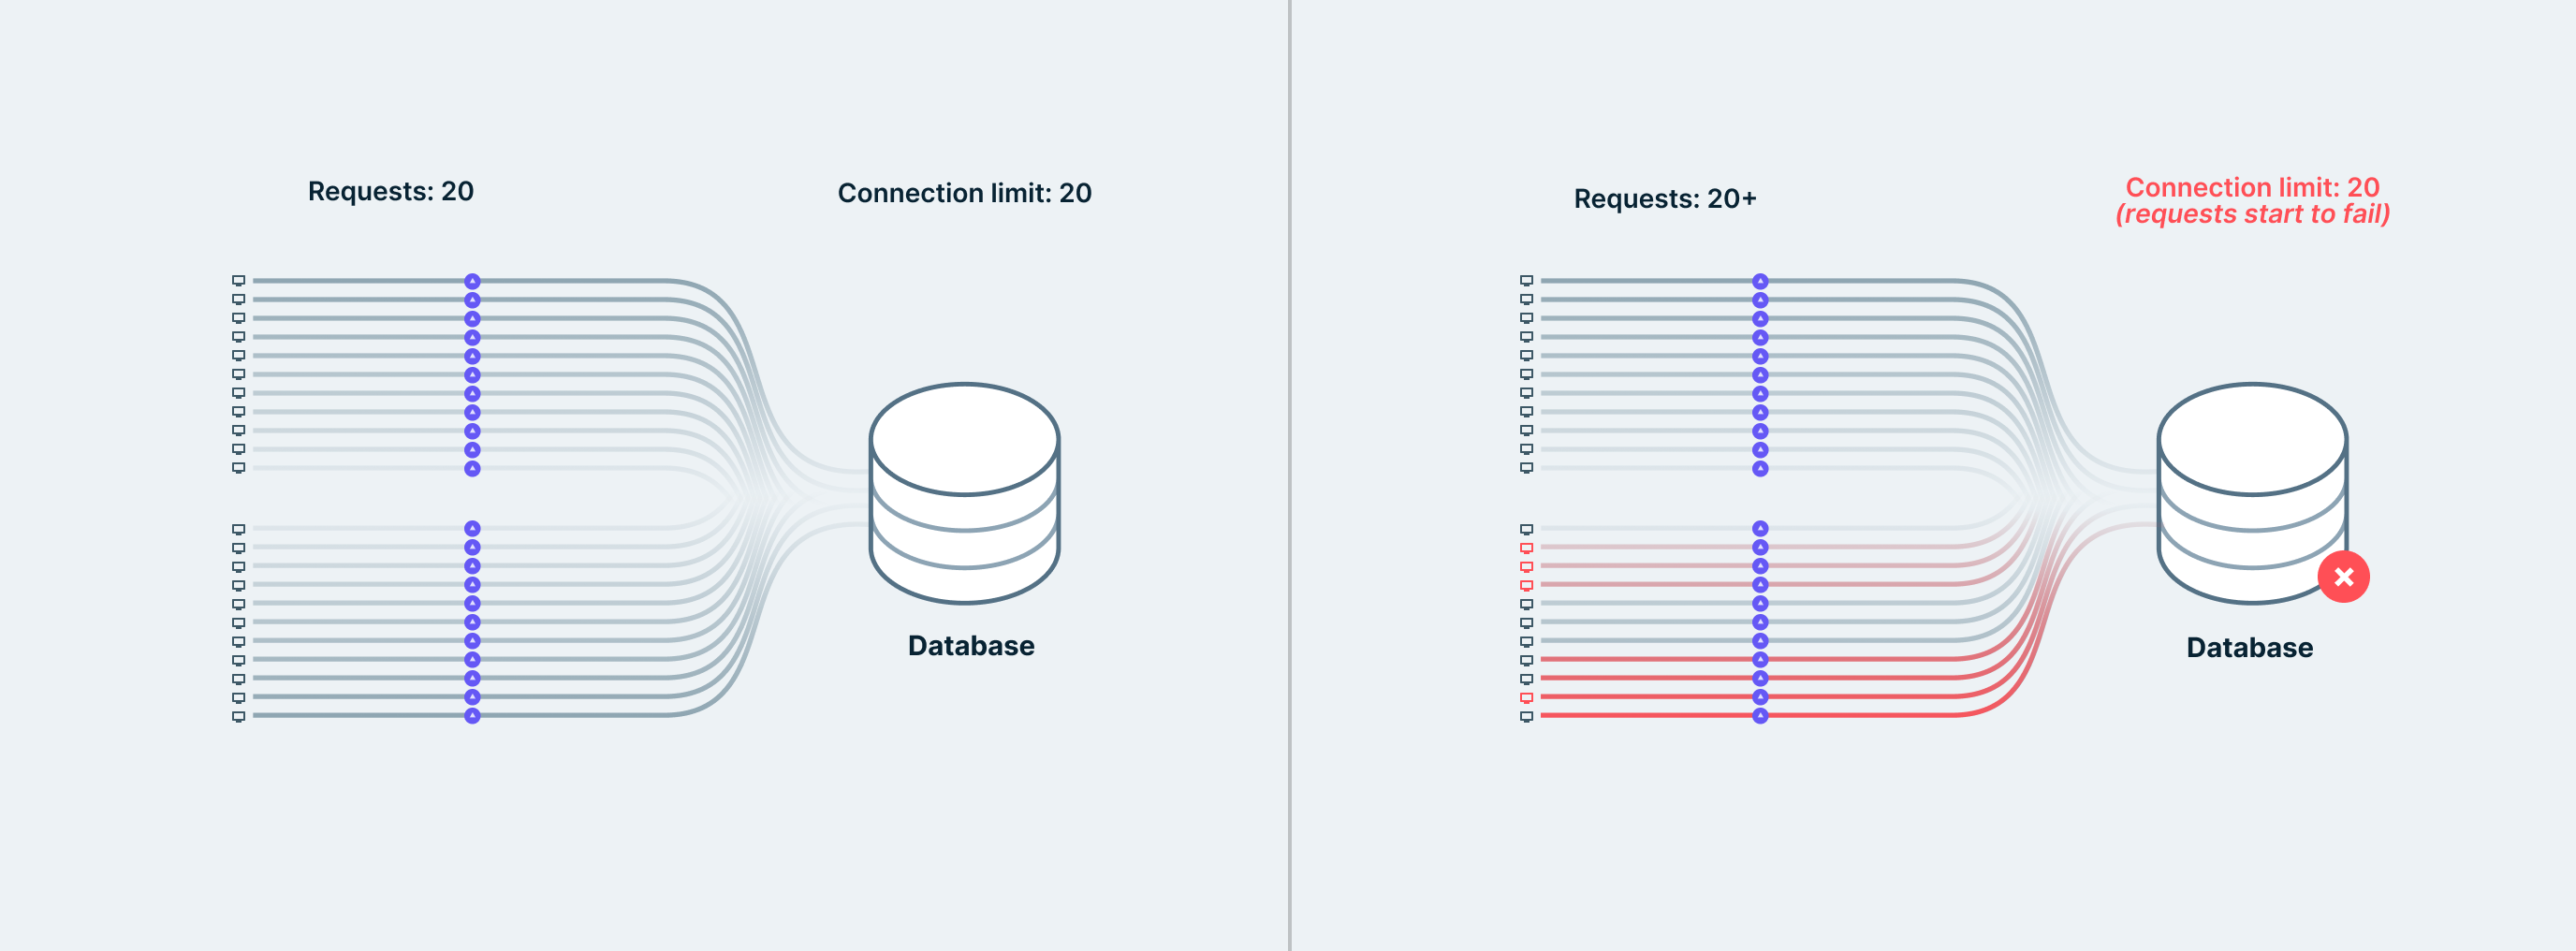
Traditional databases such as PostgreSQL and MySQL typically have a database connection limit that can be easily exhausted when there's a traffic spike to your application. When the connection limit is exhausted, the requests to your application would start failing.
A solution to this problem is using a database connection pooler, such as pgBouncer for PostgreSQL or the Prisma Data Proxy.
The Prisma Data Proxy is a proxy server for your database that manages a connection pool and ensures existing database connections are reused. This prevents incoming user requests from failing and improves your app's performance.
Getting started with the Prisma Data Proxy
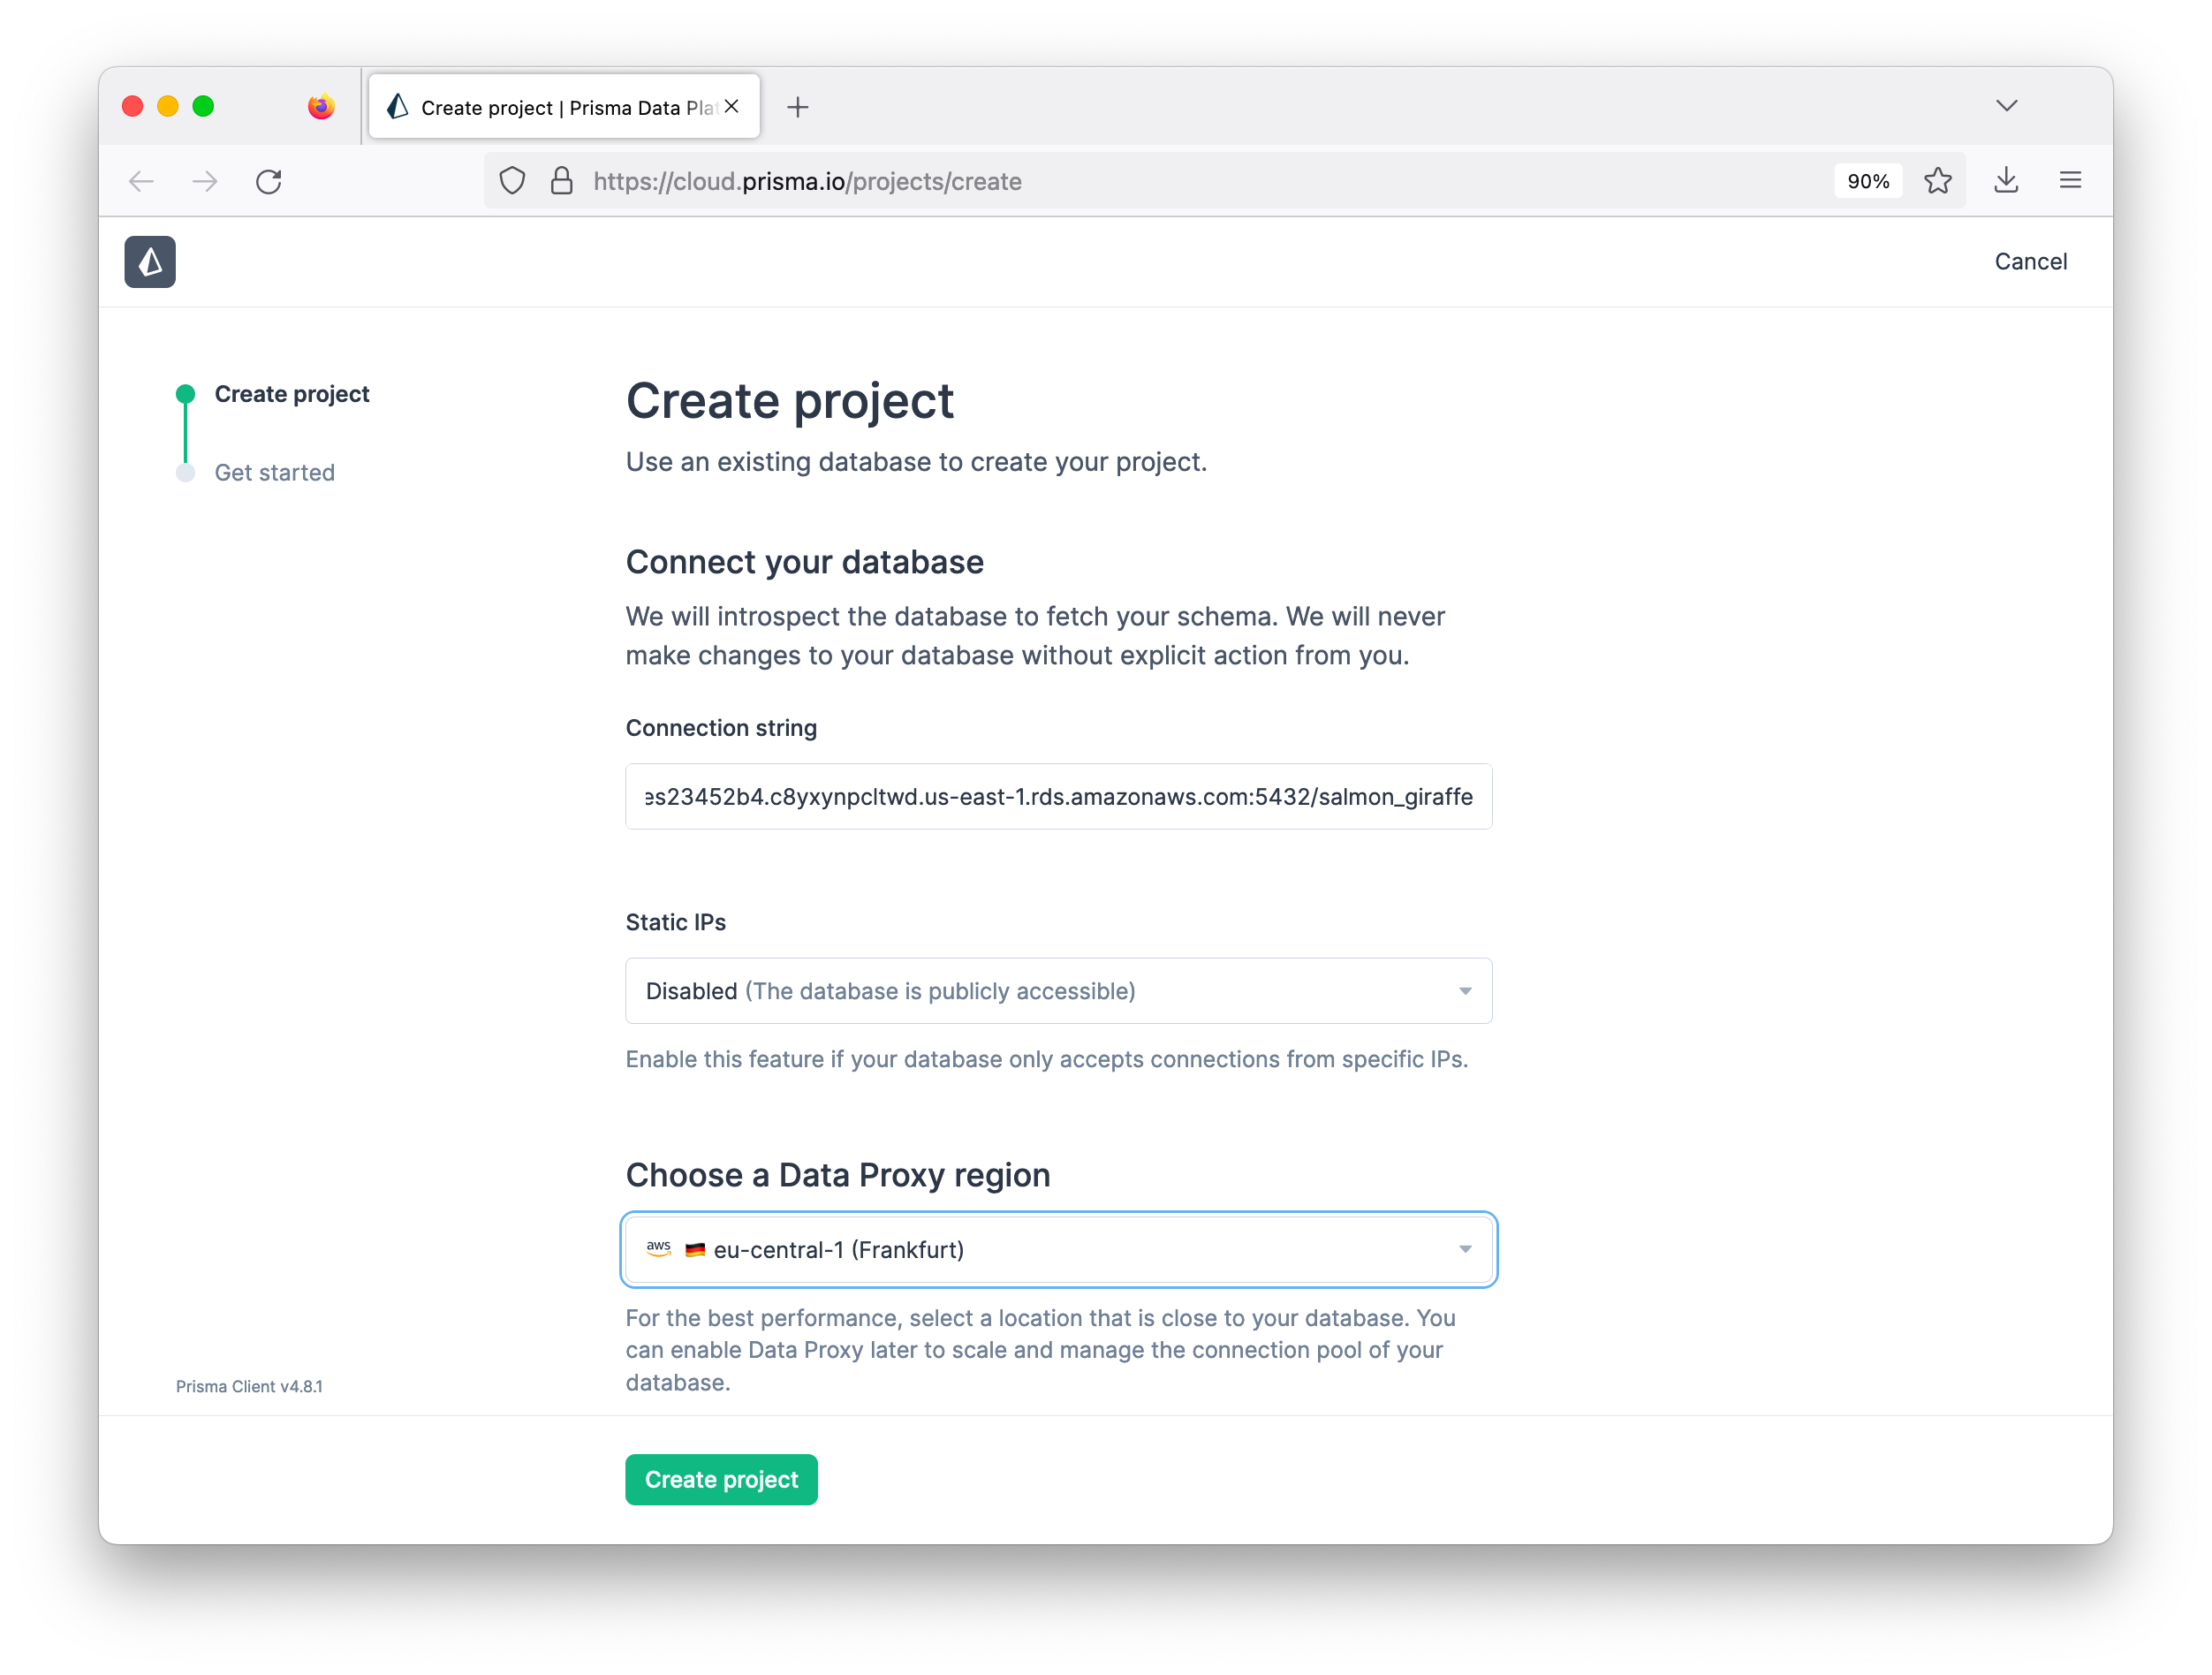
Go to https://cloud.prisma.io/projects/create and log in using GitHub.
In the "Create project" page, paste in your database's connection string to connect your project to the database. If your database is behind a Static IP, enable the feature in the "Static IP" section. Once you're done, click Create project.
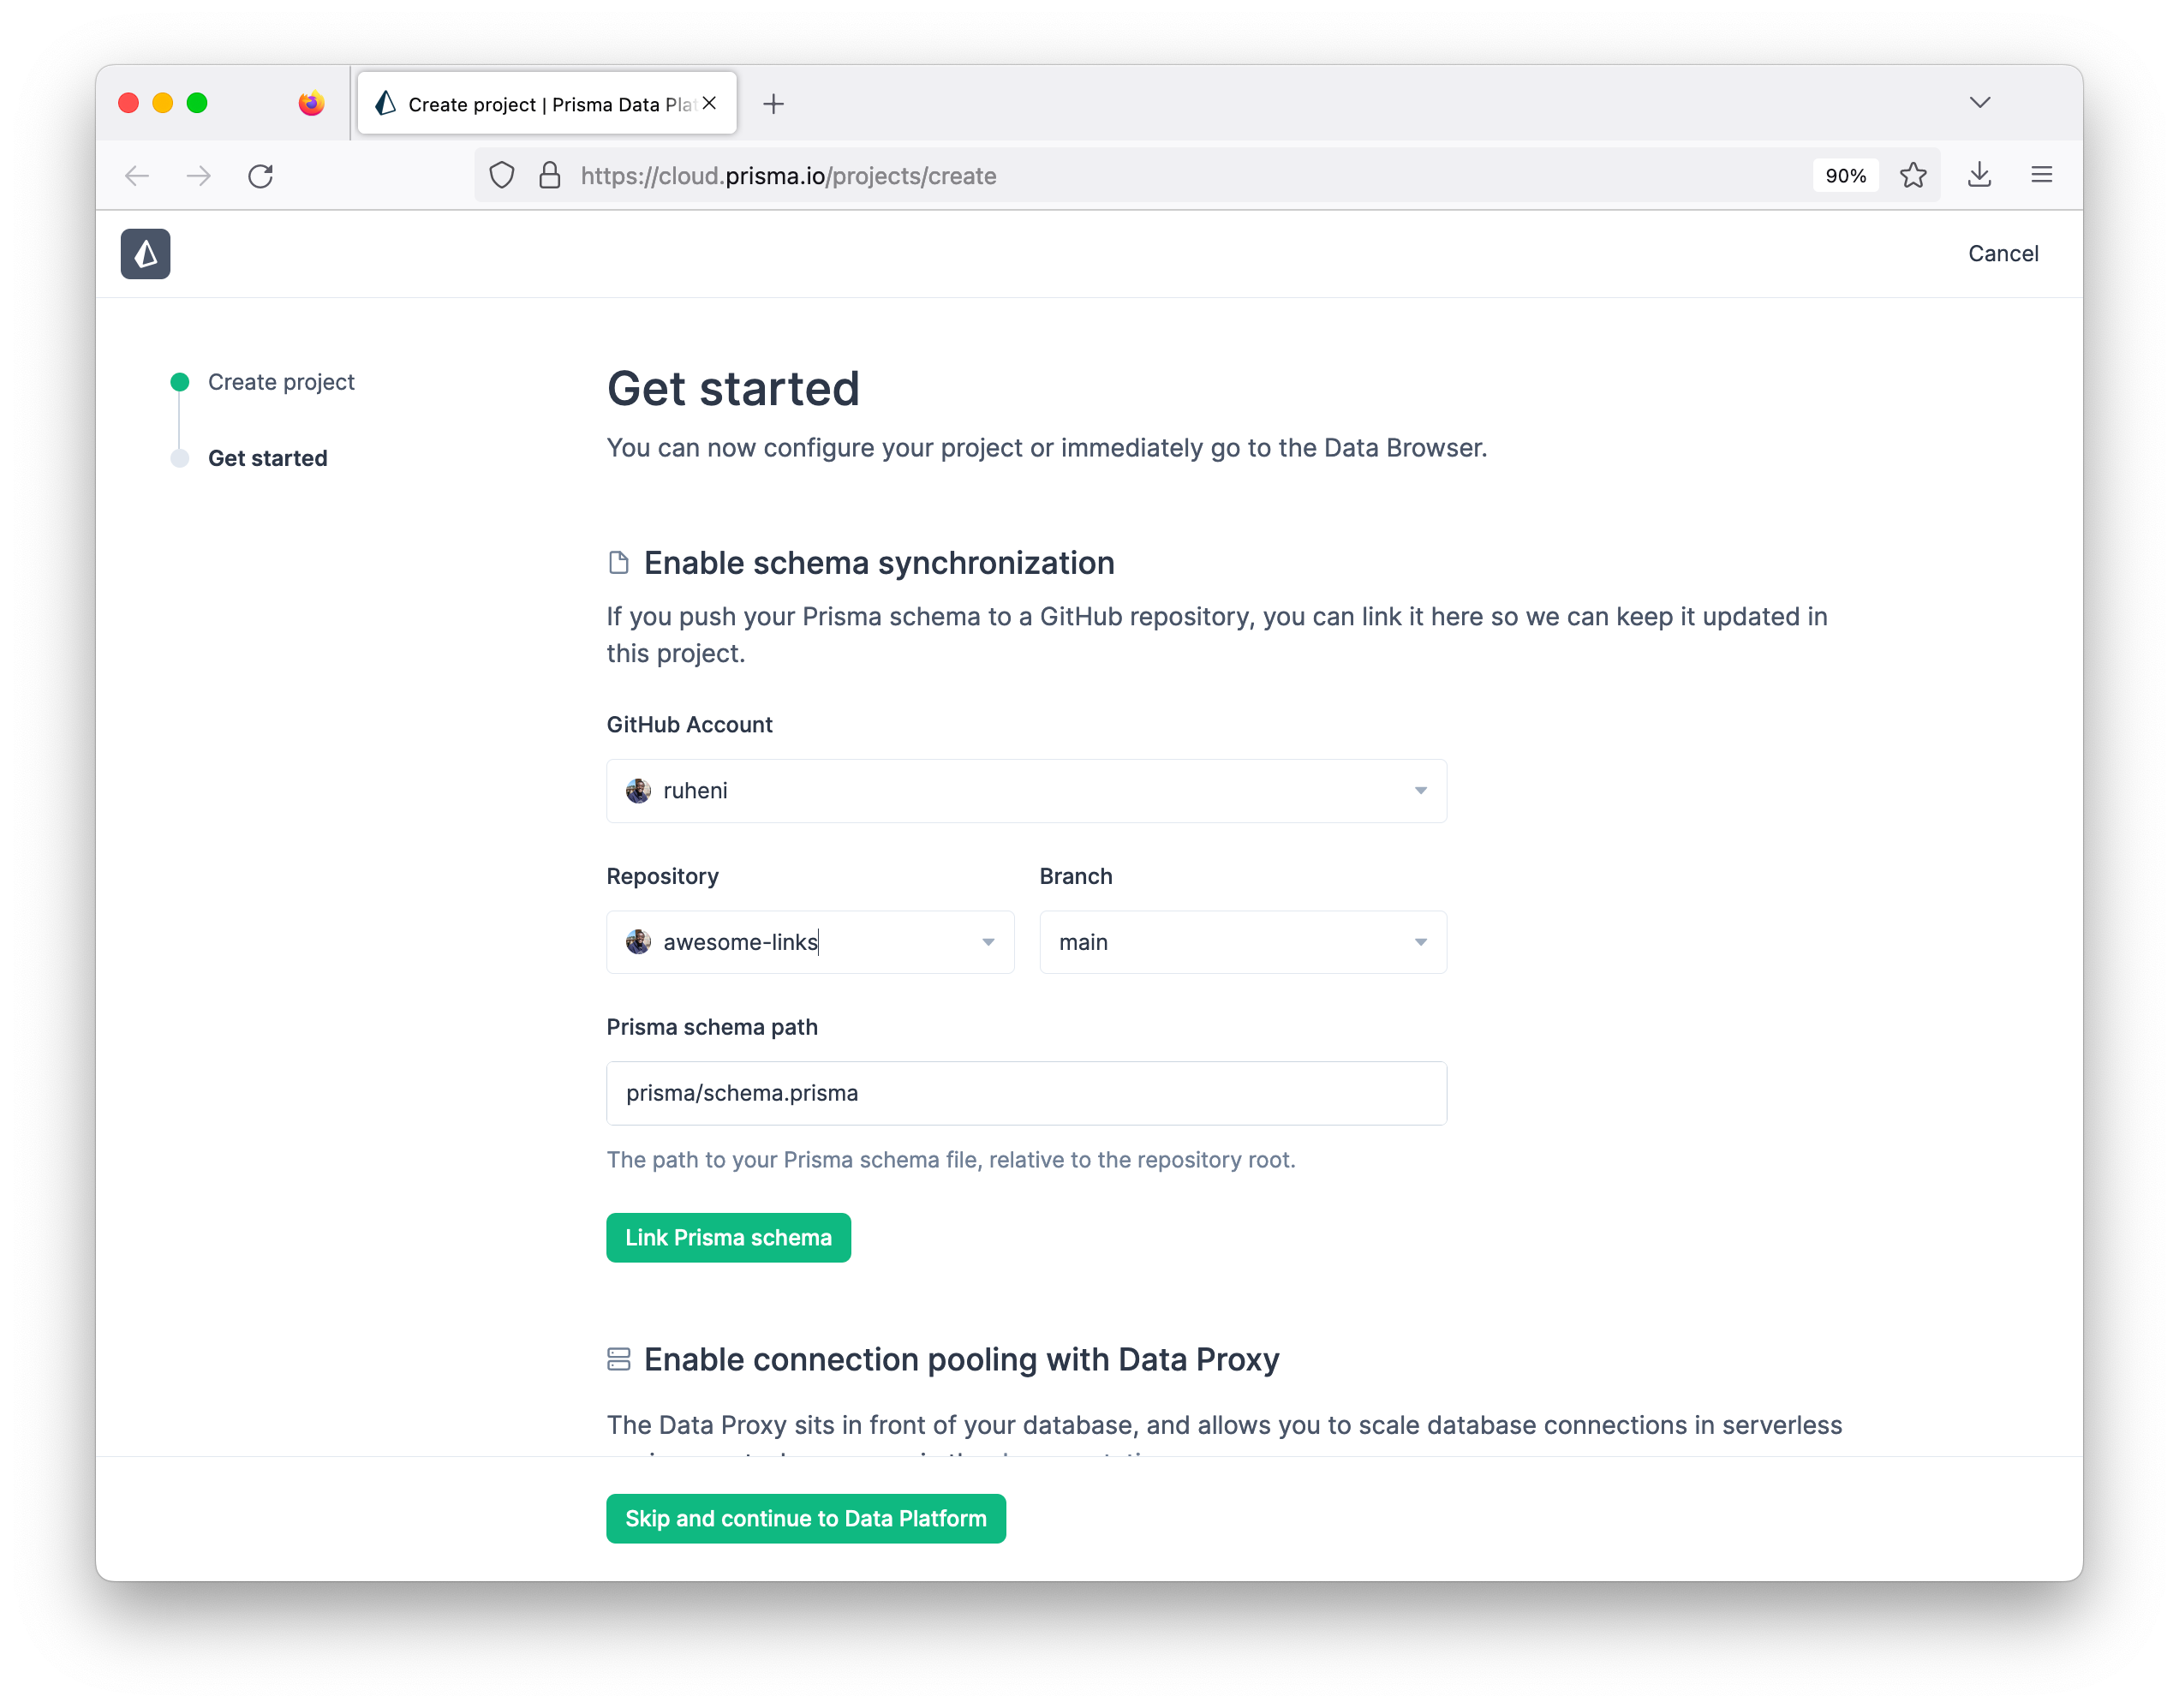
Once your project is created, you should be redirected to the "Get started" page. You can connect your project to your GitHub repository in the "Enable schema synchronization" section, however, it's completely optional.
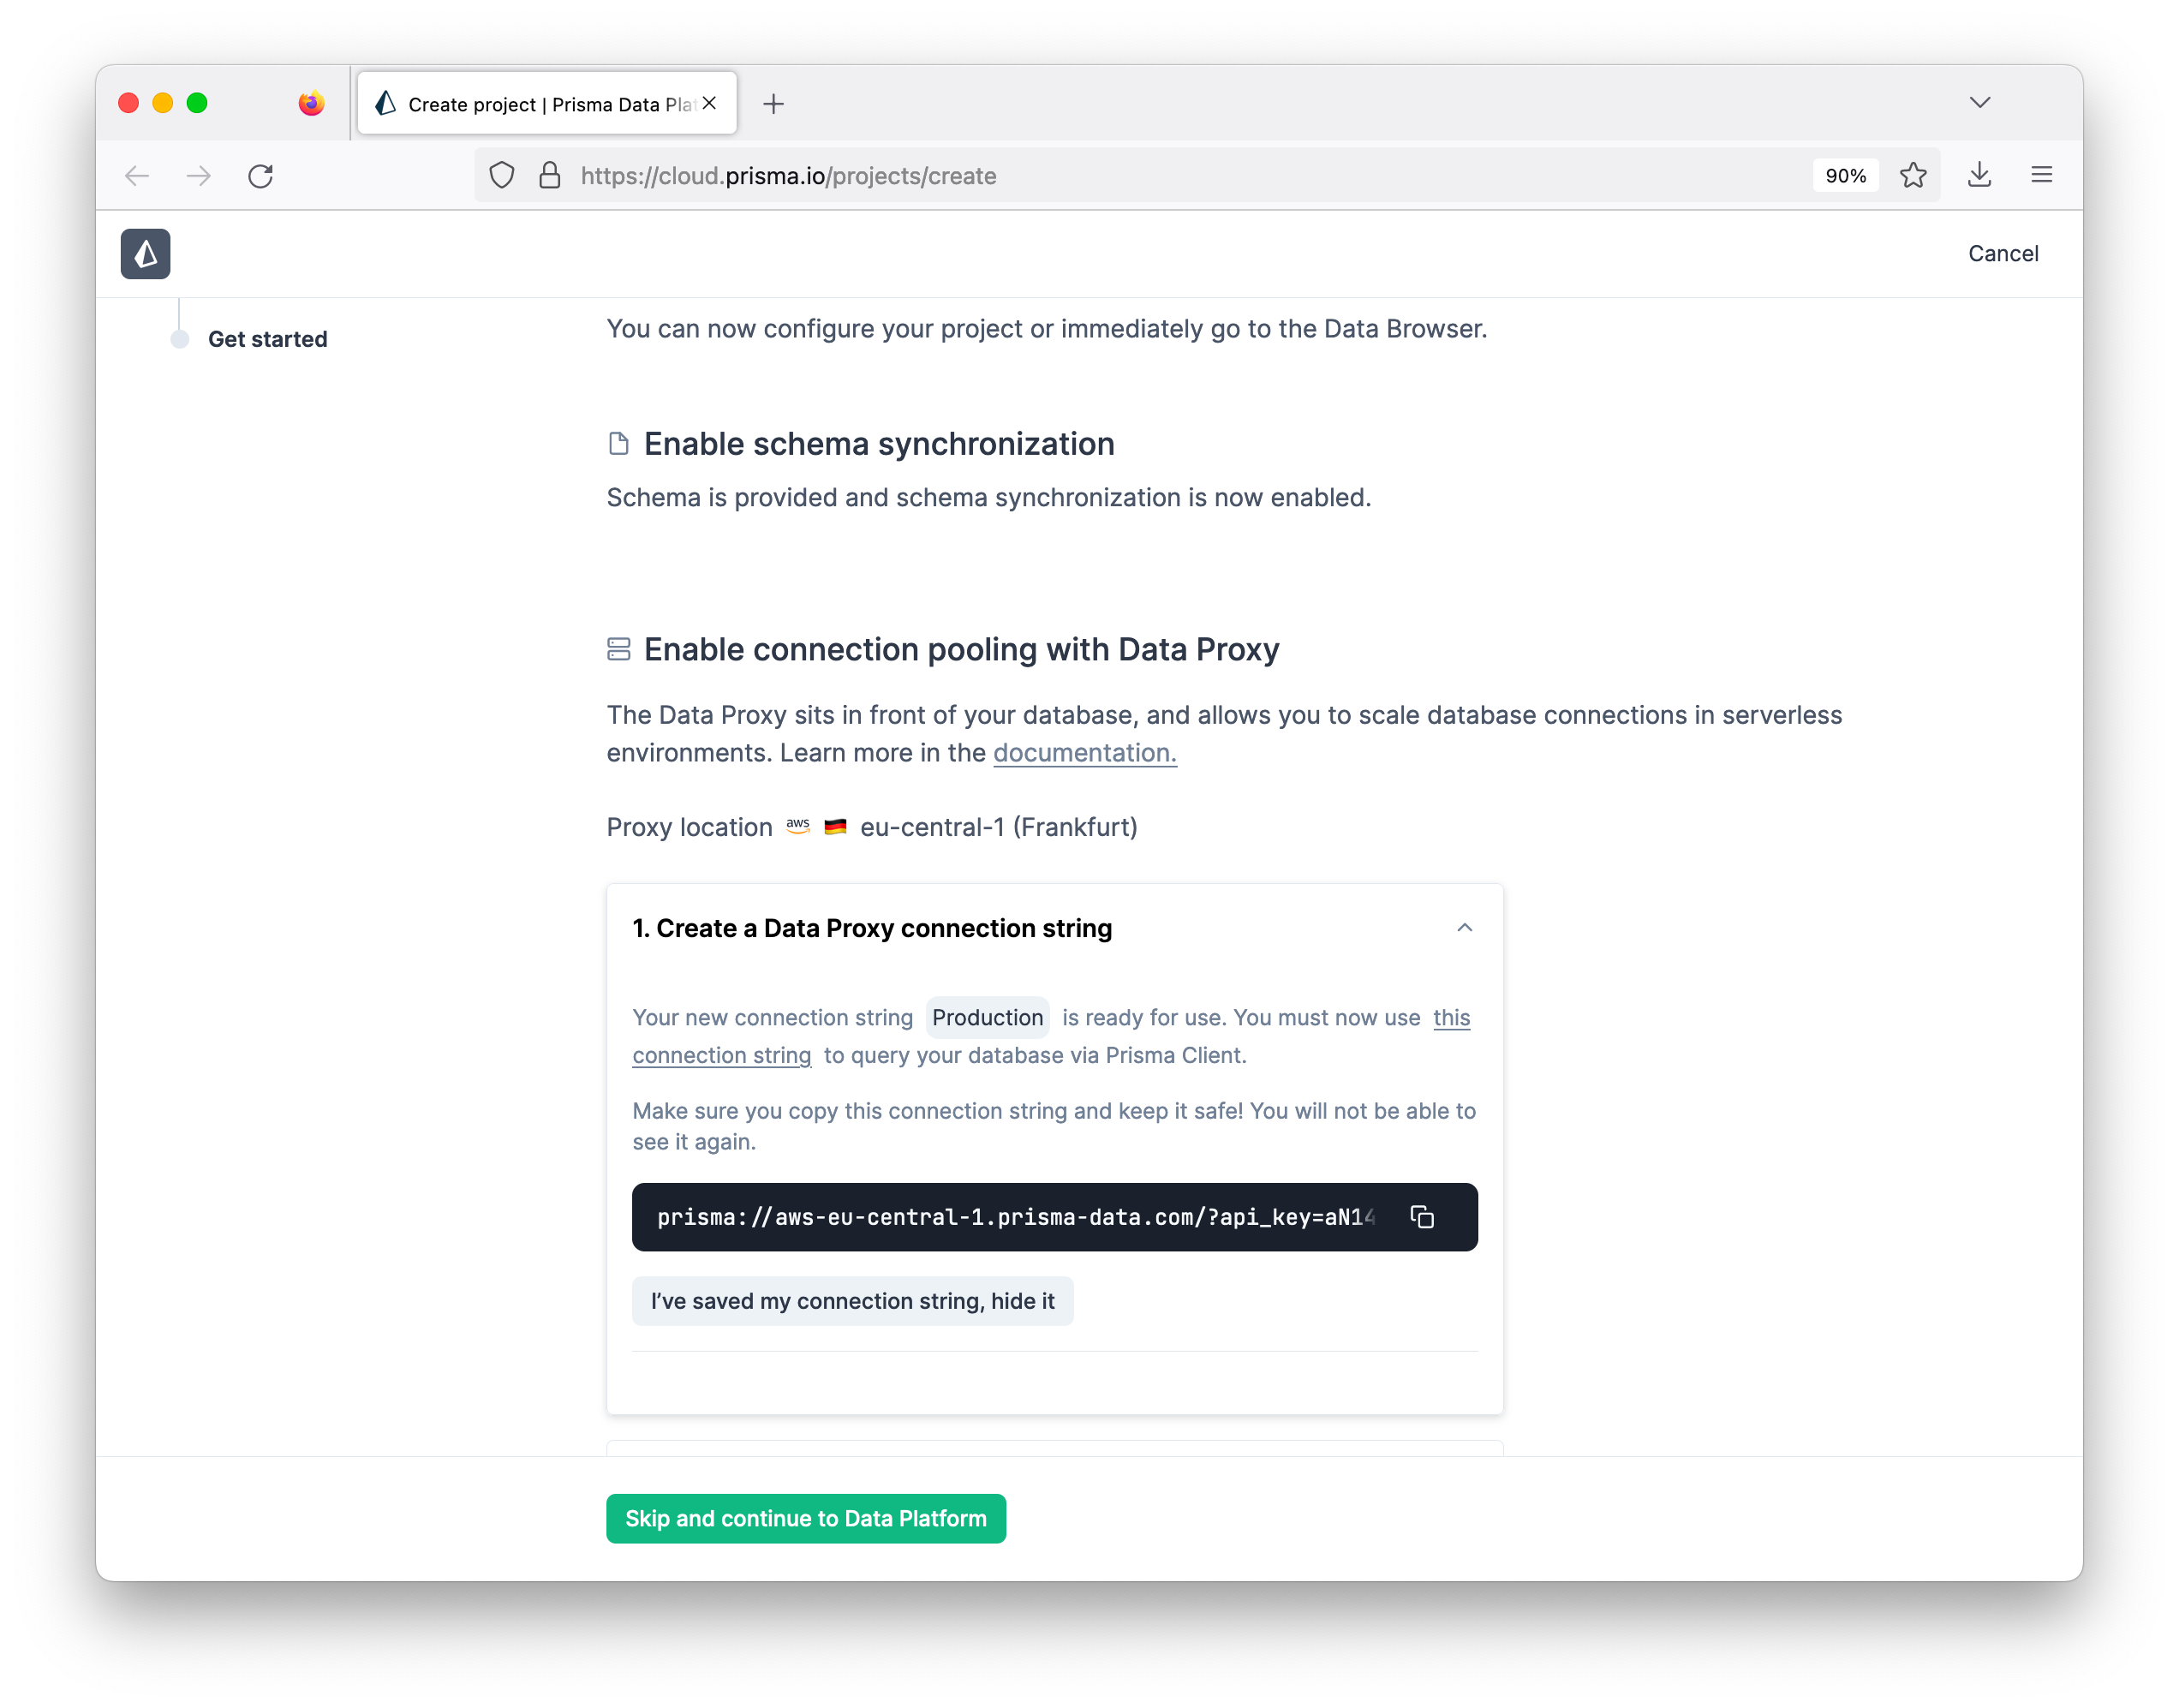
To create a Data Proxy connection string, click the Create a new connection string button in the "Create a Data Proxy new connection string" section. Give your connection string a name and click Create once you're ready.
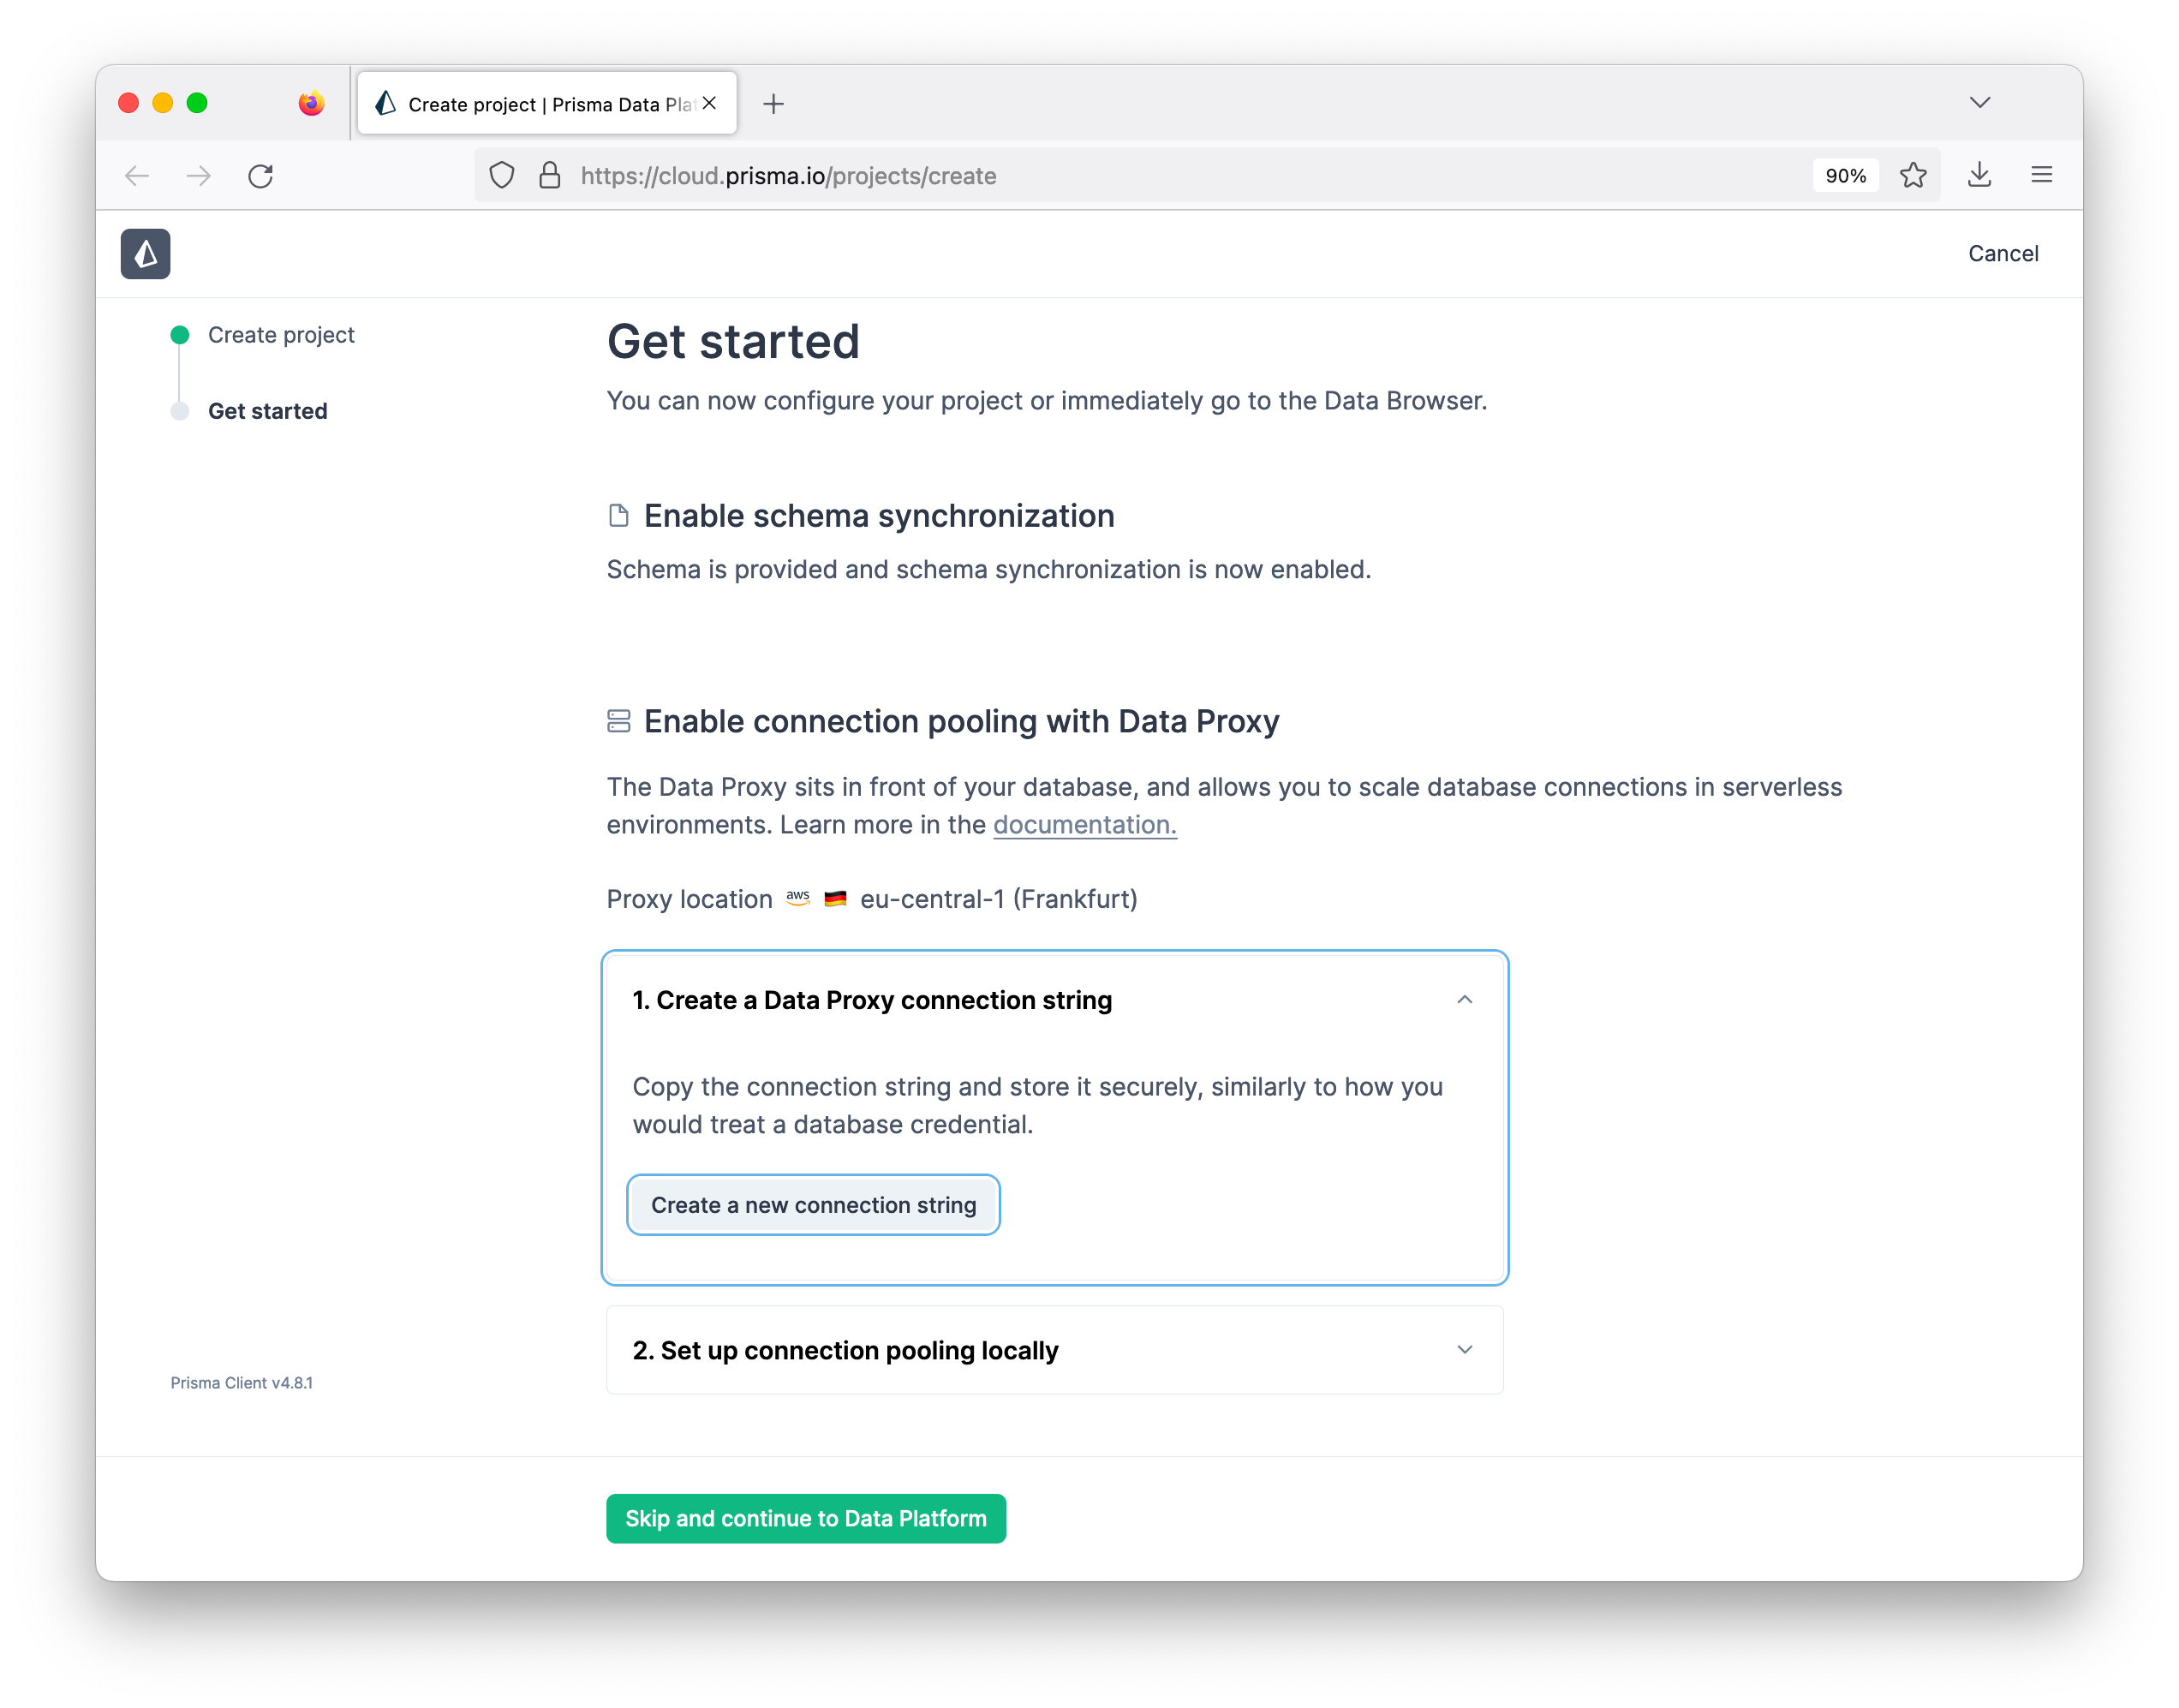
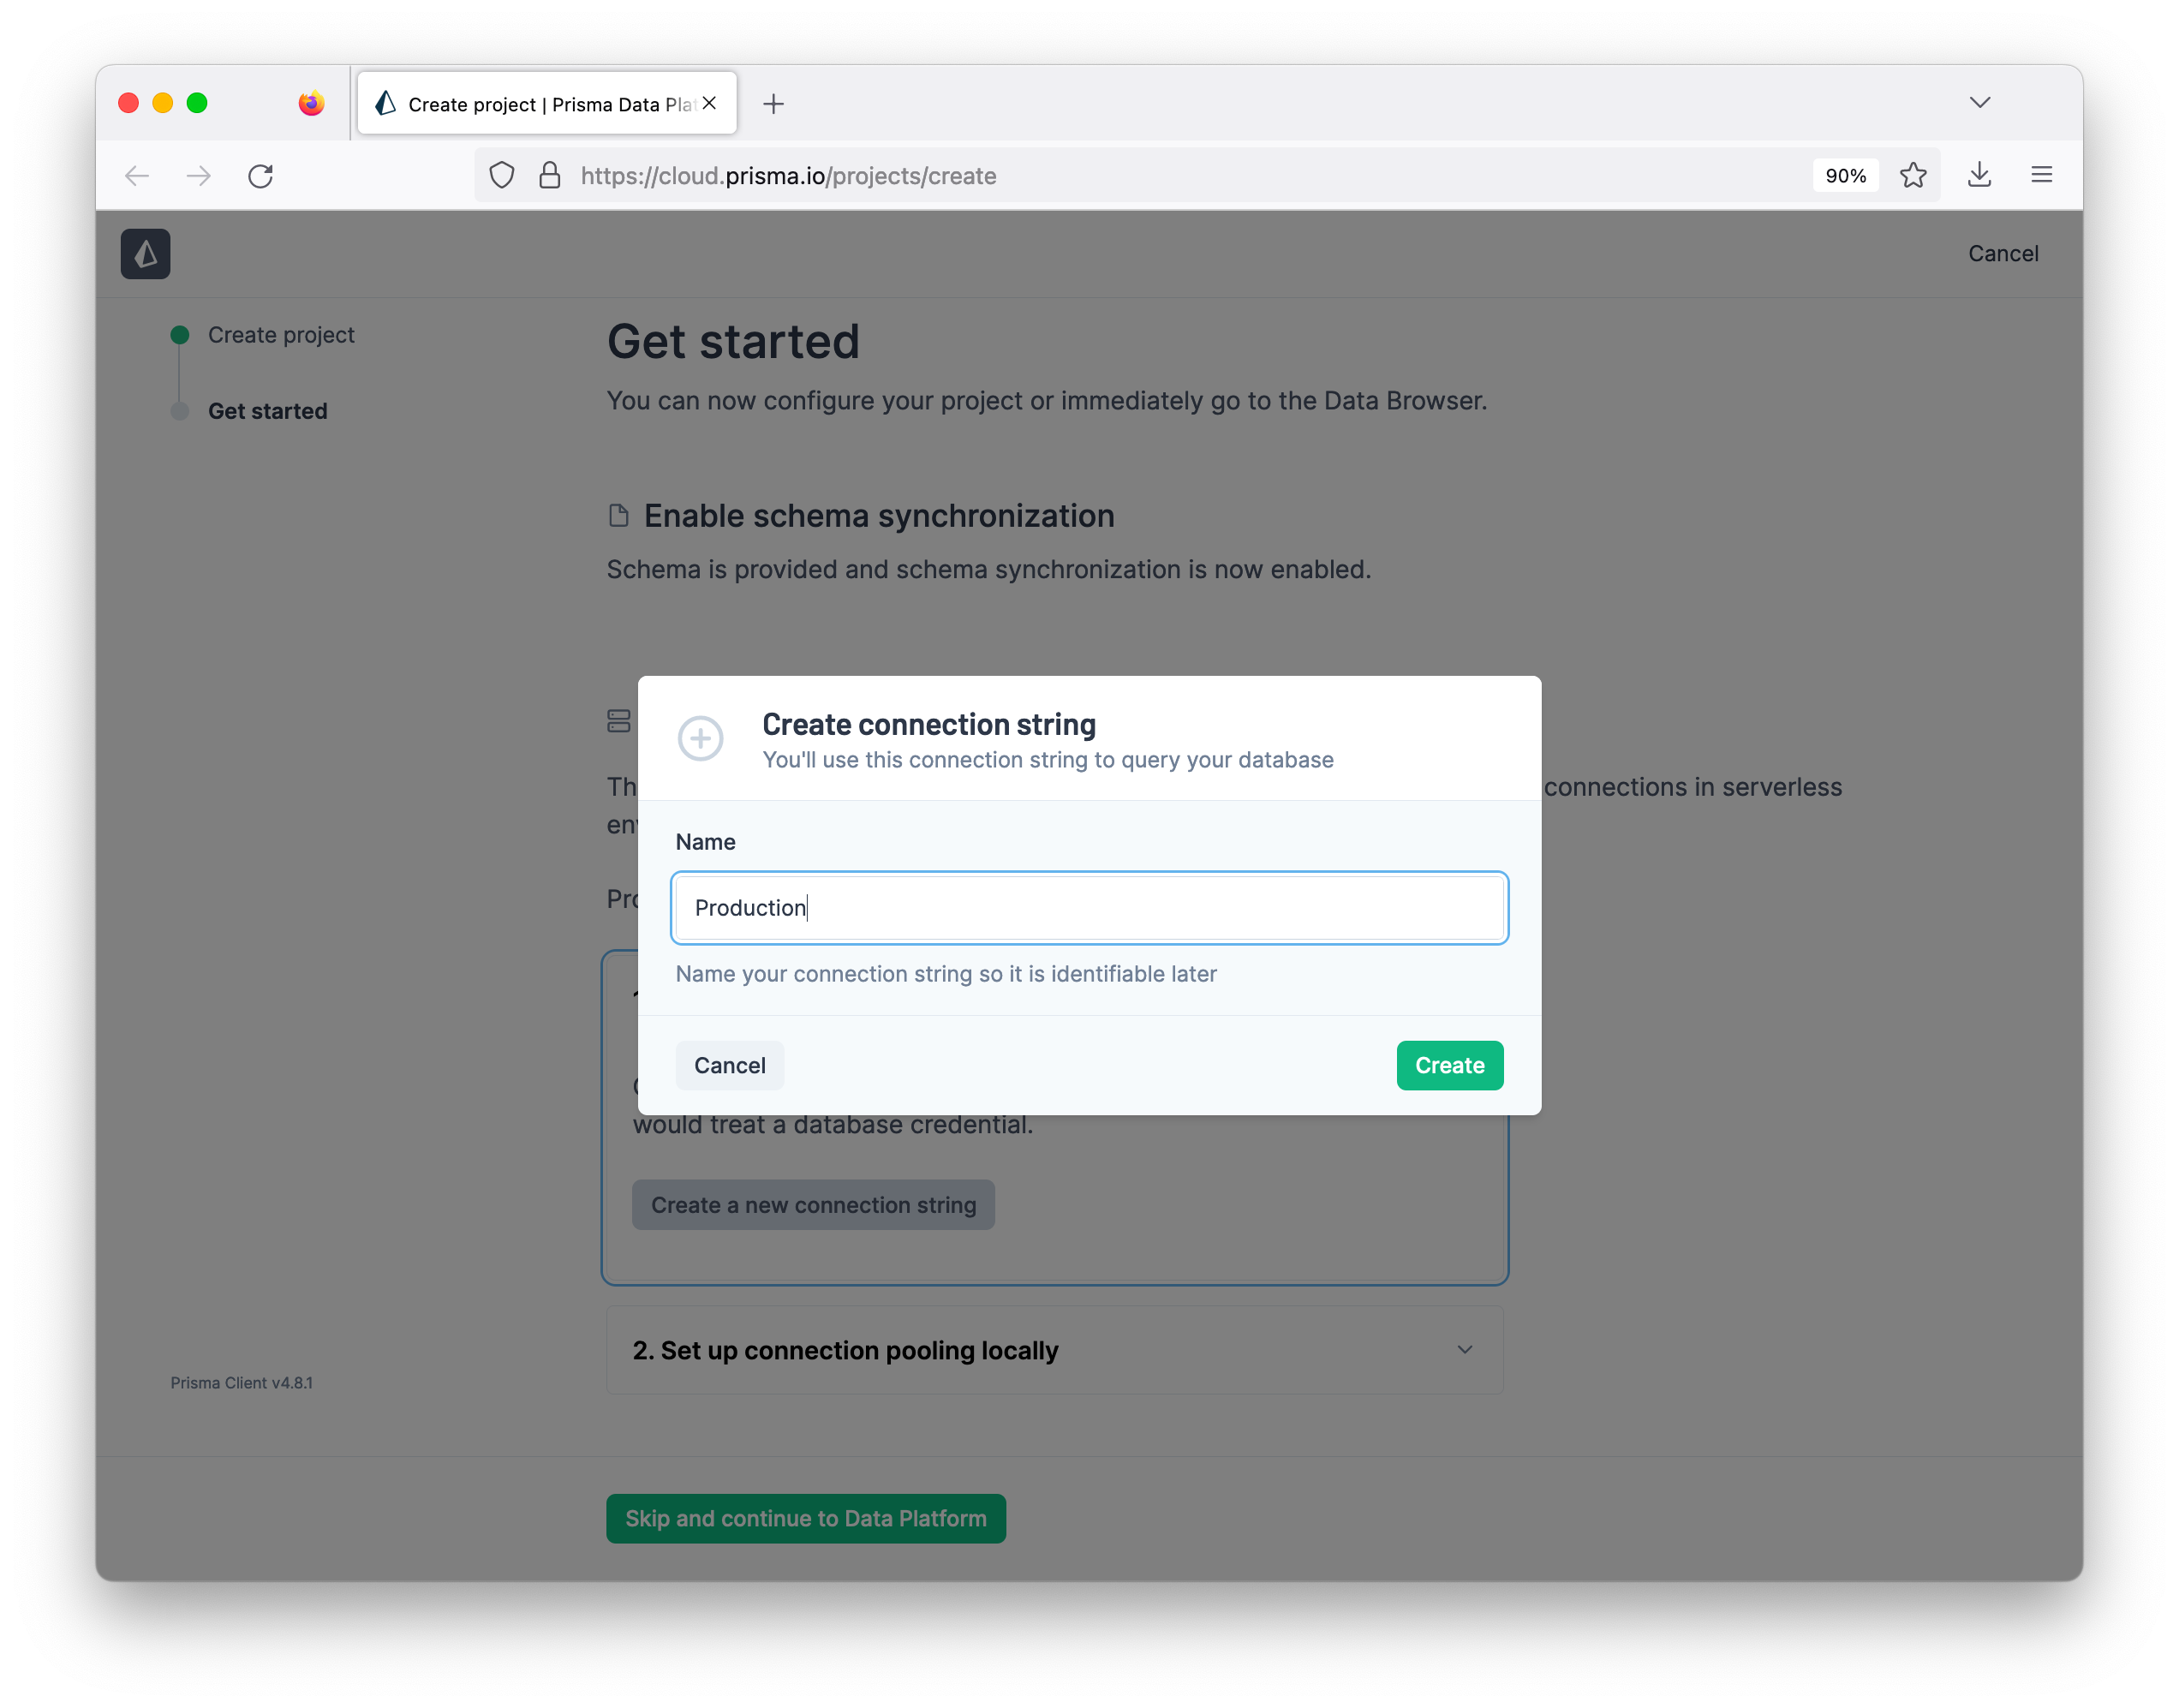
Copy the Prisma Data Proxy URL as you won't be able to see it again, but you can create more later.
Update the application
Before you deploy the application, you will make a few changes.
Enable the Prisma Data Proxy
Before you deploy your application, you will need to make a few updates to your application to make it work with the Prisma Data Proxy.
First, update your .env file by renaming the existing DATABASE_URL to MIGRATE_DATABASE_URL. Create a DATABASE_URL variable and set the Prisma Data Proxy URL from the previous step here:
# .env
MIGRATE_DATABASE_URL="postgres://"
DATABASE_URL="prisma://"
The MIGRATE_DATABASE_URL will be used for making database schema changes to your database.
Create new scripts in package.json
Next, update your package.json file by adding a vercel-build script:
"scripts": {
    //... existing scripts
    "vercel-build": "npx prisma generate --data-proxy && next build",
  },
The vercel-build script will generate Prisma Client that uses the Prisma Data Proxy and build the application.
Deploy the app to Vercel
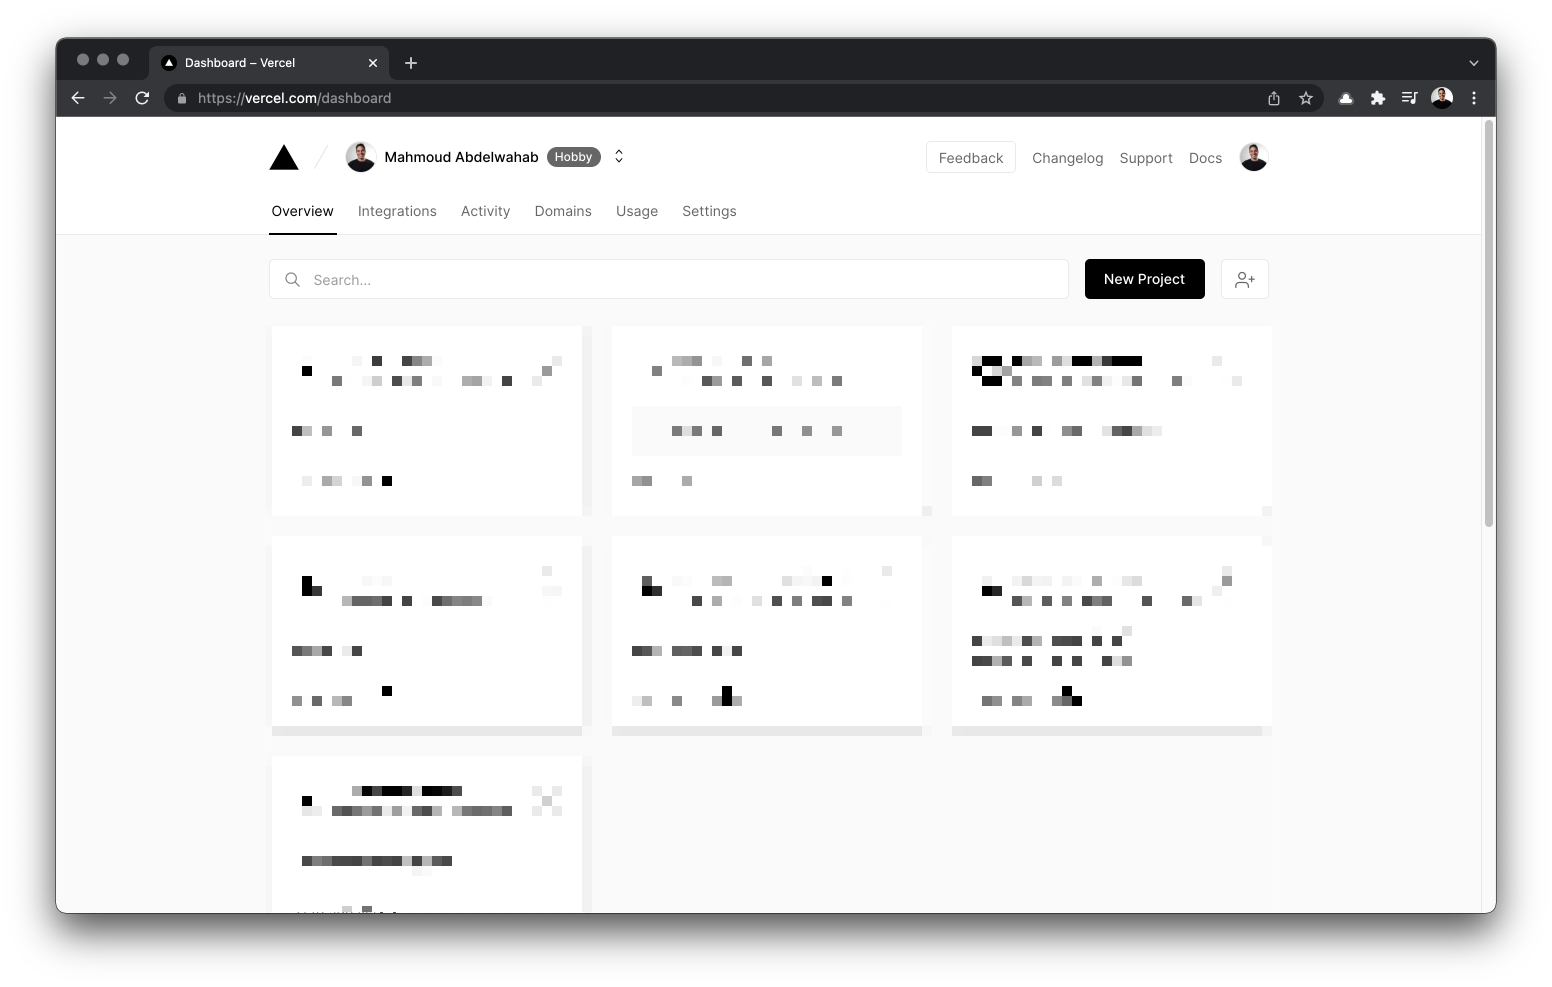
Log in to your Vercel account and create a new project by clicking New Project.
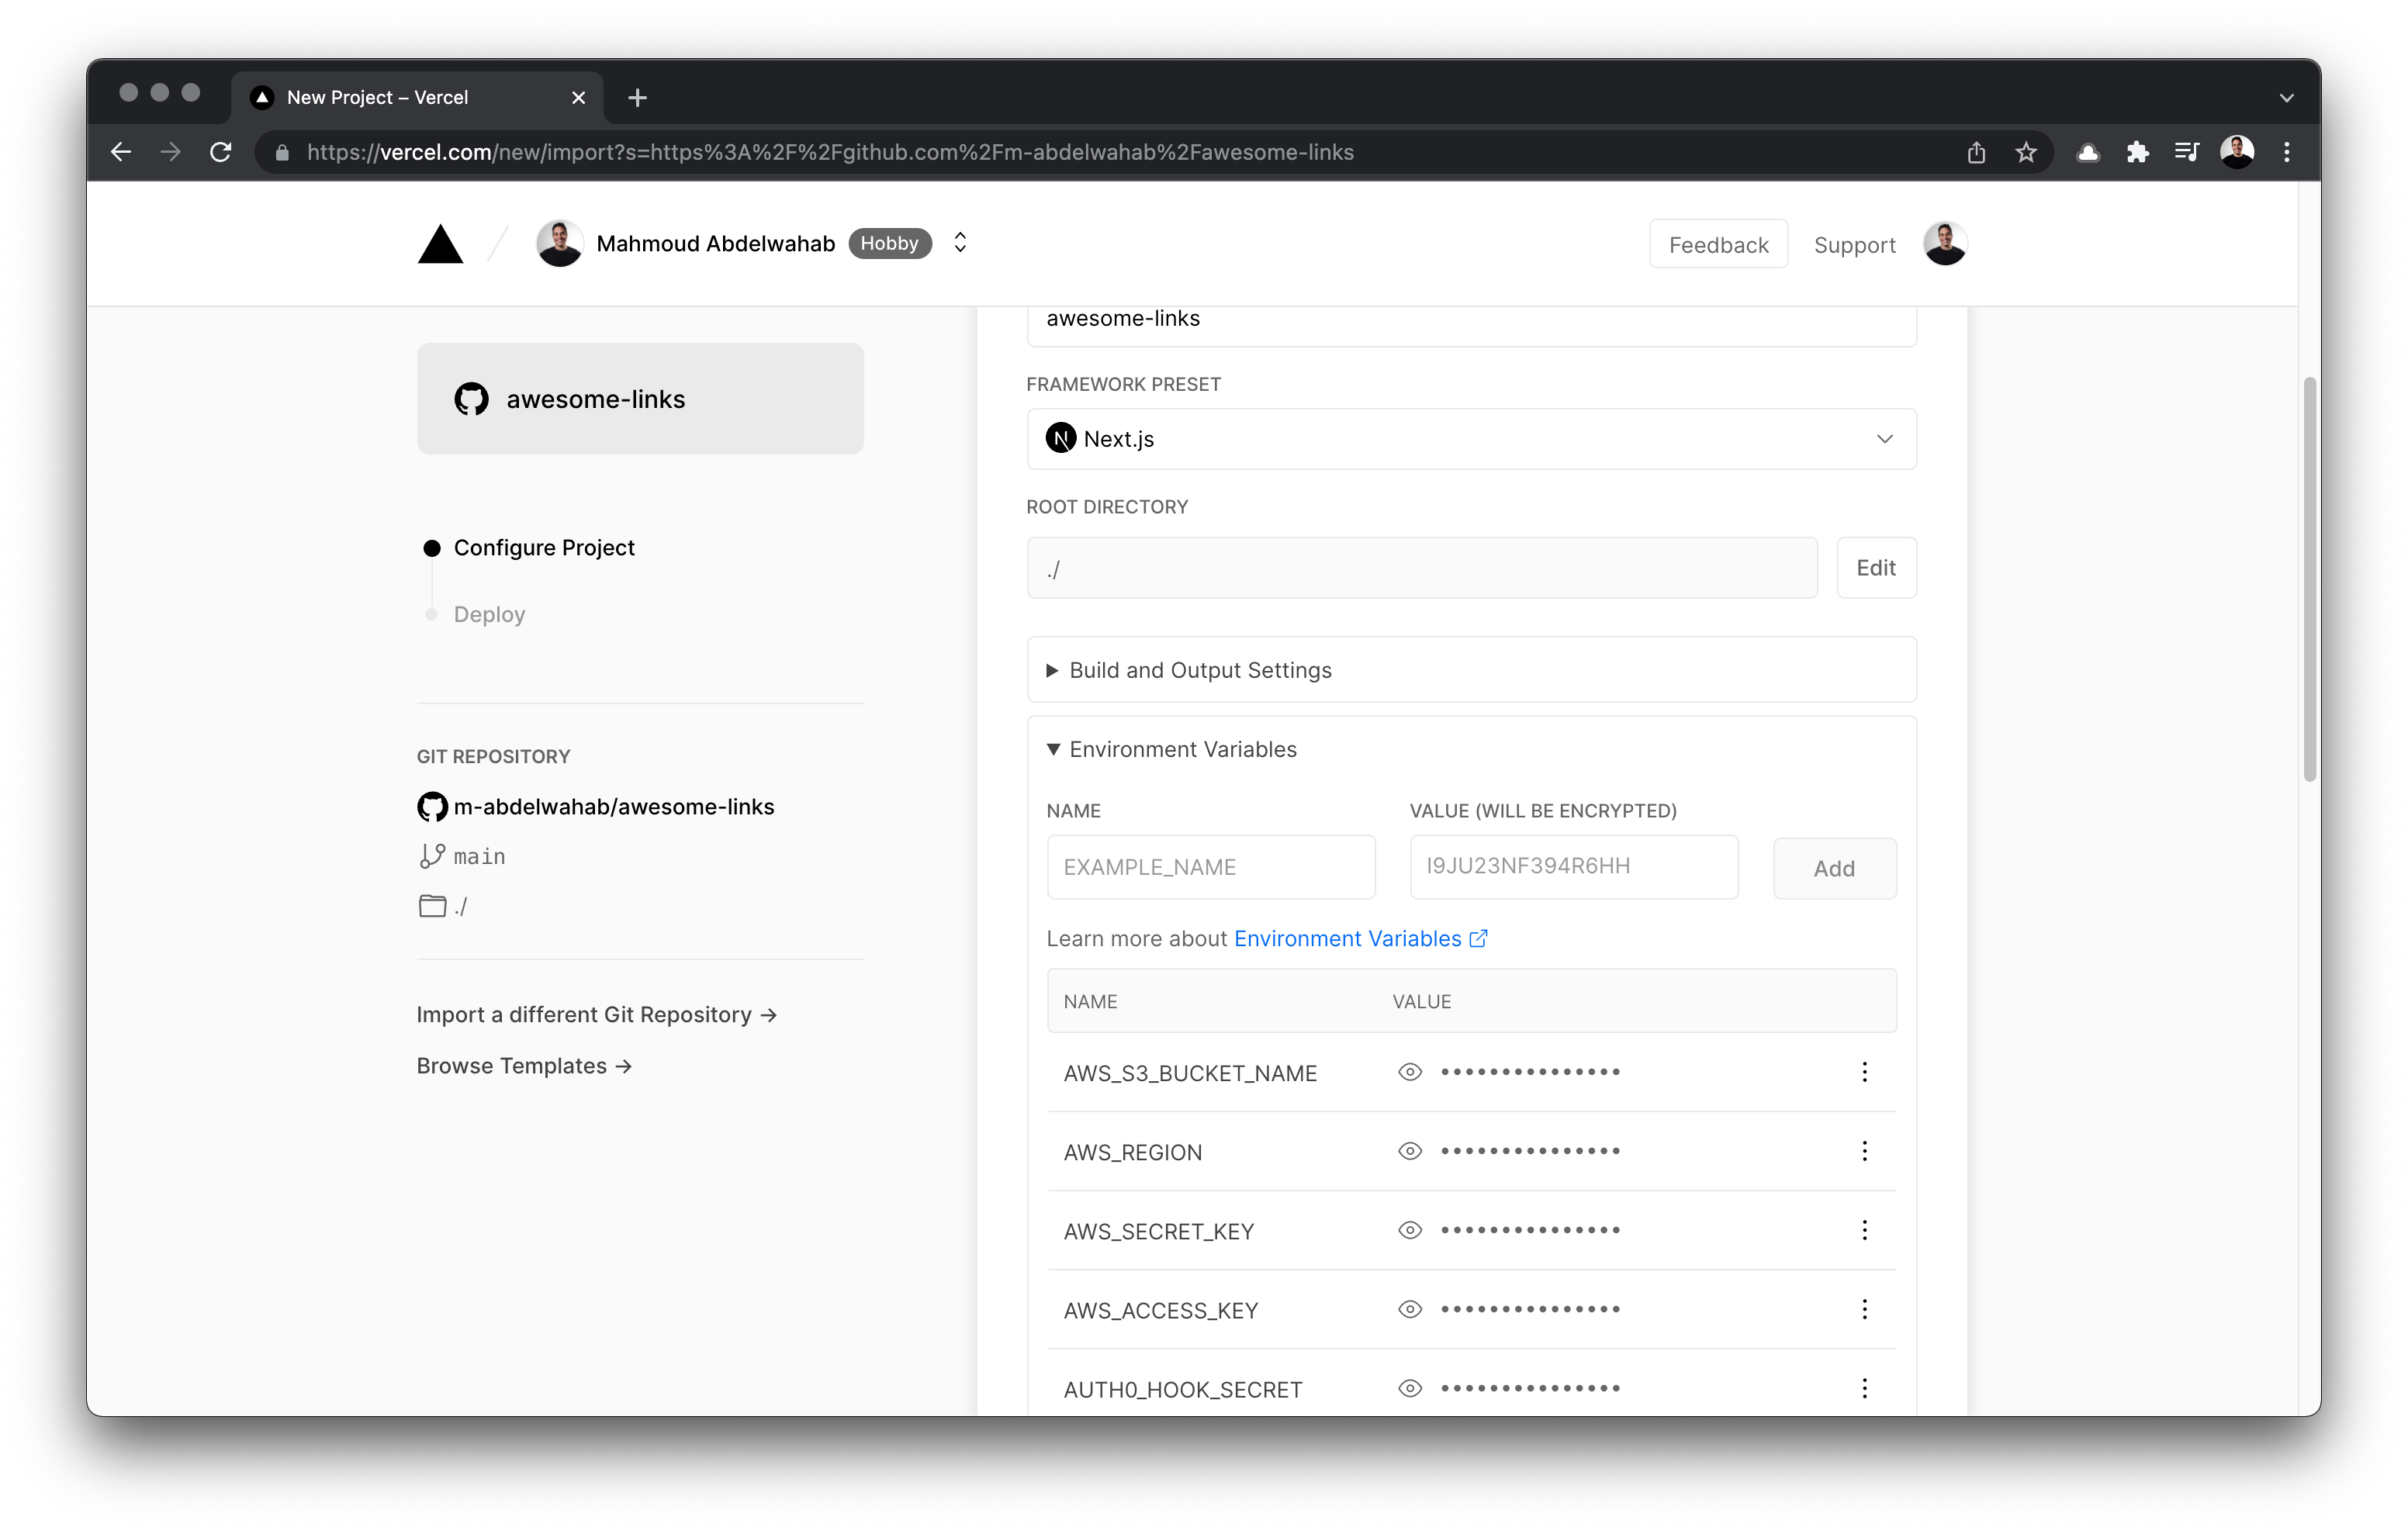
Next, import the "awesome-links" repository.

Finally, add your environment variables.
Refer to the .env.example file in the repository for the environment variables.
Note: Make sure that you are using the Data Proxy connection string when setting the
DATABASE_URLenvironment variable.
Once you've added the environment variables, click Deploy.
Once your application is successfully deployed, copy its URL and:
- Update the Allowed Callback URLs and Allowed Logout URLs on the Auth0 Dashboard with the URL of your application
- Update your Auth0 Action with the URL of the deployed application
- Update the AllowedOrigins Cross-origin Resource Sharing (CORS) policy on S3 with the URL to your deployed application
- Update the
AUTH0_CALLBACK_URLenvironment variable with the URL of your deployed application - Redeploy the application to production
If everything works correctly, you will be able to view your deployed application.
Summary
This article concludes the series. You learned how to build a full-stack app using modern tools that offer great developer experience and leveraged different services to get your application production-ready.
You:
- Explored database modeling using Prisma
- Built a GraphQL API using GraphQL Yoga and Pothos
- Added authentication using Auth0
- Added image upload using AWS S3.
- Learned why serverless deployments need connection pooling and how Prisma approached that problem at the time
- Deployed your Next.js application to Vercel
For a modern production setup, use Prisma Accelerate together with the latest Prisma Client deployment docs.
You can find the complete source code for the app on GitHub. Feel free to raise issues or contribute to the repository if you find any bugs or want to make improvements.
Feel free to reach out on Twitter if you have any questions.
Build your next app with Prisma
Start free. Scale when you’re ready.