Fullstack App With TypeScript, PostgreSQL, Next.js, Prisma & GraphQL: Data Modeling

This article is the first part of a course where we build a fullstack app with Next.js, GraphQL, TypeScript,Prisma and PostgreSQL. In this article, we'll create the data model and explore the different components of Prisma.
Table of contents
- Introduction
- Prerequisites
- Clone the repository
- Creating the data model for the app
- Migrating and pushing changes to the database
- Seeding the database
- Use Prisma Studio to explore your database
- Summary and next steps
Introduction
In this course, you'll learn how to build "awesome-links", a fullstack app where users can browse through a list of curated links and bookmark their favorite ones.
The app is built using the following technologies:
- Next.js as the React framework
- GraphQL Yoga as the GraphQL server
- Pothos for constructing the GraphQL schema
- Apollo Client as the GraphQL client
- Prisma as the ORM for migrations and database access
- PostgreSQL as the database
- AWS S3 for uploading images
- Auth0 for authentication
- TypeScript as the programming language
- TailwindCSS a utility-first CSS framework
- Vercel for deployment
What the course will cover
- Data modeling using Prisma
- Building a GraphQL API layer in a Next.js API route using GraphQL Yoga and Pothos
- GraphQL pagination
- Authentication using Auth0
- Authorization
- Image upload using AWS S3
- Deployment to Vercel
What you will learn today
In the first article of this course, we will start by defining the app's requirements and setting up the database layer using Prisma.
Prerequisites
Assumed knowledge
This course assumes:
- Basic knowledge of Node.js.
- Basic understanding of relational databases. If you would like to learn more about databases before diving into this course, then check out Prisma's data guide to learn more about how databases work, how to choose the right one, and how to use databases with your applications to their full potential.
- Knowledge of React is strongly recommended, since we will be using Next.js.
This course doesn't require:
- TypeScript knowledge, assuming you already have JavaScript experience.
- Prisma knowledge, as it will be explained in this course.
Finally, the course uses PostgreSQL as the database, however, most of the concepts can be applied to other relational databases such as MySQL.
By the end of this article you will have a Next.js app that is connected to a database.
Development environment
To follow along with this course you need to have Node.js installed on your machine. You will also need to have a running PostgreSQL instance.
Note: You can set up PostgreSQL locally or create a hosted instance on Heroku. A remote database will be required for deployment chapter.
Clone the repository
The complete source code for the course can be found on GitHub.
Note: Each article has a corresponding branch, so that you can follow along as you go through it. By checking out the
part-1branch you have the same starting point as this article.
To get started, navigate into the directory of your choice and run the following command to clone the repository:
git clone -b part-1 https://github.com/m-abdelwahab/awesome-links.gitYou can now navigate into the cloned directory, install the dependencies and start the development server:
cd awesome-links
npm install
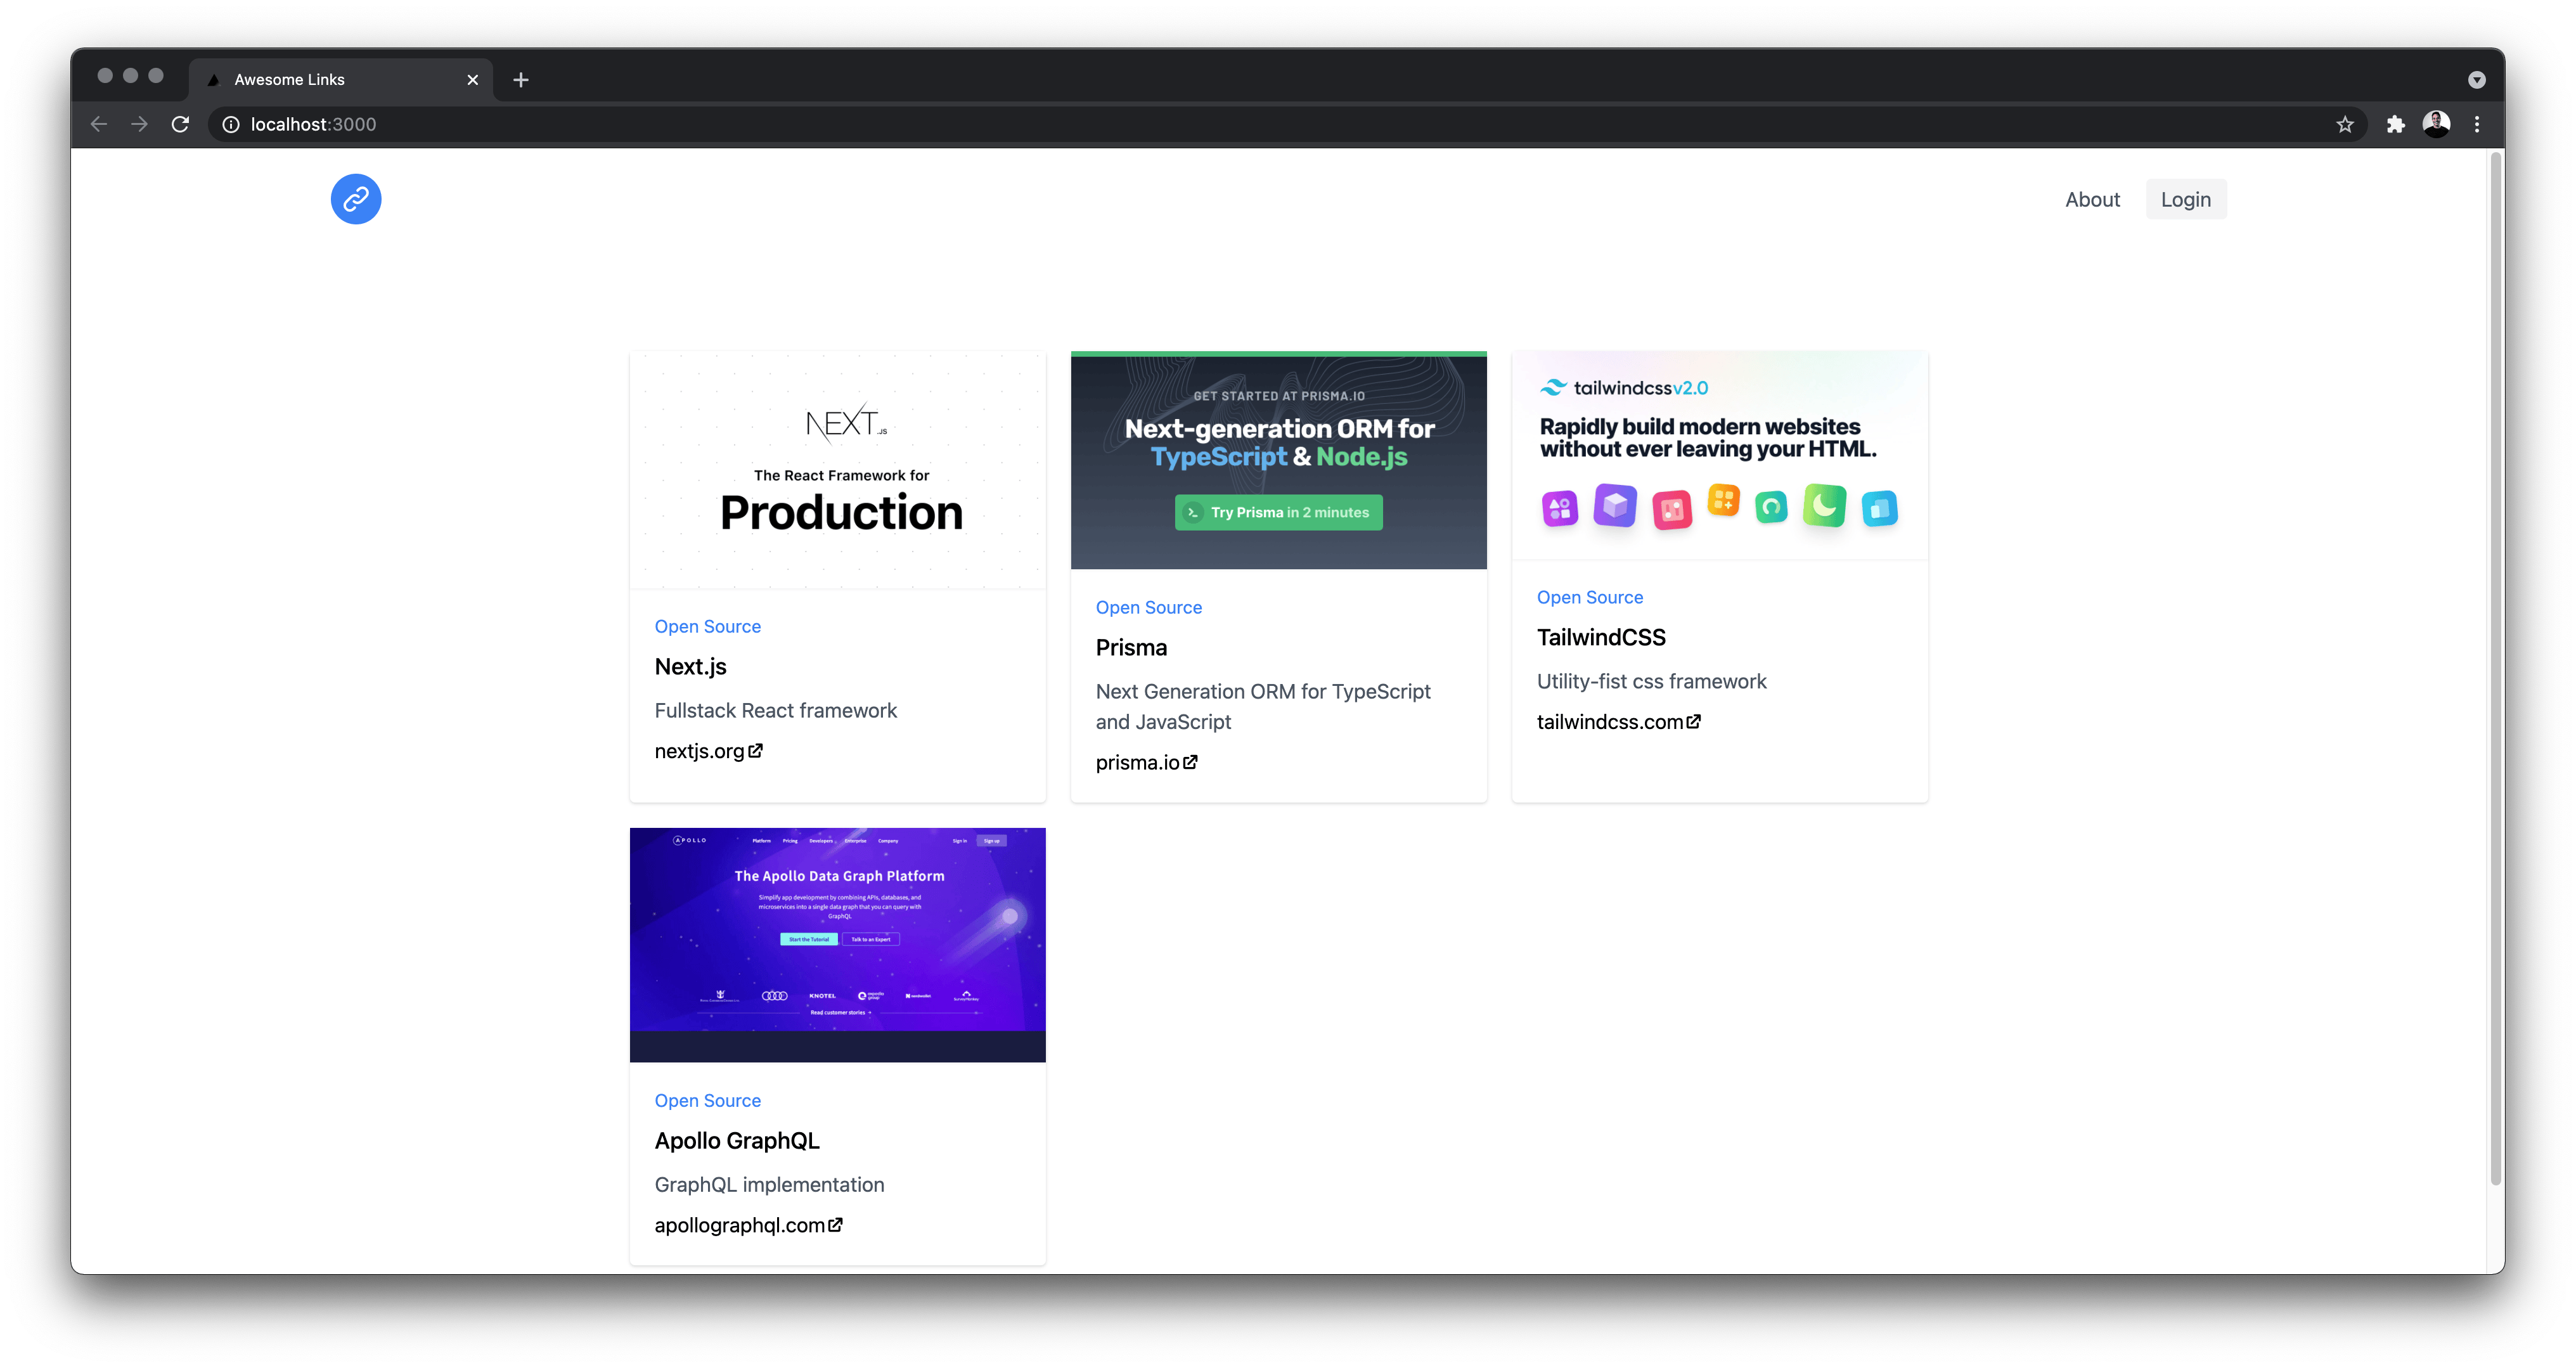
npm run devHere's what the starter project looks like:
A look at the project structure and dependencies
Taking a look at the project we see the following folder structure:
awesome-links/
┣ components/
┃ ┗ Layout/
┣ data/
┃ ┗ links.ts
┣ pages/
┃ ┣ _app.tsx
┃ ┣ about.tsx
┃ ┗ index.tsx
┣ public/
┣ styles/
┃ ┗ tailwind.css
┣ .env.example
┣ .gitignore
┣ next-env.d.ts
┣ package-lock.json
┣ package.json
┣ postcss.config.js
┣ README.md
┣ tailwind.config.js
┗ tsconfig.json
This starter project is a Next.js app with TypeScript and TailwindCSS installed.
Next.js is a fullstack React framework with support for different data fetching strategies. The first one is server-side rendering, where we fetch data on each request. Alternatlively, you can fetch data at build time and have a static website that can be served by a CDN. In this app, we will be fetching data server-side.
Next.js uses file-based routing, where each file inside the pages directory is a route. We currently have an index page at http://localhost:3000 and an about page at http://localhost:3000/about.
The _app.tsx file is used to override the default App behavior. This file allows you to persist layout between page changes, add global CSS and more.
// pages/_app.tsx

import '../styles/tailwind.css' // import Tailwind globally
import Layout from '../components/Layout' // header layout persists between page changes
function MyApp({ Component, pageProps }) {
  return (
    <Layout>
      <Component {...pageProps} />
    </Layout>
  )
}
export default MyApp
The data we see when navigating to http://localhost:3000 is hardcoded in the /data/links.ts file. In the upcoming parts, the data will be fetched dynamically from the database using a GraphQL API.
Creating the data model for the app
The database will have the following entities, where each entity will map to a table in the database.
User: a person with an account. They can bookmark their favorite links and can either be an admin or a regular user.Link: to represent the different attributes for a link such as a title, a description, and a URL.
There's a many-to-many (also known as m-n) relation between the User and Link entities. This way a user can have many links and a link can have many users.
Add Prisma to your project
We're going to use Prisma to create the database tables. It is an ORM that can be used to interact with a database.
To get started, first install Prisma's CLI as a development dependency:
npm install --save-dev prismaYou can now use the Prisma CLI to create a basic Prisma setup by running:
npx prisma initA new /prisma directory is created and inside it you will find a schema.prisma file. This is your main Prisma configuration file which will contain your database schema.
A .env (dotenv) file is also added to the root of the project. This is where you define environment variables such as the database connection URL or access tokens.
Open the .env file and replace the dummy connection URL with the connection URL of your PostgreSQL database.
// .env

# Example: postgresql://giwuzwpdnrgtzv:d003c6a604bb400ea955c3abd8c16cc98f2d909283c322ebd8e9164b33ccdb75@ec2-54-170-123-247.eu-west-1.compute.amazonaws.com:5432/d6ajekcigbuca9
DATABASE_URL="<your-database-connection-string>"
The database URL you just added has the following structure:

| Name | Placeholder | Description |
|---|---|---|
| Host | HOST | IP address/domain of your database server, e.g. localhost |
| Port | PORT | Port on which your database server is running, e.g. 5432 |
| User | USER | Name of your database user, e.g. janedoe |
| Password | PASSWORD | Password for your database user |
| Database | DATABASE | Name of the database you want to use, e.g. mydb |
Create your database schema with Prisma
When you open the /prisma/schema.prisma file you will find the following schema:
// prisma/schema.prisma

datasource db {
  provider = "postgresql"
  url      = env("DATABASE_URL")
}

generator client {
  provider = "prisma-client-js"
}Note: This file uses PSL (Prisma Schema Language). To get the best possible development experience, make sure you install our VSCode extension, which adds syntax highlighting, formatting, auto-completion, jump-to-definition, and linting for
.prismafiles.
In the datasource field, we specified that we're using PostgreSQL and that we're loading the database URL from the .env file.
Next, in the generator block, we're specifying that we want to generate Prisma Client based on our data models.
Prisma Client is an auto-generated and type-safe query builder; we're going to see how it simplifies working with databases.
Defining the models
Let's create the User model:
// prisma/schema.prisma
// code above unchanged
model User {
  id        Int      @id @default(autoincrement())
  createdAt DateTime @default(now())
  updatedAt DateTime @updatedAt
  email     String?  @unique
  image     String?
  role      Role     @default(USER)
}

enum Role {
  USER
  ADMIN
}Note: models are typically spelled in PascalCase and should use the singular form. (for example,
Userinstead ofuser,usersorUsers)
Here we defined a User model with several fields. Each field has a name followed by a type and optional field attributes.
For example, the id field is of type String and has the @id field attribute, specifying that this is the primary key of the table. The @default(uuid()) attribute sets a default UUID value.
All fields are required by default. To make a field optional, you can add a ? after the field type.
The Role enum is used to denote whether a user is an admin or not and is then referenced in the User model.
Next, we're going to create the Link model:
model Link {
  id          Int      @id @default(autoincrement())
  createdAt   DateTime @default(now())
  updatedAt   DateTime @updatedAt
  title       String
  description String
  url         String
  imageUrl    String
  category    String
}Defining relations
Finally, we need to create a many-to-many relation between the User and the Link models, so that a user can have many links and a link can have many users. We do so by definining relation fields as lists on both sides of the relations.
We will add a bookmarks field to the User model, where the type is Link[]. We then add a users field to the Link model, where the type is User[].
diff // prisma/schema.prisma
// code above unchanged

model User {
  id        Int      @id @default(autoincrement())
  createdAt DateTime @default(now())
  updatedAt DateTime @updatedAt
  email     String?  @unique
  image     String?
  role      Role     @default(USER)
+  bookmarks Link[]
}

enum Role {
  USER
  ADMIN
}

model Link {
  id          Int      @id @default(autoincrement())
  createdAt   DateTime @default(now())
  updatedAt   DateTime @updatedAt
  title       String
  description String
  url         String
  imageUrl    String
  category    String
+  users      User[]
}
This is an implicit many-to-many relation, where we have a relation table in the underlying database. This relation table is managed by Prisma.
Here's what the final schema looks like:
copy
// prisma/schema.prisma

datasource db {
  provider = "postgresql"
  url      = env("DATABASE_URL")
}

generator client {
  provider = "prisma-client-js"
}

model User {
  id        Int      @id @default(autoincrement())
  createdAt DateTime @default(now())
  updatedAt DateTime @updatedAt
  email     String?  @unique
  image     String?
  role      Role     @default(USER)
  bookmarks Link[]
}

enum Role {
  USER
  ADMIN
}

model Link {
  id          Int      @id @default(autoincrement())
  createdAt   DateTime @default(now())
  updatedAt   DateTime @updatedAt
  title       String
  description String
  url         String
  imageUrl    String
  category    String
  users       User[]
}
Migrating and pushing changes to the database
To create these tables in the database, you will use the prisma migrate dev command:
npx prisma migrate dev --name initThe command does the following things:
- Generate a new SQL migration called
init - Apply the migration to the database
- Install Prisma Client if it's not yet installed
- Generate Prisma Client based off the current schema
If Prisma Client is not automatically installed, you can install it with the following command:
npm install @prisma/clientInside the prisma directory, you will notice a new folder called migrations. It should also contain another folder that ends with init and contains a file called migration.sql. The migration.sql file contains the generated SQL.
Seeding the database
Since the database is currently empty, we want to populate it with data. You'll use Prisma Client, a type-safe query builder to interact with your database and populate it with sample data.
Create a new file called /prisma/seed.ts. Inside this file, import Prisma Client, instantiate it, and create some records:
// prisma/seed.ts

import { PrismaClient } from '@prisma/client'
import { links } from '../data/links'
const prisma = new PrismaClient()

async function main() {
  await prisma.user.create({
    data: {
      email: `testemail@gmail.com`,
      role: 'ADMIN',
    },
  })

  await prisma.link.createMany({
    data: links,
  })
}

main()
  .catch(e => {
    console.error(e)
    process.exit(1)
  })
  .finally(async () => {
    await prisma.$disconnect()
  })
We are first creating a user using the create() function, which creates a new database record.
Next, we are using the createMany() function to create multiple records. We are passing the hard-coded data we have as a parameter.
By default, Next.js forces the use of ESNext modules, we need to override this behavior or else we will not be able to execute the seeding script. To do so, first install ts-node as a development dependency:
npm install --save-dev ts-nodeThen in the tsconfig.json file, specify that ts-node will use CommonJS modules:
diff
{
  //...

  "include": [
    "next-env.d.ts",
    "**/*.ts",
    "**/*.tsx"
  ],
  "exclude": [
    "node_modules"
  ],
+  "ts-node": {
+    "compilerOptions": {
+      "module": "CommonJS"
+    }
+  }
}
Update your package.json file by adding a prisma key with a seed property defining the script for seeding the database:
diff {
  // ...
  "devDependencies": {
    "@tailwindcss/forms": "^0.4.0",
    "@tailwindcss/typography": "^0.5.0",
    "@types/node": "^16.3.2",
    "@types/react": "^17.0.14",
    "autoprefixer": "^10.4.1",
    "postcss": "^8.4.5",
    "prisma": "4.8.0",
    "tailwindcss": "^3.0.8",
    "ts-node": "10.9.1",
    "typescript": "^4.9.4"
+  },
+  "prisma": {
+    "seed": "ts-node --transpile-only ./prisma/seed.ts"
+  }
}

You can now seed your database by running the following command:

```shell
npx prisma db seed
If everything worked correctly you should see the following output:
Environment variables loaded from .env
Prisma schema loaded from prisma/schema.prisma
Running seed: ts-node --compiler-options '{"module":"CommonJS"}' "prisma/seed.ts" ...

🌱  Your database has been seeded.
Use Prisma Studio to explore your database
Prisma comes with Prisma Studio, a GUI for exploring and manipulating your data. You can use it to view, create, update or delete data from your database.
To start Prisma Studio, run the following command
npx prisma studioIf you've done all the steps correctly you should you have the Link and User models inside your database. Inside the Link model you'll find 4 records and for the User model you'll find 1 record.

Summary and next steps
In this article we explained the problem domain and modeled our data using Prisma. We also seeded our database and explored it using Prisma Studio. Now we have a Next.js app that is connected to a PostgreSQL database.
In the next part of the course, we will learn about:
- GraphQL and the advantages it has over REST when building APIs.
- Building a GraphQL API for our app using GraphQL Yoga and Pothos
- Consuming the API on the client using Apollo Client.
- GraphQL pagination so that we don't load all links at once and have better performance.
Build your next app with Prisma
Start free. Scale when you’re ready.