Deploy to Netlify
This guide covers the steps you will need to take in order to deploy your application that uses Prisma ORM to Netlify.
Netlify is a cloud platform for continuous deployment, static sites, and serverless functions. Netlify integrates seamlessly with GitHub for automatic deployments upon commits. When you follow the steps below, you will use that approach to create a CI/CD pipeline that deploys your application from a GitHub repository.
Prerequisites
Before you can follow this guide, you will need to set up your application to begin deploying to Netlify. We recommend the "Get started with Netlify" guide for a quick overview and "Deploy functions" for an in-depth look at your deployment options.
Binary targets in schema.prisma
Since your code is being deployed to Netlify's environment, which isn't necessarily the same as your development environment, you will need to set binaryTargets in order to download the query engine that is compatible with the Netlify runtime during your build step. If you do not set this option, your deployed code will have an incorrect query engine deployed with it and will not function.
Depending on the version of Node.js, your Prisma schema should contain either rhel-openssl-1.0.x or rhel-openssl-3.0.x in the generator block:
- Node.js 16 and 18
- Node.js 20+
binaryTargets = ["native", "rhel-openssl-1.0.x"]
binaryTargets = ["native", "rhel-openssl-3.0.x"]
Store environment variables in Netlify
We recommend keeping .env files in your .gitignore in order to prevent leakage of sensitives connection strings. Instead, you can use the Netlify CLI to import values into netlify directly.
Assuming you have a file like the following:
# Connect to DB
DATABASE_URL="postgresql://postgres:__PASSWORD__@__HOST__:__PORT__/__DB_NAME__"
You can upload the file as environment variables using the env:import command:
netlify env:import .env
site: my-very-very-cool-site
---------------------------------------------------------------------------------.
                         Imported environment variables                          |
---------------------------------------------------------------------------------|
     Key      |                              Value                               |
--------------|------------------------------------------------------------------|
 DATABASE_URL | postgresql://postgres:__PASSWORD__@__HOST__:__PORT__/__DB_NAME__ |
---------------------------------------------------------------------------------'
If you are not using an .env file
If you are storing your database connection string and other environment variables in a different method, you will need to manually upload your environment variables to Netlify. These options are discussed in Netlfiy's documentation and one method, uploading via the UI, is described below.
- Open the Netlify admin UI for the site. You can use Netlify CLI as follows:
netlify open --admin - Click Site settings:
- Navigate to Build & deploy in the sidebar on the left and select Environment.
- Click Edit variables and create a variable with the key
DATABASE_URLand set its value to your database connection string.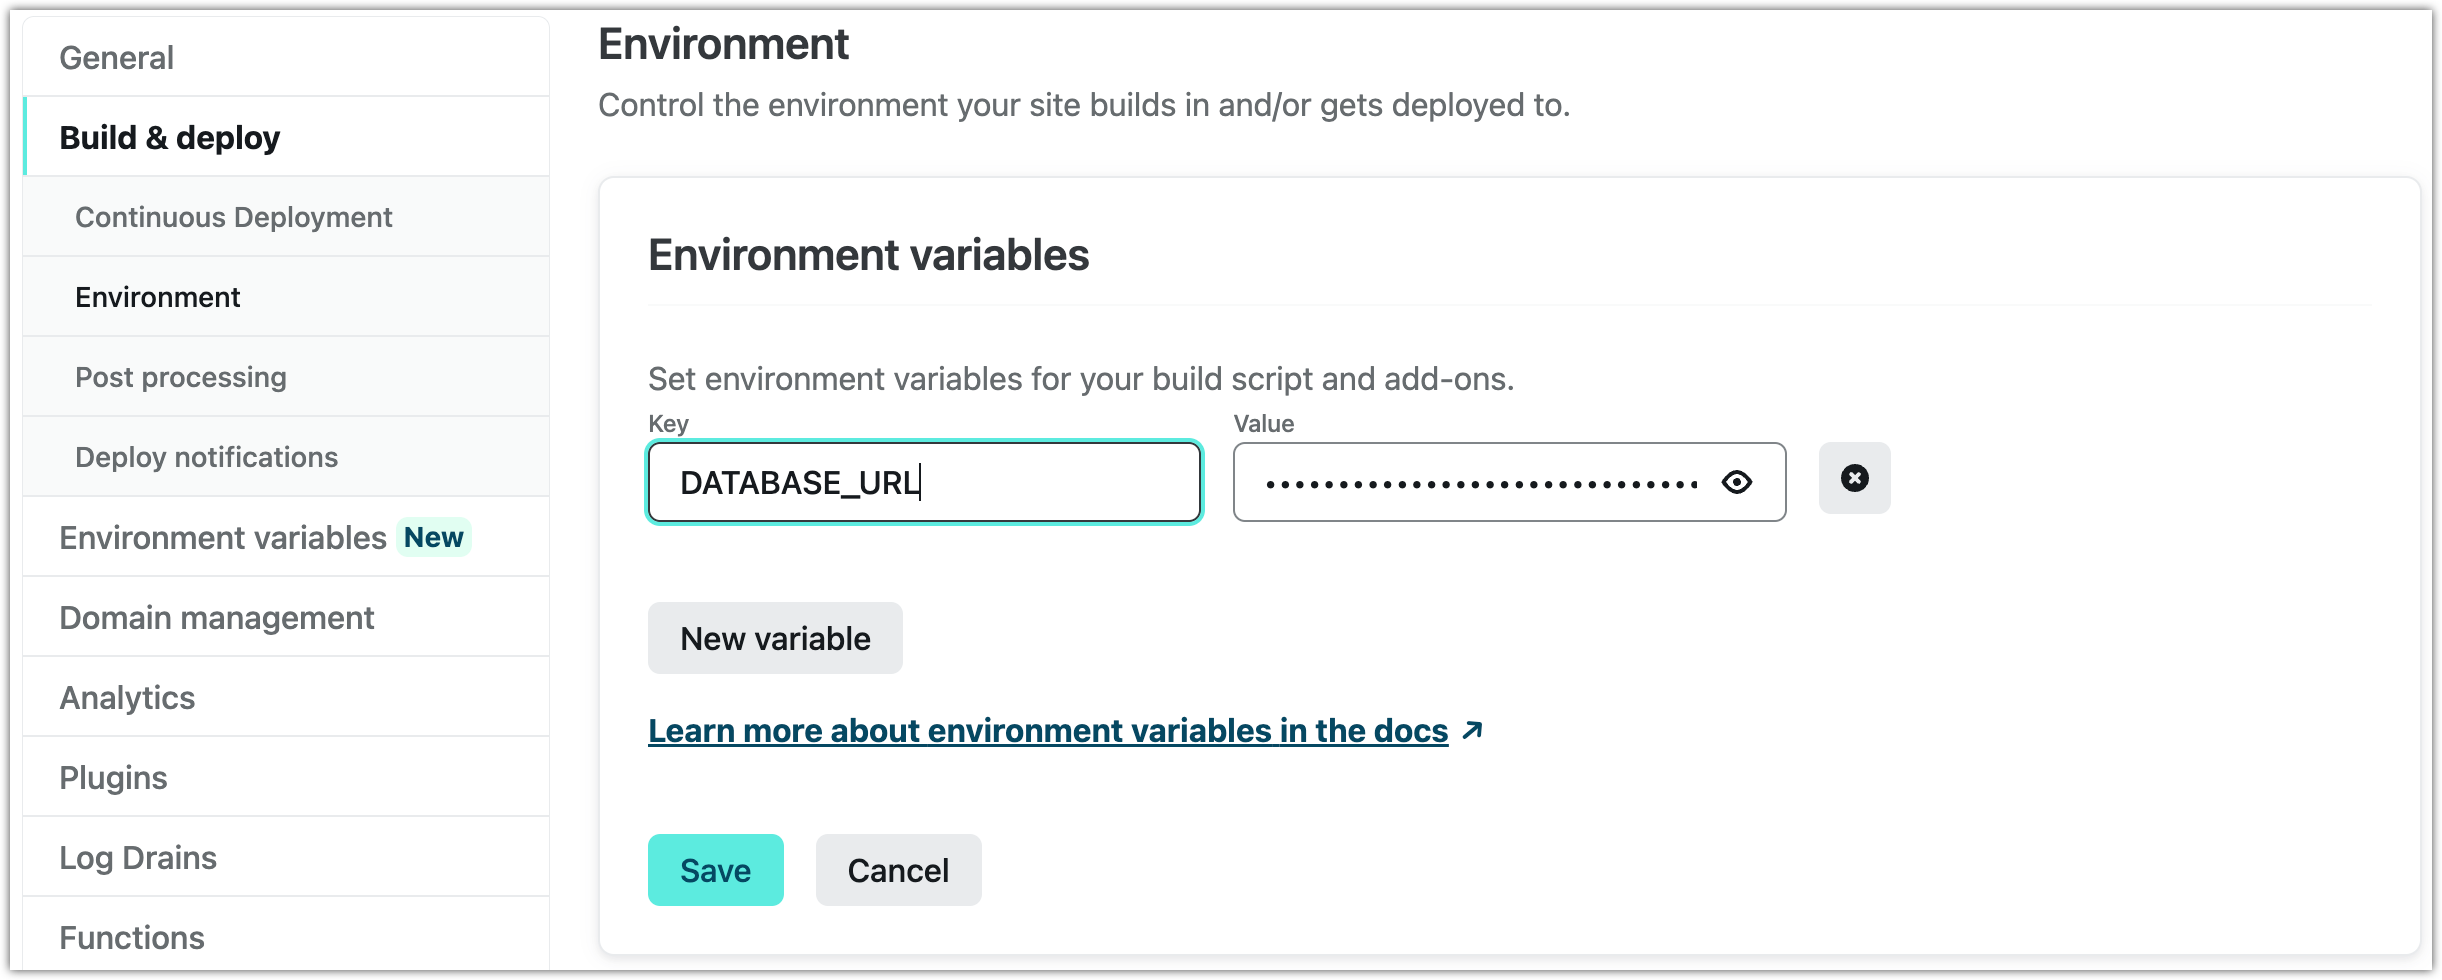
- Click Save.
Now start a new Netlify build and deployment so that the new build can use the newly uploaded environment variables.
netlify deploy
You can now test the deployed application.
Connection pooling
When you use a Function-as-a-Service provider, like Netlify, it is beneficial to pool database connections for performance reasons. This is because every function invocation may result in a new connection to your database which can quickly run out of open connections.
You can use Accelerate for connection pooling or Prisma Postgres, which has built-in connection pooling, to reduce your Prisma Client bundle size, and to avoid cold starts.
For more information on connection management for serverless environments, refer to our connection management guide.